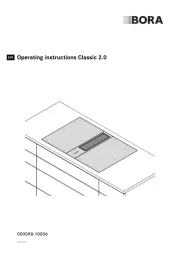
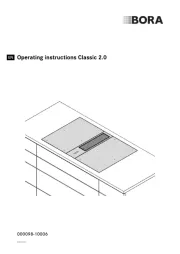
Bora PUXA Manual
Læs gratis den danske manual til Bora PUXA (60 sider) i kategorien Komfur. Denne vejledning er vurderet som hjælpsom af 37 personer og har en gennemsnitlig bedømmelse på 5.0 stjerner ud af 19 anmeldelser. Har du et spørgsmål om Bora PUXA, eller vil du spørge andre brugere om produktet?
Side 1/60

EN
PUREUMEN-101
www.bora.com
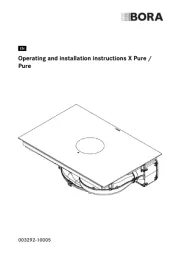
Operating and installation instructions X Pure, Pure
BORA X Pure surface induction cooktop with integrated
cooktop extractor – exhaust air/recirculation (PUXA/PUXU)
BORA Pure induction cooktop with integrated cooktop
extractor – exhaust air/recirculation (PURA/PURU)

EN
2
www.bora.com
5.6.1 Safety shut-down ...........................................................20
– Cooktop extractor .........................................................20
– Cooktops 20 ......................................................................
5.6.2 Overheating protection .................................................. 21
6 Installation 22
6.1 General installation instructions ..................................22
6.1.1 Simultaneous operation of the cooktop extractor
in the exhaust air mode and a fireplace dependent
upon the air supply in the room ..................................... 22
6.1.2 Home In module PUHIM (optional) ................................ 23
6.2 Scope of delivery ...........................................................23
6.2.1 Checking the scope of delivery ...................................... 23
6.3 Tool and aids ..................................................................23
6.4 Assembly instructions ...................................................23
6.4.1 Required clearance distances ........................................ 23
6.4.2 Minimum unit dimensions for X Pure (PUXA, PUXU) ..... 23
6.4.3 Minimum unit dimensions for Pure (PURA, PURU) ........24
6.5 Worktop cut-out .............................................................24
6.5.1 X Pure cut-out dimensions (PUXA, PUXU) ..................... 24
– X Pure flush installation (PUXA, PUXU) .........................24
– X Pure surface mounting (PUXA, PUXU) .......................24
6.5.2 Pure cut-out dimensions (PURA, PURU) ........................ 25
– Pure flush installation (PURA, PURU) ............................25
– Pure surface mounting (PURA, PURU) ..........................25
6.6 Installing the appliance in exhaust air mode
(PUXA, PURA) ................................................................. 25
6.6.1 Preparing kitchen units for the exhaust air model ......... 25
– Installation dimensions .................................................26
– Adjusting the back wall of the unit ................................26
6.6.2 Preparing the cooktop .................................................... 26
– Attaching the sealing tape ............................................26
– Fitting the installation clamps .......................................26
6.6.3 Inserting the cooktop ..................................................... 27
– Height adjustment plates for flush installation(optional)27
6.6.4 Securing the cooktop ..................................................... 27
6.6.5 Connecting the device to the duct system .................... 28
6.7 Installing the recirculation model (PUXU, PURU)
of the appliance .............................................................28
6.7.1 Recirculation of air from the kitchen unit ...................... 28
6.7.2 Installation variants (A and B) for
recirculation appliances ................................................. 29
– A: floor unit with continuous back wall .........................29
– B: floor unit with false floor under the cooktop .............29
6.7.3 Preparing kitchen units for installation variant A
(floor unit with continuous back wall) ............................30
– Installation dimensions .................................................30
– Adjusting the back wall of the unit ................................30
6.7.4 Preparing kitchen units for installation variant B
(floor unit with false floor under the cooktop) ...............31
– Installation dimensions .................................................31
– Adjusting the back wall of the unit ................................31
6.7.5 Preparing the cooktop .................................................... 31
– Attaching the sealing tape ............................................31
– Fitting the installation clamps .......................................31
6.7.6 Extending the telescopic pull-out of the
air cleaning box (PULBTA) .............................................. 32
6.7.7 Inserting the cooktop ....................................................33
– Height adjustment plates for flush installation
(optional) 33 ......................................................................
1 General information 4
1.1 Liability ............................................................................. 4
1.2 Validity of the operating and installation instructions . 4
1.3 Product conformity ......................................................... 4
1.4 Presentation of information............................................4
2 Safety 5
2.1 Use as intended ............................................................... 5
2.2 People with limited abilities ........................................... 5
2.3 General safety instructions ............................................ 5
2.4 Safety instructions for installation ................................. 6
2.5 Safety instructions – operation ...................................... 8
2.6 Safety instructions – cleaning and maintenance ......... 9
2.7 Safety instructions – repairs, servicing and
spare parts ..................................................................... 10
2.8 Safety instructions – disassembly and disposal ........10
3 Technical data 11
3.1 X Pure (PUXA, PUXU) ....................................................11
3.2 Pure (PURA, PURU) .......................................................12
4 Energy labelling 14
5 Device description 15
5.1 Model description ..........................................................15
5.2 System description ........................................................15
5.2.1 Structure ........................................................................ 15
5.2.2 Operating panel and operating principle........................ 15
5.2.3 Symbols .......................................................................... 16
5.2.4 7-segment display ..........................................................17
5.2.5 Lighting ...........................................................................17
5.2.6 Sounds ........................................................................... 17
5.3 How the cooktop extractor works ...............................17
5.4 How the induction cooktop works ...............................17
– Power levels ..................................................................18
– Suitable cookware ........................................................18
– Noises 18 ..........................................................................
5.5 Overview of features and functions .............................18
– Electronic power adjustment ........................................19
– Short-time timer (egg timer) .........................................19
5.5.1 Cooktop extractor functions ......................................... 19
– Automatic extractor control ..........................................19
– Automatic after-run .......................................................19
– Cooktop extractor power setting...................................19
– Filter service display .....................................................19
5.5.2 Cooktop functions .......................................................... 19
– Automatic heat up function...........................................19
– Pan size recognition......................................................19
– Permanent pan size recognition ....................................19
– One-level warming function ..........................................19
– Variable warming function (3 levels) .............................20
– Bridging function ..........................................................20
– Automatic bridging function ..........................................20
– Cooking zone timers (automatic cut-off) .......................20
– Pause function ..............................................................20
– Cooktop power setting..................................................20
5.6 Safety devices ................................................................20
– Childproofing feature ....................................................20
– Control lock ..................................................................20
– Cleaning lock (wipe function) ........................................20
– Residual heat display ....................................................20
Table of Contents
Produkt Specifikationer
Mærke: | Bora |
Kategori: | Komfur |
Model: | PUXA |
Har du brug for hjælp?
Hvis du har brug for hjælp til Bora PUXA stil et spørgsmål nedenfor, og andre brugere vil svare dig
Komfur Bora Manualer
9 Juli 2025
5 Juli 2025
5 Juli 2025
5 Juli 2025
5 Juli 2025
5 Juli 2025
5 Juli 2025
6 November 2024
6 November 2024
Komfur Manualer
- Thermex
- Sauber
- Nabo
- Küppersbusch
- Mellerware
- Barazza
- Vulcan
- Xblitz
- Globe
- Kompernass
- Matrix
- Toshiba
- Morsø
- Amica
- Cambridge
Nyeste Komfur Manualer
6 August 2025
6 August 2025
6 August 2025
6 August 2025
6 August 2025
6 August 2025
6 August 2025
6 August 2025
6 August 2025
6 August 2025