Candy CDPN 1L390PB-80 Manual

Candy Opvaskemaskine CDPN 1L390PB-80

Læs nedenfor 📖 manual på dansk for Candy CDPN 1L390PB-80 (40 sider) i kategorien Opvaskemaskine. Denne guide var nyttig for 7 personer og blev bedømt med 4.1 stjerner i gennemsnit af 4 brugere

Side 1/40
EN
!
2
Thank you for choosing a Candy dish
washer. We are confident it will assist you
loyally in washing your daily dishes in full
safety.
Carefully read this manual for correct and
safe appliance use and for helpful tips on
efficient maintenance.
Only use the dish washer
after
carefully reading these instructions. We
recommend you always keep this manual
to hand and in good condition for any
future owner.
Please check that the appliance is
delivered with this instruction manual, the
warranty certificate, the service centre
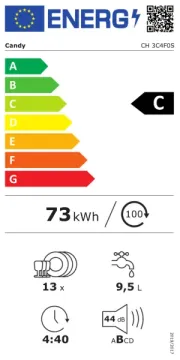
address and the energy efficiency label.
Each product is identified by a unique 16-
digit code, also called the “serial number”,
printed on the warranty
certificate or on
the serial plate found inside the door, on
the upper right hand side. This code is a
sort of product specific ID card that you-
will need to use to register the product or
if you need to contact the Technical
Assistance Centre.
Fig. A
15
4
3 2
1. GENERAL SAFETY RULES
2. WATER CONNECTION
3. LOADING THE SALT
4. ADJUSTING THE UPPER BASKET
(SAME MODELS ONLY)
5. LOADING DISHES
6. INFORMATION FOR TEST
LABORATORIES
7. LOADING THE DETERGENT
8. TYPES OF DETERGENT
9. LOADING THE RINSE AID
10.
CLEANING THE FILTERS
11.
PRATICAL HINTS
12.
CLEANING AND MAINTENANCE
13.
DESCRIPTION OF THE CONTROL PANEL
14.
TECHNICAL DATA
15.
PROGRAMME SELECTION AND SPECIAL
FEATURES
16.
REMOTE CONTROL (WI-FI)
17.
PROGRAMME LEGEND
18.
WATER SOFTENER UNIT
19.
THROUBLESHOOTING AND WARRANTY
20.
ENVIRONMENTAL CONDITIONS
A.
WIRELESS PARAMETERS (PAG.36)
Contents
!
4
!
Make sure carpets or rugs do
not obstruct the base or any of
the ventilation openings.
! After installation, the appliance
must be positioned so that the
plug is accessib le.
!
Do not leave the door open in
a horizontal position, in order
to avoid potential dangers (e.g.
tripping).
! For further information on the
product or to consult the technical
data sheet, please refer to the
manufacturer's website.
!
The technical details (supply
voltage and power input) are
indicated on the product rating
plate.
!
Make sure that the electrical
system is earthed and complies
with all applicable laws, and
that the socket is compatible
with the plug of the appliance.
The manufacturer declines all
responsibility for any damage
to people or property due to
non-earthing of the machine.
! Ensure that the dishwasher
does not crush power cables.
! In general it is not advisable to
use adaptors, multiple plugs
and/or extension cables.
! Before cleaning or maintaining
the dishwasher, unplug the
appliance and turn off the
water supply.
! Do not pull on the power cord
or appliance to unplug the
machine.
! Do not leave the appliance
exposed to the elements (rain,
sun, etc.).
! Leaning or sitting on the open
door of the dishwasher could
cause it to tip over.
!
The dishwasher is designed for
normal kitchen utensils. Objects
that have been contamined by
petrol, paint, traces of steel or
iron, corrosive chemicals, acids
or alkalis must not be washed in
the dishwasher.
WARNING:
Knives and other utensils
with sharp points must be
loaded in the basket with
their points down or placed
in a horizontal position.
Electrical connections and
safety instructions
!
6
2. WATER CONNECTION
! The inlet and drain hoses can be directed
to left or right.
!
Water pressure must be between 0,08
MPa and 0,8 MPa.
!
The inlet hose must be connected to a tap
so that the water supply can be cut off
when the machine is not in use (fig. 1 B).
! The dishwasher is fitted with 3/4" threaded
connector (fig. 2).
! Connect inlet hose "A" to water tap "B"
with a 3/4" attachment making sure that it
has been properly tightened.
! If it is necessary, the inlet pipe can be
lengthened up to 2,5 m. The extension
pipe is available from the After Sales
Service Centre.
! If the dishwasher is connected to new pipes
or to pipes which have not been inuse for a
long time run water through for a few
minutes before connecting the inlet hose. In
this way no deposits of sand or rust will
clog up the water inflow filter.
1
B
2
B
A
The appliance must be connected to
the water mains using new hose-sets.
The old hose-sets should not be
reused.
The dishwasher can be connected to
either cold or hot water, as long as it
is no hotter than 60°C.
!
7
SOME MODELS may include one or more
of the following features:
! WATERBLOCK (fig. 3)
The waterblock system has been designed
to
improve the safety of your appliance. The
system prevents flooding which might be
caused by a machine malfunction or as a
result of a fracture on the rubber pipes
and in particular on the water supply pipe.
How it works
A sump located on the base of the appliance
collects any possible water leakage and
operates a sensor which activates a valve
placed under the water tap and blocks any
water, even with the tap fully opened.
If box "A" containing the electrical parts is
damaged, remove the plug from the socket
immediately. To ensure perfect operation of
the safety system, the hose with box "A"
should be connected to the tap as shown in
the . The water supply hose shouldfigure
not be cut, as it contains live parts. If the
hose is not long enough for correct
connection, it must be replaced with a longer
one. The hose can be obtained from the
Technical Assistance Centre.
3A
! AQUASTOP (fig. 4):
A device located on the supply tube that
stops water flow if the tube deteriorates;
in this case, a red mark will appear in the
window "A" and the tube must be
replaced. To unscrew the nut, press the
one-way lock device "B".
B
A
4
!
AQUAPROTECT - SUPPLY TUBE WITH
GUARD
(fig. 5):
Should water leak from the primary internal
tube , the transparent containment"A"
sheath "B" will contain water to permit
the washing cycle to complete. At the
end of the cycle, contact the Customer
Service Centre to replace the supply
tube.
B
A
5
Hydraulic safety devices
All the dishwashers are equipped with
an overflow safety device which, if
water exceeds normal levels due to
malfunctions, automatically blocks
water flow and/or drains excess
quantities.
!
9
3. LOADING THE SALT
(Fig. A "1")
! The appearance of white stains on dishes
is generally a warning sign that the salt
container needs filling.
! On the bottom of the machine there is a
container for the salt for regenerating the
softener.
! It is important to use only a salt that is
specifically designed for dishwasher.
Other types of salt contain small
quantities of insoluble particles which
over a long period of time may affect and
deteriorate the softener performance.
! To add salt, unscrew the cap of the
container on the bottom and then refill the
container.
! During this operation a little water will
overflow; but keep adding salt until the
container is full. When the container is
full, clean the thread of salt residue and
retighten the tap.
! After loading the salt, it is recommended
running a complete washing cycle, or
COLD RINSE programme.
! The salt dispenser has a capacity of
between 1.5 and 1.8 kg and, for efficient
use of the appliance, it should be refilled
from time to time .
After loading the salt, YOU MUST run
a complete washing cycle, or the
PRE-WASH/COLD RINSE/REFRESH
programme.
(Only for first start up) When the
appliance is used for the first time,
after completely filling the salt
container, it is necessary to add water
until the container overflows.
!
12
! Place the cutlery in the plastic cutlery
holder with the handles pointing upwards.
! Place the cutlery holder on the lower
basket (fig. 4 and 5), making sure that
the cutlery does not get in the way of the
rotating arms.
Please load the dishwasher sensibly to
ensure the best wash results.
example of loading see. fig. 4 e 5
Lower basket (fig. 4)
Lower basket (fig. 5)
Cutlery basket (fig. 6)
The cutlery basket is made with two
detachable parts which will enable various
loading options. The two parts can be
detached by sliding the left section away
from the right section. The top of cutlery
basket can be removed, for enable various
loading options.
6. INFORMATION FOR
TEST LABORATORIES
Please ask information required for
comparison testing and measuring noise
levels, according to EN normative, to the
following address:
testinfo- dishwasher@candy.it
In the request, please specify model name
and number of the dishwasher (see rating
plate).
The lower basket has a safety-stop
device, for its safe extraction, also
especially useful with a full load. For
loading salt, cleaning filter and for
ordinary maintenance, the complete
extraction of the basket is necessary.
!
13
7. LOADING THE
DETERGENT
(Fig. A "2")
Unsuitable detergents (like those for
washing up by hand) do not contain the
proper ingredients for use in a dishwasher,
and stop the dishwasher from working
correctly.
The detergent container is inside the door
(fig. A "2"). If the lid of the container is
closed, press the button (A) to open. At the
end of every wash cycle the lid is always
open and ready for the next time the
dishwasher is used.
The amount of detergent to be used varies
according to how dirty the dishes are and
on the type of dishes to be washed. We
advise using 20:30 g of detergent in the
wash section of detergent compartment (B).
After pouring the detergent into the
container, close the lid, firstly pushing (1)
and then pressing on it until you hear (2)
the click.
Since not all detergents are the same the
instructions on the boxes of detergent can
vary. We should just like to remind users
that too little detergent does not clean the
dishes properly whilst too much detergent
will not produce better results and is also a
waste.
The detergent
It is essential to use a detergent that is
specifically designed for dishwashers
either in powder, liquid,gel or tablet form.
Filling the detergent container
WARNING
When loading the lower basket, please
ensure that the plates or others do not
obstruct the detergent dispenser.
Do not use an excessive amount of
detergent and help limit damage to the
environment at the same time.
!
17
11. PRATICAL HINTS
! Before placing the dishes in the
dishwasher, remove any remaining food
(bones, shells, pieces of meat or
vegetables, coffee grounds, skin of fruit,
cigarette ash, thooth picks etc. to avoid
blocking the filters, water outlet and
washing arm nozzles.
! Try not to rinse the dishes before loading
them into the dishwasher.
! If saucepans and oven dishes are
encrusted with the remains of burnt or
roast food, it is advisable to leave them to
soak before washing.
! Place the dishes face downwards.
! Try to place the dishes in such a way that
they are not touching one another. If they
are loaded properly you will get better
results.
! After loading the dishes check that the
washing arms can rotate freely.
! Pans and other dishes that have
particularly stubborn food particles or
remnants of burnt food should be left to
soak in water with dishwasher detergent.
! To wash silver properly:
a) rinse the silver immediately after use,
especially if it has been used for
mayonnaise, eggs, fish etc.;
b) do not sprinkle detergent onto it;
c) keep it separate from other metals.
! If you want the dishwasher to give a
complete wash, place the dishes in the
dishwasher at the end of each meal and if
necessary turn on the COLD RINSE cycle
to soften the food remains and remove
bigger particles of food from the new load
of dishes. When the dishwasher is full
start the complete wash cycle
programme.
! If the dishes are not very dirty or if the
baskets are not very full select an
ECONOMY programme, following the
instructions in the program list.
! It should be remembered that not all
dishes are suitable for washing in a
dishwasher. We advise against using the
dishwasher to wash items in
thermoplastic, cutlery with wooden or
plastic handles, saucepans with wooden
handles, items in aluminum, crystal
leaded glass unless otherwise stated.
! Certain decorations may fade. It is
therefore a good idea before loading the
whole batch to wash just one of the items
first so as to be sure that others like it will
not fade.
! It is a good idea not to put silver cutlery
with non-stainless steel handles into the
dishwasher as there could be a chemical
reaction between them.
! In order to avoid any dripping from the top
rack, remove the lower rack first.
! If the dishes are to be left in the machine
for some time, leave the door ajar, to let
some air circulate and to improve the
drying performance.
How to get really good wash
results.
How to make savings.
What not to wash.
When buying new crockery or cutlery
always make sure that they are
suitable for washing in a dishwasher.
Useful hints


Produkt Specifikationer

Mærke: Candy
Kategori: Opvaskemaskine
Model: CDPN 1L390PB-80

Har du brug for hjælp?

Hvis du har brug for hjælp til Candy CDPN 1L390PB-80 stil et spørgsmål nedenfor, og andre brugere vil svare dig