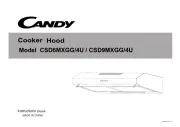
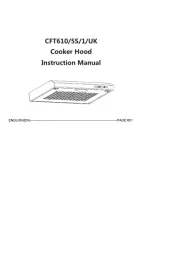
Candy CFT610/4X Manual

Candy Emhætte CFT610/4X

Læs gratis den danske manual til Candy CFT610/4X (9 sider) i kategorien Emhætte. Denne vejledning er vurderet som hjælpsom af 36 personer og har en gennemsnitlig bedømmelse på 3.6 stjerner ud af 18.5 anmeldelser. Har du et spørgsmål om Candy CFT610/4X, eller vil du spørge andre brugere om produktet?

Side 1/9
CLASSICAL COOKER HOOD USER'S MANUAL (EN)

1
Dear Custo
Dear Custo
Dear Custo
Dear CustoDear Customer,
mer,
mer,
mer, mer,
Thank you for preferring our product. It is very important that you install the cooker hood correctly so as to use ,
it for a long time, efficiently and reliability. Please read this User's Manual carefully before installation and using.
1)
1)
1)
1)1)
WHAT
WHAT
WHAT
WHAT WHAT TO DO BEFORE US
TO DO BEFORE US
TO DO BEFORE US
TO DO BEFORE USTO DO BEFORE USING
ING
ING
ING ING
1. Please feed your cooker hood with 220 V through a grounded line.
"WE SHALL ASSUME NO RESPONSIBILITY FOR THE LOSSES CAUSED BY UNGROUNDED
LINES"
2. Please connect your cooker hood to chimney outlet where warm gases are discharged and equipment such as
heaters or boilers are connected.
3. Please plug your cooker hood to an earthed socket, while the buttons on the control panel are in off position.
4. Please install the bulb by opening the aluminum cassette filters below your cooker hood.
5. Please install your cooker hood using the instructions within the packing.
6. The distance between the aluminum cassette filter and oven or hob upper surface must be minimum 75cm for
gas ovens, 65 cm for electric ovens.
7. Your cooker hood has been manufactured to offer operation with or without smoke hole connection.
2) CONNECTIO
2) CONNECTIO
2) CONNECTIO
2) CONNECTIO2) CONNECTION TO DUCTIN
N TO DUCTIN
N TO DUCTIN
N TO DUCTINN TO DUCTING FUNCTION
G FUNCTION
G FUNCTION
G FUNCTION G FUNCTION
There is an air discharge outlet on your cooker hood. Please connect the outlet to the chimney outlet, air discharge
or atmosphere, by cutting the glass, using aluminum pipe of 12cm diameter. For the vertical outlets, entry of rain
water into cooker hood should be prevented. Chimney outlet connection will be provided through this hole. For
this purpose, we recommend you to use 120mm diameter pipe with cooker hood. The pipe should be as short as
possible and if possible number of bends. This is important for an efficient operation.
3) RECIRCULA
3) RECIRCULA
3) RECIRCULA
3) RECIRCULA3) RECIRCULATION FU
TION FU
TION FU
TION FUTION FUNCTION
NCTION
NCTION
NCTIONNCTION
Note: If it is necessary to use with recirculation function, you can obtain carbon filter from our authorized dealers.
Please remove the cassette aluminum filter on the cooker hood, by pressing the latches inward, and install the
ACTIVE CARBON FILTER that you have obtained from the service. Your cooker hood is ready to operate with
recirculation mode.
4) INSTALL
4) INSTALL
4) INSTALL
4) INSTALL4) INSTALLATION OF THE CO
ATION OF THE CO
ATION OF THE CO
ATION OF THE COATION OF THE COOKER HOOD
OKER HOOD
OKER HOOD
OKER HOODOKER HOOD
Use the cooker hood frame to mark upper or back connection holes as well as chimney outlet connection.
(Figure1- Page13)You can see last page of this manuel). Cut chimney outlet hole. Use 4 screws of 3.5x16 YHB to
install the cooker hood onto the kitchen shelf. For the back connection, use an impact drill to open two 7.8mm
diameter, 45mm deep holes and place two dowels of 8mm diameter into these two holes. Screw the L brackets so
as there is 10mm space between them and holes. (Figure2-Page ). Mount your cooker hood to those brackets 13
through the 2 slots in the back and fix the cooker hood by tightening L brackets. The wall must be intact and
drilled without any damage; otherwise it cannot bear the cooker hood. Connect the aluminum spiral pipe to
complete installation. After installation of inox model hood, please pull up aluminum folio from surface of hood.
5) ELECTRICA
5) ELECTRICA
5) ELECTRICA
5) ELECTRICA5) ELECTRICAL CONNECTI
L CONNECTI
L CONNECTI
L CONNECTIL CONNECTION
ON
ON
ON ON
Connect the cooker hood to a grounded wall outlet which is close enough for the length of the cooker hood cable.
PUSH BUT
PUSH BUT
PUSH BUT
PUSH BUTPUSH BUTTON SWITCH USI
TON SWITCH USI
TON SWITCH USI
TON SWITCH USITON SWITCH USING INFORMATIO
NG INFORMATIO
NG INFORMATIO
NG INFORMATIONG INFORMATION
N
N
N N
The functions of the buttons are as follows:


Produkt Specifikationer

Mærke: Candy
Kategori: Emhætte
Model: CFT610/4X

Har du brug for hjælp?

Hvis du har brug for hjælp til Candy CFT610/4X stil et spørgsmål nedenfor, og andre brugere vil svare dig


Emhætte Candy Manualer
Candy

Candy CDG6CBHT Manual

18 Juni 2025
Candy

Candy CGM90NX Manual

1 Oktober 2024
Candy

Candy CGM90NN Manual

30 September 2024
Candy

Candy CDG6CMBGWIFI/1 Manual

5 September 2024
Candy

Candy CBT60RX Manual

5 September 2024
Candy

Candy CBT6ESMX Manual

5 September 2024
Candy

Candy CFT636/1W Manual

5 September 2024
Candy

Candy CBP 612/2 GR Manual

5 September 2024

Emhætte Manualer

Nyeste Emhætte Manualer