DeLonghi DNS80 Manual
DeLonghi
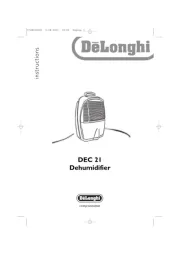
Luftfugter
DNS80

| Mærke: | DeLonghi |
| Kategori: | Luftfugter |
| Model: | DNS80 |
| Tænd-/slukkontakt: | Ja |
| Velegnet til rumvolumen på op til: | - m³ |
| Vekselstrømsindgangsspænding: | 220 - 240 V |
| Vekselstrømsindgangsfrekvens: | 50 Hz |
| Bredde: | 340 mm |
| Dybde: | 192 mm |
| Højde: | 501 mm |
| Vægt: | 6500 g |
| Produktfarve: | Black, Grey |
| Antal hastigheder: | 2 |
| Indbygget skærm: | Ja |
| Pakkevægt: | 7400 g |
| Pakkedybde: | 390 mm |
| Pakkebredde: | 245 mm |
| Pakkehøjde: | 570 mm |
| Relativ luftfugtighed ved drift (H-H): | 30 - 95 % |
| Driftstemperatur (T-T): | 1 - 35 °C |
| Skærm: | LCD |
| Vandtank volumen: | 2.8 L |
| Aftagelig vandtank: | Ja |
| Støjniveau: | 34 dB |
| Produkter pr. palle: | 27 stk |
| Ioniseringsanlæg: | Ja |
| Timer varighed (maksimum): | 12 t |
| Filtrering: | Ja |
| Luftfilter: | Ja |
| Affugtningskapacitet (maks.): | 7.5 l/24t |
| Integreret timer: | Ja |
| Håndtag: | Ja |
| Indgangsspænding: | 220-240 V |
| Strømforsyningens indgangsfrekvens: | 50 Hz |
| Vandmåler: | Ja |
| Fugtighedsregulator, hygrostat: | Ja |
| Slangetilslutning: | Ja |
| Hygrometer: | Ja |
| Fugtighedskontroltype: | Trin |
Har du brug for hjælp?
Hvis du har brug for hjælp til DeLonghi DNS80 stil et spørgsmål nedenfor, og andre brugere vil svare dig
Luftfugter DeLonghi Manualer
10 November 2025
30 August 2025
7 August 2025

7 Oktober 2024

30 August 2024
29 August 2024

29 August 2024

7 August 2024

3 August 2024

2 August 2024
Luftfugter Manualer
- Trotec
- Alpatec
- Trebs
- Ionmax
- Toyotomi
- Terraillon
- Klarbach
- Joycare
- Ivation
- Alpina
- SilverCrest
- Electrolux
- Sonnenkönig
- Noveen
- Kenmore
Nyeste Luftfugter Manualer

11 December 2025

10 December 2025

5 December 2025

3 December 2025

2 December 2025

29 November 2025

28 November 2025

28 November 2025

28 November 2025

27 November 2025