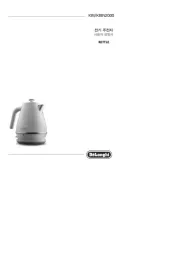
DeLonghi Icona Vintage Manual

DeLonghi Kedel Icona Vintage

Læs gratis den danske manual til DeLonghi Icona Vintage (5 sider) i kategorien Kedel. Denne vejledning er vurderet som hjælpsom af 76 personer og har en gennemsnitlig bedømmelse på 4.1 stjerner ud af 38.5 anmeldelser. Har du et spørgsmål om DeLonghi Icona Vintage, eller vil du spørge andre brugere om produktet?

Side 1/5
6
INTRODUCTION
Thank you for choosing this De’Longhi Coffee machine.
We hope you enjoy your new appliance.
Please take a few minutes to read these instructions.
This is the only way to ensure optimum results and
maximum safety.
Symbols used in these instructions
The important recommendations have these symbols.
These recommendations must be followed.
Danger! Failure to comply can be or is the cause
of injury due to life-threatening electric shocks.
Attention! Failure to comply can be or is the
cause of injury or damage to the appliance.
Scalding hazard! Failure to comply can be or is
the cause of scalding or burns.
Please Note: This symbol highlights
recommendations and important information for
the user.
SAFETY
Fundamental recommendations regarding safety
Danger! As the appliance operates using electric
current, electric shocks can not be excluded.
Therefore, follow the safety recommendations given:
UÊÊ Ê ÌÊ ÌÕVÊ ÌiÊ >««>ViÊ ÜiÊ ÞÕÊ >ÛiÊ ÜiÌÊ
hands or feet.
UÊÊ ÊÌÊÌÕVÊÌiÊ«Õ}ÊÜÌÊÜiÌÊ>`ð
UÊÊ >iÊÃÕÀiÊÌ>ÌÊÌiÊÃViÌÊÕÃiV>Ê>Ü>ÞÃÊLiÊi>ÃÞÊ
reached, so that the plug can be removed when
required.
UÊÊ ,iÛiÊÌiÊ«Õ}ÊvÀÊÌiÊÃViÌÊLÞÊ>VÌ}Ê`ÀiVÌÞÊ
on the plug itself. Do not pull the cable as damage
could be caused.
UÊÊ ,iÛiÊÌiÊ«Õ}ÊvÀÊÌiÊÃViÌÊÌÊ`ÃViVÌÊÌiÊ
appliance completely.
UÊÊ ÊÌÊ>ÌÌi«ÌÊÌÊÀi«>ÀÊÌiÊ>««>ViÊvÊÌÊÃÕ`Ê
breakdown.
Switch the appliance off, remove the plug from the
socket and contact the After-Sales Service. Please
refer to enclosed guarantee leaflet for details.
UÊÊ vÊÌiÊ«Õ}ÊÀÊ«ÜiÀÊÃÕ««ÞÊV>LiÊ>ÀiÊ`>>}i`]Ê>ÛiÊ
them replaced exclusively by the De’Longhi After-
Sales Service, in order to prevent risks. Please refer
to enclosed guarantee leaflet for details.
Attention: Keep the packaging material (plastic
bags, expanded polystyrene) out of the reach of
children.
Attention: The appliance is not intended for use
by persons (including children) with reduced
physical, sensory or mental capabilities, or lack of
experience and knowledge, unless they have been
given supervision or instruction concerning use
of the appliance by a person responsible for their
safety. Children should be supervised to ensure
that they do not play with the appliance.
Scalding hazard! This appliance produces hot
water and steam may form when it is operating.
Pay attention not to come into contact with hot
water sprays or steam.
Do not touch the cup warmer plate when the
appliance is on; it is hot.
CONDITIONS OF USE
This appliance is manufactured for the preparation of
coffee and to heat beverages.
The appliance is designed and produced for domestic
ÕÃiÊÞ°ÊÌÊÃÊÌÊÃÕÌ>LiÊvÀÊÕÃiÊ\
- staff kitchens in shops, offices and other workplaces.
- farms
- hotels, motels or other holiday accommodation
- guest houses
Any other use must be considered improper and
therefore dangerous.
The manufacturer is not liable for damage deriving from
the improper use of the appliance.
INSTRUCTIONS FOR USE
,i>`Ê ÌiÃiÊ ÃÌÀÕVÌÃÊ V>ÀivÕÞÊ LivÀiÊ ÕÃ}Ê ÌiÊ
appliances.
- Failure to comply with these instructions can lead
to injury and damage to the machine.
The manufacturer is not liable for damage
deriving from the failure to comply with the user
instructions.
Please Note: Keep these instructions carefully.
vÊ ÌiÊ >««>ViÊ ÃÕ`Ê LiÊ ÌÀ>ÃviÀÀi ÌÊ ÌiÀÊ
persons, these instructions must accompany it.
DESCRIPTION
1. Control panel
2. Steam knob
3. Water tank
4. Water tank lid
5. Power supply cable
6. Steam or hot water tube
7. Cup tray
8. Drip tray
9. Cappuccino maker
10. Nozzle
11. Boiler outlet
7
12. Coffee tamper
£Î°Êi>ÃÕÀiÊvÀÊ}ÀÕ`ÊVvvii
14. Filter-holder
15. Large filter, 2 cups
16. Small filter, 1 cup or for ESE pod
17. Steam function selection button
18. Coffee or hot water tube
19. On/off button
20. On indicator light
21. OK indicator light
22. Steam function selected indicator light
23. Cup warmer plate
PRELIMINARY OPERATIONS
Check after transport
After the packaging has been removed, check the
integrity of the appliance and the presence of all
accessories.
Do not use the appliance in the presence of obvious
damage. Contact the De’Longhi After-Sales Service.
Installing the appliance
The following safety measures must be complied with
when installing the appliance:
UÊ /iÊ>««>ViÊVÕ`ÊLiÊ`>>}i`ÊLÞÊÌiÊ«iiÌÀ>ÌÊ
of water.
Do not position the appliance near to water taps or
sinks.
UÊÊ /iÊ >««>ViÊ VÕ`Ê LiÊ `>>}i`Ê vÊ ÌiÊ Ü>ÌiÀÊ ÌÊ
contains freezes. Do not install the appliance in a
room where the temperature can fall below freezing
point.
UÊÊ *ÃÌÊ ÌiÊ «ÜiÀÊ ÃÕ««ÞÊ V>LiÊ Ê >Ê Ü>ÞÊ Ì>ÌÊ ÌÊ
cannot be damaged by sharp edges or by contact
with hot surfaces (e.g. electric plates).
Connecting the appliance
Attention! >iÊ ÃÕÀiÊ Ì>ÌÊ ÌiÊ iiVÌÀVÊ >ÃÊ
voltage corresponds with that indicated on the
data plate on the base of the appliance.
UÊÊ "ÞÊViVÌÊÌiÊ>««>ViÊÌÊVÀÀiVÌÞÊÃÌ>i
socket with a minimum rating of 10A and correctly
earthed.
UÊÊ Ê ÌiÊ V>ÃiÊ vÊ V«>ÌLÌÞÊ LiÌÜiiÊ ÌiÊ ÃViÌÊ
and the plug on the appliance, have the plug
replaced by a qualified technician.
UÊÊ /iÊ «ÜiÀÊ ÃÕ««ÞÊ V>LiÊ Ê ÌÃÊ >««>ViÊ ÕÃÌÊ
never be replaced by the user as special tools are
needed for this operation. Contact an After-Sales
Centre authorised by the manufacture if the cable
is damaged or must be replaced, in order to avoid
all risks. Please refer to enclosed guarantee leaflet
for details
Filling the water tank
1. Open the water tank lid (fig. 1) and then lift the tank
to remove it (fig. 2).
Ó°ÊÊ ÊÌiÊÌ>ÊÜÌÊvÀiÃÊÜ>ÌiÀÊLÕÌÊ`ÊÌÊ«>ÃÃÊ8°Ê
w}°Êή°Ê,i«ÃÌÊÌiÊÌ>ÊLÞÊ«ÀiÃÃ}ÊÌÊ}ÌÞÊÊ
a way to open the valve situated on the base of the
tank itself.
3. Alternatively, do not remove the tank, just fill it by
pouring in water from a jug, be careful of splashes
Attention: do not operate the appliance without
water in the tank and always fill it when the water
is a few centimetres from the bottom.
Please Note: it is normal to find water in the
compartment under the tank; dry using a clean
sponge.
USING FOR THE FIRST TIME
Pre-heating the coffee machine
Before using the machine for the first time all accessories
and internal circuits must be washed by making at least
five cups of coffee without using ground coffee.
ÌÊÃÊ>`ÛÃi`ÊÌÊ«Àii>ÌÊÌiÊVvviiÊ>ViÊ>ÃÊvÜÃÊ
in order to obtain an espresso coffee at the right
temperature:
1. Press the ON/OFF button (the relative indicator light
switches on) (fig. 4) and attach the empty filter-
holder to the machine (fig. 5).
2. Place a cup under the filter-holder. Use the same
cup in which the coffee is to be served so that it can
be pre-heated.
3. Wait until the OK light comes on (fig. 6) and then
press the coffee button straight away (fig. 7). Allow
the water to run until the OK light switches off and
then stop the water by pressing the coffee button
again (fig. 7).
4. Empty the cup, wait for the “OK” light to switch on
again and repeat the same operation again.
ÌÊÃÊÀ>ÊvÀÊ>ÊÃ>]Ê>ÀiÃÃÊ«ÕvvÊvÊÃÌi>ÊÌÊLiÊ
released when the filter-holder is removed).
MAKING AN ESPRESSO USING GROUND
COFFEE
1. After having pre-heated the machine as described
in the previous paragraph, in¬sert the ground
coffee filter into the filter-holder, making sure that
the projection is correctly inserted into the relative
seat as indicated in fig. 8. Use the smallest filter for
one coffee or the larger one to make two cups of
coffee.
2. To prepare one coffee, fill the filter with a level
measuring spoon of ground coffee, about 7gr. (fig.
®°ÊvÊÞÕÊÜÃÊÌÊ«Ài«>ÀiÊÌÜÊVÕ«ÃÊvÊVvvii]ÊwÊÌiÊ
filter with two less-than-level measuring spoons
of ground coffee (about 6+6 gr). Fill the filter with
small amounts at a time to prevent the coffee
spilling out.


Produkt Specifikationer

Mærke: DeLonghi
Kategori: Kedel
Model: Icona Vintage
Type: Kaffe
Vekselstrømsindgangsspænding: 220-240 V
Vekselstrømsindgangsfrekvens: 50 - 60 Hz
Bredde: 260 mm
Dybde: 290 mm
Højde: 315 mm
Vægt: 4100 g
Produktfarve: Blue,Stainless steel
Kontroltype: Knapper
Indbygget skærm: Ingen
Produkttype: Espressomaskine
Strøm: 1100 W
Placering af apparat: Bordplade
Vandtank volumen: 1.4 L
Kaffetype: Coffee pod,Ground coffee
Kaffemaskine type: Fuld-auto
Maksimalt driftstryk: 15 bar
Indbygget kværn: Ingen
Justerbare vandmængde: Ja
Aftagelig vandtank: Ja
Indikatorlampe: Ja
Kaffebrygning: Ja
Fremstilling af Espresso: Ja
Fremstilling af Cappuccino: Ja
Fremstilling af Latte: Ja
Volumen i kopper: 2 kopper
Vandfilter: Ja
Aftagelig drypbakke: Ja
Fremstilling af Americano: Ja
Fremstilling af Lungo: Ja
Tænd- og slukkontakt med lys: Ja
Kopvarmer: Ja
Synligt vandniveau: Ja
Damprør: Ja
Aftageligt svingfilter: Ja
Justerbar mælkemængde: Ja
Mælke tilføjelsestype: Rør
Indbygget kaffestamper: Ja
Flere drikkevarer: Ja

Har du brug for hjælp?

Hvis du har brug for hjælp til DeLonghi Icona Vintage stil et spørgsmål nedenfor, og andre brugere vil svare dig