ElectriQ VS4-1600-1BW Manual
ElectriQ
Varmeapparat
VS4-1600-1BW
Læs gratis den danske manual til ElectriQ VS4-1600-1BW (31 sider) i kategorien Varmeapparat. Denne vejledning er vurderet som hjælpsom af 10 personer og har en gennemsnitlig bedømmelse på 3.6 stjerner ud af 5.5 anmeldelser. Har du et spørgsmål om ElectriQ VS4-1600-1BW, eller vil du spørge andre brugere om produktet?
Side 1/31

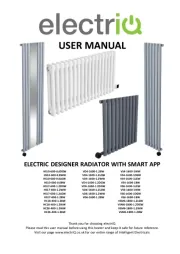
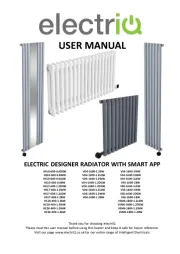
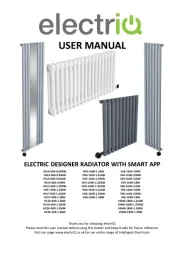
USER MANUAL
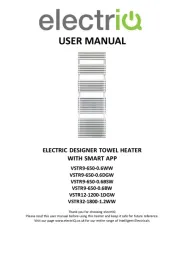
ELECTRIC DESIGNER RADIATOR WITH SMART APP
Thank you for choosing electriQ
Please read this user manual before using this heater and keep it safe for future reference.
Visit our page www.electriQ.co.uk for our entire range of Intelligent Electricals
HS10-600-0.6DGW
VD4-1600-1.2BW
VS4-1600-1WW
HS10-600-0.6WW
VD4-1600-1.2LGW
VS4-1600-1DGW
HS10-600-0.6LGW
VD4-1600-1.2WW
VS4-1600-1LGW
HS10-600-0.6BW
VD4-1600-1.2DGW
VS4-1600-1BW
HS17-600-1.2DGW
VD6-1600-1.2DGW
VS6-1600-1LGW
HS17-600-1.2WW
VD6-1600-1.2LGW
VS6-1600-1WW
HS17-600-1.2LGW
VD6-1600-1.2WW
VS6-1600-1DGW
HS17-600-1.2BW
VD6-1600-1.2BW
VS6-1600-1BW
HC18-400-1.2BW
VSM6-1800-1.2LGW
HC18-400-1.2WW
VSM6-1800-1.2DGW
HC26-400-1.2WW
VSM6-1800-1.2WW
HC26-400-1.2BW
VSM6-1800-1.2BW

Page 2 of 31

Page 4 of 31
SAFETY INSTRUCTIONS
IMPORTANT: Carefully read the instructions before operating the unit.
• This appliance is for indoor use only.
• Rating: This unit must be only connected to a 220-240 V / 50 Hz earthed outlet.
• If you are in any doubt about the suitability of your electrical supply have it checked and, if
necessary, modified by a qualified electrician.
• This heater has been tested and is safe to use. However, as with any electrical appliance - use
it with care.
• Disconnect the power from the unit before dismantling, assembling or cleaning.
• This appliance can be used by children aged from 8 years and above and persons with
reduced physical, sensory or mental capabilities or lack of experience and knowledge if they
have been given supervision or instruction concerning use of the appliance in a safe way and
understand the hazards involved. Children shall not play with the appliance. Cleaning and
user maintenance shall not be carried out by children.
• Children aged from 3 years and less than 8 years shall only switch the appliance on or off
provided that it has been placed or installed in its intended normal operating position and
they have been given supervision or instruction concerning use of the appliance in a safe way
and understand the hazards involved. Children aged from 3 years and less than 8 years shall
not plug in, regulate, or clean the appliance or perform user maintenance.
• Children under 3 years should be kept away unless continuously supervised.
• Some parts of this product can become very hot and cause burns. Particular attention has to
be given where children and vulnerable people are present.
• Do not clean the unit by spraying it or immersing it in water.
• Never connect the unit to an electrical outlet using an extension cord. If an outlet is not
available, one should be installed by a qualified electrician.
• Never operate this appliance if the unit, cord or plug is damaged. Ensure the power cord is
not stretched, exposed to sharp object/edges, or routed under the unit.
• Any service other than regular cleaning should be performed by an authorised service
representative. Failure to comply could result in a voided warranty.
• Do not use an external timer.
• The heater must not be located immediately below a socket outlet.
• Always ensure the unit is secure before operation. It must be securely attached to a suitable
wall.
• Avoid keeping the unit in direct sunlight for a long periods of time.
• The heater is designed to be used at temperatures above -20°C. If it is exposed to
temperatures below this, it must be allowed to warm above this level before operation.
• Do not attempt to repair, disassemble or modify the appliance. This unit contains no user-
serviceable parts.
• Always unplug or disconnect the appliance from the mains power supply when not in use, or
when moving or cleaning it. Do not pull the cord to unplug the heater.
• Do not use the appliance for anything other than its intended use. It is designed for domestic
indoor use only.
• There may be a trace of odour during the first few minutes of initial use, or after a period of

Page 5 of 31
storage. This is normal and will quickly disappear.
• This appliance has hot and arcing or sparking parts inside. Do not use it in areas where
gasoline, paint, or any flammable liquids are used or stored.
• Never locate this appliance where it may fall into a bathtub or otherwise become exposed to
water.
• This appliance is IPX4 rated, and so can be used or installed within a bathroom as long as the
appliance and its cables are not within Zones 0-2.
• If used within a bathroom, the circuit must be protected by a suitable RCD to prevent electric
shock.
• Do not allow the appliance to be submerged or sprayed with water.
• The unit must be installed in accordance with current regulations for the area of installation.
If unsure, professional advice should be sought.
• WARNING: To reduce the risk of fire or electrical shock, DO NOT use this appliance with any
solid-state speed control device or any variable speed controllers.
• Installation must be in accordance with all relevant local regulations applicable at the time
of installation.
• If electrical work is carried out within the bathroom which involves addition or alteration of
existing circuits, it may be notifiable to your local building control department (Part P). If
unsure, professional advice should be sought.
• Ensure that your heater is filled with glycol. If filling up your heater with Glycol, ensure to
leave room inside the unit for expansion. It is recommended to leave 10 percent of the unit
empty to allow for expansion of the liquid during operation.
• As the room temperature sensor is close to the radiator, it is unavoidable that heat from the
radiator will affect the room temperature reading during operation. This is normal for all
heaters with built in room temperature sensors.
• Illustrations in this manual may differ from the final product, this is due to constant product
development and improvement. There may also be slight variations between different
models covered by this manual.
PARTS SUPPLIED
HEATER
SCREWS (B) X8
WALL PLUGS X8
UPPER AND
LOWER
BRACKETS X4
PTFE TAPE X1
SPANNER X1
BRACKET COVER X4
(excluding
HC18-400-1.2WW,
HC26-400-1.2WW)
HEATING
ELEMENT
RUBBER WASHER X2
METAL WASHER X4
BRACKETS X4
(HC18-400-1.2WW,
HC26-400-1.2WW)

Page 6 of 31
INSTALLING WITHIN A BATHROOM
If the appliance is to be fitted within a bathroom, a good understanding of the
zoning within bathrooms is required to ensure the unit is mounted in a safe position.
The appliance is rated as IPX4 and should be installed outside of Zones 0 -2. We
would advise when the unit is fitted within a bathroom, the plug is removed from
the unit, and a suitable fused spur is installed in accordance with BS 7671. In
addition, when used in a bathroom, it must be protected by a suitable RCD to
prevent the risk of electric shock.
Zone 0:
The interior of the bathtub or shower basin.
Zone 1:
The area around the bathtub or shower basin up to a height
of 2.25m above the floor
Zone 2:
The area stretching to 0.6m outside the bath or shower and
above the bath or shower if over 2.25m

Page 8 of 31
WALL MOUNTING
NOTE: Depending on your wall type alternative fixings may be required to secure the
heater to your wall. If in any doubt advice should be sought from a competant person.
Step
1
Measure the distance between the two columns that you will be hanging your
heater from on the top of the heater and the two ends on the bottom of the rail.
Then measure the distance vertically between the top and bottom holes. Make a
note of the measurement, and mark four points on the wall that distance apart.
Use a spirit level to ensure that they are level.
Step
2
Drill 4 holes into the
wall in the positions
marked using a
Ø10mm drill bit and
insert the wall plugs
provided. Secure
the brackets to the
wall using the
screws and washers
provided with the
grooves all facing
upward, then insert
the bracket covers
onto the grooves.
Ensure that the
brackets are secure
before commencing
onto the next step.
Step
3
Carefully hang the radiator onto the brackets. It is highly recommended that two
people perform this step, due to the weight of the radiator.

Page 11 of 31
ADDITIONAL SETTINGS
To Access the additional settings, press and hold the INCREASE button for 10 seconds while the
unit is in standby. While within the additional settings use the INCREASE and DECREASE buttons to
change their values, and the MODE button to move to the next setting.
OPTION
MODE
DESCRIPTION
F0
TEMPERATURE
COMPENSATION
If the room temperature displayed is not accurate, the
temperature compensation option can be altered to improve the
accuracy of the temperature displayed. (Note due to the proximity
of the sensor to the heat source it is unavoidable for the sensor not
to be affected by the heat emitted from the heater)
F1
OPEN WINDOW
DETECTION
Turn the open window detection feature between Off, 30 and 60.
The two figures indicate how long the unit will stay in ANTI-FROST
mode after a significant drop in room temperature is detected.
F2
RADIATOR SURFACE
TEMPERATURE
(COMFORT MODE)
Use to set the desired maximum temperature of the radiator when
heating in comfort mode. This defaults to 80°C, but can be set
between 40°C and 80°C.
F3
RADIATOR SURFACE
TEMPERATURE
(ECO MODE)
Use to set the desired maximum temperature of the radiator when
heating in eco mode. This defaults to 60°C, but can be set between
40°C and 80°C.
F4
Wi-Fi
Use to turn the Wi-Fi on or off. Using the appliance with Wi-Fi
turned off will reduce the amount of standby power consumed by
the unit, but will prevent the use of the features within the app.
The radiator surface temperature option can be used to limit the external temperature of the
radiator. At lower temperatures, this can help prevent the radiator from getting too hot, should it
be in close proximity to vulnerable people such as children. Even when a low surface temperature
is set, we would advise that children are supervised by a responsible person when in close
proximity to the radiator.

Page 15 of 31
CONNECTING THE APPLIANCE TO WIFI
DOWNLOAD THE APP TO YOUR PHONE
Download the” TUYA SMART” app, from your chosen app store, using the QR codes below, or by
searching for the app in your chosen store.
MODES AVAILABLE FOR SETUP
The appliance has 2 different modes that can be used for connection, Bluetooth mode and Access
Point (AP) mode. It is recommended to use Bluetooth connection to connect your unit to Wi-Fi. This
is the easiest connection method and will ensure that no time is wasted in getting to use your new
heater to its fullest potential.
If connecting the unit to Wi-Fi using the Bluetooth connection method, ensure your mobile phone
has Bluetooth enabled. For both connection methods ensure that WiFi has not been disabled in the
additional settings on the thermostat (See Page 11).
Press and hold the MODE button for 5 seconds until the display shows lines moving in a clockwise
direction to enter connection mode. A timer will also appear in the centre of the display for 3
minutes. After the 3 minutes has elapsed, the connection mode will stop. If connection is
unsuccessful the MODE button should be held again, and the process repeated.
ANDROID
IOS
Produkt Specifikationer
Mærke: | ElectriQ |
Kategori: | Varmeapparat |
Model: | VS4-1600-1BW |
Har du brug for hjælp?
Hvis du har brug for hjælp til ElectriQ VS4-1600-1BW stil et spørgsmål nedenfor, og andre brugere vil svare dig
Varmeapparat ElectriQ Manualer
18 Juni 2025
15 Juni 2025
9 Juni 2025
9 Juni 2025
9 Juni 2025
8 Juni 2025
8 Juni 2025
8 Juni 2025
8 Juni 2025
8 Juni 2025
Varmeapparat Manualer
- Heatstrip
- Klarstein
- Life On Products
- Gossmann
- Tornado
- VOX
- Qlima
- Haverland
- Ecoteck
- VIESTA
- Carson
- Techly
- EvoHeat
- Lavex
- Big Ass Fans
Nyeste Varmeapparat Manualer
27 Juli 2025
27 Juli 2025
27 Juli 2025
26 Juli 2025
26 Juli 2025
26 Juli 2025
26 Juli 2025
26 Juli 2025
26 Juli 2025
26 Juli 2025