INSTALLATION INSTRUCTIONS
READ AND SAVE THESE INSTRUCTIONS
These instructions are provided for your safety. It is essential to read them carefully and completely before installing the
light fixture. We strongly suggest that all direct-wired fixtures be installed by a qualified, licensed electrician.
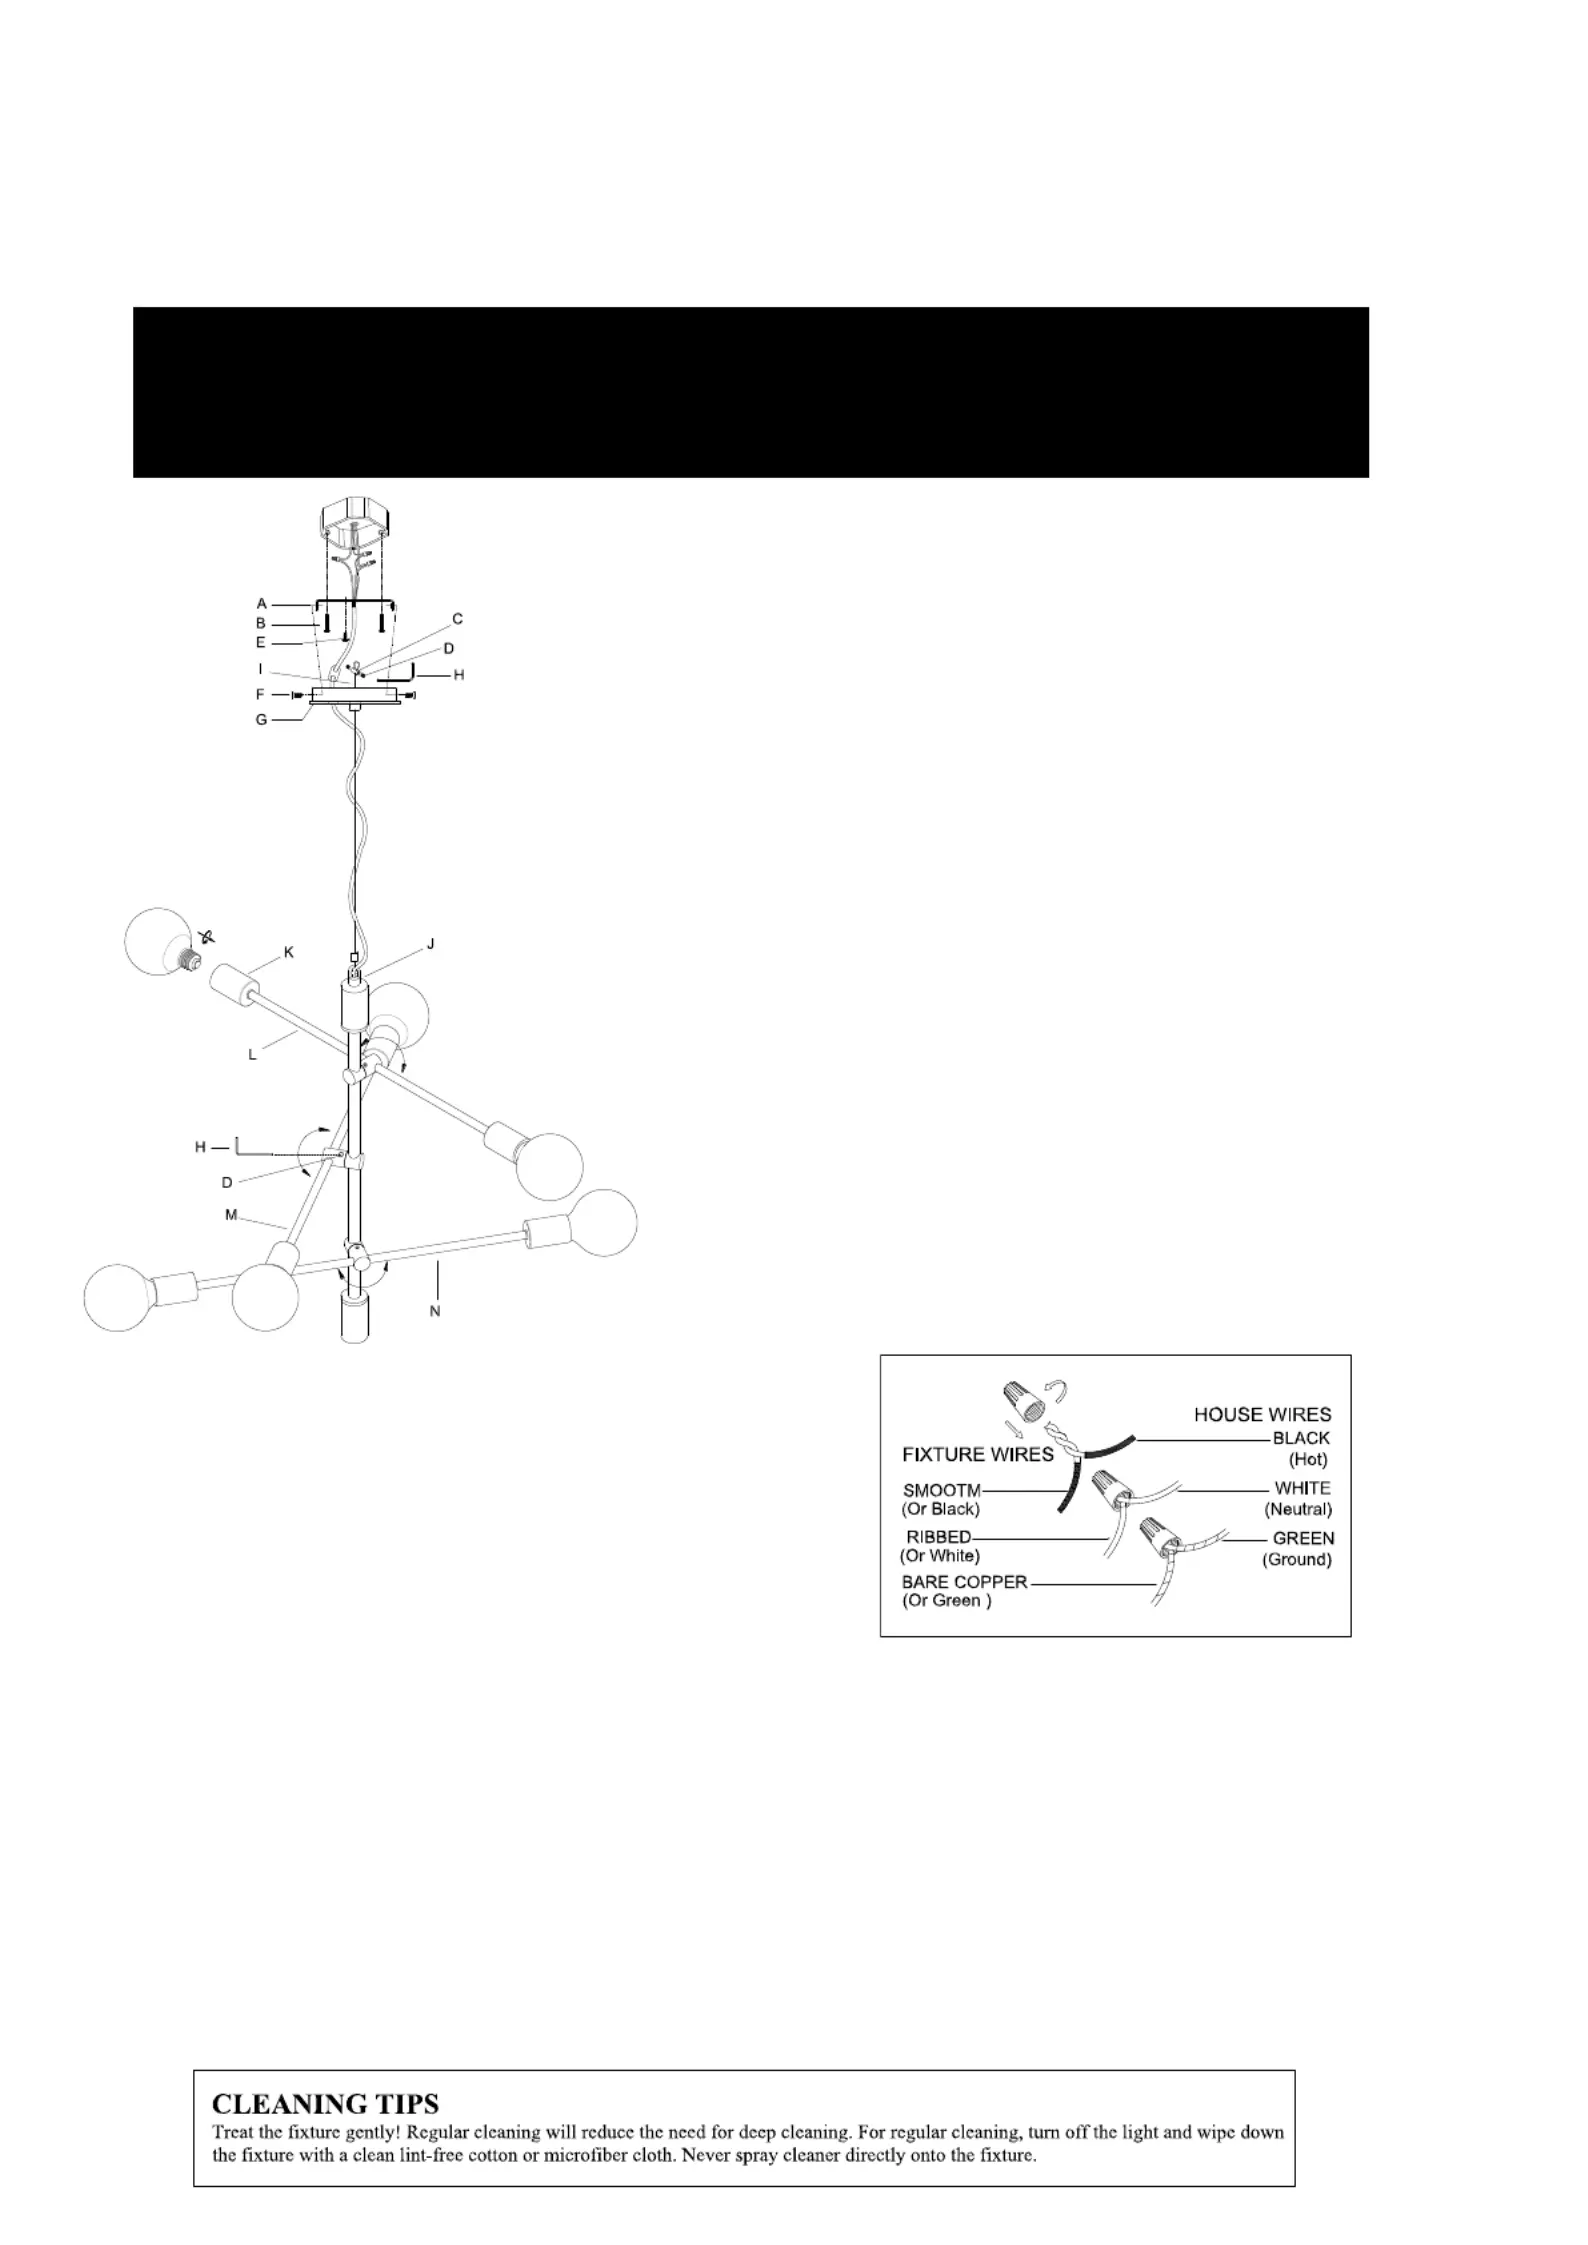
Rota Adjus three place a s (L) (M) (N) desired angle and t rm to a
tighten the allen screws(D) using allen wrench(H). an
Attach the fixture s wire to the power supply wires at the junction ’
box. Connect the black wire to the black wire(or smooth), the
white wire to the white(or ribbed), the ground wire to the ground
wire(green or copper). Twist the end of the wire pairs together,
and twist on a wire connector. Make sure all twists are in the same
direction. If there is no ground wire(green or copper) from the
junction box, locate the ground screw(E) on the mounting plate(A)
and wrap the fixture s ground wire around the green ground ’
screw(E). Use a screwdriver to secure the ground screw(E) onto
the mounting bracket. Tuck all wires neatly into the junction box.
PREPARING FOR INSTALLATIONS
Remove all contents from the carton. See the important notes
above. Shut off the power at the circuit breaker and completely
remove the old fixture from the ceiling, including the
Rotate both of the allen screws (D) clockwise into the binding
collar (C) using the allen wrench(H) until tight.
If needed, cut off any remaining excess steel cable (I )
using a wire cutter so the steel cable(I) and binding collar (C )
can properly fit the inside of the final assembled canopy (G ). FINISHING THE INSTALLATIONS
Gently pull the existing wire down from the ceiling
junction box and allow wires to hang.
Attach the mounting plate (A) to the ceiling outlet box, and align Install light bulb(s) (not included) in accordance
the slots of the mounting plate (A) with two threaded holes with the fixture s specifications. ’
located on the J-Box. Do not exceed the recommended maximum
Secure the mounting plate (A) by tightening 2 mounting screws (F wattage. )
with a screwdriver. Your installation is now complete. Turn on the power
Secure the mounting plate(A) to the junction box by securely and test the fixture.
tightening the mounting screws(F ).
WAR NI NG ! S HU T PO W ER O FF AT F U SE O R C IR CU IT B R E AK E R
BE F OR E I NS TAL L AT I ON
AVERTISSEMENT! COUPER LE COURANT AU NIVEAU DES FUSIBLES OU DU DISJONCTEUR.


