GE JSS28CKCC Manual

GE Komfur JSS28CKCC

Læs gratis den danske manual til GE JSS28CKCC (12 sider) i kategorien Komfur. Denne vejledning er vurderet som hjælpsom af 27 personer og har en gennemsnitlig bedømmelse på 3.6 stjerner ud af 14 anmeldelser. Har du et spørgsmål om GE JSS28CKCC, eller vil du spørge andre brugere om produktet?

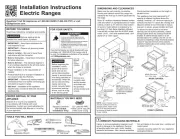
Side 1/12
TOOLS YOU WILL NEED
1
Installation
30 Electric
Instructions Slide-In Range
BEFORE YOU BEGIN
Read these instructions completely
and carefully.
IMPORTANT Save these
instructions for local inspector’s use.
IMPORTANT Observe all
governing codes and ordinances.
Note to Installer Be sure to leave these
instructions with the Consumer.
Note to Consumer Keep these
instructions for future reference.
Skill level Installation of this appliance
requires basic mechanical skills.
Completion time 1 to 3 hours
Proper installation is the responsibility of
the installer.
Product failure due to improper installation
is not covered under the Warranty.
WARNING This appliance must
be properly grounded.
FOR YOUR SAFETY:
CAUTION: For Personal Safety
remove house fuse or open circuit breaker
before beginning installation. Failure to do so
could result in serious injury or even death.
ANTI-TIP DEVICE
WARNING To reduce the risk
of tipping, the appliance must be secured by
properly installed Anti-Tip bracket packed
with this appliance.
If the Anti-Tip device supplied with the range
does not fit this application, use the universal
Anti-Tip device WB2X7909.
WARNING
All ranges can tip
Injury to persons could result
Install Anti-Tip bracket packed
with range
See Installation Instructions
If you pull the range out and away from the
wall for any reason, make sure the Anti-Tip
bracket is engaged when the range is pushed
back against the wall.
Questions? Call 800.GE.CARES (800.432.2737) or Visit our Website at: ge.com
JSS28, JSP39
Straight EdgeDrill with 1/8 Bit
Hand or Saber Saw Pencil
Safety Glasses
Tape Measure
FOR YOUR SAFETY:
All rough-in and spacing dimensions must be
met for safe use of your range. Electricity to
the range can be disconnected at the outlet
without moving the range if the outlet is in
the preferred location (remove lower drawer).
To reduce the risk of burns or fire when
reaching over hot surface elements, cabinet
storage space above the cooktop should be
avoided. If cabinet storage space is to be
provided above the cooktop, the risk can
be reduced by installing a range hood that
sticks out at least 5beyond the front of the
cabinets. Cabinets installed above a cooktop
must be no deeper than 13.
Be sure your appliance is properly installed
and grounded by a qualified technician.
31-10596-2 1-07 JR
2
Installation Instructions
PREPARE TO INSTALL THE RANGE
REMOVE SHIPPING MATERIALS
Remove all parts from the plastic bag found
inside the prepack of the oven and save
packaging tape.
1
STORAGE DRAWER REMOVAL
Pull the drawer out until it stops.
Lift the front of the drawer until the stops
clear the guides.
Pull forward and remove the drawer.
C
B
A
Rail
Stop
Move range indoors in front of cabinet
opening.
Protect the kitchen floor! Flatten and place a
piece of the shipping carton in front of the
installation location to protect the flooring.
Remove packing materials. Remove labels on
door, plastic on trim and panel, and all tape
around the range.
Guide
Stop
DOOR REMOVAL (optional)
Door removal is not a requirement for
installation of the product, but is an added
convenience. To remove the door:
Open the oven door as far as it will go.
Push both hinge
locks down toward
the door frame
to the unlocked
position. This may
require a flat blade
screwdriver.
DO NOT LIFT THE DOOR BY THE HANDLE!
Place hands on both sides of
the door, and close the oven
door to the removal position.
This is half way between the
broil stop and fully closed.
Lift door up and out until the hinge arms
clear the slots.
NOTE: The oven door is very heavy. Be sure
you have a firm grip before lifting the oven
door off the hinges. Use caution once the
door is removed. Do not lay the door on its
handle. This could cause dents or scratches.
D
C
B
A
Hinge clears slot
Hinge
unlocked
position
Hinge
slot
Hinge
arm


Produkt Specifikationer

Mærke: GE
Kategori: Komfur
Model: JSS28CKCC

Har du brug for hjælp?

Hvis du har brug for hjælp til GE JSS28CKCC stil et spørgsmål nedenfor, og andre brugere vil svare dig


Komfur GE Manualer

GE

GE PXOVNPRB1VDM Manual

17 Juni 2025
GE

GE JB480SYSS Manual

17 Juni 2025
GE

GE GRF500SVSS Manual

17 Juni 2025
GE

GE JCB840 Manual

17 Januar 2025
GE

GE JGS650SEFSS Manual

24 December 2024
GE

GE PC2S930YPFS Manual

16 August 2024
GE

GE JDP36BWWH Manual

6 August 2024
GE

GE JGBS60DEKCC Manual

26 Juli 2024
GE

GE JB640DFWW Manual

27 Maj 2024
GE

GE JBS61BCAD Manual

26 Maj 2024

Komfur Manualer

Nyeste Komfur Manualer