Honda CTX1300 (2014) Manual
Læs gratis den danske manual til Honda CTX1300 (2014) (182 sider) i kategorien Motor. Denne vejledning er vurderet som hjælpsom af 29 personer og har en gennemsnitlig bedømmelse på 4.4 stjerner ud af 15 anmeldelser. Har du et spørgsmål om Honda CTX1300 (2014), eller vil du spørge andre brugere om produktet?
Side 1/182

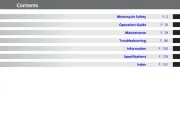
Contents
Motorcycle Safety P. 2
Operation Guide P. 16
Maintenance P. 68
Troubleshooting P. 116
Information P. 146
Specifications P. 170
Index P. 174
31MJN600 CTX1300/A (Deluxe) MOM 14786 (1311)

Welcome
Congratulations on your purchase of a new
Honda motorcycle. Your selection of a
Honda makes you part of a worldwide family
of satisfied customers who appreciate
Honda’s reputation for building quality into
every product.
To ensure your safety and riding pleasure:
●Read this owner’s manual carefully.
●Follow all recommendations and
procedures contained in this manual.
●Pay close attention to safety messages
contained in this manual and on the
motorcycle.
To protect your investment, we urge you to
take responsibility for keeping your
motorcycle well serviced and maintained.
Also, observe the break-in guidelines, and
always perform the pre-ride inspection and
other periodic checks in this manual.
When service is required, remember that your
Honda dealer knows your motorcycle best. If
you have the required mechanical “know-
how” and tools, you can purchase an official
Honda Service Manual to help you perform
many maintenance and repair tasks. 2P. 164
Read the warranty information thoroughly so
that you understand the warranty coverage
and that you are aware of your rights and
responsibilities. 2P. 165
You may also want to visit our website at
www.powersports.honda.com.
www.honda.ca.
Happy riding!
California Proposition 65 Warning
WARNING: This product contains or emits
chemicals known to the State of California to
cause cancer and birth defects or other
reproductive harm.
Canada

A Few Words About Safety
Your safety, and the safety of others, is very
important. Operating this motorcycle safely is
an important responsibility.
To help you make informed decisions about
safety, we have provided operating
procedures and other information on safety
labels and in this manual. This information
alerts you to potential hazards that could
hurt you or others.
Of course, it is not practical or possible to
warn you about all hazards associated with
operating or maintaining a motorcycle. You
must use your own good judgment.
You will find important safety information in
a variety of forms, including:
●Safety labels on the motorcycle
●Safety Messages preceded by a safety alert
symbol and one of three signal words:
DANGER, WARNING, or CAUTION.
These signal words mean:
3
DANGER
You WILL be KILLED or SERIOUSLY
HURT if you don’t follow instructions.
3
WARNING
You CAN be KILLED or SERIOUSLY
HURT if you don’t follow instructions.
3
CAUTION
You CAN be HURT if you don’t follow
instructions.
Other important information is
provided under the following titles:
NOTICE
Information to help you avoid
damage to your motorcycle,
other property, or the
environment.

Motorcycle Safety
This section contains important information for safe riding of your motorcycle.
Please read this section carefully.
Safety Guidelines .........................................P. 3
Safety Labels ................................................P. 7
Safety Precautions .......................................P. 9
Riding Precautions .....................................P. 10
Accessories & Modifications......................P. 14
Loading .......................................................P. 15

Safety Guidelines
3
continued
Motorcycle Safety
Safety Guidelines
Follow these guidelines to enhance your safety:
●Perform all routine and regular inspections
specified in this manual.
●Stop the engine and keep sparks and flame
away before filling the fuel tank.
●Do not run the engine in enclosed or partly
enclosed areas. Carbon monoxide in exhaust
gases is toxic and can kill you.
It’s a proven fact: helmets and protective
apparel significantly reduce the number and
severity of head and other injuries. So always
wear an approved motorcycle helmet and
protective apparel. 2P. 9
Make sure that you are physically fit, mentally
focused and free of alcohol and drugs. Check
that you and your passenger are both wearing
an approved motorcycle helmet and protective
apparel. Instruct your passenger on holding
onto the grab rails or your waist, leaning with
you in turns, and keeping their feet on the
footpegs, even when the motorcycle is stopped.
Even if you have ridden other motorcycles,
practice riding in a safe area to become familiar
with how this motorcycle works and handles,
and to become accustomed to the motorcycle’s
size and weight.
Always Wear a Helmet
Before Riding
Take Time to Learn & Practice

Safety Guidelines
4
Motorcycle Safety
We recommend that all riders take a certified
course approved by the Motorcycle Safety
Foundation (MSF). New riders should start with
the basic course, and even experienced riders
will find the advanced course beneficial.
For information about the MSF training course
nearest you, call the national toll-free number:
(800) 446-9227.
Other riding tips can be found in the You
and Your Motorcycle Riding Tips booklet that
came with your motorcycle.
Always pay attention to other vehicles around
you, and do not assume that other drivers see
you. Be prepared to stop quickly or perform an
evasive maneuver.
Make yourself more visible, especially at night,
by wearing bright reflective clothing,
positioning yourself so other drivers can see
you, signaling before turning or changing lanes,
and using your horn when necessary.
Never ride beyond your personal abilities or
faster than conditions warrant. Fatigue and
inattention can impair your ability to use good
judgment and ride safely.
Alcohol and riding don’t mix. Even one
alcoholic drink can reduce your ability to
respond to changing conditions, and your
reaction time gets worse with every additional
drink. Don’t drink and ride, and don’t let your
friends drink and ride either.
Ride Defensively
USA
Make Yourself Easy to See
Ride within Your Limits
Don’t Drink and Ride

Safety Guidelines
5
continued
Motorcycle Safety
It’s important to keep your motorcycle properly
maintained and in safe riding condition.
Inspect your motorcycle before every ride and
perform all recommended maintenance. Never
exceed load limits (2P. 15), and do not modify
your motorcycle or install accessories that
would make your motorcycle unsafe (2P. 14).
Personal safety is your first priority. If you or
anyone else has been injured, take time to
assess the severity of the injuries and whether it
is safe to continue riding. Call for emergency
assistance if needed. Also follow applicable
laws and regulations if another person or
vehicle is involved in the crash.
If you decide to continue riding, first evaluate
the condition of your motorcycle. If the engine
is still running, turn it off. Inspect for fluid leaks,
check the tightness of critical nuts and bolts,
and check the handlebar, control levers, brakes,
and wheels. Ride slowly and cautiously.
Your motorcycle may have suffered damage
that is not immediately apparent. Have your
motorcycle thoroughly checked at a qualified
service facility as soon as possible.
Keep Your Honda in Safe Condition
If You are Involved in a Crash

Safety Guidelines
6
Motorcycle Safety
Exhaust contains poisonous carbon monoxide,
a colorless, odorless gas. Breathing carbon
monoxide can cause loss of consciousness and
may lead to death.
If you run the engine in a confined or even
partly enclosed area, the air you breathe could
contain a dangerous amount of carbon
monoxide. Never run your motorcycle inside a
garage or other enclosure.
Carbon Monoxide Hazard
3
WARNING
Carbon monoxide gas is toxic.
Breathing it can cause
unconsciousness and even kill you.
Avoid any areas or activities that
expose you to carbon monoxide.

Safety Labels
7
continued
Motorcycle Safety
Safety Labels
Safety and information labels on your
motorcycle provide important safety
information and may warn you of potential
hazards that could cause serious injury. Read
these labels carefully and don’t remove them.
If a label comes off or becomes hard to read,
contact your dealer for a replacement.

Safety Labels
8
Motorcycle Safety

Safety Precautions
9
continued
Motorcycle Safety
Safety Precautions
●Ride cautiously and keep your hands on the
handlebar and feet on the footpegs.
●Keep passenger’s hands on the grab rails or
your waist, passenger’s feet on the footpegs
while riding.
●Always consider the safety of your passenger,
as well as other drivers and riders.
Make sure that you and any passenger are
wearing an approved motorcycle helmet, eye
protection, and high-visibility protective
clothing. Ride defensively in response to
weather and road conditions.
❙
Helmet
Should be safety-standard certified, high-
visibility, and correct size for your head
●Must fit comfortably but securely, with the
chin strap fastened
●Face shield with unobstructed field of vision
or other approved eye protection
Look for a DOT (Department of
Transportation) certification label on any helmet
you buy.
❙
Gloves
Full-finger leather gloves with high abrasion
resistance
Protective Apparel
3
WARNING
Not wearing a helmet increases the
chance of serious injury or death in a
crash.
Make sure that you and any passenger
always wear an approved helmet and
protective apparel.
USA

Riding Precautions
11
continued
Motorcycle Safety
❙
Combined ABS
Your motorcycle’s rear brake system is linked to
the front brake. This means that operating the
rear brake pedal applies the rear brake and a
portion of the front brake. Operating the front
brake lever applies only the front brake.
For full braking effectiveness, operate both the
front and rear brakes together.
This model is also equipped with an Anti-lock
Brake System (ABS) designed to help prevent
the brakes from locking up during hard braking.
●ABS does not reduce braking distance. In
certain circumstances, ABS may result in a
longer stopping distance.
●ABS does not function at speeds below 6
mph (10km/h).
●The brake lever and pedal may recoil slightly
when applying the brakes. This is normal.
●Always use the recommended tires to ensure
correct ABS operation.
❙
Combi Brake
Your motorcycle’s rear brake system is linked to
the front brake. This means that operating the
rear brake pedal applies the rear brake and a
portion of the front brake. Operating the front
brake lever applies only the front brake.
For full braking effectiveness, operate both the
front and rear brakes together.
❙
Engine Braking
Engine braking helps slow your motorcycle
down when you release the throttle. For further
slowing action, downshift to a lower gear. Use
engine braking with intermittent use of the
brakes to reduce speed when descending long,
steep slopes.
CTX1300A only
CTX1300 only

Riding Precautions
12
Motorcycle Safety
❙
Wet or Rainy Conditions
Road surfaces are slippery when wet, and wet
brakes further reduce braking efficiency.
Exercise extra caution when braking in wet
conditions.
If the brakes get wet, apply the brakes while
riding at low speed to help them dry.
●Park on a firm, level paved surface.
●If you must park on a slight incline or loose
surface, park so that the motorcycle cannot
move or fall over.
●Make sure that high-temperature parts
cannot come into contact with flammable
materials.
●Do not touch the engine, muffler, brakes and
other high-temperature parts until they cool
down.
●To reduce the likelihood of theft, always lock
the handlebar and remove the key when
leaving the motorcycle unattended.
Use of an anti-theft device is also
recommended.
❙
Parking with the Side Stand or Center Stand
(Canada model only)
1.
Stop the engine.
2.
Using the side stand
Push the side stand down.
Slowly lean the motorcycle to the left until its
weight rests on the side stand.
Using the center stand
Let down the center stand, stand on the left
side of the motorcycle. Hold the left handle
grip and the left grab rail. Press down on the
tip of the stand with your right foot and,
simultaneously, pull up and back.
3.
Turn the handlebar fully to the left.
uTurning the handlebar to the right reduces
stability and may cause the motorcycle to
fall.
4.
Turn the ignition switch to the LOCK position
and remove the key. 2P. 39
Parking
Canada model only

Riding Precautions
13
Motorcycle Safety
Follow these guidelines to protect the engine
and catalytic converters:
●Use only unleaded gasoline.
●Use recommended octane number. Using
lower octane gasoline will result in decreased
engine performance.
●Do not use fuels containing a high
concentration of alcohol. 2P. 163
●Do not use stale or contaminated gasoline or
an oil/gasoline mixture.
●Avoid getting dirt or water in the fuel tank.
TCS (Traction Control System) assists you in
maintaining traction while accelerating on
slippery surfaces by regulating the engine’s
power output when it senses the rear wheel
starting to lose traction.
TCS does not work in case of rear wheel lock
caused by a sudden closing of the throttle.
Do not close the throttle suddenly especially on
the slippery road surface.
TCS may not compensate for rough condition
of roads or rapid and improper throttle
operations.
Always ride with sufficient caution for road and
weather conditions.
In certain unusual conditions when your
motorcycle gets stuck in shallow mud or fresh
snow, it may be easier to free it with the TCS
temporarily switched off.
It may also help to make it easier to maintain
the balance and control in such condition as
riding in an off-road terrain.
Always use the recommended tires to ensure
correct TCS operation.
Refueling and Fuel Guidelines
TCS (Traction Control System)
CTX1300A only

Accessories & Modifications
14
Motorcycle Safety
Accessories &
Modifications
We strongly advise that you do not add any
accessories that were not specifically designed
or approved for your motorcycle by Honda or
make modifications to your motorcycle from its
original design. Doing so can make it unsafe.
Modifying your motorcycle may also void your
warranty and make your motorcycle illegal to
operate on public roads and highways. Before
deciding to install accessories on your
motorcycle be certain the modification is safe
and legal.
Do not pull a trailer with, or attach a sidecar to,
your motorcycle. Your motorcycle was not
designed for these attachments, and their use
can seriously impair your motorcycle’s handling.
3
WARNING
Improper accessories or modifications
can cause a crash in which you can be
seriously hurt or killed.
Follow all instructions in this owner’s
manual regarding accessories and
modifications.

Loading
15
Motorcycle Safety
Loading
●Carrying extra weight affects your
motorcycle’s handling, braking and stability.
Always ride at a safe speed for the load you
are carrying.
●Avoid carrying an excessive load and keep
within specified load limits.
2Maximum weight capacity P. 170
●Tie all luggage securely, evenly balanced and
close to the center of the motorcycle.
●Do not place objects near the lights or the
muffler.
3
WARNING
Overloading or improper loading can
cause a crash and you can be seriously
hurt or killed.
Follow all load limits and other
loading guidelines in this manual.

16
Operation Guide
Parts Location
Right saddlebag (P66 ) (P91)
Throttle grip (P112 )
Front brake fluid reservoir (P105 )
Front brake lever (P113)
Rear brake fluid reservoir
(P105)
Spark plugs (P97)
Right over head cover (P89)
Engine oil fill cap (P100)
Engine oil level inspection
window (P99)
Brake light switch (P107)
Rear brake pedal
Center stand
Canada model only
Right rear suspension spring
preload adjuster (P114)
Final drive oil drain bolt (P111 )
Final drive oil fill hole cap (P110)
Accessory Socket (P67 )
Canada model only

17
Operation Guide
Left middle cowl (P94)
Left shroud (P93 )
Battery (P96 )
Main fuse A (P145)
Spark plugs (P97)
Shift lever (P60)
Left over head cover (P89)
Engine oil drain bolt (P101)
Coolant reserve tank (P103)
Side stand (P109)
Engine oil filter (P10 2 )
Left inner panel (P88 )
Clutch lever
Clutch fluid reservoir (P108) Fuse box (P143)
Main fuse B (P144)
Fairing pockets (P65) (P92)
Left side cover (P90 )
Fuel fill cap (P61)
Seat (P87 )
Right grab
rail
Left grab
rail
Document bag (P65)
Tool kit (P65 )
Left saddlebag (P66) (P91)
Left rear suspension spring
preload adjuster (P114)

19
continued
Operation Guide
i-Multi-Information Display
The i-multi-information display shows the odometer, trip meter, air temperature gauge, and
other gauges.
It also displays important messages such as warnings and other helpful information.
Clock (12-hour display)
To set the clock: (P26) (P28)
Fuel gauge
Remaining fuel when only 1st (E) segment starts flashing (reserve fuel mode):
approximately 0.9 US gal (3.4 liters)
At the same time, the low fuel indicator lights and the available driving distance display
shows. (P24) (P35)
If the fuel gauge flashes sequentially or turns off: (P122 )
Coolant temperature gauge ( )
When the coolant is over specified temperature, the 6th (H) segment
flashes and high coolant temperature indicator lights. (P34)
If the 6th (H) segment flashes while riding: (P118 )
If the coolant temperature gauge flashes sequentially or turns
off: (P122 )
Status icons (P25)
CTX1300A only

20
Instruments (Continued)
Operation Guide
Only when reserve fuel mode*
Current fuel mileage [INST.FUEL] & Average fuel mileage
[AVG.FUEL] & Average speed [AVG.SPEED] & Trip time
[TRIP TIME]& Audio information
uTo reset the average fuel mileage: (P25)
Current fuel
mileage
Average
fuel mileage
Average
speed
Trip time
Audio
information
CTX1300A only
Press the 5 (up) button
SELECT
Odometer [TOTAL] & Tripmeter [TRIP A/B] & Air temperature gauge [AIR] &
Available driving distance [RANGE] & Amount of remaining fuel [REMAINING FUEL]
uTo reset the tripmeter: (P25)
Odometer Tripmeter A Tripmeter B
Available
driving
distance
Air
temperature
gauge
Amount of
remaining
fuel
Press the 6 (down) button
SELECT
* Reserve fuel mode: When the 1st (E) segment of the fuel gauge flashes and the low fuel indicato distance r lights, the available driving
display and amount of remaining fuel display can be selected.

22
Instruments (Continued)
Operation Guide
❙
Average speed
Shows average speed since the engine was started.
Display range: 0 to 130 mph (0 to 210 km/h)
• Initial display: “---“ is displayed
When “---” is displayed while riding, go to your dealer for service.
❙
Trip time
Shows operating time since the engine was started.
Display range: 00:00 to 99:59 (hours:minutes)
• Above 99:59: back to 00:00
❙
Audio information
Shows the artist name and title of the currently played track.
When the audio system is off, the audio information display is blank.
uTo play the audio system: (P42 )
CTX1300A only

23
continued
Operation Guide
❙
Odometer
Total distance ridden. When “------” is displayed, go to your dealer for
service.
❙
Tripmeter A/B
Distance ridden since the tripmeter was reset. When “---.-” or “----.-” is
displayed, go to your dealer for service.
uTo reset the tripmeter: (P25 )
❙
Air temperature gauge
Shows ambient temperature.
Display range: 14 to 122°F (−10 to 50°C)
• 38°F (3°C) or less: “LOW AMBIENT TEMPERATURE” is displayed
• Below 14°F (−10°C): “---” is displayed
• Above 122°F (50°C): 122°F or 50°C flashes
The temperature readout may be incorrect at low speeds due to reflected
heat.
❙
LOW AMBIENT TEMPERATURE display
Displayed when ambient temperature drops to 38°F (3°C).
To return to the ordinary display, the or button needs to
be pressed or ambient temperature needs to rise to 41°F (5°C).
SET
SELECT

24
Instruments (Continued)
Operation Guide
❙
Available driving distance (only reserve fuel mode)
When the 1st (E) segment of the fuel gauge flashes, the estimated
available driving distance is indicated.
Display range: 99 to 0 mile (km)
• Above 99 mile (km): “99“ is displayed
The indicated available driving distance is calculated based on the
driving conditions, and the indicated figure may not always be the
actual allowable distance.
❙
Amount of remaining fuel (only reserve fuel mode)
When the 1st (E) segment of the fuel gauge flashes, the estimated
amount of remaining fuel can be selected.
Display range: 0.9 to 0.3 gal (gallon) or 3.4 to 1.0 L (liters)
• Below 0.3 gal (1.0 L): “-.-” is displayed
The amount of remaining fuel is calculated from the driving conditions.
The indicated amount of remaining fuel may be different from the
actual amount. When the battery reconnects during reserve fuel mode,
“-.-” is displayed.

25
continued
Operation Guide
❙
Status Icons
The information about currently used audio system and handle grip heater system (Canada
model only) is displayed on the upper part of i-multi-information display by icons.
uInformation of the audio system: (P42 )
uInformation of the handle grip heater system (Canada model only): (P40)
❙
To reset the tripmeter and average fuel mileage
To reset the tripmeter A and average fuel mileage, press and hold the button to reset
to 0.0 mile (km) with the tripmeter A displayed. At the same time the average fuel mileage
is reset.
To reset the tripmeter B, press and hold the button to reset to 0.0 mile (km) with the
tripmeter B displayed.
CTX1300A only
SET
SET

26
Instruments (Continued)
Operation Guide
Setting Mode
You can set up the following items:
• Backlight brightness setting [BRIGHTNESS]
• Clock setting [CLOCK]
• Each meter unit setting [UNIT]
• Reset to factory default setting [DEFAULT
ALL]
To shift to the setting mode, press and hold
the button and the button
with your motorcycle stopped until main
menu screen is displayed.
Select the menu by pressing the
buttons and decide the menu by pressing the
button.
To end the setting mode, select “EXIT“ menu
on the main menu screen. Also, the setting
mode is ended when the ignition switch is
turned to the OFF position or your speed
reaches approximately 3 mph (5 km/h).
SET
SELECT
SELECT
SET
(P27)
(P28)
(P29)
(P32)

27
Operation Guide
continued
❙
Backlight brightness setting
You can adjust the brightness to one of five
levels.
!aSelect “BRIGHTNESS“ menu on the main
menu screen, and then the display moves to
the menu screen of “BRIGHTNESS“.
(P26)
!bSelect the brightness level using the
buttons.
SELECT
Dim Bright
!cPress the button. The brightness level
is set, and then the display returns to the
main menu screen.
SET

28
Instruments (Continued)
Operation Guide
❙
Clock setting
!aSelect “CLOCK“ menu on the main menu
screen, and then the display moves to the
menu screen of “CLOCK“. (P26)
!bPress the button until the desired
hour is displayed.
uPress and hold to move the hour fast.
!cPress the button. The cursor moves to
the minute digits.
!dPress the button until the desired
minute is displayed.
uPress and hold to move the minute fast.
!ePress the button. The clock is set, and
then the display returns to the main menu
screen.
SELECT
SET
SELECT
SET

29
Operation Guide
continued
❙
Each meter unit setting
You can change the speed and mileage unit,
fuel mileage meter unit and temperature
unit.
The unit of the odometer, tripmeter A/B,
current fuel mileage and average fuel
mileage is changed by “DIST“ menu.
The unit of current fuel mileage, average fuel
mileage and amount of remaining fuel is
changed by “FUEL“ menu.
The unit of air temperature gauge is changed
by “TEMP“ menu.
To change the unit of each meter, select
“UNIT“ menu on the main menu screen, and
then the display moves to the menu screen of
“UNIT“. (P26)
To end the each meter unit setting, select
“EXIT“ menu, and then the display returns to
the main menu screen.

30
Instruments (Continued)
Operation Guide
To change the speed and mileage unit
!aSelect “DIST“ on the menu screen of
“UNIT“, and then the cursor moves to
“mile“ or “km“.
!bPress the button to select either
“mile” or “km”.
!cPress the button. The cursor returns to
“DIST“.
When selecting “mile”
• Unit of the average speed shows “mph”
• Unit of the odometer, tripmeter A/B and
available driving distance shows “mile”
• Unit of the current fuel mileage and
average fuel mileage shows “mile/gal”
• Unit of the amount of remaining fuel
shows “gal”
When selecting “km”
• Unit of the average speed shows “km/h”
• Unit of the odometer, tripmeter A/B and
available driving distance shows “km”
• Unit of the current fuel mileage and
average fuel mileage shows “l/100km” or
“km/l“
• Unit of the amount of remaining fuel
shows “L”
SELECT
SET

31
Operation Guide
continued
To change the fuel mileage meter unit
!aSelect “FUEL“ on the menu screen of
“UNIT“, and then the cursor moves to
“l/100km“ or “km/l“.
!bPress the button to select either
“l/100km“ or “km/l“.
!cPress the button. The cursor returns to
“FUEL“.
Only when the “km” is chosen with the “DIST“
SELECT
SET
When selecting “l/100km”
• Unit of current fuel mileage and average
fuel mileage shows “l/100km”
• Unit of amount of remaining fuel shows
“L”
When selecting “km/l”
• Unit of current fuel mileage and average
fuel mileage shows “km/l”
• Unit of amount of remaining fuel shows
“L”

32
Instruments (Continued)
Operation Guide
To change the temperature gauge unit
!aSelect “TEMP“ on the menu screen of
“UNIT“, and then the cursor moves to “°F”
or “°C”.
!bPress the button to select either
“°F” or “°C”.
!cPress the button. The cursor returns to
“TEMP“.
❙
Reset to factory default setting
The set value can be returned to initial
setting.
!aSelect “DEFAULT ALL“ menu on the main
menu screen, and then the display moves to
the menu screen of “DEFAULT ALL“.
(P26)
!bPress the button to select either
“NO“ (not reset) or “YES“ (reset).
SELECT
SET
SELECT

34
Operation Guide
Indicators
High beam indicator
Neutral indicator
Comes on when the transmission
is in Neutral.
High coolant temperature
indicator
Comes on briefly when the ignition
switch is turned on.
If it comes on while riding: (P118)
Low oil pressure indicator
Comes on when the ignition switch is
turned on.
Goes off when the engine starts.
If it comes on while engine is
running: (P119)
PGM-FI (Programmed Fuel Injection)
malfunction indicator lamp (MIL)
Comes on briefly when the ignition switch is turned
on with the engine stop switch in the (Run)
position. Comes on when the ignition switch is
turned on with the engine stop switch in the
(Off) position.
If it comes on while engine is running: (P119)

35
Operation Guide
Right turn signal indicator
Left turn signal indicator
Low fuel indicator
• Comes on briefly when the ignition
switch is turned on.
• Comes on when there is only reserve
fuel left in the fuel tank. Remaining fuel
when low fuel indicator comes on:
0.9 US gal (3.4 liters)
Low fuel indicator comes on and the
1st (E) segment of the fuel gauge
flashes: (P24)
TCS (Traction Control System)
indicator
TCS (Traction Control System)
OFF indicator
ABS (Anti-lock Brake System)
indicator
CTX1300A only
• Comes on when the ignition switch is
turned on. Goes off when your speed
reaches approximately 6 mph
(10 km/h) to indicate TCS is ready to
work.
• Blinks when TCS is operating.
If it comes on while riding: (P121)
Comes on when the ignition switch is
turned on. Goes off when your speed
reaches approximately 6 mph (10 km/h).
If it comes on while riding: (P120)
CTX1300A only
Comes on when the TCS is turned off.
CTX1300A only

36
Operation Guide
Switches
Handle grip heater
switch (P40)
Headlight dimmer switch
• : High beam
• : Low beam
Turn signal switch
• The turn signal will automatically stop when you complete the turn.
• When used for a lane change, the turn signal is automatically stopped in 7 seconds or after
riding 131 yards (120 m).
uYou can manually cancel the turn signal by pressing the switch in.
uIn some cases, the timing at which the turn signal stops is changed.
uAlways use the recommended tires to ensure correct automatic cancellation operation.
uPressing the switch turns the turn signal off.
CTX1300A
CTX1300
Horn button
Canada model only

39
Operation Guide
Steering Lock
Lock the steering when parking to help
prevent theft.
A U-shaped wheel lock or similar device is
also recommended.
❙
Locking
!aTurn the handlebar all the way to the left.
!bPush the key down, and turn the ignition
switch to the LOCK position.
uJiggle the handlebar if the lock is difficult
to engage.
!cRemove the key.
❙
Unlocking
Insert the key, push it in, and turn the
ignition switch to the OFF position.
Ignition Switch
Switches the electrical system on/off, locks the
steering.
uKey can be removed when in the OFF or LOCK
position.
ACC
Turns electrical system on for accessory.
OFF
Turns engine off.
LOCK
Locks steering.
ON
Turns electrical system
on for starting/riding.
Push
Ignition key
!a
!b
Turn

40
Operation Guide
Handle Grip Heater
CTX1300A is equipped with a handle grip
heater that warms up your hands during ride.
Wear gloves to protect your hands from the
heated grips.
Handle grip heater indicator:
Displayed when handle grip heater is on.
The selected heater level is indicated by the
number of times the indicator blinks when
the heater is turned on and the heater level is
changed. For example, If you select heater
level 5, the indicator blinks 5 times and
repeats it 7 times.
Heater level:
The selected heater level is indicated for a
few seconds when the handle grip heater
switch is operated.
Handle grip heater status icon:
Displayed when the handle grip heater is on.
❙
If “E-1”, “E-2” or “E-3” brinks (P123 )
Canada model only
Handle grip
heater indicator
Handle grip
heater switch
Handle grip
heater status icon
Heater level

45
Operation Guide
continued
❙
Audio Files on USB Flash Drives
MP3
Standard MPEG1 Audio Layer 3
File extension .mp3
Sampling periodicity
(kHz) 32/44.1/48
Bit rates (kbps) 32/40/48/56/64/80/96/112/128/160/
192/224/256/320/VBR
Available tags ID3v2 (v2.2/v2.3/v2.4)
ID3v1 (v1.0/v1.1)
WMA
Standard Windows Media Audio Version
7/8/9
File extension .wma
Digital rights
management (DRM) Not support
Sampling periodicity
(kHz) 16/22.05/32/44.1/48
Bit rates (kbps) 5 to 320/VBR
Available tags ASF
AAC
Standard MPEG4/AAC LC
MPEG2/AAC LC
File extension .m4a
Digital rights
management (DRM) Not support
Sampling periodicity
(kHz) 16/22.05/32/44.1/48
Bit rates (kbps) 16 to 320/VBR
Available tags MPEG-4 header
WAV
Standard WAVE
File extension .wav
Sampling periodicity
(kHz) 16/22.05/32/44.1/48

50
Audio System (Continued)
Operation Guide
❙
To pair a Bluetoothr sound device
!aSelect the audio mode 1 or 3 using the
button. (P48)
uThe beep signal cannot be heard when
the mode 2 or 4 is chosen.
!bPress and hold the and
5 (up) buttons. The Bluetoothr device
status icon (Bluetoothr mark and right
arrow) starts blinking and the short beep
begins to sound. The motorcycle is in pairing
mode. (The audio system sends a PIN code
“0000”.)
uThe PIN code cannot be changed.
!cRegister a sound device according to its
manual.
Registration is completed when the icon
stops blinking and a long beep (1 second) is
heard.
uIf a sound device cannot be registered,
there will be three short beeps and the
display returns to the ordinary display.
To end the pairing mode process, press and
hold the and 5 (up)
buttons.
After pairing, when the audio mode 2 or 4 is
selected with the registered sound device in
connectable state, the sound device will
connect automatically.
Presence of a Bluetoothr device in the
vicinity sometimes affects the pairing.
Some Bluetoothr sound devices may not be
compatible.
In the following cases, registration will be
canceled.
• If another sound device is registered.
• The audio system is reset. (P52)
MODE
MODE
VOLUME
Bluetoothr device
status icon
MODE
VOLUME
Produkt Specifikationer
Mærke: | Honda |
Kategori: | Motor |
Model: | CTX1300 (2014) |
Har du brug for hjælp?
Hvis du har brug for hjælp til Honda CTX1300 (2014) stil et spørgsmål nedenfor, og andre brugere vil svare dig
Motor Honda Manualer
8 Januar 2025
8 Januar 2025
2 Januar 2025
31 December 2025
31 December 2025
31 December 2025
14 December 2024
13 Oktober 2024
3 Oktober 2024
3 Oktober 2024
Motor Manualer
- Piaggio
- Danfoss
- Mahindra
- Zero
- Ducati
- Joy-It
- ELAC
- Royal Enfield
- Derbi
- KTM
- Benelli
- Kettler
- Moto Guzzi
- Triumph
- Husqvarna
Nyeste Motor Manualer
15 Januar 2025
10 Januar 2025
31 December 2025
30 December 2025
30 December 2025
30 December 2025
29 December 2024
4 December 2024
15 Oktober 2024
15 Oktober 2024