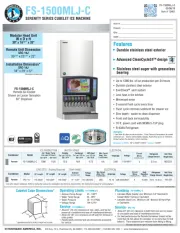
Hoshizaki HS-2129 Manual


Læs gratis den danske manual til Hoshizaki HS-2129 (1 sider) i kategorien Ismaskine. Denne vejledning er vurderet som hjælpsom af 6 personer og har en gennemsnitlig bedømmelse på 4.3 stjerner ud af 3.5 anmeldelser. Har du et spørgsmål om Hoshizaki HS-2129, eller vil du spørge andre brugere om produktet?

Side 1/1
Hoshizaki Top Kit
HS-2129, HS-2130, HS-2131, HS-2132, HS-2153
Installation Instructions
Check to ensure that all parts are included in your HS-Kit:
Index
No. Description Part Number Qty. HS-Kit No.
1 Extension Bracket (22" Wide Bin) 3A5783G01 1 HS-2153
Extension Bracket (30" Wide Bin) 3A4929G01 1 HS-2129
Extension Bracket (44" Wide Bin) 3A4931G01 1 HS-2130
Extension Bracket (48" Wide Bin) 3A4930G01 1 HS-2131
Extension Bracket (52" Wide Bin) 3A4932G01 1 HS-2132
1a Self-Tapping Hex Head Screw (#12, 3/4) 7P11I1234 5 All
2 Foam Tape (L=559) 4A0808L01 2 HS-2153
Foam Tape (L=762) HS-2129
Foam Tape (L=1118) HS-2130
Foam Tape (L=1220) HS-2131
Foam Tape (L=1321) HS-2132
3a Hex Head Bolt (5×12, SS) 7B02-0512 2 All
Installation
1. Unpack the storage bin, and attach the 4 adjustable legs provided (bin accessory) to the bottom of the
storage bin.
2. Place the rear channel of the extension bracket over the back of the bin. See Fig. 1.
3. Make sure the rectangular holes in the back of the extension bracket are aligned to allow free access to the
slots in the bin. Secure the extension bracket to the bin using the 5 self-tapping hex head screws provided.
4. Cut a piece of foam tape to the length of the extension bracket, then peel off the backing and adhere the
foam tape to the top of the extension bracket towards the front.
5. Remove the foam tape at the front of the bin. Cut a piece of foam tape to match the length of the foam
tape at the front of the bin. Trim the side pieces of foam tape to accomodate the new piece. See the table
below and Fig. 2. Peel off the backing and adhere the foam tape to the top of the bin where the front of the
icemaker will sit.
Model
Depth Including
Front Panel
Depth of Base
Contacting the Bin
Measurement from Rear of Foam Tape on Extension
Bracket to End of Side Piece of Foam Tape ("D" on
illustration)
KMD
24 " (617 mm) 22 " (577 mm) 21 " (547 mm)¼ ¾ ½
KMD
24 " (625 mm) 23 " (597 mm) 22 " (567 mm)½ ¼
KMS 24" (614 mm) 23" (585 mm)
21 " (555 mm)¾
6. Position the storage bin in the selected permanent location.
7. To prevent damage to the icemaker's panels, remove them before installation. See the icemaker's
instruction manual for details.
8. Place the icemaker on top of the storage bin.
9. Secure the icemaker to the storage bin using the 2 mounting brackets and the hex head bolts provided with
this kit. See Fig. 3.
10. Level the icemaker and storage bin in both the left-to-right and front-to-rear directions. Adjust the storage
bin legs to make the icemaker level.
11. See the icemaker's instruction manual for further icemaker and bin installation/connection instructions.
Fig. 3
Mounting
Bracket
Hex Head
Bolt
Storage Bin
Icemaker
Extension
Bracket
Fig. 1
Foam Tape
Extension
Bracket
Self-Tapping
Hex Head
Screw
Storage Bin
Slot
Rear
Channel
Rectangular
Hole
Extension Bracket Details
D
(see table in step 5)
Trim this
Side Piece
of Foam
Tape
Remove this Foam Tape
Trim this
Side Piece
of Foam
Tape
New Foam Tape
Fig. 2
2A4696-012


Produkt Specifikationer

Mærke: Hoshizaki
Kategori: Ismaskine
Model: HS-2129

Har du brug for hjælp?

Hvis du har brug for hjælp til Hoshizaki HS-2129 stil et spørgsmål nedenfor, og andre brugere vil svare dig


Ismaskine Hoshizaki Manualer
Ismaskine Manualer

Nyeste Ismaskine Manualer

Hatco

Hatco FTBR-1 Manual

16 Juni 2025
Hatco

Hatco CSBF-48-I Manual

16 Juni 2025
Hatco

Hatco FTBP-3 Manual

16 Juni 2025
Hatco

Hatco CSUP-24 Manual

15 Juni 2025
Hatco

Hatco FTBP-2 Manual

15 Juni 2025
Scotsman

Scotsman CU3030 Manual

15 Juni 2025
Hatco

Hatco FTBP-S2 Manual

15 Juni 2025
Hatco

Hatco FTB-2 Manual

15 Juni 2025