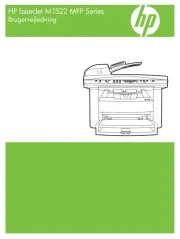
HP LaserJet Pro M252dw Manual

HP Printer LaserJet Pro M252dw

Læs nedenfor 📖 manual på dansk for HP LaserJet Pro M252dw (114 sider) i kategorien Printer. Denne guide var nyttig for 33 personer og blev bedømt med 4.9 stjerner i gennemsnit af 17 brugere

Side 1/114
User Guide
www.hp.com/support/colorljM252
Color LaserJet Pro M252
M252n M252dw
HP Color LaserJet Pro M252
User Guide
Copyright and License
© 2015 Copyright Hewlett-Packard
Development Company, L.P.
Reproduction, adaptation, or translation
without prior written permission is prohibited,
except as allowed under the copyright laws.
The information contained herein is subject to
change without notice.
The only warranties for HP products and
services are set forth in the express warranty
statements accompanying such products and
services. Nothing herein should be construed
as constituting an additional warranty. HP shall
not be liable for technical or editorial errors or
omissions contained herein.
Part number: B4A21-90907
Edition 1, 4/2015
Trademark Credits
Adobe®, Adobe Photoshop®, Acrobat®, and
PostScript® are trademarks of Adobe Systems
Incorporated.
Apple and the Apple logo are trademarks of
Apple Computer, Inc., registered in the U.S. and
other countries. iPod is a trademark of Apple
Computer, Inc. iPod is for legal or rightholder-
authorized copying only. Don't steal music.
Microsoft®, Windows®, Windows® XP, and
Windows Vista® are U.S. registered trademarks
of Microsoft Corporation.
UNIX® is a registered trademark of The Open
Group.
Table of contents
1 Product overview .......................................................................................................................................... 1
Product views ........................................................................................................................................................ 2
Product front view ............................................................................................................................... 2
Product back view ............................................................................................................................... 3
2-line control-panel view (M252n model) .......................................................................................... 4
Touchscreen control-panel view (M252dw model) ............................................................................ 5
Home screen layout .......................................................................................................... 6
How to use the touchscreen control panel ...................................................................... 7
Product specifications ........................................................................................................................................... 8
Introduction ......................................................................................................................................... 8
Technical specifications ...................................................................................................................... 8
Supported operating systems ............................................................................................................ 8
Mobile printing solutions .................................................................................................................. 10
Product dimensions .......................................................................................................................... 11
Power consumption, electrical specifications, and acoustic emissions .......................................... 12
Operating-environment range .......................................................................................................... 12
Product hardware setup and software installation ............................................................................................ 13
2 Paper trays ................................................................................................................................................. 15
Load paper into the single-sheet slot (Tray 1) ................................................................................................... 16
Introduction ....................................................................................................................................... 16
Load paper into the single-sheet priority feed slot ......................................................................... 16
Load an envelope in the single-sheet priority feed slot (Tray 1) ..................................................... 17
Tray 1 paper orientation ................................................................................................................... 19
Load paper into Tray 2 ......................................................................................................................................... 20
Introduction ....................................................................................................................................... 20
Load paper into Tray 2 ...................................................................................................................... 20
Load envelopes in Tray 2 .................................................................................................................. 22
Tray 2 paper orientation ................................................................................................................... 25
ENWW iii
3 Supplies, accessories, and parts ................................................................................................................... 27
Order supplies, accessories, and parts ............................................................................................................... 28
Ordering ............................................................................................................................................. 28
Supplies and accessories .................................................................................................................. 28
Customer self-repair parts ............................................................................................................... 28
Replace the toner cartridges ............................................................................................................................... 30
Introduction ....................................................................................................................................... 30
Remove and replace the toner cartridges ........................................................................................ 31
4 Print ........................................................................................................................................................... 37
Print tasks (Windows) .......................................................................................................................................... 38
How to print (Windows) ..................................................................................................................... 38
Automatically print on both sides (Windows) .................................................................................. 39
Manually print on both sides (Windows) .......................................................................................... 39
Print multiple pages per sheet (Windows) ....................................................................................... 40
Select the paper type (Windows) ...................................................................................................... 40
Print tasks (OS X) ................................................................................................................................................. 41
How to print (OS X) ............................................................................................................................ 41
Automatically print on both sides (OS X) .......................................................................................... 41
Manually print on both sides (OS X) .................................................................................................. 41
Print multiple pages per sheet (OS X) ............................................................................................... 41
Select the paper type (OS X) ............................................................................................................. 42
Mobile printing ..................................................................................................................................................... 43
Introduction ....................................................................................................................................... 43
Wi-Fi Direct and NFC Printing (wireless models only) ...................................................................... 43
HP ePrint via email ............................................................................................................................ 44
HP ePrint software ............................................................................................................................ 45
AirPrint ............................................................................................................................................... 45
Android embedded printing .............................................................................................................. 45
Use walk-up USB printing (touchscreen models only) ....................................................................................... 47
5 Manage the product ..................................................................................................................................... 49
Use HP Web Services applications (touchscreen models only) .......................................................................... 50
Change the product connection type (Windows) ................................................................................................ 51
Advanced configuration with HP Embedded Web Server (EWS) and HP Device Toolbox (Windows) ................ 52
Advanced configuration with HP Utility for OS X ................................................................................................ 54
Open HP Utility .................................................................................................................................. 54
HP Utility features ............................................................................................................................. 54
Configure IP network settings ............................................................................................................................. 57
Introduction ....................................................................................................................................... 57
iv ENWW
Check the paper-type setting for the print job ................................................................................. 86
Check the paper type setting (Windows) ....................................................................... 86
Check the paper type setting (OS X) ............................................................................... 87
Check toner-cartridge status ............................................................................................................ 87
Print and interpret the print quality page ........................................................................................ 88
Clean the product .............................................................................................................................. 88
Print a cleaning page ...................................................................................................... 88
Visually inspect the toner cartridge .................................................................................................. 89
Check paper and the printing environment ...................................................................................... 89
Step one: Use paper that meets HP specifications ........................................................ 89
Step two: Check the environment .................................................................................. 89
Adjust color settings (Windows) ....................................................................................................... 90
Calibrate the product to align the colors .......................................................................................... 91
Check the EconoMode settings ......................................................................................................... 92
Try a different print driver ................................................................................................................ 92
Solve wired network problems ........................................................................................................................... 94
Introduction ....................................................................................................................................... 94
Poor physical connection .................................................................................................................. 94
The computer is using the incorrect IP address for the product ...................................................... 94
The computer is unable to communicate with the product ............................................................. 94
The product is using incorrect link and duplex settings for the network ........................................ 95
New software programs might be causing compatibility problems ................................................ 95
The computer or workstation might be set up incorrectly .............................................................. 95
The product is disabled, or other network settings are incorrect ................................................... 95
Solve wireless network problems ....................................................................................................................... 96
Introduction ....................................................................................................................................... 96
Wireless connectivity checklist ......................................................................................................... 96
The product does not print after the wireless configuration completes ......................................... 97
The product does not print, and the computer has a third-party firewall installed ....................... 97
The wireless connection does not work after moving the wireless router or product ................... 97
Cannot connect more computers to the wireless product ............................................................... 97
The wireless product loses communication when connected to a VPN .......................................... 98
The network does not appear in the wireless networks list ............................................................ 98
The wireless network is not functioning .......................................................................................... 98
Perform a wireless network diagnostic test .................................................................................... 98
Reduce interference on a wireless network ..................................................................................... 98
Index ........................................................................................................................................................... 101
vi ENWW
1 Product overview
Product views
Product specifications
Product hardware setup and software installation
For more information:
Go to www.hp.com/support/colorljM252.
HP's all-inclusive help for the product includes the following information:
Install and configure
Learn and use
Solve problems
Download software updates
Join support forums
Find warranty and regulatory information
ENWW 1
Product views
Product front view
Product back view
2-line control-panel view (M252n model)
Touchscreen control-panel view (M252dw model)
Product front view
8
9
5
1
7
6
3
2
4
1 2-line backlit control panel (M252n model)
Color touchscreen control panel (M252dw model, shown above)
2 Output bin
3 Walk-up USB port for printing without a computer (M252dw model)
4 Near field communication (NFC) internal antenna
5 Output bin extension
6 Front door (provides toner cartridge access)
7 Power on/off button
8 Single-sheet priority feed slot (Tray 1)
9 Main input tray (Tray 2)
2 Chapter 1 Product overview ENWW
Product back view
2
1
5
4
3
6
1 Rear door (provides access for clearing jams)
2 Power connection
3 USB interface port
4 Ethernet port
5 Duplexer (duplex models only)
6 Serial number and product number label
ENWW Product views 3
2-line control-panel view (M252n model)
1
2
43
5
6
1 2-line control panel display This screen displays menus and product information.
2OK button Press the OK button for the following actions:
Open the control-panel menus.
Open a submenu displayed on the control-panel display.
Select a menu item.
Clear some errors.
Begin a print job in response to a control-panel prompt (for example, when the
message Press [OK] to continue appears on the control-panel display).
3 Left arrow button Use this button to navigate through the menus or to decrease a value that appears on
the display.
4Right arrow button Use this button to navigate through the menus or to increase a value that appears on
the display.
5Back arrow button Use this button for the following actions:
Exit the control-panel menus.
Scroll back to a previous menu in a submenu list.
Scroll back to a previous menu item in a submenu list (without saving changes to
the menu item).
6 Cancel button Press this button to cancel a print job or to exit the control panel menus.
4 Chapter 1 Product overview ENWW
Touchscreen control-panel view (M252dw model)
4
5
3
2
1
1Back button Touch this button to return to the previous screen.
2Home button Touch this button to navigate to the Home screen.
3Help button Touch this button to open the control-panel help system.
4 Color touchscreen The display provides access to menus, help animations, and product information.
5 Home page screen indicator The display indicates which Home screen the control panel is currently displaying.
NOTE: While the control panel does not have a standard Cancel button, during many product processes a
Cancel button appears on the touchscreen. This permits users to cancel a process before the product
completes it.
ENWW Product views 5
Home screen layout
The Home screen provides access to the product features and indicates the current status of the product.
Return to the Home screen at any time by touching the Home button on the product control panel.
NOTE: The features that appear on the Home screen can vary, depending on the product configuration.
5 6
43
1 2
7
1Reset button Touch this button to reset any temporary job settings to the
default product settings.
2 Connection Information button Touch this button to open the Connection Information menu,
which provides network information. The button appears as
either a wired network icon or a wireless network icon
, depending on the type of network to which the product
is connected.
3 Product status This screen area provides information about the overall
product status.
4USB button Touch this button to open the USB Flash Drive menu.
5Supplies button Touch this button to view information about supplies status.
6Apps button Touch this button to open the Apps menu to print directly from
select Web applications.
7Setup button Touch this button to open the Setup menu.
6 Chapter 1 Product overview ENWW
How to use the touchscreen control panel
Use the following actions to use the product touchscreen control panel.
Action Description Example
Touch Touch an item on the screen to select that
item or open that menu. Also, when
scrolling through menus, briefly touch the
screen to stop the scrolling.
Touch the Setup button to open the
Setup menu.
Swipe Touch the screen and then move the finger
horizontally to move the screen sideways.
Swipe the Home screen to access the
Setup button.
Scroll Touch the screen, and then, without lifting
the finger, move the finger vertically to
move the screen.
Scroll through the Setup menu.
ENWW Product views 7
Product specifications
Introduction
IMPORTANT: The following specifications are correct at the time of publication, but they are subject to
change. For current information, see www.hp.com/support/colorljM252.
Technical specifications
Supported operating systems
Mobile printing solutions
Product dimensions
Power consumption, electrical specifications, and acoustic emissions
Operating-environment range
Technical specifications
Model name
Product number
M252n
B4A21A
M252dw
B4A22A
Paper handling Single-sheet priority feed slot (Tray 1)
Tray 2 (150-sheet capacity)
Automatic duplex printing Not available
Connectivity 10/100/1000 Ethernet LAN connection
with IPv4 and IPv6
Hi-Speed USB 2.0
Easy-access USB port Not available
Print server for wireless network
connectivity
Not available
HP near field communication (NFC) and
Wi-Fi Direct for printing from mobile
devices
Not available
Control-panel display and input 2-line backlit control panel Not available
Color touchscreen control panel Not available
Print Prints 18 pages per minute (ppm) on A4
and 19 ppm on letter-size paper
Easy-access USB printing (no computer
required)
Not available
Supported operating systems
The following information applies to the product-specific Windows PCL 6 and OS X print drivers and to the in-
box software installation CD.
8 Chapter 1 Product overview ENWW
Operating system Driver installed Notes
Windows Server 2008 R2, SP 1, 64-bit The HP PCL 6 product-specific print driver
is installed for this operating system as
part of the full software installation.
Windows Server 2012, 64-bit The software installer does not support
Windows Server 2012 but the HP PCL 6 and
HP PCL-6 version 4 product-specific print
drivers do support it.
Download the driver from the HP Web site
www.hp.com/support/colorljM252, and
use the Windows Add Printer tool to install
it.
Windows Server 2012 R2, 64 bit The software installer does not support
Windows Server 2012 but the HP PCL 6 and
HP PCL-6 version 4 product-specific print
drivers do support it.
Download the driver from the HP Web site
www.hp.com/support/colorljM252, and
use the Windows Add Printer tool to install
it.
OS X 10.7 Lion, OS X 10.8 Mountain Lion,
and OS X 10.9 Mavericks
The OS X print driver and print utility are
available for download from hp.com and
may also be available via Apple Software
Update. The HP installer software for OS X
is not included in the in-box CD.
For OS X, download the full installer from
the support Web site for this product.
1. Go to www.hp.com/support/
colorljM252.
2. Select Support Options, and then
under Download Options select
Drivers, Software & Firmware.
3. Click the operating system version,
and then click the Download button.
NOTE: For a current list of supported operating systems, go to www.hp.com/support/colorljM252 for HP's
all-inclusive help for the product.
NOTE: For details on client and server operating systems and for HP UPD PCL6, UPD PCL 5, and UPD PS
driver support for this product, go to www.hp.com/go/upd and click the Specifications tab.
Mobile printing solutions
The product supports the following software for mobile printing:
HP ePrint software
NOTE: The HP ePrint Software supports the following operating systems: Windows Vista® (32-bit and
64-bit); Windows 7 SP 1 (32-bit and 64-bit); Windows 8 (32-bit and 64-bit); Windows 8.1 (32-bit and 64-
bit); and OS X versions 10.6 Snow Leopard, 10.7 Lion, 10.8 Mountain Lion, and 10.9 Mavericks.
HP ePrint via email (Requires HP Web Services to be enabled and the product to be registered with HP
Connected)
HP ePrint app (Available for Android, iOS, and Blackberry)
ePrint Enterprise app (Supported on all products with ePrint Enterprise Server Software)
HP All-in-One Remote app for iOS and Android devices
Google Cloud Print
AirPrint
Android Printing
10 Chapter 1 Product overview ENWW
Power consumption, electrical specifications, and acoustic emissions
See www.hp.com/support/colorljM252 for current information.
CAUTION: Power requirements are based on the country/region where the product is sold. Do not convert
operating voltages. This will damage the product and void the product warranty.
Operating-environment range
Table 1-1 Operating-environment specifications
Environment Recommended Allowed
Temperature 17° to 25°C (62.6° to 77°F) 15° to 30°C (59° to 86°F)
Relative humidity 30% to 70% relative humidity (RH) 10% to 80% RH
Altitude Not applicable 0 to 3048 m (0 to 10,000 ft)
12 Chapter 1 Product overview ENWW
Product hardware setup and software installation
For basic setup instructions, see the Hardware Installation Guide that came with the product. For additional
instructions, go to HP support on the Web.
Go to www.hp.com/support/colorljM252 for HP's all-inclusive help for the product. Find the following
support:
Install and configure
Learn and use
Solve problems
Download software updates
Join support forums
Find warranty and regulatory information
ENWW Product hardware setup and software installation 13
Load paper into the single-sheet slot (Tray 1)
Introduction
Use the single-sheet priority feed slot to print single-page documents, documents that require multiple
paper types, or envelopes.
Load paper into the single-sheet priority feed slot
Load an envelope in the single-sheet priority feed slot (Tray 1)
Tray 1 paper orientation
Load paper into the single-sheet priority feed slot
1. Move the paper width guides in the single-sheet priority feed
slot outward.
2. Place the top edge of the sheet at the opening, and then
adjust the side guides so that they lightly touch the sheet, but
do not bend it.
16 Chapter 2 Paper trays ENWW
2. Place the right edge of the envelope, face-up, at the opening,
and then adjust the side guides so that they lightly touch the
envelope, but do not bend it.
3. Insert the envelope into the slot and hold it. The product will
pull the envelope partially into the paper path..
NOTE: Depending on the size of the envelope, you might
need to support it with two hands until the envelope
advances into the product.
4. At the computer, begin the printing process from the software
application. Make sure that the driver is set to the correct
paper type and size for the envelope being printed from the
single-sheet priority feed slot.
18 Chapter 2 Paper trays ENWW
Tray 1 paper orientation
When using paper that requires a specific orientation, load it according to the information in the following
table.
Paper type Output How to load paper
Letterhead or preprinted 1-sided printing Face-up
Top edge leading into the product
123
Letterhead or preprinted 2-sided printing Face-down
Top edge away from the product
123
Prepunched 1-sided printing or 2-sided printing Face-up
Holes toward the left side of the product
ENWW Load paper into the single-sheet slot (Tray 1) 19
5. Make sure that the paper stack is flat at all four corners. Slide
the paper length and width guides so that they are against
the stack of paper.
NOTE: To prevent jams, do not overfill the tray. Be sure that
the top of the stack is below the tray full indicator.
6. After making sure that the paper stack is below the tray full
indicator, close the tray.
Load envelopes in Tray 2
1. Open the tray.
22 Chapter 2 Paper trays ENWW
Tray 2 paper orientation
When using paper that requires a specific orientation, load it according to the information in the following
table.
Paper type Output How to load paper
Letterhead or preprinted 1-sided printing Face-up
Top edge toward the product
123
Letterhead or preprinted 2-sided printing Face-down
Top edge away from the product
123
Prepunched 1-sided printing or 2-sided printing Face-up
Holes toward the left side of the product
ENWW Load paper into Tray 2 25
26 Chapter 2 Paper trays ENWW
3 Supplies, accessories, and parts
Order supplies, accessories, and parts
Replace the toner cartridges
For more information:
Go to www.hp.com/support/colorljM252.
HP's all-inclusive help for the product includes the following information:
Install and configure
Learn and use
Solve problems
Download software updates
Join support forums
Find warranty and regulatory information
ENWW 27
Parts listed as Mandatory self-replacement are to be installed by customers, unless you are willing to
pay HP service personnel to perform the repair. For these parts, on-site or return-to-depot support is
not provided under the HP product warranty.
Parts listed as Optional self-replacement can be installed by HP service personnel at your request for
no additional charge during the product warranty period.
Item Description Self-replacement
options
Part number
Single-sheet priority feed slot tray Replacement tray for single-sheet priority feed
slot (Tray 1)
Mandatory RM2-5865-000
150-sheet paper input tray Replacement cassette for Tray 2 Mandatory RM2-5885-000
ENWW Order supplies, accessories, and parts 29
Replace the toner cartridges
Introduction
This product indicates when the toner cartridge level is low. The actual toner cartridge life remaining can
vary. Consider having a replacement cartridge available to install when print quality is no longer acceptable.
To purchase cartridges or check cartridge compatibility for the product, go to HP SureSupply at www.hp.com/
go/suresupply. Scroll to the bottom of the page and verify that the country/region is correct.
The product uses four colors and has a different toner cartridge for each color: yellow (Y), magenta (M), cyan
(C), and black (K). The toner cartridges are inside the front door.
Item Description Cartridge number Part number
HP 201A Black Original LaserJet Toner
Cartridge
Standard-capacity replacement black
toner cartridge
201A CF400A
HP 201X High Yield Black Original LaserJet
Toner Cartridge
High-capacity replacement black toner
cartridge
201X CF400X
HP 201A Cyan Original LaserJet Toner
Cartridge
Standard-capacity replacement cyan toner
cartridge
201A CF401A
HP 201X High Yield Cyan Original LaserJet
Toner Cartridge
High-capacity replacement cyan toner
cartridge
201X CF401X
HP 201A Yellow Original LaserJet Toner
Cartridge
Standard-capacity replacement yellow
toner cartridge
201A CF402A
HP 201X High Yield Yellow Original
LaserJet Toner Cartridge
High-capacity replacement yellow toner
cartridge
201X CF402X
HP 201A Magenta Original LaserJet Toner
Cartridge
Standard-capacity replacement magenta
toner cartridge
201A CF403A
HP 201X High Yield Magenta Original
LaserJet Toner Cartridge
High-capacity replacement magenta toner
cartridge
201X CF403X
Do not remove the toner cartridge from its package until it is time to install it.
CAUTION: To prevent damage to the toner cartridge, do not expose it to light for more than a few minutes.
If the toner cartridge must be removed from the product for an extended period of time, place the cartridge
in the original plastic packaging, or cover the cartridge with a light-weight, opaque item.
The following illustration shows the toner-cartridge components.
30 Chapter 3 Supplies, accessories, and parts ENWW
2
1
3
1 Handle
2 Imaging drum
3 Memory chip
CAUTION: If toner gets on clothing, wipe it off by using a dry cloth and wash the clothes in cold water. Hot
water sets toner into fabric.
NOTE: Information about recycling used toner cartridges is in the toner cartridge box.
Remove and replace the toner cartridges
1. Open the front door.
ENWW Replace the toner cartridges 31
2. Grasp the blue handle on the toner cartridge drawer, and then
pull out the drawer.
3. Grasp the handle on the toner cartridge, and then pull the
toner cartridge straight up to remove it.
4. Remove the new toner cartridge package from the box, and
then pull the release tab on the packaging.
32 Chapter 3 Supplies, accessories, and parts ENWW
5. Remove the toner cartridge from the opened packaging shell.
6. Gently rock the toner cartridge from front to back to
distribute the toner evenly inside the cartridge.
7. Do not touch the imaging drum on the bottom of the toner
cartridge. Fingerprints on the imaging drum can cause print-
quality problems.
ENWW Replace the toner cartridges 33
11. Place the used toner cartridge in the packaging from the new
cartridge.
http://www.hp.com/recycle
12. Use the pre-paid self-addressed label to return the used
cartridge to HP for recycling (where available).
ENWW Replace the toner cartridges 35
36 Chapter 3 Supplies, accessories, and parts ENWW
4. Click or tap the OK button to return to the Print dialog box. Select the number of copies to print from
this screen.
5. Click or tap the OK button to print the job.
Automatically print on both sides (Windows)
Use this procedure for products that have an automatic duplexer installed. If the product does not have an
automatic duplexer installed, or to print on paper types that the duplexer does not support, you can print on
both sides manually.
1. From the software program, select the Print option.
2. Select the product from the list of printers, and then click or tap the Properties or Preferences button
to open the print driver.
NOTE: The name of the button varies for different software programs.
NOTE: To access these features from a Windows 8 or 8.1 Start screen, select Devices, select Print,
and then select the printer.
3. Click or tap the Finishing tab.
4. Select the Print on both sides check box. Click the OK button to close the Document Properties dialog
box.
5. In the Print dialog box, click the OK button to print the job.
Manually print on both sides (Windows)
Use this procedure for products that do not have an automatic duplexer installed or to print on paper that the
duplexer does not support.
1. From the software program, select the Print option.
2. Select the product from the list of printers, and then click or tap the Properties or Preferences button
to open the print driver.
NOTE: The name of the button varies for different software programs.
NOTE: To access these features from a Windows 8 or 8.1 Start screen, select Devices, select Print,
and then select the printer.
3. Click or tap the Finishing tab.
4. Select the Print on both sides (manually) check box. Click the button to print the first side of theOK
job.
5. Retrieve the printed stack from the output bin, and place it in Tray 1.
6. If prompted, touch the appropriate control panel button to continue.
ENWW Print tasks (Windows) 39
3. Use the keypad on the touchscreen to enter the IP address, and touch the OK button. Touch the Yes
button to confirm.
4. Use the keypad on the touchscreen to enter the subnet mask, and touch the OK button. Touch the Yes
button to confirm.
5. Use the keypad on the touchscreen to enter the default gateway, and touch the OK button. Touch the
Yes button to confirm.
ENWW Configure IP network settings 59
Economy settings
Introduction
The product includes several economy features to conserve energy and supplies.
Print with EconoMode
Configure the Sleep/Auto Off After setting
Set the Shut Down After delay and configure the product to use 1 watt or less of power
Configure the Delay Shut Down setting
Print with EconoMode
This product has an EconoMode option for printing drafts of documents. Using EconoMode can use less toner.
However, using EconoMode can also reduce print quality.
HP does not recommend the full-time use of EconoMode. If EconoMode is used full-time, the toner supply
might outlast the mechanical parts in the toner cartridge. If print quality begins to degrade and is no longer
acceptable, consider replacing the toner cartridge.
NOTE: If this option is not available in your print driver, you can set it using the HP Embedded Web Server.
1. From the software program, select the Print option.
2. Select the product, and then click the Properties or Preferences button.
3. Click the Paper/Quality tab.
4. Click the EconoMode check box.
Configure the Sleep/Auto Off After setting
2-line control panels
1. On the product control panel, press the OK button.
2. Open the following menus:
System Setup
Energy Settings
Sleep/Auto Off After
3. Use the arrow keys to select the time for the Sleep/Auto Off After delay, and then press the OK button.
Touchscreen control panels
1. From the Home screen on the product control panel, touch the Setup button.
2. Open the following menus:
ENWW Economy settings 61
HP Web Jetadmin
HP Web Jetadmin is an award-winning, industry-leading tool for efficiently managing a wide variety of
networked HP products, including printers, multifunction products, and digital senders. This single solution
allows you to remotely install, monitor, maintain, troubleshoot, and secure your printing and imaging
environment — ultimately increasing business productivity by helping you save time, control costs, and
protect your investment.
HP Web Jetadmin upgrades are periodically made available to provide support for specific product features.
Go to www.hp.com/go/webjetadmin and click the Self Help and Documentation link to learn more about
upgrades.
64 Chapter 5 Manage the product ENWW
Customer support
Get telephone support for your country/region
Have the product name, serial number, date of purchase, and
problem description ready
Country/region phone numbers are on the flyer that was in the
box with your product or at www.hp.com/support/
Get 24-hour Internet support, and download software utilites and
drivers
www.hp.com/support/colorljM252
Order additional HP service or maintenance agreements www.hp.com/go/carepack
Register your product www.register.hp.com
68 Chapter 6 Solve problems ENWW


Produkt Specifikationer

Mærke: HP
Kategori: Printer
Model: LaserJet Pro M252dw
Vekselstrømsindgangsspænding: 110 - 240 V
Vekselstrømsindgangsfrekvens: 50 - 60 Hz
Bredde: 392 mm
Dybde: 412 mm
Højde: 236.2 mm
Vægt: 12200 g
Produktfarve: Grå
Kontroltype: Berøring
Indbygget skærm: Ja
Pakkevægt: 16700 g
Pakkedybde: 298 mm
Pakkebredde: 498 mm
Pakkehøjde: 510 mm
Skærm diagonal: 3 "
Berøringsskærm: Ja
Wi-Fi: Ja
Ethernet LAN: Ja
Wi-Fi-standarder: 802.11b, 802.11g, Wi-Fi 4 (802.11n)
Strømforbrug (standby): 8.7 W
Udskrivningsteknologi: Laser
Maksimal opløsning: 600 x 600 dpi
Udskrivningshastighed (sort, normal kvalitet, A4/amerikansk papirformat): 18 sider pr. minut
Medietyper til papirbakke: Card stock, Envelopes, Labels, Photo paper, Plain paper, Transparencies
Maksimal ISO A-serie papirstørrelse: A4
ISO A-serie, størrelser (A0...A9): A4, A5, A6
Samlet inputkapacitet: 150 ark
Samlet outputkapacitet: 100 ark
Mobile udskrivningsteknologier: Apple AirPrint, HP ePrint, Mopria Print Service
Markedspositionering: Forretning
Strømforbrug (slukket): 0.1 W
Maksimal driftscyklus: 30000 sider pr. måned
Udskrivning af farver: Black, Cyan, Magenta, Yellow
Intern hukommelse: 256 MB
Duplex udskrivning: Ja
Antal printpatroner: 4
Bæredygtighedscertifikater: EPEAT Silver, ENERGY STAR
Processorfrekvens: 800 MHz
Maksimal intern hukommelse: 256 MB
Tid til første side (farve, normal): 13 sek./side
Strømforbrug (udskrivning): 375 W
Understøttede Windows-operativsystemer: Ja
Understøttede Mac-operativsystemer: Ja
Farve: Ja
Udskrivningshastighed (farve, normal kvalitet, A4/amerikansk papirformat): 18 sider pr. minut
Standard grænseflader: Ethernet, USB 2.0
Tid til første side (sort, normal): 11.5 sek./side
Sidebeskrivelsessprog: PCL 5c, PCL 6, PostScript 3, URF
Anbefalet arbejdscyklus: 250 - 2500 sider pr. måned
Maksimal kapacitetsydelse: 100 ark
Indbygget processer: Ja
Netværk klar: Ja
HP segment: Små og mellemstore virksomheder (SMV)
HP ePrint: Ja
HP administrationsværktøjer: HP Proxy Agent Software; HP Imaging and Printing Security Center; HP Utility (Mac); HP Device Toolbox
HP Software medfølger: HP Software Installer/Uninstaller, HP PCL 6 Printer Driver, HP Device Experience (DXP), HP Update, Product Registration Assist, HP Web Services Assist (HP Connected),
HP Web Jetadmin: Ja
HP Auto-On/Auto-Off: Ja
HP JetAdvantage Private Print: Ja

Har du brug for hjælp?

Hvis du har brug for hjælp til HP LaserJet Pro M252dw stil et spørgsmål nedenfor, og andre brugere vil svare dig