Jandy Deck Jet Installation Instructions
This document gives in struc tions for installing the
Jandy Deck Jet. The in struc tions must be fol lowed
ex act ly. Read through the in struc tions com plete ly before
starting the procedure.
The Jandy Deck Jet is designed to be installed in the
deck surrounding the pool/spa or pond. The Jandy
Deck Jet includes a 5/16", 360° rotating jet that assures
accurate stream placement. The 2½" diameter body is
designed for installation in con crete decks, pavers or
garden areas. Two drain holes are in cor po rat ed into the
body to eliminate standing water.
An attractive bronze deck plate is also in clud ed. The
advantage of the Jandy Deck Jet is its versatile, all
plastic, fully adjustable jet, low fl ow, and ease of
installation.
1. Determine proper feed pipe size for multiple jet
setups. Refer to both Table 1 and Figure 1.
Table 1. Multiple Jet Setup
Number of Deck Jets at
rate of 5 GPM
(gallons per minute)
Recommended Pipe Size
within 25' of equipment
A B C D
2 1½" 1" ¾" 1½"
3 1½" 1" ¾" 1½"
4 1½" 1½" ¾" 1½"
5 1½" 1½" ¾" 1½"
6 2" 1½" ¾" 2"
NOTE A Jandy 3-Port Valve should be installed on the
main feed line near the pump for the adjustment
of total water pressure to all Deck Jets (see
Figure 1).
2. Refer to Table 2 to view the water volume and
pressure specifi cations for one Deck Jet.
Table 2. Water/Pressure Specifi cations
Gallons (US GPM) 3.0 4.0 5.0
Feet of Head 3.9 7.9 11.0
Height of Jet 3.0 6.6 10.0
H0562100A
"D" - Bypass/Bleed Off Line
"B" - Plumbing
Loop
"A" - Main Feed Line
"C" -
Inlet Lines to
Deck Jet Deck Box
(Maximum 6 Lines
per Plumbing Loop)
Check Valve
Isolation Valves
Jandy 3-Port Valve (P/N 4715)
Figure 1. Multiple Jet Plumbing Diagram
3. From the main feed line, reduce to ¾" piping
for each Deck Jet (see Figure 1). Either provide
individual valves for each jet, or create an equal
pressure loop to equalize pressure in the line.
4. The Jet Body has an opening on the side to allow
for a ¾", 90° PVC elbow and still sit level on the
ground. Cut the desired length of ¾" PVC pipe
(see Figure 2). Glue the cut pipe length into the
90° elbow.
NOTE to install the 90° elbow Use PVC/ABS glue only
into the bottom of the Deck Jet Body.
Figure 2. 90° Elbow Installation
Deck Jet Body
(cut away view)
90° PVC
Elbow
1½"
(min.) of
PVC pipe
OR
¾"
PVC
Pipe
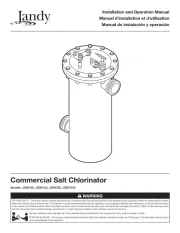
Installation Instructions
FOR YOUR SAFETY: This product must be in stalled and serviced by a professional pool/spa service
technician. The procedures in this manual must be followed exactly. Improper in stal la tion and/or op er a tion
will void the war ran ty.
WARNING