Kaiser KCG 6335 RotEm Turbo Manual
Læs nedenfor 📖 manual på dansk for Kaiser KCG 6335 RotEm Turbo (56 sider) i kategorien Ovn. Denne guide var nyttig for 12 personer og blev bedømt med 4.5 stjerner i gennemsnit af 6.5 brugere
Side 1/56


2
EN
DEAR CUSTOMERS,
thank you for purchasing this Kaiser product.
We are convinced that you have made a right choice. This
product which satisfies the high quality demands and
corresponds to world comprehensive standards realizes
your cookeries, and his modern appearance which has
been developed by the best European designers will
decorate your kitchen splendidly.
We ask you to read the operating instructions before
usage thoroughly. The consideration of
recommendations protects you from possible
i
nconveniences which can appear as a result of the
wrong use of the cooking hob , and allows you to reduce s
the consumption of gas and electric energy. If the use
corresponds to the present operating instructions, the
cooking hob will bring you a lot of pleasure for a long
time.
Our cooking hobs correspond to the main demands of the
security, hygiene and environment protection, according
to the directives of the EU which is confirmed with
certificates DIN ISO 9001, ISO 1400, according to the
norms counting within the frames of the EU, they also
correspond to the Gosstandart of Russia, standards of the
CIS, which is confirmed with the corresponding
certificates.
With the thoughts of a constant improvement of the
quality of our cooking hob the changes in design and
equipment which lead only to positive changes of the
technical qualities are reserved by the manufacturer.
We wish you an effective use of our cooking hob.
Yours faithfully
OLAN- Haushaltsgeräte
Berlin Germany
We Inform you that our devices which are the object of the present
operating instructions are precertain exclusively for the domestic use.

3
DE
RU
LIEBE KUNDIN, LIEBER KUNDE,
wir danken Ihnen für den Erwerb unserer Technik.
Wir sind überzeug, dass Sie eine richtige Wahl getroffen
haben. Dieses Produkt, das die hohen Forderungen zur
Qualität befriedigt und weltumfassenden Standards
entspricht, verwirklicht Ihre Kochkünste, und sein
modernes Aussehen, das von besten europäischen
Designer entwickelt worden ist, wird Ihre Küche
prächtig schmücken.
Wir bitten Sie die Bedienungsanleitung vor der Nutzung
aufmerksam zu lesen. Die Beachtung von Empfehlungen
schützt Sie von eventuellen Unannehmlichkeiten, die als
Folge der falschen Nutzung des Kochfeldes auftreten
können, und ermöglicht Ihnen den Verbrauch von Gas
und as bringt Elektroenergie zu reduzieren. D Kochfeld
Ihnen viel Vergnügen auf lange Zeit, wenn der Gebrauch
der vorliegenden Bedienungsanleitung entsprechen
wird.
Unsere Kochfelder entsprechen den Hauptforderungen
der Sicherheit, der Hygiene und des Umweltschutzes,
laut den Direktiven der EU, was mit Zertifikaten DIN
ISO 9001, ISO 1400, entsprechend den im Rahmen der
EU geltenden Normen, bestätigt ist, und genauso auch
den Anforderungen von Gosstandart in Russland und
Standards anderer GUS Länder, was durch die
Identifikationszertifikate bestätigt ist.
Mit den Gedanken der ständigen Verbesserung der
Qualität unserer Kochfelder
sind Änderungen bei
Design und Einrichtung, die nur zu positiven
Veränderungen der technischen Eigenschaften führen,
vom Hersteller vorbehalten.
Wir wünschen Ihnen die effektive Nutzung unseres
Kochfeldes.
Hochachtungsvoll
OLAN- Haushaltsgeräte
Berlin Germany
Wir Informieren Sie, dass unsere Geräte, die der Gegenstand der
vorliegenden Bedienungsanleitung sind, sind ausschließlich für den
häuslichen Gebrauch vorbestimmt.
УВАЖАЕМЫЙ ПОКУПАТЕЛЬ,
благодарим Вас за приобретение нашей техники.
Мы уверены, что Вы сделали правильный выбор.
Данный продукт, удовлетворяющий самым высоким
требованиям и отвечающий мировым стандартам,
позволит Вам легко воплотить все Ваши
кулинарные способности, а его современный вид,
разработанный лучшими европейскими
дизайнерами, великолепно украсит Вашу кухню.
Просим Вас внимательно прочитать инструкцию
по обслуживанию и эксплуатации до пуска
устройства. Соблюдение содержащихся в ней
рекомендаций защитит Вас от возможных
неприятностей при неправильной эксплуатации
варочной поверхности, а также позволит Вам
уменьшить расход газа и электроэнергии. Если
эксплуатация варочной поверхности будет
соответствовать настоящей инструкции, наша
варочная поверх будет радовать Вас долгое ность
время.
Наши варочные поверхности полностью
соответствует основным требованиям
безопасности, гигиены и защиты окружающей
среды, согласно директивам Европейского Союза,
что подтверждено сертификатами DIN ISO 9001,
ISO 1400, в соответствии с настоящими нормами,
действующими на территории Европейского
сообщества, a также полностью отвечают всем
требованиям Госстандарта России и стандартов
других стран СНГ, что подтверждается
сертификатами соответствия.
С мыслью о дальнейшем повышении технических и
эксплуатационных характеристик наших варочных
поверхностей мы оставляем за собой право на
внесение изменений в дизайн и устройство,
влияющих только положительно на
потребительские качества и свойства продукта.
Желаем Вам эффективного пользования варочной
поверхностью нашей фирмы.
Уважающий Вас
OLAN- äte Haushaltsger
Берлин Германия
Информируем, что наши приборы, являющиеся предметом
настоящей Инструкции, предназначены исключительно для
домашнего пользования.

4
EN
CONTENTS
I 6 NSTALLATION INSTRUCTIONS
Electrical connection 6
Gas connection 8
C a onversion to different gas type 10
Installation of t 14 he hob
SAFETY CONDITIONS 20
EQUIPMENT 26
Gas cooking hob 26
USAGE 28
CARE AND ATTENDANCE 32
RESPECT FOR THE ENVIRONMENT 36

5
DE
RU
INHALTSVERZEICHNIS
FÜR DEN INSTALLATEUR 7
Stromanschluss 7
Gasanschluss 9
Umstellen 11auf einen anderen Gastyp
Einbau des Kochfeldes 15
SICHERHEITSBEDINGUNGEN 21
AUSSTATUNG 27
Gaskochfeld 27
BENUTZUNG 29
PFLEGE W UND ARTUNG 33
UMWELTVERTR GLICHKEITÄ 37
ОГЛАВЛЕНИЕ
ИНСТРУКЦИЯ МОНТАЖУ ПО 7
Подключение к электросети 7
Подключение к у газ 9
Переключение другой газа на тип 11
Установка варочной поверхности 15
УСЛОВИЯ БЕЗОПАСНОСТИ 21
ОБОРУДОВАНИЕ 27
Газовая варочная поверхность 27
ИСПОЛЬЗОВАНИЕ 29
ОБСЛУЖИВАНИЕ И УХОД 33
ОХРАНА ОКРУЖАЮЩЕЙ СРЕДЫ 37

6
EN
NSTALLATION INSTRUCTIONS
ELECTRICAL CONNECTION
Before connecting the cooking hob
to the mains
power supply, make sure that:
• the plant characteristics are such as to follow
what is indicated on the matrix plate placed
at the bottom of the working area,
• t
he mains supply has an efficient ground
connection complying with all applicable
laws and regulations.
Co
rrect grounding is a legal requirement. If the
appliance is not pre fitted with a power cable and/or -
plug, use only suitable cables and plugs capable of
handling the power specified on the appliance's
data plate and capable of resisting heat. The power
cable should never reach a temperature 50°C
above ambient temperature at any point along its
length.
If the appliance is to be connected directly to mains
terminals, fit a switch with minimum aperture of 3
mm between the contacts. Make sure that the
switc
h is of sufficient capacity for the power
specified on the appliance's data plate, and
compliant with applicable regulations. The switch
must not break the yellow-
green earth wire. The
socket or switch must be easily reachable with the
cooking hob fully installed.
Attention! The manufacturer declines all
responsibility for damage or injury if the
above instructions and normal safety
precautions are not respected.
Attention! Installation and electrical
connection must be made by a qualified
expert only.

7
DE RU
FÜR DEN INSTALLATEUR
STROMANSCHLUSS
Vor der Durchführung des Stromanschlusses muss
sichergestellt werden, dass:
• die Eigenschaften des Stromnetzes mit den
Werten auf dem im unteren Teil des
Kochfeldes angebrachten Typenschild
übereinstimmen,
•
das Stromnetz gemäß den geltenden
Bestimmungen und Rechtsvorschriften
geerdet ist.
Die Erdung ist eine notwendige Voraussetzung der
Nutzung des Gerätes. Falls das Kochfeld mit
keinem
Kabel und/oder Netzstecker ausgestattet
ist, muss geeignetes Material verwen
det werden,
das den Werten auf dem Typenschild des Gerätes
entspricht. Das Kabel darf an keiner Stelle
keinesfalls eine Temperatur von über 50°C
erreichen.
Wenn ein direkter Netzanschluss gewünscht wird,
muss ein allpoliger Schalter mit Kontaktöffnung von
min. 3mm vorgesehen werden,
der erlaubt das
Gerät vom Netz zu trennen, der den technischen
Daten der geltenden Vorschriften entsprechen
muss (das gelb grüne Erdungskabel darf nicht vom -
genannten Schalter unterbrochen
werden). Der
Stecker bzw. der allpolige Schalter müssen bei
dem installierten Gerät problemlos zugänglich sein.
ИНСТРУКЦИЯ ПО МОНТАЖУ
ПОДКЛЮЧЕНИЕ К ЭЛЕКТРОСЕТИ
Перед подключением варочной поверхности к
эл. сети, необходимо убедиться, что :
• параметры сети соответствуют данным в
табличке на нижней части самого
прибора,
• эл. сеть заземлена в соответствии с
действующими нормами и
предписаниями.
Заземление является необходимым условием
правильной эксплуатации. Если варочная
поверхность е оборудована кабелем и/или н
штекером, применяйте только материалы,
соответствующие данным, указанным в
заводской табличке. Кабель ни в коем случае не
должен нагреваться выше температуры 50°С.
В случае подсоединения непосредственно к эл.
сети, необходимо использовать специальный
автоматический выключатель с зазором между
контактами не менее 3 мм, позволяющий
отсоединять прибор от сети, соответственно
техническим данным действующих
предписаний (желто зеленый кабель -
заземления не должен прерываться данным
выключателем). Штекер или автоматический
выключатель на правильно установленном
приборе должен быть всегда легкодоступен.
Внимание! Изготовитель не несет
никакой ответственности, если при
установке прибора не соблюдаются все
вышеприведенные предписания.
Внимание! Монтаж и подключение
должны проводиться только
квалифицированным специалистом.
Achtung! Der Hersteller ist nicht haftbar,
wenn bei der Installation des Gerätes alle
oben
angeführten Anweisungen nicht
befolgt werden.
Achtung! Die Montage und
Stromnetzanschluss soll nur von einem
qualifizierten Fachmann durchgeführt
werden.

8
EN
4
GAS CONNECTION
The cooking hob is designed to operate with both
natural gas (methane) and liquid gas (LPG), and
can be easily converted from one type to another
following the instructions given in the relative
section of this booklet «Converting to a different
type of gas . »
At factory the appliance installed has been pre-
to natural gas.
If the appliance is to operate with gas bottles (LPG),
a pressure regulator conforming to the
requirements.
Rigid pipe connection
Connection to the mains gas supply may be made
via a metal pipe or via a rigid stainless steel pipe, or
via a flexible steel which is -tipped hose 3 tightly
attached to the fitting 2 (remove the plastic cap ). 1
When connecting to LPG, use the fitting 4.
A service-adapter 5 is for gas service personal only.
The gas connection with this adapter is prohibited.
The fittings 4 and 5 with seals are supplied with the
appliance and comply with standards.
2
1
3
Attention!
Connect and ion to the gas supply
converting to different type must be a of gas
carried out by qualified technicians and in
conformance with the requirements.
Depending on r
egional rules and
regulations, may be used different (from
mentioned) types of connections.
4
5

10
EN
You must prevent the pipe from crushing, coming
into contact with moving parts of the kitchen unit (for
example, a drawer) and prevent access to any
spaces which might become obstructed.
Attention! CHECK UP LEAKPROOFNESS
of the connection to the gas supply pipe or
gas cylinder using soap suds only.
S pread soap suds on the joints, if there are
bubbles, please close the valve and re-
connect the hose until no bubbles.
Don’t use open flame danger to life!–

11
DE RU
Der Schlauch sollte nicht sein, nichtgequetscht in
Kontakt zu den bewe
glichen Teilen der
Einbaueinheit gelangen (z. B. einer Schublade)
oder durch Öffnungen verlegt werden, die
verschlossen werden könnten.
Шланг не должен сдавливаться соприкосаться,
с подвижными частями мебели, в которую
монтируется поверхность (например, с
выдвижными ящиками ить) и проход в
загроможденны местахх .
Achtung! Nach dem Anschließen des
Gerätes
an das Gasnetz (bzw. die
Gasflasche) mit Seifenwasser
KONTROLLIEREN, ob der Anschluss
DICHT ist bzw. Gas Tragen Sie austritt.
Seifenschaum auf die Verbindung. Wenn
Blasen auftreten, schließen Sie das Ventil,
den Schlauch trennen und wieder
anschließen. Wiederholen, bis Blasen
verschwinden.
Auf keinen Fall einen Feuerzeug, einen
Zündholz oder offene Flamme anderer Art
benutzen!
Внимание! После подключения прибора к
газопроводу или газовому балону
ПРОКОНТРОЛИРОВАТЬ
ГЕРМЕТИЧНОСТЬ соединений с помощью
мыльной пены. Нанесите мыльную пену на
с Е появятсяоединения. сли пузыри,
закройте кран, отсоедините шланг и
подсоедините снова. Повторяйте пока не
исчезнут пузыри.
Ни в коем случае не применять открытое
пламя!

12
EN
It is advisable to tighten the junctions by insulating teflon
tape.
And if there is gas leak happens during using, please
immediately shut off the gas source or call local gas
sector service for help.
If the hob is to be combined with an oven, please check,
that gas intake connection of the appliance has a “male
thread”
When making the connection, take care not to apply
stresses of any kind to the appliance.
CONVERSION TO A DIFFERENT TYPE OF GAS
Before converting the appliance for operation with a
different gas type, check which type of gas it is currently
set to operate with (adhesive label on appliance).
For the correct nozzle diameter, refer to the relative table
in this booklet.
Conversion to a different gas type must be carried out
by qualified technic
ians and in conformance with the
requirements.
Conversion procedure:
• Disconnect the electrical power supply to the
appliance,
• Turn the knobs in the null position.
• Replace the nozzles 1with the corresponding
type of gas to be used (see table «Nozzle
t »). able
• To adjust to the minimum, light the fire und turn
the knob in the position of minimal flame, then 2
re . move the knob of gas submission
• Use a screwdriver on the screw placed on the tap
3.
• F . or LPG (butane/propane) screw tight the tap
2
3
1

13
DE
RU
Es wird empfohlen, die Verbindungen mit Teflonband
abzudichten.
Wenn Gasaustritts findet während des Betriebes statt,
schalten Sie bitte sofort die Gasquelle, oder rufen Sie
Ihren lokalen Gasversorger um Hilfe.
Wenn das Kochfeld mit dem Ofen verbunden werden
soll, stellen Sie sicher, dass die
Gasanschlussvorrichtung ein Außengewinde
aufweist.
Beim Anschluss darauf achten, dass das Gerät von
jeder Art von Stress zu verwenden.
UMSTELLEN AUF EINEN ANDEREN GASTYP
Vor dem Umstellen auf einen anderen Gastyp den
Gastyp feststellen, auf den das Gerät eingestellt ist
(siehe Typenschild des Gerätes).
Für den Düsendurchmesser siehe »Tabelle der
Düsen«.
Umstellung von einem Gastyp auf einen anderen
muss von einem Fachmann gemäß den geltenden
Vorschriften ausgeführt werden.
Vorgangsweise bei Umstellung auf einen anderen
Gastyp:
• Das Gerät vom Stromnetz trennen,
• Die Bedienknebel in die Nullposition drehen.
• Die Düsen 1
mit den für den vorhandenen
Gastyp bestimmten Düsen (siehe Tab.
» Tabelle der Düsen«) ersetzen.
• r Für die Einstellung de minimalen Flamme, die
Flamme anzünden, den Bedienknebel 2 in die
P osition Minimum drehen n , danach de
Bedienknebel für Gaszufuhr herausziehen.
• die Einstellschraube 3
am Hahn mit
entsprechendem Schraubenzieher drehen.
• - Bei Betrieb mit Flüssiggas (Butan
/Propangas) Einstellschraube fest anziehen.
Рекомендуется уплотнить соединения при
помощи уплотняющей ленты из тефлона.
Если утечка газа происходит во время
эксплуатации, пожалуйста, немедленно
отключите источник газа или позвоните в местную
газовую службу за помощью.
Если поверхность должна быть подключена
вместе с духовкой, пожалуйста удост верьтесь, о
что газовое соединение прибора имеет наружную
резьбу.
При подсоединении, старайтесь не применять к
прибору любого рода напряжение.
ПЕРЕКЛЮЧЕНИЕ НА ДРУГОЙ ТИП ГАЗА
Перед переключением на другой тип газа,
определить на какой тип газа настроен прибор (см.
на заводской табличке).
Данные диаметра форсунок указаны в «Таблице
форсунок».
Переключение с одного типа газа на другой
должно осуществляться квалифицированным
специалистам в соответствии с действующими
предписаниями.
Порядок действий при переключении на другой
тип газа:
• Прибор отключить от эл. сети.
• Ручки управления подачей газа повернуть
в нулевое положение.
• Форсунки 1 заменить на те, которые
соответствуют имеющемуся в наличии
типу газа (см. «Таблицу форсунок»).
• Для установки минимального пламени
зажечь огонь, ручку управления подачей 2
повернуть в положение минимум и снять
ручку.
• Подходящей отверткой вращать
регулировочный винт 3
• -При использовании жидкого газа (бутан
пропан) завернуть крепко регулировочный
винт.

15
DE
RU
T ABELLE DER DÜSEN
Brenner
Nennlast kW
Durchmesser der Düse in
G / 20 20
G /30 30
G / 30 50
Turbo
3,80
1, 35
0, 98
0, 77
Turbo *
3,80
1, 49
0, 98
0, 77
Turbo**
3,50
1, 45
0, 95
0, 77
Stark
3,0
1,15
0,85
0,75
Nor l ma
1, 75
0, 97
0, 65
0, 58
S par
1,00
0, 72
0,50
0, 43
Brenner
Nennlast kW
Durchmesser der Düse in
G25/20
Turbo
3,60
1,60
Stark
3,00
1,34
Nor l ma
1,50
0, 94
S par
0,90
0, 72
* – fü r KG 6340 Turbo
** – für KG 6325… Turbo
Т А ФОРСУНОКАБЛИЦ
Горелка
Номинальная
мощность,
кВт
Диаметр форсунки в мм
G / 20 20
G /30 30
G / 30 50
Турбо
3,80
1, 35
0, 98
0, 77
Турбо*
3,80
1, 49
0, 98
0, 77
Турбо**
3,50
1, 45
0, 95
0, 77
Усиленная
3,0
1,15
0,85
0,75
Нормальная
1, 75
0, 97
0, 65
0, 58
Малая
1,00
0, 72
0,50
0, 43
Горелка
Номинальная
мощность,
кВт
Диаметр форсунки в мм
G 25/20
Турбо
3,60
1,60
Усиленная
3,00
1,34
Нормальная
1,50
0, 94
Малая 0, 0,90 72
* – KG для 6340 Turbo
** – … для KG 6325 Turbo
kW(Hs)
G30 (30mbar),
G20 (20mbar)
kW(Hs)
G30 ( 50mbar)
kW(Hs)
G25 (20mbar)
4
3.9
3.9
4
4
3.9
8.3
8.2
7.5
8.3 8.2 7.5
8.3 8.3 7.5
11.3
11.3
10.5
8.3 8.3 7.5
11.3
11.3
10.5
8.3
8.2
7.5
G20 8.1– – 8.5 ; G30
8.5
7.5
11.0 11.3 10.5

16
EN
NSTALLATION OF THE HOBS
The regulatio
ns covering the installation,
maintenance and operation of gas appliances for
domestic use are applicable regulations.
This appliance is not provided with a combustion
product discharge.
Installation and connection should be made in
accordance with this regulation.
It is recommended that it be installed in sufficiently
aerated places, in terms of the laws in force.
The quantity of air which is necessary for
combustion must not be below 2,0 m³ /h for each kW
of installed power (See «Nozzle table»).
The appliance can be fitted into a working area as
illustrated on the corresponding figure.
The installation space measurements are given in
mm.
Make sure that surrounding materials are heat
resistant.
Apply the seal provided over the whole of the area
perimeter.
min 55
min 15
min 600
min 150
min 650
min 150
Attention! We Inform you that our devices
which are the object of the present operating
instructions are precertain exclusively for the
domestic use.
Attention! To install the appliance is not
recommended the use of the silicone or other
sealants and other adhesives besides the
supplied mounting materials. If additional
fastening materials and substances have
been used, the removing the device from the
mounting niche in case of necessary service
is provided by and at the expense of the
owner. The manufacturer and the customer
services are not responsible for damages of
equipment and furniture because of the
disassembling.
Attention! Installation and electrical
connection of the cooking hob must be made
by a qualified expert only.

17
DE RU
EINBAU DES KOCHFELDES
Für die Installation, Wartung und Benutzung von
Gasgeräten des privaten Gebrauchs handeln Sie
entsprechend den geltenden Normen und
Vorschriften.
Dieses Gerät ist mit einer Vorr
ichtung zur
Beseitigung der Verbrennungsgase nicht
angeschlossen.
Installation und Anschluss müssen entsprechend
den gegebenen Vorschriften ausgeführt werden.
Gerät nur in ausreichend belüfteten Räumen und
nach den gesetzlichen Vorschriften aufstellen.
D
ie Menge der zum Verbrennungsprozess
benötigten Luftzufuhr darf nicht unter 2,0 m³/h pro
kW der einges
tellten Leistung liegen (Siehe
» «). Tabelle der Düsen
Das Gerät ist für den Einbau in einer Arbeitsfläche
vorgesehen, wie auf der Abbildung gezeigt wird.
Die Einbaumaßen sind in mm angegeben.
Das Möbelmaterial muss hitzebeständig sein.
Entlang der gesamten Außenkante der Fläche den
mitgelieferten Abdichtungsmaterial versiegeln
einlegen.
УСТАНОВКА ВАРОЧНО ПОВЕРХНОСТИЙ
Для установки, ухода и пользования газовым
прибором следуйте требованиям
соответствующих норм.
Этот прибор не подсоединен к устройству
вытяжки.
Установка и подсоединение должы
производиться в соответствии с настоящим
предписанием.
Прибор устанавливается только в достаточно
хорошо проветриваемом помещении с учетом
всех предписаний.
Объем подачи воздуха, необходимого для
процесса сгорания, не должен быть меньше 2,0
м³/час на каждый киловатт устанавливаемой
мощности (см. «Таблица форсунок»).
Прибор предусмотрен для встройки в рабочую
поверхность, как это изображно на
иллюстрации.
Размеры для встраивания даны в мм.
Мебель должна быть изготовлена из
нагревостойкого материала.
Вдоль внешнего контура встраиваемой
поверхности прокладывается прилагаемый в
комплекте уплотнительный материал.
Внимание! Информируем, что наши
приборы, являющиеся предметом
настоящей Инструкции, предназначены
исключительно для домашнего
пользования.
Внимание! При монтаже устройства не
рекомендуется применение силиконовых
и прочих герметиков, а также других
клеящих веществ помимо крепёжных
материалов, входящих в комплект
поставки. При использовании
дополнительных крепёжных материалов и
веществ, извлечение устройства из
монтажной ниши в случае необходимости
сервисного обслуживания производится
силами и за счёт его владельца.
Производитель и сервисные службы не
несут ответственности за повреждение
устройства и мебели при демонтаже.
Внимание! Монтаж и подключение
варочной поверхности должны
проводиться только квалифицированным
специалистом.
Achtung! Wir Informieren Sie, dass unsere
Geräte, d
ie der Gegenstand der
vorliegenden Bedienungsanleitung sind, sind
ausschließlich für den häuslichen Gebrauch
vorbestimmt.
Achtung! Beim Einbau ist zu beachten: die
Verwendung von der Silikonfuge, anderen
Dichtungsmittel oder Klebstoffe zusätzlich zu
den gelieferten Befestigungsmaterialien wird
nicht empfohlen. Bei der Verwendung der
zusätzlichen Befestigungsmaterialien und
Stoffen, falls die Servicedienstleitung
notwendig ist, wird das Herausnehmen des
Gerätes aus der Montagenische auf eigenen
Kosten und aus eigener Kraft des Inhabers
des Gerätes durchgeführt. Der Hersteller und
das Kunden-
Service übernehmen keine
Verantwortung für die Schäden des Gerätes
und der Möbel bei der Demontage.
Achtung! Die Montage und
Stromnetzanschluss des Kochfeldes soll nur
von einem qualifizierten Fachpersonal
durchgeführt werden.

18
KG T6350 urbo, KCG 6 * T380 urbo,
KCG 2 * T638 urbo, KG 6357 Turbo,
KCG 6387 Turbo
KG T6340 urbo
KCG 8 2 * T 38 urbo
KG 63 * T 25 urbo
KG 3351
KCG 3382
KG T4350 urbo
KCG T4380 * urbo
KG T 6360 urbo Romb
KCG * T6390 urbo Romb
KCG T 6383 * urbo
KCG 6335 * Turbo
Produkt Specifikationer
Mærke: | Kaiser |
Kategori: | Ovn |
Model: | KCG 6335 RotEm Turbo |
Bredde: | 580 mm |
Dybde: | 510 mm |
Højde: | 55 mm |
Vægt: | 17500 g |
Produktfarve: | Black, Bronze |
Kontroltype: | Dreje |
Indbygget skærm: | Ingen |
Pakkevægt: | 19500 g |
Pakkedybde: | 575 mm |
Pakkebredde: | 675 mm |
Pakkehøjde: | 165 mm |
Placering af apparat: | Indbygget |
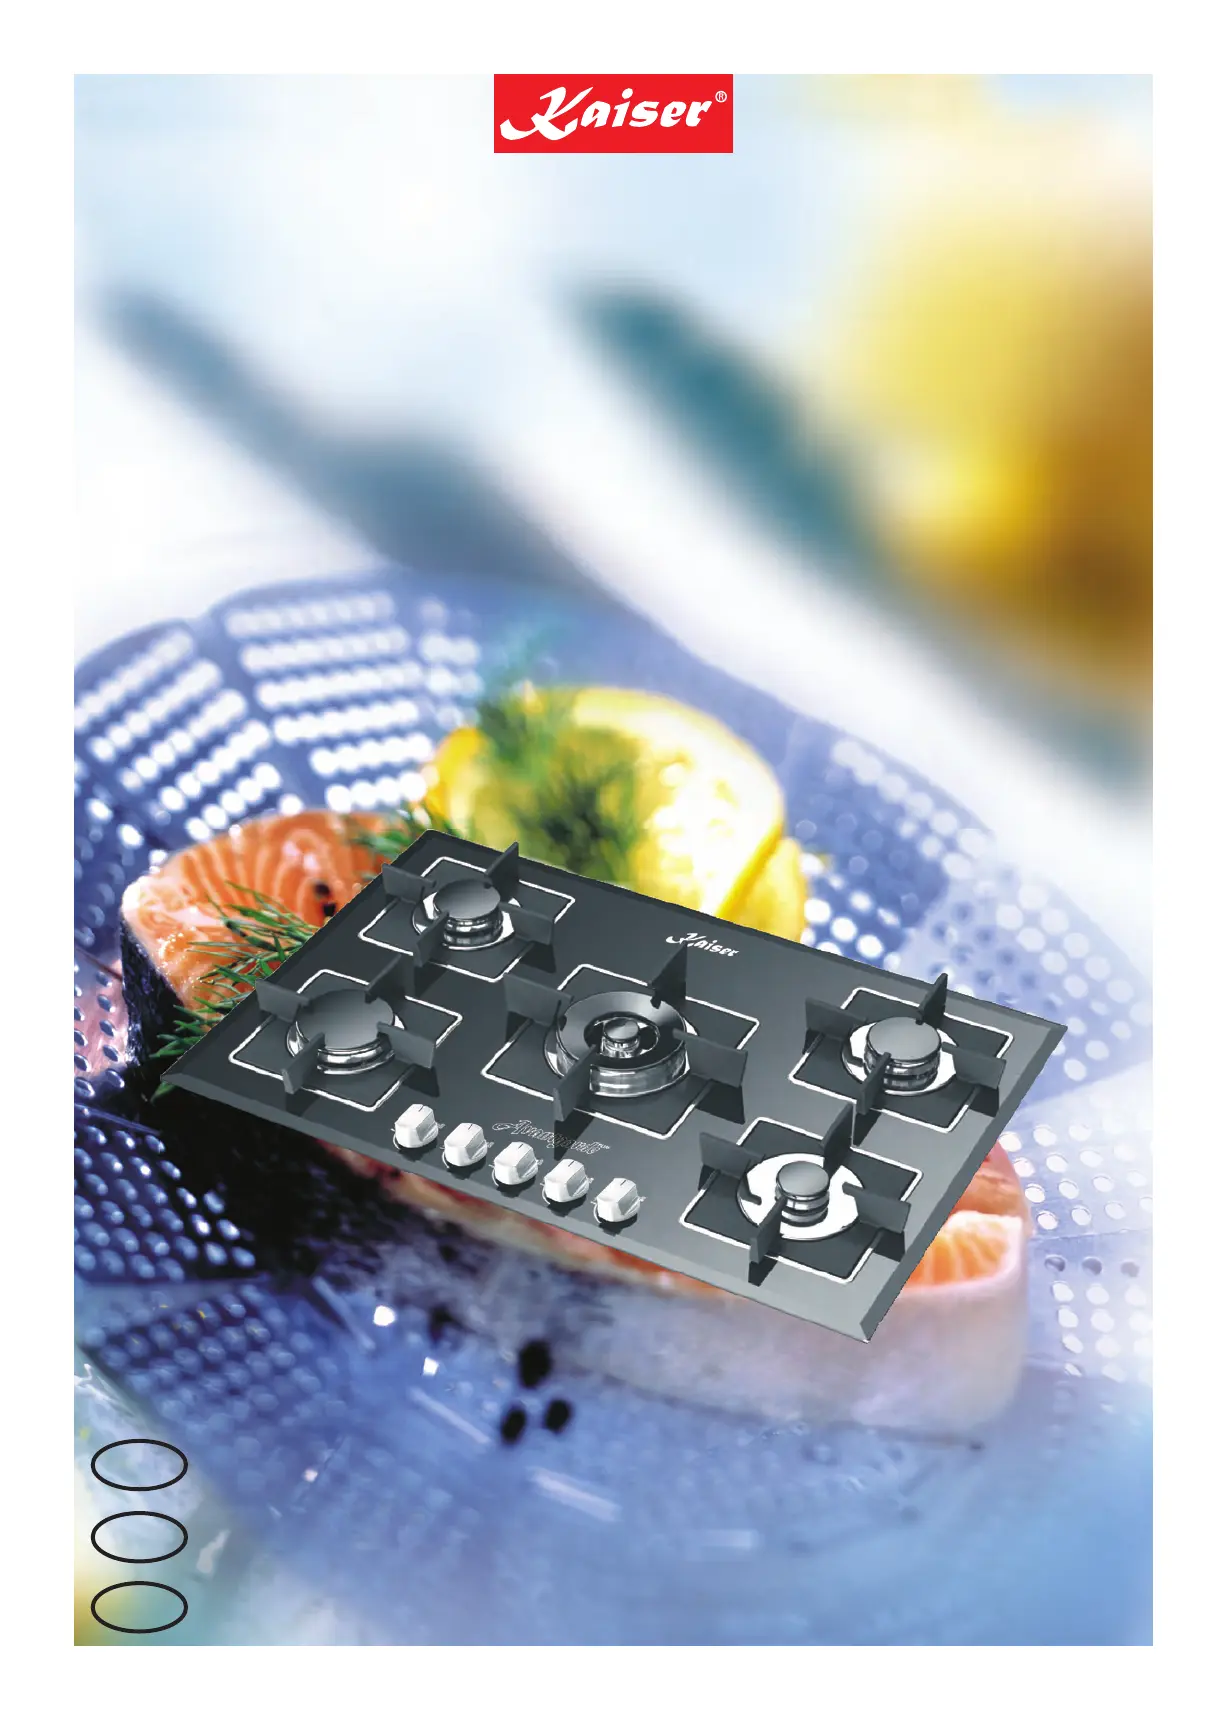
Komfurtype: | Gaskomfur |
Overfladetype: | Støbejern |
Antal kogeplader / madlavningsområde: | 4 |
Blus/kogeplade zone 1 strøm: | 3800 W |
Blus/kogeplade zone 2 strøm: | 1750 W |
Blus/kogeplade zone 1 type: | Mellem |
Kogezone 1 form: | Rund |
Blus/kogeplade zone 1 position: | Højre forside |
Blus/kogeplade zone 1 strømkilde: | Gas |
Blus/kogeplade zone 2 type: | Regelmæssig |
Kogezone 2 form: | Rund |
Blus/kogeplade zone 2 position: | Venstre bagende |
Blus/kogeplade zone 2 strømkilde: | Gas |
Kontrolposition: | Forrest til højre |
Nem at rengøre: | Ja |
Ovnbredde størrelse: | 60 cm |
Blus/kogeplade zone 3 type: | Regelmæssig |
Blus/kogeplade zone 4 type: | Simre |
Blus/kogeplade zone 2 diameter: | 65 mm |
Blus/kogeplade zone 1 diameter: | 130 mm |
Blus/kogeplade zone 3 diameter: | 65 mm |
Blus/kogeplade zone 4 diameter: | 40 mm |
Blus/kogeplade zone 4 strømkilde: | Gas |
Kogezone 4 form: | Rund |
Blus/kogeplade zone 3 strømkilde: | Gas |
Kogezone 3 form: | Rund |
Blus/kogeplade zone 3 position: | Højre bagende |
Blus/kogeplade zone 4 position: | Højre forside |
Indbygget hætte: | Ingen |
Antal gasbrændere: | 4 |
Blus/kogeplade zone 4 strøm: | 1000 W |
Blus/kogeplade zone 3 strøm: | 1750 W |
Elektronisk tænding: | Ja |
Understøttet grydemateriale: | Støbejern |
Elektronisk antændelsestype: | Enhåndstænding |
Har du brug for hjælp?
Hvis du har brug for hjælp til Kaiser KCG 6335 RotEm Turbo stil et spørgsmål nedenfor, og andre brugere vil svare dig
Ovn Kaiser Manualer

26 December 2024

26 December 2024

26 December 2024

24 December 2024

24 December 2024

24 December 2024

24 December 2024

24 December 2024

24 December 2024

23 December 2024
Ovn Manualer
- Ovn High One
- Ovn Lofra
- Ovn Hestan
- Ovn Bella
- Ovn H.Koenig
- Ovn Airlux
- Ovn Sinbo
- Ovn Beautiful
- Ovn Westfalia
- Ovn Orima
- Ovn Viking
- Ovn Scancool
- Ovn Lynx
- Ovn Rosieres
- Ovn Trebs
Nyeste Ovn Manualer

4 Juni 2025

4 Juni 2025

4 Juni 2025

4 Juni 2025

4 Juni 2025

3 Juni 2025

3 Juni 2025

3 Juni 2025

2 Juni 2025

2 Juni 2025