Page 3 Page 4Page 2
S P L A S H P R O O F ATO M I C C LO C K
WITH OUT DOO R T EM PERAT URE / HUMIDIT Y
QUIC K START G UID E
MODEL: 5151912
DC: 021819
Full manual can be found under the Support tab here: bit.ly/515-1912
P O W E R U P
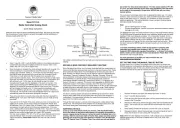
1. Insert 2-AA batteries into your Outdoor Sensor.
2. Insert 2-AA batteries into your Atomic Clock.
3. Configure basic Settings.
4. Once the sensor is reading to your clock, place sensor
outside in a shaded location.
Watch sensor mounting video: bit.ly/TH_SensorMounting
AA
AA
TX191TH
Outdoor Sensor
S E T T I N G S
AA
AA
• The clock will only search for the WWVB Atomic Time Signal at
UTC 7:00, 8:00, 9:00, 10:00, and 11:00.
• The Atomic Time Indicator will flash while searching, and will
remain solid on screen when connected.
• From the normal time display, press the SET button to search for
the WWVB Atomic Time Signal.
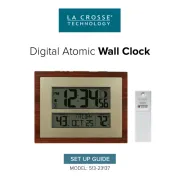
515-1912
Atomic Clock
ATO M I C TI M E SI G N A L - W W V B
1. Hold the SET button to enter the Settings Menu.
2. Press the + or - button to adjust the flashing values. Hold to
adjust quickly.
3. Press the SET button to confirm adjustments and move to the
next item.
4. Press the TIMER button at any time to exit.
Note: Weekday sets automatically when Year, Month and Date are
set.
Settings Order:
• Beep ON/OFF
• Atomic ON/OFF
• DST (Daylight Saving Time)
o DST ON
o DST OFF
o DST ALWAYS ON
• Time Zone
• Hour
• Minutes
• Year
• Month
• Date
• Fahrenheit/Celsius
TIME ZONES
AST = Atlantic
EST = Eastern
CST = Central
MST = Mountain
PST = Pacific
AKT = Alaska
HAT = Hawaii
DST ON- Clock gains 1 hour in spring
and loses 1 hour in the fall.
DST OFF- Clock remains in Standard
Time all year long.
DST ALWAYS ON- Clock remains in
Daylight Saving Time all year long.
C U S TOM D I S P L AY V I E W S
Press the MINUS (-) button to select between:
• Outdoor Temperature & Humidity
• Indoor Temperature and Seconds to display.
When Timer is active the Timer Icon and Timer Countdown will
show.
B U T TO N S
+-
TIMER SETMINUS (-)PLUS (+)
TimerOutdoor Temp/Humidity Indoor Temp & Seconds
P O SI T I O N
• Use the slot on the battery cover to mount your clock with a
screw, or insert the suction cup attachment into the slot and
mount on a clean, smooth surface.
• When using suction cup, occasionally press and hold the clock to
be sure it is secure.
Hang on a
screw or
with the
suction cup
DO NOT
place clock
in direct
contact with
water