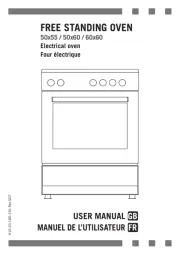
La Germania RI6 4C 71 B X Manual

La Germania Komfur RI6 4C 71 B X

Læs gratis den danske manual til La Germania RI6 4C 71 B X (52 sider) i kategorien Komfur. Denne vejledning er vurderet som hjælpsom af 32 personer og har en gennemsnitlig bedømmelse på 4.6 stjerner ud af 16.5 anmeldelser. Har du et spørgsmål om La Germania RI6 4C 71 B X, eller vil du spørge andre brugere om produktet?

Side 1/52
1
INSTALLATION, MAINTENANCE
AND USE INSTRUCTIONS FOR
FREE-STANDING COOKERS
90x60 cm (TYPE M9/M9V)
PLEASE READ THE INSTRUCTIONS BOOKLET BEFORE INSTALLING AND USING THE APPLIANCE.
These instructions are only for those countries whose symbols appear on the front of the booklet
and on the serial no. plate of the appliance.
The manufacturer may not be held liable for any damage to objects or people, resulting from the
improper or erroneous installation of the appliance.
The manufacturer is not responsible for any inaccuracies, due to printing or typing errors, in this booklet.
The drawings (in the figures) are indicative only.
The manufacturer may make product modifications when considered necessary and useful, without this
changing essential safety and operating characteristics.
code 310373
2
HEIGHT-ADJUSTABLE FEET (figure) 1)
The feet are packed in the top box.
The feet should be installed with the cooker close to its final installation position; the feet are not safe to
move the cooker long distances.
After unpacking the cooker, lift it with your foot, to fit the cooker feet in the bases at the bottom. Slowly lower
the cooker so its weight is resting on the feet and on the assembly fixings. We recommend using a lifting
device or pallet instead of tilting the cooker.
INSTALLING THE TOEKICK PANEL (only available for some models)
After installing the feet, install the cooker skirt as shown in the pictures in Figure 2. 2
INSTALLING THE (UPSTAND) RISER
Remove the 2 screws securing the hob at the rear, as shown in (figure 3)
Put the upstand in place and secure at the bottom with the two screws, as shown in (figure 3)
Secure the middle of the upstand using the screws provided with the upstand (figure 3)
INSTALLING THE HOB RAIL AND OVEN HANDLE
The rail and handle are packed with the upstand.
The rail is only available on some models.
Assemble the hob rail and oven handle as shown in the pictures (figures 4A – 4B- 4C)
INSTALLING THE SYSTEM TO PREVENT OVERTURNING
To prevent the appliance from accidentally overturning, the system provided must be installed. Install the
system as shown in the figures. Figures 5 – 5A
CONNECTING THE APPLIANCE TO THE GAS MAINS
Before connecting the appliance to the gas mains, make sure the data on the rating plate affixed inside the
warming drawer or at the rear of the oven correspond to those of the gas mains.
A label on the last page of this booklet and inside the warming drawer (or at the rear) of the appliance
gives information for adjusting the appliance: type of gas and operating pressure.
IMPORTANT: this appliance must be installed in compliance with current national standards in force and
used only in a well-ventilated room.
NOTE: The gas union of the appliance has a ½ cylindrical male gas thread, conforming to UNI-ISO 228-1
standards.
To connect the appliance to the gas mains using a flexible rubber pipe, an additional rubber union is
required (Figure 6 ) supplied with the appliance, conforming to the UNI 7141 standard.
ADJUSTMENT FOR DIFFERENT TYPES OF GAS
BEFORE CARRYING OUT ANY MAINTENANCE, UNPLUG THE APPLIANCE FROM THE GAS AND
ELECTRICITY MAINS
REPLACING NOZZLES FOR OPERATION WITH ANOTHER TYPE OF GAS:
To change the hob burner nozzles, proceed as follows:
1. Unplug the appliance from the mains, to avoid all electrical contact.
2. Remove the pan supports from the hob (Figure 7).
3. Remove the burner heads (Figure 7).
4. Use a 7 mm tubular hex wrench to loosen the nozzles and replace them with those suitable for the new type of
gas (Figure 8) as indicated in table no. 1.
To change the oven burner nozzle proceed as follows:
1. Remove the hob by removing screws G (Figure 9) and then the hob.
2. Loosen screw and remove the burner from its housing, taking care to avoid damaging the spark ignition and V
thermocouple (Figure 10).
3. Use a 7 mm tubular hex wrench to replace nozzle R with a nozzle suitable for the new type of gas as indicated
in table no. 1.
To change the grill burner nozzle proceed as follows:
1. Loosen the grill screw and remove the burner from its housing, taking care to avoid damaging the spark ignition
and thermocouple (Figure 11).
2. Use a 7m tubular hex wrench to replace nozzle R with a nozzle suitable for the new type of gas as indicated in
table no. 1.
NOTE: After replacing the nozzles, the installer shall adjust the burners as described below, seal any
regulation and pre-regulation devices, and affix the new gas regulation label, to replace the existing one.
This new label is in the bag with the spare nozzles.


Produkt Specifikationer

Mærke: La Germania
Kategori: Komfur
Model: RI6 4C 71 B X
Afrimningsfunktion: Ja
Vekselstrømsindgangsspænding: 220 - 240 V
Vekselstrømsindgangsfrekvens: 50 - 60 Hz
Bredde: 595 mm
Dybde: 600 mm
Højde: 940 mm
Produktfarve: Rustfrit stål
Kontroltype: Dreje
Indbygget skærm: Ingen
Produkttype: Fritstående komfur
Strøm: 6.5 A
Husmateriale: Rustfrit stål
Indvendig belysning: Ja
Grill: Ja
Konvektion madlavning: Ja
Justerbare fødder: Ja
Komfurtype: Gaskomfur
Overfladetype: Emalje stål
Antal kogeplader / madlavningsområde: 4
Blus/kogeplade zone 1 strøm: 3500 W
Blus/kogeplade zone 2 strøm: 1750 W
Blus/kogeplade zone 1 type: Wok
Blus/kogeplade zone 1 position: Venstre front
Blus/kogeplade zone 1 strømkilde: Gas
Blus/kogeplade zone 2 type: Lille
Blus/kogeplade zone 2 position: Venstre bagende
Blus/kogeplade zone 2 strømkilde: Gas
Kontrolposition: Front
Blus/kogeplade zone 3 type: Stor
Blus/kogeplade zone 4 type: Mellem
Blus/kogeplade zone 4 strømkilde: Gas
Blus/kogeplade zone 3 strømkilde: Gas
Blus/kogeplade zone 3 position: Højre bagende
Blus/kogeplade zone 4 position: Højre forside
Energieffektivitetsklasse: A
Antal glasdørpaneler: 2
Ovn - størrelse: Medium
Samlet indvendig ovn kapacitet: 69 L
Strøm for samtlige ovne: - W
Antal ovne: 1
Ovn nettokapacitet: 69 L
Energiforbrug (konventionel): - kWh
Højdejustering: 70 mm
Hurtig varme: Ja
Bageplade: Ja
Aftaglig ovndør: Ja
Antal hylder: 2 hylder
Antal hyldepositioner: 5
Højde (min.): 870 mm
Antal gasbrændere: 4
Blus/kogeplade zone 4 strøm: 3500 W
Blus/kogeplade zone 3 strøm: 3000 W
Elektronisk tænding: Ja
Ovn strømkilde: Elektrisk
Ovn samlet kapacitet: 69 L
Understøttet grydemateriale: Emaljeret stål
Ovnposition: Bund

Har du brug for hjælp?

Hvis du har brug for hjælp til La Germania RI6 4C 71 B X stil et spørgsmål nedenfor, og andre brugere vil svare dig