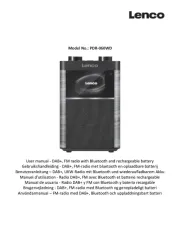
Lenco DAR-012 Manual
Læs gratis den danske manual til Lenco DAR-012 (56 sider) i kategorien Radio. Denne vejledning er vurderet som hjælpsom af 14 personer og har en gennemsnitlig bedømmelse på 5.0 stjerner ud af 7.5 anmeldelser. Har du et spørgsmål om Lenco DAR-012, eller vil du spørge andre brugere om produktet?
Side 1/56

Model DAR: -012
USER MANUAL
DAB+ FM radio with Bluetooth
HANDLEIDING
DAB+ FM radio met Bluetooth-
BEDIENUNGSANLEITUNG
DAB+/UKW Radio mit Bluetooth-
MODE D’EMPLOI
Radio FM DAB+ avec Bluetooth
MANUAL DEL USUARIO
Radio FM DA+ con Bluetooth

Index:
English 3........................................................................................................................................
Nederlands .............................................................................................................................. 13
Deutsch .................................................................................................................................... 24
Français .................................................................................................................................... 35
Español .................................................................................................................................... 46

English
DAR-012
CAUTION:
Usage of controls or adjustments or performance of procedures other than those specied
herein may result in hazardous radiaon exposure.
This unit should not be adjusted or repaired by anyone except qualified service personnel.
PRECAUTIONS BEFORE USE
KEEP THESE INSTRUCTIONS IN MIND:
1. Do not use this device near water.
2. Clean only with a slightly damp cloth.
3. Do not cover or block any venlaon openings. When placing the device on a shelf,
leave 5 cm (2”) free space around the whole device.
4. Install in accordance with the supplied user manual.
5. Don’t step on or pinch the power adaptor. Be very careful, parcularly near the plugs
and the cable’s exit point. Do not place heavy items on the power adaptor, which may
damage it. Keep the enre device out of children’s reach! When playing with the power
cable, they can seriously injure themselves.
6. Unplug this device during lightning storms or when unused for a long period.
7. Keep the device away from heat sources such as radiators, heaters, stoves candles and ,
other heat generang products.-
8. Avoid using the device near strong magnec elds.
9. Electrostac discharge can disturb normal usage of this device. If so, simply reset and
restart the device following the instrucon manual. During le transmission please ,
handle with care and operate in a stac free environment.-
10. Warning! Never insert an object into the product through the vents or openings. High
voltage ows through the product and inserng an object can cause electric shock
and/or short circuit internal parts. For the same reason, do not spill water or liquid on
the product.
11. not use in wet or moist areas such as bathrooms, steamy kitchens or near swimming Do
pools.
12. Do not use this device when condensaon may occur.
13. Although this device is manufactured with the utmost care and checked several mes
before leaving the factory, it is sll possible that problems may occur, as with all
electrical appliances. If you noce smoke an excessive build, -up of heat or any other
unexpected phenomena, you should disconnect the plug from the main power socket
immediately.
14. This device must be well venlated at all me!
15. This device must operate on a power source as specied on the specicaon label. If
you are not sure of the type of power supply used in your home, consult your dealer or
local power company.
16. The socket outlet must be installed near the equipment and must be easily accessible.
17. Do not overload ac outlets or extension cords. Overloading can cause re or electric
shock.
18. Devices with class 1 construcon should be connected to a main socket outlet with a
protecve earthed connecon.
19. Devices with class 2 construcon do not require a earthed connecon.
20. Keep away from rodents. Rodents enjoy bing on power cords.
21. Always hold the plug when pulling it out of the main supply socket. Do not pull the
power cord. This can cause a short circuit.
22. Avoid placing the device on any surfaces that may be subject to vibraons or shocks.
23. To protect the device during a thunderstorm, unplug the ac power adaptor.
24. When the device is not in use for long periods unplug the ac power adaptor for safety ,
reasons.
25. To clean the device, use a so dry cloth. Do not use solvents or petrol based uids. To
remove severe stains, you may use a damp cloth with dilute detergent.

26. The supplier is not responsible for damage or lost data caused by malfuncon misuse, ,
modicaon of the device or battery replacement.
27. Do not interrupt the connecon when the device is formang or transferring les.
Otherwise data may be corrupted or lost.,
28. The apparatus shall not be exposed to dripping or splashing and make sure that no
objects lled with liquids, such as vases, are placed on or near the apparatus.
29. To completely disconnect the power input, the mains plug of the apparatus shall be
disconnected from the mains, as the disconnect device is the mains plug of apparatus.
30. The mains plug of the apparatus should not be obstructed or should be easily accessed
during intended use.
31. Baery shall not be exposed to excessive heat such as sunshi , re or the like.ne
32. Minimum distance of 10cm around the apparatus is needed for sucient venlaons.
33. The venlaon should not be impeded by covering the venlaon openings with items
such as newspapers, table cloths curtains etc.-,
34. No naked ame sources such as lighted candles should be placed on the apparatus.
35. Aenon should be drawn to the environmental aspects of baery disposal.
36. The apparatus can only be used in moderate extremely cold or climates warm
environments should be avoided.
37. The rang label has been marked on the boom panel of the apparatus.
38. This device is not intended for use by people (including children) with physical, sensory
or mental disabilies, or a lack of experience and knowledge, unless they’re under
supervision or have received instrucons about the correct use of the device by the
person who is responsible for their safety.
39. This product is intended for household use only and not for commercial or industrial
use.
40. Make sure the unit is adjusted to a stable posion. Damage caused by using this
product in an unstable posion or by failure to follow any other warning or precauon
contained within this user manual will not be covered by warranty.
41. Never remove the casing of this apparatus.
42. Never place this apparatus on other electrical equipment.
43. Do not use or store this product in a place where it is subject to direct sunlight, heat,
excessive dust or vibraon.
44. Do not clean this product with water or other liquids.
45. Do not block or cover the slots and holes in the product.
46. Do not push foreign objects into the slots or holes in the product.
47. Do not allow children access to plasc bags.
48. Please check that the voltage on the type plate of your appliance corresponds with
your house electricity supply (type plate is located on the back of the unit).
49. Protect the power cord from being walked on or pinched, parcularly at plugs,
convenience receptacles, and the point where they exit from the apparatus.
50. Only use attachments/accessories specied by the manufacturer.
51. Refer all servicing to qualied service personnel. Servicing is required when the
apparatus has been damaged in any way, such as the power supply cord or the plug,
when liquid has been spilled or objects have fallen into the apparatus, when the
apparatus has been exposed to rain or moisture, does not operate normally, or has
been dropped.
52. Do not use a damaged power cord or plug or a loose outlet. Doing so may result in re
or electric shock.
53. Warning prolonged exposure to loud sounds from personal music players may lead to :
temporary or permanent hearing loss.
INSTALLATION
• Unpack all parts and remove protecve material.
• Do not connect the unit to the mains before checking the mains voltage and before all
other connecons have been made.
• Do not cover any vents and make sure that there is a space of several cenmeters around
the unit for venlaon.

1. Volume Knob
2. Power Buon
3. Funcon Button
4. Preset Buon
5. Dimmer Button
6. Menu/Alarm Buon
7. Select/Time Button
8. Info Buon
9. Scan/Pair Buon
10. LENS
11. LCD Display
12. Tuning/Enter knob
13. AUX IN le
14. AUX IN right
15. Baery Compartment
16. Clock Back up Baery (Baeries not included)
17. FM Telescopic antenna
18. AC Power Cord
Instrucons
Basic operaons
Mains Connection
Make sure that all of the components are connected correctly.
Check that the voltage level required by your equipment matches the local mains supply,
namely 110 220V/AC- -60/50Hz. Plug the AC plug into the wall outlet.
Clock back up baery
- Open the baery compartment cover
- Insert 2xAAA size 1.5V batteries, ensuring correct polarity as indicated inside the baery
compartment.
NOTE Check your baeries regularly, old or discharged baeries may leak and damage the :
unit. When replacing batteries always ensure you do not mix old and new baeries and
replace with the same type baeries.

- Press and hold “SCAN” to search radio staons automacally and the staons found
will be stored in a DAB program list. The rst stored staon will be played aer the
scan is completed. Use the “TUNING” knob to select one of the staons stored in the
program list.
Press “INFO” to check informaon in DAB program:
- Text Informaon “Playing” appears if nothing is to be shown;,
- Signal strength;
- Program type, “No PTY” appears if nothing is to be shown;
- Radio staon name;
- Staon Frequency. Example: 5A 174.928MHz;
- Signal error;
- Bit rate and radio frequency, such as 192kbps/DAB+;
- Radio Staon Time, “No Time” appears if nothing is to be shown;
- Radio Staon Date, “No Date” appears if nothing is to be shown;
Press “MENU” to enter DAB menu turn “TUNING” to set:,
- <Manual tune>manual tuning can be used to search manually for a specic :
frequency. Turn the “TUNING” knob to select the requested frequency and then
press the “TUNING” knob to use the selected frequency.
- <Prune> Remove invalid radio staons from the DAB channel list. which means :
delete Staons without signal aer a full scan
- <System> System seng: (See Submenu opons below)
- <Language> DAB system language Press “TUNING” knob to select language, default :
is English. There are 4 languages, you can choose Deutsch, Italiano, Francais : ,
Portuguese The selected language has a “*” mark;
- <Factory Reset> Full reset to factory setngs Press “TUNING” knob to reset. Note: :
Aer factory reset the default mode is DAB radio.,
- <SW Version> Will show the actual rmware version
DAB Programming:
- Preset Store Staon storing Press and hold the “P.SET” buon to enter the “Preset store” : :
modus. Use the “TUNING” knob to select the desired preset locaon. The unused
presets will have (empty) displayed. You can overwrite an exisng or empty preset by
selecng it and pressing the “TUNING” knob.
- Preset Recall staon recall Press the “P.SET” buon to enter the “Preset recall” modus. : :
Turn the “TUNING” knob to select your favorite stored preset staon and then press the

“TUNING". The selected staon will be played.

Aux in funcon
Switch the unit on by pressing the “POWER” button.
- Press the “FUNCTION” button unl “AUX mode” is shown on the display.
- Now you can play music from other music devices (MP3, CD player, Smartphone etc.)
connected to the RCA aux in connecons on the back of the unit.
Bluetooth funcon
- Press the “FUNCTION” button unl “BT mode” is shown on the display.
- -If the Lenco DAR 012 has never been paired or cannot nd the last paired device, the
display will show “UNCONNECT”. This means the unit is in search mode. Please follow
the instrucons below to pair your Bluetooth device with the Lenco DAR-012.
- When pairing was successful, the display will show “CONNECTED”.
- By pressing the “PAIR/SCAN” buon you can PLAY/PAUSE the song.
- Turn the “TUNING” knob to play previous or next song.
- Press and hold the “PAIR/SCAN” buon for 3 seconds to pair with another Bluetooth
device
Notes If your Bluetooth enabled device does not support A2DP prole it will not play the : ,
music through the speaker, even if paired (linked).
Clock and Alarm Operaon
- If the radio is powered off, you can turn on the display light for a few seconds by pressing
any buon.
Setng the alarm
- Make sure the radio is turned o. Press and hold the “MENU” buon unl the hour
indicator starts to blink. You can set the hour by turning the “TUNING” knob and when
you have reached the desired hour me, press the “TUNING” knob to conrm. Now you
can set the minutes by turning the “TUNING” knob again and pressing the “TUNING”
knob to conrm.
Aer conrming the minutes you may set the alarm sound (BUZZER DAB or FM) by turning ,
the “TUNING” knob and conrm by pressing the “TUNING” knob
Setng the me
- Make sure the radio is turned o. Press and hold the “SELECT” buon unl “Time setup”
is shown on the display. Turn the “TUNING” knob unl you see “Set Clock” and select it
by pressing the “TUNING” knob.
You can set the hour by turning the “TUNING” knob and when you have reached the
desired hour me, press the “TUNING” knob to conrm. Now you can set the minutes by
turning the “TUNING” knob again and pressing the “TUNING” knob to conrm.
Produkt Specifikationer
Mærke: | Lenco |
Kategori: | Radio |
Model: | DAR-012 |
Har du brug for hjælp?
Hvis du har brug for hjælp til Lenco DAR-012 stil et spørgsmål nedenfor, og andre brugere vil svare dig
Radio Lenco Manualer
26 Juli 2025
25 Juli 2025
25 Juli 2025
25 Juli 2025
25 Juli 2025
9 Juli 2025
20 Februar 2025
30 Januar 2025
6 Oktober 2024
29 September 2024
Radio Manualer
- EKO
- Irox
- Krüger&Matz
- Muse
- Topcom
- Audio-Technica
- Yamazen
- Audio Pro
- Prunus
- Mesqool
- Ricatech
- Polk
- Mebby
- Infinity
- Telefunken
Nyeste Radio Manualer
28 August 2025
28 August 2025
27 August 2025
27 August 2025
26 August 2025
24 August 2025
24 August 2025
24 August 2025
22 August 2025
22 August 2025