Motorola MBP662CONNECT-4 Manual
Læs nedenfor 📖 manual på dansk for Motorola MBP662CONNECT-4 (12 sider) i kategorien Babyalarm. Denne guide var nyttig for 16 personer og blev bedømt med 4.8 stjerner i gennemsnit af 8.5 brugere
Side 1/12

US EN
MODELS:
MBP662CONNECT
MBP662CONNECT-2
MBP662CONNECT-3
MBP662CONNECT-4
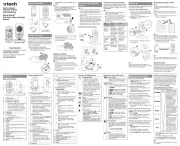
QUICK START GUIDE
For a full explanation of all features and instructions, please refer to the User’s Guide.
1. Setting up your Digital Video Baby Monitor
A. Baby unit power supply
Power adapter plug Slide to the ON position to
switch ON the Camera.
Give enough space
around the temperature
sensor.
Wall
2”
• Connect the power adapter to an electrical
outlet and insert the plug into the micro USB
socket on the back of the Baby Unit.
• Slide the ON/OFF switch to the ON position.
The power indicator LED will light up in green.
• Insert the wire tabs of the rechargeable
battery pack into the contact slots.
• Fit the battery pack into the compartment.
• Place the battery cover over the
compartment and gently tighten the screw
in a clockwise direction using a small cross-
head or flat-head screwdriver.
B. Install battery pack for the Parent Unit C. Fasten cover for the Parent Unit D. Parent Unit power supply
Black
Red
• Connect the small plug of the Power
Adapter to the Parent Unit and the other
end to the electrical outlet. Only use the
enclosed adapter (6V DC/500mA).
WARNING:
Strangulation Hazard.
Children have STRANGLED
in cords. Keep this cord out
of the reach of children
(more than 3 feet away).
Never use extension cords
with AC Adapters. Only use
the AC Adapters provided.

US FR
MODÈLES :
MBP662CONNECT
MBP662CONNECT-2
MBP662CONNECT-3
MBP662CONNECT-4
GUIDE DE DÉMARRAGE RAPIDE
Pour le détail des fonctionnalités et les instructions d’utilisation, veuillez consulter le guide de
l’utilisateur.
1. Installation de votre moniteur vidéo numérique pour bébé
A. Alimentation électrique de l’unité bébé
Fiche de l’adaptateur
secteur.
Faites glisser le
commutateur sur ON pour
allumer la caméra.
Laissez suffisamment
d'espace autour du
capteur de température.
Mur
2”
• Branchez l’adaptateur secteur à une prise de
courant adéquate et insérez le connecteur micro
USB de l’adaptateur dans la prise micro USB au
dos de l'unité bébé.
• Faites glisser le commutateur ON/OFF sur ON.
La LED d’alimentation s’allume en vert.
• Insérez la fiche du bloc-piles dans la prise à
l'intérieur du logement du bloc-piles.
• Placez le bloc-piles dans son logement.
• Remettez en place le couvercle du
logement du bloc-piles et vissez
doucement la vis dans le sens horaire à
l’aide d’un petit tournevis cruciforme ou
plat.
B. Mise en place du bloc-piles de l’unité
parents
C.
Fixation du capot du bloc-piles de
l'unité parents
D. Alimentation électrique de
l’unité parents
Noir
Rouge
• Connectez la petite fiche de l’adaptateur
secteur à l'unité parents et branchez
l'adaptateur à une prise de courant.
Utilisez uniquement l'adaptateur secteur
fourni (6V CC/500mA).
ATTENTION :
Risque d'étranglement : des
enfants se sont accidentellement
ÉTRANGLÉS dans des cordons.
Tenez ce cordon hors de portée
des enfants (à plus d'un mètre de
distance). N'utilisez jamais de
rallonges avec les adaptateurs
secteur. Utilisez uniquement les
adaptateurs secteur fournis.
Produkt Specifikationer
Mærke: | Motorola |
Kategori: | Babyalarm |
Model: | MBP662CONNECT-4 |
Har du brug for hjælp?
Hvis du har brug for hjælp til Motorola MBP662CONNECT-4 stil et spørgsmål nedenfor, og andre brugere vil svare dig
Babyalarm Motorola Manualer
30 November 2024

30 November 2024

30 Oktober 2024

30 Oktober 2024

30 August 2024

30 August 2024

30 August 2024

23 August 2024

23 August 2024

22 August 2024
Babyalarm Manualer
- Babyalarm Modern-Electronics
- Babyalarm Heimvision
- Babyalarm Binatone
- Babyalarm Marmitek
- Babyalarm Trebs
- Babyalarm Duux
- Babyalarm Beurer
- Babyalarm Geemarc
- Babyalarm Albrecht
- Babyalarm Amplicomms
- Babyalarm Olympia
- Babyalarm Lupilu
- Babyalarm Miniland
- Babyalarm IBaby
- Babyalarm Tommee Tippee
Nyeste Babyalarm Manualer

4 Juni 2025

6 April 2025

8 Marts 2025

1 Marts 2025

27 Februar 2025

25 Februar 2025

24 Februar 2025

24 Februar 2025

10 Februar 2025

10 Februar 2025