ORNO OR-CR-212 Manual


Læs gratis den danske manual til ORNO OR-CR-212 (5 sider) i kategorien Ikke kategoriseret. Denne vejledning er vurderet som hjælpsom af 14 personer og har en gennemsnitlig bedømmelse på 4.6 stjerner ud af 7.5 anmeldelser. Har du et spørgsmål om ORNO OR-CR-212, eller vil du spørge andre brugere om produktet?

Side 1/5
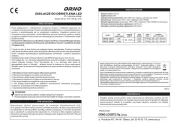
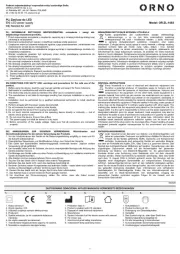
OR- - 2CR 21
(PL) Mikrofalowy czujnik ruchu
(EN) Microwave motion sensor
(DE) Mikrowellen-Bewegungssensor
ORNO-LOGISTIC Sp. z o.o.
ul. Rolników 437
44-141 Gliwice POLAND
tel. (+48) 32 43 43 110
(PL) WAŻNE!
Przed rozpoczęciem korzystania z urządzenia, należy zapoznać się z niniejszą instrukcją obsługi oraz zachowaćna przyszłość. Dokonanie samodzielnych napraw
i modyfikacji skutkuje utratą gwarancji. Producent nie odpowiada za uszkodzenia mogące wyniknąć z nieprawidłowego montażu czy eksploatacji urządzenia.
Z uwagi na fakt, że dane techniczne podlegają ciągłym modyfikacjom, Producent zastrzega sobie prawo do dokonywania zmian dotyczących charakterystyki wyrobu
oraz wprowadzania innych rozwiązań konstrukcyjnych niepogarszających parametrów i walorów użytkowych produktu.
Najnowsza wersja instrukcji do pobrania na stronie www.orno.pl. Wszelkie prawa do tłumaczenia/interpretowania oraz prawa autorskie niniejszej instrukcji
zastrzeżone.
1. Wszelkie czynności wykonuj przy odłączonym zasilaniu.
2. Nie zanurzaj urządzenia w wodzie i innych płynach.
3. , gdy uszkodzona jest obudowa. Nie obsługuj urządzenia
4. Nie otwieraj urządzenia i nie dokonuj samodzielnych napraw.
5. Nie używaj urządzenia niezgodnie z jego przeznaczeniem.
6. Instalacji może dokonywać elektryk lub osoba doświadczona.
7. Nie wykorzystuj przedmiotów niestabilnych jako podstawy instalowania.
8. j Przed urządzeniem nie umieszcza przedmiotów mogących zakłócić pracę czujnika.
9. Nie otwieraj obudowy po podłączeniu do zasilania.
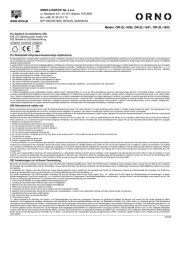
(EN) IMPORTANT!
Before using the device, read this Service Manual and keep it for future use. Any repair or modication carried out by yourselves results in loss of guarantee. The
manufacturer is not responsible for any damage that can result from improper device installation or operation.
In view of the fact that the technical data are subject to continuous modications, the manufacturer reserves a right to make changes to the product characteristics
and to introduce dierent constructional solutions without deterioration of the product parameters or functional quality.
The latest version of the Manual can be downloaded from www.orno.pl. Any translation/interpretation rights and copyright in relation to this Manual are reserved.
1. Disconnect the power supply before any activities on the product.
2. Do not immerse the device in water or other uids.
3. Do not operate the device when its housing is damaged.
4. Do not open the device and do not repair it by yourselves.
5. Do not use the device against its intended use.
6. Installation works can only be carried out by a professional electrician or an experienced person.
7. Do not use unstable objects as the basis for installation.
8. Do not place objects that could interfere with the sensor operation before the device.
9. Do not open the housing when device is connected to the power supply.
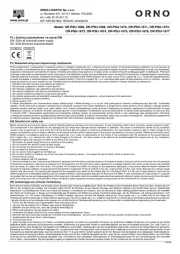
(DE) WICHTIG!
Bevor Sie das Gerät anschließen und benutzen, lesen Sie bitte diese Anleitung sorgfältig durch. Eigene Reparaturen und Modifikationen führen zum Verlust der
Garantie. Der Hersteller haftet nicht für Schäden, die durch unsachgemäße Montage oder Bedienung des Gerätes entstehen können.
Da technische Daten ständigen Modifikationen unterliegen, behält sich der Hersteller das Recht vor, Änderungen bezüglich Erzeugnischarakteristik und anderer
Konstruktionsänderungen vorzunehmen, die Parameter und Nutzwerte des Produkts nicht beeinträchtigen.
Aktuelle Version zum Herunterladen unter www.orno.pl. Alle Rechte an Übersetzung/Dolmetschen und Urheberrechten an dieser Bedienungsanleitung sind
vorbehalten.
1. Alle Arbeiten dürfen nur bei abgeschalteter Stromversorgung durchgeführt werden.
2. Tauchen Sie das Gerät nicht ins Wasser oder in andere Flüssigkeiten.
3. Nutzen Sie das Gerät nicht, wenn ihre Gehäuse beschädigt ist.
4. Öffnen Sie die Einrichtung nicht und führen Sie keine selbstständigen Reparaturen aus.
5. Verwenden Sie das Gerät nicht unsachgemöß.
6. Die Montage und Installation kann von einem Elektriker oder einer erfahrenen Person durchgeführt werden.
7. Verwenden Sie keine instabilen Gegen stände als Basis für die Installation.
8. Stellen Sie vor das Gerät keine Gegenstände, die den Betrieb des Sensors stören könnten.
9. Öffnen Sie das Gehäuse nicht, wenn das Gerät an die Stromversorgung angeschlossen ist.
Każde gospodarstwo jest ytkownikiem sprzętu elektrycznego i elektronicznego, a co za tym idzie potencjalnym wytwórcą niebezpiecznego dla ludzi i środowiska odpadu
z tytułu obecności w sprzęcie niebezpiecznych substancji, mieszanin oraz części sadowych. Z drugiej strony zużyty sprzęt to cenny materiał, z którego możemy odzyska
surowce takie jak miedź, cyna, szkło, żalazo i inne.
Symbol przekreślonego kosza na śmieci umieszczany na sprzęcie, opakowaniu lub dokumentach do niego dołączonych oznacza, że produktu nie wolno wyrzuc łącznie
z innymi odpadami. Oznakowanie oznacza jednocześnie, że sprzęt został wprowadzony do obrotu po dniu 13 sierpnia 2005 r. Obowiązkiem użytkownika jest przekazanie
zużytego sprzętu do wyznaczonego punktu zbiórki w celu aściwego jego przetworzenia. Informacje o dostępnym systemie zbierania zytego sprzętu elektrycznego można
znaleźć w punkcie informacyjnym sklepu oraz w urzędzie miasta/gminy.
Odpowiednie postępowanie ze zużytym sprzętem zapobiega negatywnym konsekwencjom dla środowiska naturalnego i ludzkiego zdrowia!
Each household is a user of electrical and electronic equipment, and hence a potential producer of hazardous waste for humans and the environment, due to the presence o
hazardous substances, mixtures and components in the equipment. On the other hand, used equipment is valuable material from which we can recover raw materials such as
copper, tin, glass, iron and others.
The weee sign placed on the equipment, packaging or documents attached to it indicates the need for selective collection of waste electrical and electronic equipment. Products
so marked, under penalty of ne, cannot be thrown into ordinary garbage along with other waste. The marking means at the same time that the equipment was placed on the
market after August 13, 2005. It is the responsibility of the user to hand the used equipment to a designated collection point for proper processing. Used equipment can also be
handed over to the seller, if one buys a new product in an amount not greater than the new purchased equipment of the same ty . Information on the available collection systempe
of waste electrical equipment can be found in the information desk of the store and in the municipal oce or district oce. Proper handling of used equipment prevents negative
consequences for the environment and human health!
Jeder Haushalt ist ein Nutzer von elektrischen und elektronischen Geräten und dadurch auch ein potenzieller Produzent von für Menschen und Umwelt gefährlichen Abfällen
aufgrund der sich drin befindenden gefährlichen Stoffe, Mischungen und Bestandteile. Andererseits sind die gebrauchten Geräte auch ein wertvoller Stoff, aus denen wir Rohstoffe
wie: Kupfer, Zinn, Glas, Eisen und andere wieder verwerten können.
Das Zeichen einer durchgestrichenen Mülltonne auf dem Gerät, der Verpackung oder in den Dokumenten, die dem Gerät beigelegt sind, weist darauf hin, dass die elektronischen
und elektrischen Altgeräte getrennt gesammelt werden müssen. Die so gekennzeichneten Produkte dürfen nicht im normalen Hausmüll mitsamt anderen Abfällen entsorgt werden
unter Androhung einer Geldbuße. Das Zeichen bedeutet auch, dass das Gerät nach dem 13. August 2005 in den Verkehr gebracht wurde. Der Nutzer ist verpflichtet, das Altgerät
an die angewiesene cknahmestelle zu übermitteln, damit es richtig wieder verwertet wird. Beim Kauf von neuen Geräten kann man die Altgeräte in gleicher Menge und Art
beim Verkäufer zurückgeben. Die Informationen über das System der Sammlung der elektrischen Altgeräte kann man sich bei einem Auskunftspunkt des Ladens sowie bei de
Stadt-/Gemeindeverwaltung einholen. Der richtige Umgang mit den Altgeräten verhindert negative Konsequenzen für die Umwelt und die Gesundheit!
07/ 2020
2
MONT INSTALLATION/ MONTAGE/
PL
Instrukcja obsługi i montażu
OPIS I ZASTOSOWANIE
Mikrofalowy (radarowy) czujnik ruchu z osłoną, jest aktywnym detektorem ruchu, który wysyła fale elektromagnetyczne wysokiej częstotliwości (5,8GHz) i odbiera ich
echo. Czujnik wykrywa zmiany w echu, wywołane nawet najmniejszym ruchem w obserwowanym obszarze. Niewielka emisja mocy (<0,2mW), potencjometry do
regulacji: czasu świecenia, zasięgu wykrywania ruchu i czułości natężenia światła. Detekcja ruchu przez szkło, tworzywa sztuczne, płyty kartonowo-gipsowe, brak
wpływu temperatury na detekc. Czujnik współpracuje z oświetleniem LED-owym.
FUNKCJE
Ustawienie natężenia światła LUX:
Umożliwia ustawienie poziomu natężenia oświetlenia, przy którym czujnik będzie mógł załączyć oświetlenie. Zabezpiecza to przed niepożądanym włączeniem oświetlenia
podczas dnia.
Ustawienie zasięgu (strefy działania) SENS:
służy do ustawienia promienia zasięgu czujnika. Po zamontowaniu czujnika na wysokości ok. 2,5m strefa wykrywania ruchu jest okręgiem, którego średnicę możemy
płynnie regulować.
Ustawienie zegara (czasu świecenia) TIME:
Umożliwia określenie czasu przez jaki urządzenie działało po aktywacji czujnika, czas świecenia czujnika jest regulowany w zakresie od ok. 10 sek. do12 min.
UWAGA
Wysoka częstotliwość wysyłana przez czujnik ma moc <0,2mW, czyli około 1/5000 mocy emitowanej przez telefon komórkowy.
INSTALACJA
1. Wyłącz zasilanie. Sprawdź odpowiednim przyrządem stan beznapięciowy na przewodach zasilających.
2. Zdejmij górną osłonę czujnika poprzez odkręcenie jej w kierunku przeciwnym do ruchu wskazówek zegara.
3. Przytrzymaj podstawę przy ścianie, a następnie zaznacz miejsce wywiercenia otworów.
4. Wywierć otwory i wstaw kołki rozporowe.
5. Przeprowadź przewody przez otwory w podstawie.
6. Dokręć podstawę.
7. Podłącz przewody pod zaciski zgodnie ze schematem podłączenia (rys. 2).
8. Dopasuj parametry pracy czujnika (LUX, TIME, SENS).
9. Załóż górną osłonę i przekręć ją zgodnie z ruchem wskazówek zegara (rys. 1).
10. Włącz zasilanie i przetestuj czujnik (patrz test urządzenia).
SPECYFIKACJA TECHNICZNA
Napięcie zasilania:
230VAC / 50 Hz
Częstotliwość pracy:
5,8 GHz
Max. obciążenie:
1200W
Kąt detekcji ruchu:
360°
Regulacja natężenia światła:
<3 – 2000 LUX
Regulacja czasu świecenia:
min: 10sek. ± 3sek.
max: 12min. ± 1min.
Regulacja zasięgu czujnika:
1-8 m (promień)
Pobór mocy:
około 0,9W
Prędkość wykrywanego ruchu:
0,6~1,5 m/s
Moc promieniowania:
<0.2mW
Wysokość instalacji:
1,5-3,5 m (ściana)
Stopień ochrony:
IP20
Waga netto:
0,04 kg
Wymiary:
96 mm (średnica) x 43,3 mm


Produkt Specifikationer

Mærke: ORNO
Kategori: Ikke kategoriseret
Model: OR-CR-212

Har du brug for hjælp?

Hvis du har brug for hjælp til ORNO OR-CR-212 stil et spørgsmål nedenfor, og andre brugere vil svare dig