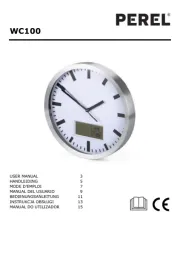
Perel WC120 Manual


Læs gratis den danske manual til Perel WC120 (5 sider) i kategorien Clockradio. Denne vejledning er vurderet som hjælpsom af 17 personer og har en gennemsnitlig bedømmelse på 4.8 stjerner ud af 9 anmeldelser. Har du et spørgsmål om Perel WC120, eller vil du spørge andre brugere om produktet?

Side 1/5
WC120
V. 01 28/08/2019 1 ©Velleman nv
WC1 20
USER MANUAL
1. Introduction
To all residents of the European Union
Important environmental information about this
product
This symbol on the device or the package indicates that
disposal of the device after its lifecycle could
harm the environment. Do not dispose of the
unit (or batteries) as unsorted municipal
waste; it should be taken to a specialized
company for recycling. This device should be
returned to your distributor or to a local
recycling service. Respect the local environmental rules.
If in doubt, contact your local waste disposal
authorities.
Thank you for choosing Velleman! Please read the
manual thoroughly before bringing this device into
service. If the device was damaged in transit, do not
install or use it and contact your dealer.
2. Safety Instructions
Read and understand this manual and all safety signs
before using this appliance Indoor use only. This . ● ●
device can be used by children aged from 8 years and
above, and persons with reduced physical, sensory or
mental capabilities or lack of experience and knowledge if
they have been given supervision or instruction
concerning the use of the device in a safe way and
understand the hazards involved. Children shall not play
with the device. Cleaning and user maintenance shall not
be made by children without supervision.
3. General Guidelines
Refer to the Velleman® Service and Quality Warranty on
www.velleman.eu All modifications of the device are .
forbidden for safety reasons. Damage caused by user
modifications to the device is not covered by the
warranty. Only use the device for its intended purpose.
Using the device in an unauthorised way will void the
warranty. Damage caused by disregard of certain
guidelines in this manual is not covered by the warranty
and the dealer will not accept responsibility for any
ensuing defects or problems. Nor Velleman nv nor its
dealers can be held responsible for any damage
(extraordinary, incidental or indirect) of any nature
(financial, physical…) arising from the possession, use or
failure of this product. Keep this manual for future
reference.
4. Overview
1. reset pin
4. protection pin
2. forced signal
reception button
5. battery compartment
3. manual setting
button
5. Battery
Remove the protection pin before first use! Dispose of it
in a safe way. Do not attempt to reinsert the pin
afterwards as this will surely damage the clock. Insert a
new battery in the battery compartment in accordance
with the polarity markings inside the battery
compartment.
6. Working Principle
The clock contains a receiver, which receives a radio-
signal from a radio station located near Frankfurt,
Germany. This long-wave radio-signal (DCF77) is based
on atomic clocks and contains time and date information.
The clock automatically synchronizes with this master
clock radio-signal and when necessary adjusts the
positions of second, minute or hour hands of the clock.
Due to its nature, the radio-signal can be received
indoors. However, it should be noted that the signal is
weakened by the presence of concrete and metal.
Therefore, the clock must not be installed in concrete
basements or inside metal cages. In large concrete office
buildings or apartments, the clock should be located near
a window for better reception. Also, avoid installing the
clock near strong magnetic fields or other devices that
generate a lot of electrical noise (e.g. engines).
7. Operation
General Operation
Note: Remove the protection pin before first use!
Dispose of it in a safe way. Do not attempt to reinsert the
pin afterwards as this will surely damage the clock.
Insert a battery in the battery compartment. All hands
will move forward towards 12:00. Note: when the original
position of the second hand is between 11:55 and 12:00,
the second hand will make a full turn before stopping at
12:00. The same happens with the minute hand when
the original position is between 11:52 and 12:00.
Choose a location for the clock (see Working
principle). Wait until the clock receives the
synchronization signal from the master clock. This might
take up to 7 minutes. Note that the received signal is
usually stronger at night. Once synchronized, the hands
will start moving towards the correct time. When the
clock does not receive the radio-signal, it will start
running showing the wrong time. However, it will keep
attempting to synchronize.
Manual Setting
It is possible to set the time manually, e.g. for use in
places where no radio-signal is received.
Press and hold the manual setting button. After
± 3 seconds the minutes and hour hands start moving.
Hold down the manual setting and release a couple of
minutes before desired time setting. Press the manual
setting button repeatedly until the desired time indication
is reached. When no press is detected within 7 seconds,
the clock starts running.
Forced Receiving
force the clock to synchronize, press and hold the To
forced reception button for ± 3 seconds. The current time
is stored in memory and all hands will start moving
towards 12:00. The clock attempts to synchronize with
the master clock. When synchronization is successful,
the hands will move towards the correct time. If it fails
however, the hands will move towards the time that was
memorized.
Reset
To reset the time and memory, press and hold the
reset button with a piece of metal (e.g. a blank
paperclip). All hands will move to the 12:00 position
and the memory is cleared. The clock will attempt to
synchronize to the master clock.
8. Maintenance
Occasionally wipe with a damp cloth to keep it looking
new. Do not use harsh chemicals, cleaning solvents or
strong detergents.
9. Specifications
power supply ............. 1 x 1.5 V AA/R6 battery (not incl.)
weight ................................................................. 15 g
overall dimensions ............................. 5.5 x 5.5 x 1.5 cm
second hand dimensions
length ........................................................... 10 cm
width ............................................................ 1 mm
thickness ....................................................... 1 mm
minute hand dimensions
length .......................................................... 5.7 cm
width ............................................................ 4 mm
thickness ....................................................... 1 mm
hour hand dimensions
length .......................................................... 4.5 cm
width ............................................................ 6 mm
thickness ....................................................... 1 mm
RED Declaration of Conformity
Hereby, Velleman NV declares that the radio equipment
type WC120 is in compliance with Directive 2014/53/EU.
The full text of the EU declaration of conformity is
available at the following internet address:
www.velleman.eu.
Use this device with original accessories only.
Velleman nv cannot be held responsible in the
event of damage or injury resulting from
(incorrect) use of this device. For more info
concerning this product and the latest version of
this manual, please visit our website www.perel.eu.
The information in this manual is subject to change
without prior notice.
© COPYRIGHT NOTICE
The copyright to this manual is owned by Velleman
nv. All worldwide rights reserved. No part of this
manual may be copied, reproduced, translated or
reduced to any electronic medium or otherwise without
the prior written consent of the copyright holder.
Handleiding
1. Inleiding
Aan alle ingezetenen van de Europese Unie
Belangrijke milieu-informatie betreffende dit
product
Dit symbool op het toestel of de verpakking geeft aan
dat, als het na zijn levenscyclus wordt
weggeworpen, dit toestel schade kan
toebrengen aan het milieu. Gooi dit toestel
(en eventuele batterijen) niet bij het gewone
huishoudelijke afval; het moet bij een
gespecialiseerd bedrijf terechtkomen voor
recyclage. U moet dit toestel naar uw verdeler of naar
een lokaal recyclagepunt brengen. Respecteer de
plaatselijke milieuwetgeving. Hebt u vragen,
contacteer dan de plaatselijke autoriteiten
betreffende de verwijdering.
Dank u voor uw aankoop! Lees deze handleiding grondig
door voor u het toestel in gebruik neemt. Werd het
toestel beschadigd tijdens het transport, installeer het
dan niet en raadpleeg uw dealer.
2. Veiligheidsvoorschriften
Lees en begrijp deze handleiding en de
veiligheidsinstructies ór ingebruikname. Gebruik het
toestel enkel binnenshuis. Dit toestel is geschikt voor
gebruik door kinderen vanaf 8 jaar, door personen met
fysieke, zintuiglijke of verstandelijke beperkingen, of door
personen met gebrek aan ervaring en kennis, op
voorwaarde dat dit onder toezicht gebeurt van een
persoon die verantwoordelijk is voor hun veiligheid of hun
aanwijzingen heeft gegeven, hoe zij het toestel moeten
gebruiken en zich bewust zijn van de risico's die het
gebruik van het toestel met zich meebrengt. Kinderen
mogen niet met het toestel spelen. De reiniging en het
onderhoud van het toestel mogen niet worden uitgevoerd
door kinderen, tenzij ze onder toezicht staan.
3. Algemene richtlijnen
Raadpleeg de Velleman® service- en kwaliteitsgarantie op
www.velleman.eu. Om veiligheidsredenen mag u geen
wijzigingen aanbrengen. Schade door wijzigingen die de
gebruiker heeft aangebracht aan het toestel valt niet
onder de garantie. Gebruik het toestel enkel waarvoor
het gemaakt is. De garantie vervalt automatisch bij
ongeoorloofd gebruik. De garantie geldt niet voor
schade door het negeren van bepaalde richtlijnen in deze
handleiding en uw dealer zal de verantwoordelijkheid
afwijzen voor defecten of problemen die hier rechtstreeks
verband mee houden. Noch Velleman nv noch zijn
verdelers kunnen aansprakelijk gesteld worden voor
schade (buitengewoon, incidenteel of onrechtstreeks)
van welke aard dan ook (financieel, fysisch…)
voortvloeiend uit het bezit, gebruik of falen van dit
product. Bewaar deze handleiding voor verdere
raadpleging.
4. Omschrijving
1. veiligheidspin
4. veiligheidspin
2. gedwongen
ontvangst
5. batterijvak
3. handmatige instelling
5. Batterij
Verwijder de veiligheidspin voor de eerste
ingebruikname! Verwijder de pin op een veilige manier.
Steek deze pin nooit terug in het gaatje, om
onherroepelijke schade te vermijden. ● Plaats een batterij
in het batterijvak. Respecteer de polariteit.
6. Over het DCF-signaal
De klok beschikt over een ontvanger, die de
radiogestuurde signalen (DCF77) van de zender in
Frankfurt kan ontvangen. De zender is gekoppeld aan
een atoomklok die de tijd- en datuminformatie bevat. De
klok zal de wijzers bij ontvangst van het DCF-signaal
automatisch met de atoomklok synchroniseren. Het
radiosignaal is gemakkelijk binnenshuis te ontvangen. De
ontvangst kan echter verzwakken indien er beton en
metaal aanwezig is. Installeer de klok daarom niet in een
kelder of in een metalen kooi. De beste montageplaats in
een kantoor of appartement, is naast een venster.
Installeer de klok niet in de nabijheid van magnetische
velden of toestellen die elektrische ruis voortbrengen (bv.
motor).
7. Gebruik
Algemeen
Opmerking: Verwijder de veiligheidspin voor de eerste
ingebruikname! Verwijder de pin op een veilige manier.
Steek deze pin nooit terug in het gaatje, om
onherroepelijke schade te vermijden.
Plaats een batterij in het batterijvak. Alle wijzers
plaatsen zich automatisch op 12:00. Opmerking:
wanneer de secondewijzer tussen 11:55 en 12:00 staat,
maakt deze eerst een volledige omwenteling alvorens
zich op 12:00 te plaatsen. Hetzelfde gebeurt wanneer de
minutenwijzer tussen 11:52 en 12:00 staat. Kies een
geschikte montageplaats (zie ). Over het DCF-signaal
Wacht tot de klok het DCF-signaal ontvangt. Dit kan tot
7 minuten duren. Het DCF-signaal is meestal sterker 's
nachts. Eenmaal de klok is gesynchroniseerd, plaatsen
de wijzers zich op het correcte uur. Wanneer de klok
het signaal niet kan ontvangen, zal deze toch
functioneren. De klok blijft proberen het DCF-signaal te
ontvangen.
WC120
V. 01 28/08/2019 2 ©Velleman nv
Handmatige instelling
Stel de klok handmatig in, wanneer er geen DCF-signaal
kan ontvangen worden.
Houd de instelknop ingedrukt. Na ± 3 seconden
verplaatsen de Laat de instelknop enkele wijzers zich.
minuten vóór de correcte tijd los. Druk de instelknop
herhaaldelijk in tot de klok de correcte tijd weergeeft.
De klok loopt 7 seconden na de laatste druk op een
knop.
Gedwongen ontvangst
Houd de ontvangstknop ± 3 seconden ingedrukt, om de
klok te dwingen om zich te synchroniseren. De
aangeduide tijd wordt opgeslagen en de wijzers
verplaatsen zich naar 12:00. De klok probeert zich nu te
synchroniseren. Na de synchronisatie verplaatsen de
wijzers zich naar de correcte tijd. Is dit niet het geval,
dan verplaatsen de wijzers zich naar de opgeslagen tijd.
De klok resetten
Houd de resetknop ingedrukt (met bv. een paperclip)
om de tijd en het geheugen te resetten. De wijzers
verplaatsen zich naar 12:00 en het geheugen wordt
gewist. De klok zal zich daarna opnieuw met het DCF-
signaal proberen te synchroniseren.
8. Onderhoud
Reinig het toestel af en toe met een vochtige doek.
Gebruik geen bijtende chemische producten,
reinigingsmiddelen of sterke detergenten.
9. Specificaties
voeding ........... 1 x 1.5 V AA/R6-batterij (niet meegelev.)
gewicht ............................................................... 15 g
afmetingen ....................................... 5.5 x 5.5 x 1.5 cm
afmetingen secondewijzer
lengte ........................................................... 10 cm
breedte ......................................................... 1 mm
dikte ............................................................. 1 mm
afmetingen minutenwijzer
lengte .......................................................... 5.7 cm
breedte ......................................................... 4 mm
dikte ............................................................. 1 mm
afmetingen uurwijzer
lengte .......................................................... 4.5 cm
breedte ......................................................... 6 mm
dikte ............................................................. 1 mm
RED-conformiteitsverklaring
Hierbij verklaart Velleman nv, dat dit type
radioapparatuur [WC120] conform is met richtlijn
2014/53/EU.
Raadpleeg de volgende website voor de volledige tekst
van de -conformiteitsverklaring: www.velleman.eu. EU
Gebruik dit toestel enkel met originele accessoires.
Velleman nv is niet aansprakelijk voor schade of
kwetsuren bij (verkeerd) gebruik van dit toestel.
Voor meer informatie over dit product en de laatste
versie van deze handleiding, zie www.perel.eu. De
informatie in deze handleiding kan te allen tijde
worden gewijzigd zonder voorafgaande
kennisgeving.
© AUTEURSRECHT
Velleman nv heeft het auteursrecht voor deze
handleiding. Alle wereldwijde rechten
voorbehouden. Het is niet toegestaan om deze
handleiding of gedeelten ervan over te nemen, te
kopiëren, te vertalen, te bewerken en op te slaan op een
elektronisch medium zonder voorafgaande schriftelijke
toestemming van de rechthebbende.
Mode d'emploi
1. Introduction
Aux résidents de l'Union européenne
Informations environnementales importantes
concernant ce produit
Ce symbole sur l'appareil ou l'emballage indique que
l’élimination d’un appareil en fin de vie peut
polluer l'environnement. Ne pas jeter un
appareil électrique ou électronique (et des
piles éventuelles) parmi les déchets
municipaux non sujets au tri sélectif ; une
déchetterie traitera l’appareil en question.
Renvoyer l'appareil à votre fournisseur ou à un service de
recyclage local. Respecter la glementation locale
relative à la protection de l’environnement. En cas de
questions, contacter les autorités locales pour
élimination.
Nous vous remercions de votre achat ! Lire attentivement
le présent mode d'emploi avant la mise en service de
l’appareil. Si l'appareil a été endommagé pendant le
transport, ne pas l’installer et consulter votre revendeur.
2. Consignes de sécurité
Lire et comprendre ce mode d'emploi et toutes les
consignes de sécurité avant d'utiliser l'appareil. Utiliser
à l'intérieur uniquement. Cet appareil peut être utilisé
par des enfants âgés de 8 ans et plus et des personnes
manquant d’expérience et de connaissances ou dont les
capacités physiques, sensorielles ou mentales sont
réduites, si elles ont été formées et encadrées quant à
l'utilisation de l'appareil d'une manière sûre et
connaissent les risques encourus. Ne pas laisser les
enfants jouer avec l'appareil. Le nettoyage et l'entretien
ne doivent pas être effectués par des enfants sans
surveillance.
3. Directives générales
Se référer à la garantie de service et de qualité
Velleman® sur www.velleman.eu. Toute modification
est interdite pour des raisons de sécurité. Les dommages
occasionnés par des modifications par le client ne
tombent pas sous la garantie. N’utiliser l'appareil qu’à
sa fonction prévue. Un usage impropre annule d'office la
garantie. ● La garantie ne se s’appliqu e pas aux
dommages survenus en négligeant certaines directives de
ce mode d'emploi et votre revendeur déclinera toute
responsabilité pour les problèmes et les défauts qui en
résultent. Ni Velleman nv ni ses distributeurs ne
peuvent être tenus responsables des dommages
exceptionnels, imprévus ou indirects, quelles que soient
la nature (financière, corporelle, etc.), causés par la
possession, l’utilisation ou le dysfonctionnement de ce
produit. Garder ce mode d'emploi pour toute référence
ultérieure.
4. Description
1. ergot de verrouillage
4. ergot de verrouillage
2. réinitialisation forcée
5. compartiment à piles
3. réglage manuel
5. La pile
Retirer l'ergot de verrouillage avant le premier emploi !
Le jeter en toute sécurité. Ne jamais réinsérer l'ergot afin
de ne pas endommager l'horloge de manière irrévocable.
Insérer une pile de 1.5 V dans le compartiment à piles.
Respecter la polarité.
6. Principe de fonctionnement
L'horloge intègre un récepteur qui capte le signal DCF
transmis par l'émetteur situé près de Francfort en
Allemagne. Cet émetteur est connec à une horloge
atomique qui contient les données de temps et de date.
L'horloge se synchronise automatiquement avec l'horloge
atomique pour régler les aiguilles. Il est possible de
capter parfaitement ce signal radio à l'intérieur d'un
immeuble. Sa puissance sera cependant affaiblie par la
présence de béton et de métal. Il est donc préférable de
ne pas monter l'horloge dans des caves ou dans un
endroit sur-isolé. L'endroit le plus approprié dans un
bureau ou un appartement en béton est près d'une
fenêtre. ● Ne pas installer l'horloge à proximité d'un
champ magnétique ou d'un appareil générant un bruit
électrique (p. ex. un moteur).
7. Emploi
Général
Note : Retirer l'ergot de verrouillage avant le premier
emploi ! Jeter le en toute sécurité. Ne jamais réinsérer
l'ergot afin de ne pas endommager l'horloge de manière
irrévocable.
Insérer la pile dans le compartiment à piles. Toutes les
aiguilles se déplaceront vers 12:00. Note : la trotteuse
fera un tour de cadran complet lorsqu'elle se situe entre
11:55 et 12:00. La même chose se produit lorsque la
grande aiguille se situe entre 11:52 et 12:00. Choisir
l'emplacement pour l'horloge (voir Principe de
fonctionnement). ● Attendre jusqu'à ce que l'horloge se
soit synchronisée. Ceci peut durer jusqu'à 7 minutes.
Noter que le signal est généralement plus puissant la
nuit. Une fois l'horloge synchronisée, les aiguilles se
déplaceront vers l'heure exacte. Si le signal de
réception est trop faible, l'horloge se met en marche en
indiquant l'heure inexacte. Elle continuera d'essayer de
se synchroniser.
Réglage manuel
Régler l'horloge manuellement si le signal de réception
est trop faible.
Maintenir enfoncé le bouton de réglage manuel. Les
aiguilles se déplacent après ± 3 secondes. Relâcher le
bouton quelques minutes avant l'heure exacte. ● Appuyer
plusieurs fois sur le bouton de réglage manuel jusqu'à ce
que l'horloge affiche l'heure exacte. ● L'horloge se met en
marche 7 secondes après le dernier réglage.
Réception forcée
Pour effectuer une synchronisation forcée, maintenir
enfoncé le bouton de réception pendant ± 3 secondes.
L'heure affichée sera mémorisée et toutes les aiguilles se
déplaceront vers 12:00. L'horloge tentera de se
synchroniser avec l'horloge atomique. ● Une fois l'horloge
synchronisée, les aiguilles afficheront l'heure exacte.
Dans le cas contraire, l'horloge affichera l'heure
préalablement mémorisée.
Réinitialisation
Maintenir enfoncé le bouton de réinitialisation (p.ex.
avec un trombone) pour réinitialiser l'heure et la
mémoire. Les aiguilles se déplacent vers 12:00 et la
mémoire est effacée. L'horloge tentera de se
synchroniser avec l'horloge atomique.
8. Entretien
Nettoyer occasionnellement l'appareil avec un chiffon
humide. Ne pas utiliser d'agents chimiques agressifs, de
solvants ni de détergents puissants.
9. Spécifications
alimentation .............. 1 x pile AA/R6 de 1.5 V (non incl.)
poids .................................................................. 15 g
dimensions ....................................... 5.5 x 5.5 x 1.5 cm
dimensions de l'aiguille des secondes
longueur ........................................................ 10 cm
largeur .......................................................... 1 mm
épaisseur 1 mm .......................................................
dimensions de l'aiguille des minutes
longueur ....................................................... 5.7 cm
largeur .......................................................... 4 mm
épaisseur 1 mm .......................................................
dimensions de l'aiguille des heures
longueur ....................................................... 4.5 cm
largeur .......................................................... 6 mm
épaisseur 1 mm .......................................................
Déclaration de conformité RED
Par la présente, Velleman SA, déclare que le type
d'équipement radioélectrique [WC120] est conforme à la
norme 2014/53/EU.
Le texte complet de la déclaration de conformité est
disponible sur la page web suivante : www.velleman.eu.
N'employer cet appareil qu’avec des accessoires
d’origine. Velleman SA ne peut, dans la mesure
conforme au droit applicable être tenue
responsable des dommages ou lésions (directs ou
indirects) pouvant résulter de l’utilisation de cet
appareil. Pour plus d’informations concernant cet
article et la dernière version de ce mode d'emploi,
visiter notre site web www.perel.eu. Les
spécifications et le continu de ce mode d'emploi
peuvent être modifiés sans notification préalable.
© DROITS D’AUTEUR
Velleman SA est l’ayant droit des droits d’auteur de
ce mode d'emploi. Tous droits mondiaux réservés.
Toute reproduction, traduction, copie ou diffusion,
intégrale ou partielle, du contenu de ce mode d'emploi
par quelque procédé ou sur tout support électronique que
ce soit est interdite sans l’accord préalable écrit de
l’ayant droit.
MANUAL DEL USUARIO
1. Introducción
A los ciudadanos de la Unión Europea
Importantes informaciones sobre el medio
ambiente concerniente a este producto
Este símbolo en este aparato o el embalaje indica que, si
tira las muestras inservibles, podrían dañar
el medio ambiente. No tire este aparato (ni
las pilas, si las hubiera) en la basura
doméstica; debe ir a una empresa
especializada en reciclaje. Devuelva este
aparato a su distribuidor o a la unidad de
reciclaje local. Respete las leyes locales en relación con el
medio ambiente. Si tiene dudas, contacte con las
autoridades locales para residuos.
¡Gracias por elegir Velleman! Lea atentamente las
instrucciones del manual antes de usar el aparato. Si ha
sufrido algún daño en el transporte no lo instale y
póngase en contacto con su distribuidor.
2. Instrucciones de seguridad
Lea y comprenda este manual y todas las instrucciones
de seguridad antes de usar el aparato. ● Utilice el aparato
sólo en interiores. Este aparato no es apto para niños
menores de 8 años ni para personas con capacidades
físicas, sensoriales o mentales reducidas ni para personas
con una falta de experiencia y conocimientos del
producto, salvo si están bajo la vigilancia de una persona
que pueda garantizar la seguridad. Asegúrese de que los
niños no jueguen con este dispositivo. Nunca deje que los
niños limpien o manipulen el aparato sin supervisión.
3. Normas generales
Para más información sobre la Garantía de servicio y
calidad Velleman®, visite www.velleman.eu. Por
razones de seguridad, las modificaciones no autorizadas
del aparato están prohibidas. Los daños causados por
modificaciones no autorizadas, no están cubiertos por la
garantía. Utilice sólo el aparato para las aplicaciones
descritas en este manual. Su uso incorrecto anula la
garantía completamente. Los daños causados por
descuido de las instrucciones de seguridad de este
manual invalidarán su garantía y su distribuidor no será
responsable de ningún daño u otros problemas
r Ni Velleman nv ni sus distribuidores serán esultantes.
responsables de los daños extraordinarios, ocasionales o
indirectos, sea cual sea la índole (financiera, física, etc.),
causados por la posesión, el uso o el fallo de este
producto. ● Guarde este manual del usuario para cuando
necesite consultarlo.
4. Descripción
1. pin de bloqueo
4. pin de protección
2. botón de recepción
forzada
5. compartimento de
pilas
3. botón de ajuste
manual


Produkt Specifikationer

Mærke: Perel
Kategori: Clockradio
Model: WC120

Har du brug for hjælp?

Hvis du har brug for hjælp til Perel WC120 stil et spørgsmål nedenfor, og andre brugere vil svare dig


Clockradio Perel Manualer

Perel

Perel WC100 Manual

14 December 2024
Perel

Perel WC102 Manual

5 August 2024
Perel

Perel WC106 Manual

4 August 2024
Perel

Perel WC103 Manual

3 August 2024
Perel

Perel WC201 Manual

31 Juli 2024
Perel

Perel WC107 Manual

30 Juli 2024
Perel

Perel WC108 Manual

29 Juli 2024
Perel

Perel WC208 Manual

27 Juli 2024
Perel

Perel WC109 Manual

27 Juli 2024
Perel

Perel WC117 Manual

26 Juli 2024

Clockradio Manualer

Nyeste Clockradio Manualer