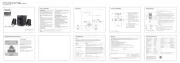
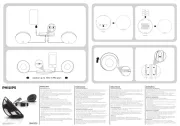
Philips SPA2300 Manual
Læs gratis den danske manual til Philips SPA2300 (2 sider) i kategorien Højttaler. Denne vejledning er vurderet som hjælpsom af 15 personer og har en gennemsnitlig bedømmelse på 4.4 stjerner ud af 8 anmeldelser.
Har du et spørgsmål om Philips SPA2300, eller vil du spørge andre brugere om produktet?

Produkt Specifikationer
| Mærke: | Philips |
| Kategori: | Højttaler |
| Model: | SPA2300 |
| Vekselstrømsindgangsspænding: | 220 V |
| Vekselstrømsindgangsfrekvens: | 50 Hz |
| Produktfarve: | Sort, sølv |
| Pakkevægt: | 4300 g |
| Pakkedybde: | 323 mm |
| Pakkebredde: | 268 mm |
| Pakkehøjde: | 304 mm |
| Bluetooth: | Ingen |
| Udgangseffekt (RMS): | 15.5 W |
| Volumenkontrol: | Digital |
| Antal: | 1 |
| Hurtig installationsvejledning: | Ja |
| Anbefalet brug: | Universel |
| Frekvensområde: | 55 - 20000 Hz |
| Forbindelsesteknologi: | Ledningsført |
| Lyd-output kanaler: | 2.1 kanaler |
| Strømkilde: | Vekselstrøm |
| LED-indikatorer: | Strøm |
| Peak Music-Udgangseffekt (PMPO): | 38 W |
| Hovedkassen højde (udvendigt): | 326 mm |
| Hovedkassens længde (udvendigt): | 1084 mm |
| Hovedkassens bruttovægt (udvendigt): | 15000 g |
| Hovedkassens bredde (udvendigt): | 333 mm |
| Garantibevis: | Ja |
| Antal udvendige papkasser: | 4 stk |
| Fjernbetjeningstype: | Ledningsført |
| AirPlay: | Ingen |
| Subwoofer RMS-effekt: | 12 W |
| Subwoofer driver diameter (britisk): | 5.25 " |
| Satellithøjttalere RMS-effekt: | 3.5 W |
| Antal satellithøjttalere: | 2 |
| Forstærkningsenhed inkluderet: | Ingen |
| Strømkabellængde: | 1.6 m |
| Basrefleks: | Ja |
| Magnetisk afskærmet: | Ja |
| Satellithøjttaler driver diameter: | 2.5 " |
| Line-in-tilsutning: | 3.5 mm |
Har du brug for hjælp?
Hvis du har brug for hjælp til Philips SPA2300 stil et spørgsmål nedenfor, og andre brugere vil svare dig
Højttaler Philips Manualer


Højttaler Manualer
- HEOS
- Renegade
- Showtec
- Escene
- Audio-Technica
- Hyundai
- Denon
- GGMM
- ATen
- Karcher Audio
- V-Moda
- HP
- Max
- DataVideo
- Uniden
Nyeste Højttaler Manualer


