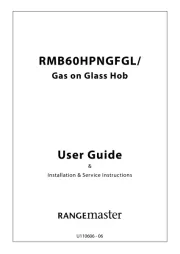
Rangemaster Professional + 90 Gas Manual
Læs gratis den danske manual til Rangemaster Professional + 90 Gas (40 sider) i kategorien Ovn. Denne vejledning er vurderet som hjælpsom af 8 personer og har en gennemsnitlig bedømmelse på 4.8 stjerner ud af 4.5 anmeldelser.
Har du et spørgsmål om Rangemaster Professional + 90 Gas, eller vil du spørge andre brugere om produktet?

Produkt Specifikationer
| Mærke: | Rangemaster |
| Kategori: | Ovn |
| Model: | Professional + 90 Gas |
| Vekselstrømsindgangsspænding: | 230 - 400 V |
| Vekselstrømsindgangsfrekvens: | 50 Hz |
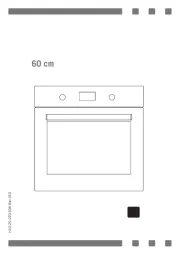
| Bredde: | 900 mm |
| Dybde: | 650 mm |
| Højde: | 905 mm |
| Vægt: | 109000 g |
| Produktfarve: | Black, Stainless steel |
| Kontroltype: | Dreje |
| Indbygget skærm: | Ja |
| Skærmtype: | LCD |
| Produkttype: | Fritstående komfur |
| Timer: | Ja |
| Indvendig belysning: | Ja |
| Integreret ur: | Ja |
| Urtype: | Elektronisk |
| Grill: | 2730 W |
| Støjniveau: | - dB |
| Justerbare fødder: | Ja |
| Komfurtype: | Gaskomfur |
| Antal kogeplader / madlavningsområde: | 5 |
| Blus/kogeplade zone 1 strøm: | 1000 W |
| Blus/kogeplade zone 2 strøm: | 1700 W |
| Blus/kogeplade zone 1 type: | Lille |
| Blus/kogeplade zone 2 type: | Mellem |
| Kontrolposition: | Front |
| Tilsluttet belastning (elektrisk): | 10900 W |
| Blus/kogeplade zone 3 type: | Stor |
| Blus/kogeplade zone 4 type: | Ekstra stor |
| Timer type: | Digital |
| Tilsluttet belastning (gas): | 2600 W |
| Energieffektivitetsklasse: | A |
| Rengøringstype: | Katalytisk |
| Ovn - størrelse: | Medium |
| Samlet indvendig ovn kapacitet: | 128 L |
| Strøm for samtlige ovne: | - W |
| Antal ovne: | 2 |
| Ovn nettokapacitet: | 61 L |
| Konventionel madlavning: | Ja |
| Energiforbrug (konventionel): | 1.68 kWh |
| Energiforbrug (tvungen konvektion): | 0.8 kWh |
| Højdejustering: | 25 mm |
| Energiforbrug (traditionel): | 6.05 MJ |
| Ovn effekt: | - W |
| Antal gasbrændere: | 5 |
| Blus/kogeplade zone 4 strøm: | 3500 W |
| Blus/kogeplade zone 3 strøm: | 3000 W |
| Elektronisk tænding: | Ja |
| Ovn strømkilde: | Electric, Natural gas |
| Ovn samlet kapacitet: | 61 L |
| Understøttet grydemateriale: | Støbejern |
| Wokbrænder: | Ja |
| Tændblussikring: | Ja |
| Ovn 2 samlet kapacitet: | 67 L |
| Stegeplade: | Ja |
| Ovn 2 konvektionstilberedning: | Ja |
Har du brug for hjælp?
Hvis du har brug for hjælp til Rangemaster Professional + 90 Gas stil et spørgsmål nedenfor, og andre brugere vil svare dig
Ovn Rangemaster Manualer


Ovn Manualer
- Valberg
- Primo
- Klarstein
- ZLine
- Tracer
- Bellini
- Gasmate
- Viva
- ECG
- Exquisit
- Signature
- Thomson
- Mitsubishi
- Flama
- Gemini
Nyeste Ovn Manualer