6901-602184 00
OPTION 1:
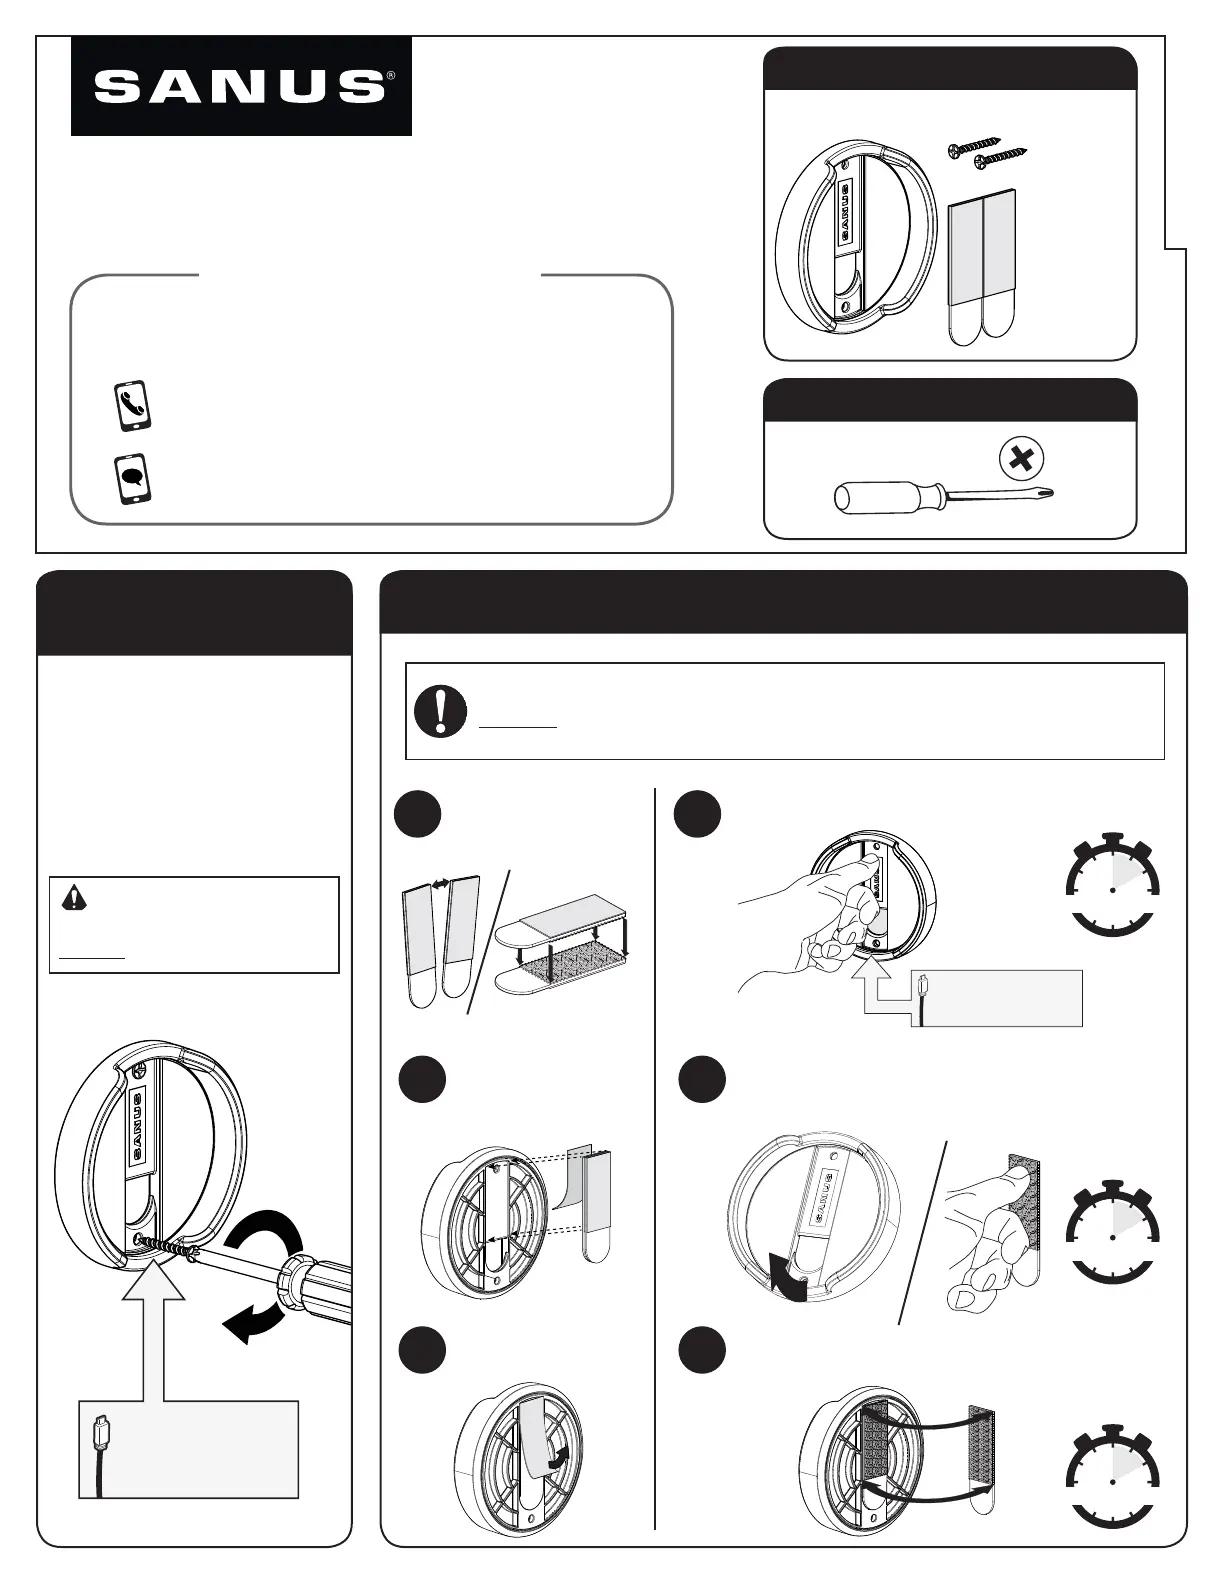
Mount with Screws
OPTION 2: Mount with Command
™
Picture Hanging Strips from 3M
®
Align the channel
for plug insertion.
Align the channel
for plug insertion.
TOOL NEEDED (for Option 1 Install)
Phillips Screwdriver
SOA-EDM1 INSTALLATION INSTRUCTION
WALL side
WALL side
WALL side
WALL side
WALL side
WALL side
WALL side
WALL side
WALL side
WALL side
WALL side
WALL side
WALL side
WALL side
WALL side
WALL side
W
ALL side
WALL side
W
ALL side
WALL side
WALL side
WALL side
WALL side
WALL side
WALL side
WALL side
WALL side
WALL side
Base
Screws (Option 1 Install)
Command
™
Picture
Hanging Strips
from 3M
®
(Option 2 Install)
PARTS INCLUDED
WE’RE HERE TO HELP
Call us at: 800-359-5520
Or, chat at: SANUS.com/chatSO
Our US-based install experts are standing by to help.
Contact us: Weekdays 8-9 CT, Weekends 10:30-7 CT
30 seconds
30 seconds
1 hour
WAL L side
WALL side
WAL L s
id
e
WALL side
WAL L side
WALL side
W
ALL side
WALL side
W
ALL sid
e
WAL L side
W
ALL side
WALL side
W
ALL
s
ide
WALL side
WALL side
W
ALL side
WALL side
W
ALL side
WALL side
WALL side
WALL side
W
ALL side
WALL side
WALL side
WALL side
WALL side
WALL side
W
ALL side
WALL side
WALL side
W
ALL side
WALL side
WALL side
W
ALL side
WALL
side
WALL side
WALL side
WALL side
W
A
LL side
WALL sid
e
WALL side
WALL side
Secure the base in place using
the two screws provided.
The screws are designed to
work with wood stud or drywall
only, without anchors. Predrilling
is not necessary.
CAUTION:
Avoid damage to the base.
DO NOT overtighten the screws.
WALL side
WALL side
WALL side
WALL side
WALL side
WALL side
WALL side
WALL side
WALL side
WALL side
WALL side
WALL side
WALL side
WALL side
WALL side
WALL side
WALL side
WALL side
WALL side
WALL side
WALL side
WALL side
WALL side
WALL side
WALL side
WALL side
WALL side
WALL side
WALL side
WALL side
WALL side
WALL side
WALL side
WALL side
WALL side
WALL side
WALL side
WALL side
WALL side
WALL side
WALL side
WALL side
Lightly clean both wall and dot mount surfaces with isopropyl alcohol.
DO NOT use household cleaners as they may leave behind residues
which can affect adhesion.
Remove one liner and
press the pair of strips
onto the back of the base.
Separate the strips and
press together until
they click.
Remove the other liner.
Press the base firmly against the surface for 30 seconds.
Remove the base by lifting up at the bottom of the base.
Now press the strip on the wall for 30 seconds to ensure
adhesive hold.
Wait 1 hour before reattaching the base. Line up
the strips and press until they click.
A D
B E
C F