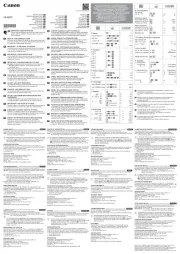
Sharp EL-2901PIII Manual

Sharp kalkulator EL-2901PIII

Læs nedenfor 📖 manual på dansk for Sharp EL-2901PIII (45 sider) i kategorien kalkulator. Denne guide var nyttig for 29 personer og blev bedømt med 4.8 stjerner i gennemsnit af 15 brugere

Side 1/45
EL-2901P
III
ELECTRONIC PRINTING CALCULATOR
DRUCKENDER TISCHRECHNER
CALCULATRICE IMPRIMANTE ÉLECTRONIQUE
CALCULADORA IMPRESORA ELECTRÓNICA
CALCOLATRICE ELETTRONICA STAMPANTE
ELEKTRONISK SKRIVANDE OCH VISANDE RÄKNARE
ELEKTRONISCHE REKENMACHINE MET AFDRUK
CALCULADORA ELETRÔNICA COM IMPRESSORA E VISOR
NAUHALASKIN
SZALAGOS ASZTALI KALKULÁTOR
OPERATION MANUAL
BEDIENUNGSANLEITUNG
MODE D’EMPLOI
MANUAL DE MANEJO
MANUALE DI ISTRUZIONI
BRUKSANVISNING
GEBRUIKSAANWIJZING
MANUAL DE INSTRUÇÕES
KÄYTTÖOHJE
HASZNÁLATI ÚTMUTATÓ
ENGLISH ...................................................... Page 1
CALCULATION EXAMPLES......................... Page 31
DEUTSCH..................................................... Seite 4
RECHNUNGSBEISPIELE............................. Seite 31
FRANÇAIS .................................................... Page 7
EXEMPLES DE CALCULS ........................... Page 31
ESPOL ..................................................... Página 10
EJEMPLOS DE CÁLCULOS......................... Página 31
ITALIANO...................................................... Pagina 13
ESEMPI DI CALCOLO .................................. Pagina 31
SVENSKA ..................................................... Sida 16
RÄKNEEXEMPEL ......................................... Sida 31
NEDERLANDS.............................................. Pagina 19
REKENVOORBEELDEN .............................. Pagina 32
PORTUGUÊS ............................................... Página 22
EXEMPLOS DE CÁLCULOS ........................ Página 32
SUOMI .......................................................... Sivu 25
LASKENTAESIMERKKEJÄ .......................... Sivu 32
MAGYAR ...................................................... Oldal 28
LDASZÁMÍTÁSOK ................................... Oldal 32
Notes for handling Lithium batteries:
CAUTION
Danger of explosion if battery is incorrectly replaced.
Replace only with the same or equivalent type recommended
by the manufacturer.
Dispose of used batteries according to the manufacturer’s
instructions.
Hinweise zur Handhabung von Lithium-Batterien:
VORSICHT
Bei Verwendung einer uneeigneten Ersatzbatterie besteht
Explosionsgefahr.
Nur durch den gleichen oder einen vom Hersteller
empfohlenen gleichwertigen Typ ersetzen.
Verbrauchte Batterien gemäß Herstelleranleitung entsorgen.
Remarques sur la manipulation des piles au lithium:
ATTENTION
Danger d’explosion de la pile si elle n’est pas remplacée
correctement.
Remplacez-la uniquement par le même type de pile ou un
type équivalent recommandé par le fabricant.
Débarrassez-vous des piles usagers en respectant les
instructions du fabricant.
Notas para el manejo de las baterías de litio:
PRECAUCIÓN
Peligro de explosión si reemplaza incorrectamente la batería.
Reemplácela por otra igual o de tipo equivalente
recomendada por el fabricante.
Deshágase de las baterías de acuerdo con las instrucciones
del fabricante.
Note concernenti le batterie al litio:
AVVERTENZA
Se la batteria non viene sostituita in modo corretto c’è
pericolo di esplosioni.
Sostituire la batteria con una dello stesso tipo o con una
equivalente raccomandata dalla fabbrica.
Smaltire le batterie usate seguendo le istruzioni della
fabbrica.
Observera om hantering av litiumbatterier:
OBSERVERA!
Felaktigt batteribyte medför risk för explosion.
Byt endast ut batteriet mot ett batteri av samma eller
motsvarande typ rekommenderat av tillverkaren.
Kassera ett förbrukat batteri enligt tillverkarens anvisningar.
Opmerkingen betreffende de behandeling van
lithiumbatterijen:
LET OP
Ontploffingsgevaar indien de batterij verkeerd wordt
aangebracht.
Vervang uitsluitend door een batterij van hetzelfde of een
gelijkwaardig type, aanbevolen door de fabrikant.
Gooi gebruikte batterijen weg overeenkomstig de instructies
van de fabrikant.
Notas para o manuseio de pilhas de lítio:
PRECAUÇÃO
Existe o perigo de explosão se a pilha for trocada
incorretamente.
Troque apenas com o mesmo tipo ou equivalente
recomendado pelo fabricante.
Descarte-se das pilhas usadas de acordo com as instruções
do fabricante.
Huomautuksia litiumparistojen käsittelystä:
HUOMAUTUS
Räjähdysvaara, jos paristo vaihdetaan väärin.
Paristo tulee vaihtaa vain samaniaiseen tai valmistajan
suosittelemaan vastaavaan tyyppiin.
Hävitä käytetyt paristot valmistajan antamien ohjeiden
mukaisesti.
Caution!
The socket outlet shall be installed near the equipment and
shall be easily accessible.
Vorsicht!
Die Netzsteckdose muß in der Nähe des Gerätes angebracht
und leicht zugänglich sein.
Attention!
La prise de courant murale doit être installée à proximide
l’appareil et doit être facilement accessible.
Aviso!
El tomacorriente debe estar instalado cerca del equipo y debe
quedar bien accesible.
Attenzione!
La presa della corrente deve essere installata in prossimità
dell’apparecchio ed essere facilmente accessibile.
Observera!
Anslut till ett vägguttag som återfinns nära enheten och är lätt
åtkomligt.
Let op!
Het stopcontact moet in de buurt van het apparaat zijn en ook
gemakkelijk toegankelijk zijn.
Atenção!
A tomada elétrica deve estar perto do equipamento e ser de
fácil acesso.
Huomautus!
Pistorasia tulee asentaa laitteen lähelle paikkaan, jossa sen
käyttöä on helppoa.
Figyelem!
A kalkulátort úgy érdemes elhelyezni, hogy a lózati csatlako
aljzatot könnyenel lehessen érni.
SHARP ELECTRONICS (Europe) GmbH
Sonninstra e 3, D-20097 Hamburgß
A lítium elemek kezelése:
FIGYELMEZTETÉS
Az elemek helytelen behelyezése robbanásveszélyt okoz.
Kizárólag a gyártó által ajánlott, az eredetivel azonos vagy
annak megfelelő típusú elemet használjon.
A gyártó rendelkezései szerint járjon el az elhasznált elemek
kidobásakor.
1
OPERATIONAL NOTES
To insure trouble-free operation of your SHARP calculator, we recommend the
following:
1. The calculator should be kept in areas free from extreme temperature changes,
moisture, and dust.
2. A soft, dry cloth should be used to clean the calculator. Do not use solvents
or a wet cloth.
3. Since this product is not waterproof, do not use it or store it where fluids, for
example water, can splash onto it. Raindrops, water spray, juice, coffee,
steam, perspiration, etc. will also cause malfunction.
4. If service should be required, use only a SHARP servicing dealer, a SHARP
approved service facility or SHARP repair service.
5. Do not operate this unit with the insulation sheet attached; the insulation
sheet prevents the battery wear while shipping, and can be found on the
back of the unit's body. If the insulation sheet is not removed, the previously
set date and time, as well as the tax rate information will be cleared as soon
as the AC power is accidentally unplugged.
6. Do not wind the AC cord around the body or otherwise forcibly bend or twist
it.
SHARP will not be liable nor responsible for any incidental or
consequential economic or property damage caused by misuse and/or
malfunctions of this product and its peripherals, unless such liability is
acknowledged by law.
15 9 2005 15.09.2005
15 38 15-38 00
0.
Operation Display
GT
RATE
SET
(see “GRAND TOTAL / RATE SETTING MODE SELECTOR”)
* When the adjustment is complete, the clock starts at 3:38:00 p.m.
USING THE CALCULATOR FOR THE FIRST TIME
First, pull out the insulation sheet for the memory protection battery (installed
for retaining the date/time/tax rate information). Reset the calculator to
initialize the units state, then adjust the date and time before using the
calculator.
Removing the insulation sheet, and resetting
1. Pull out the insulation sheet for the memory protection battery.
2. Press the RESET switch located on the back of the unit.
(See “RESETTING THE UNIT”.)
* The clock starts, indicating the current date and time as 1 January, 2006,
12:00:00 a.m.
Adjusting date and time
Example: When the date is 15, Septem-ber, 2005, and the time is 3:38 p.m.
OPERATING CONTROLS
OFF P P ICON
POWER SWITCH; PRINT / ITEM COUNT MODE SELECTOR:
“ ”OFF : Power OFF
“ ”: Power ON. Set to the non print mode.
“ ”P : Power ON. Set to the print mode.
“ • P IC : Power ON. Set to the print and item count mode.
1) For addition or subtraction, each time is pressed, 1 is added
to the item counter, and each time is pressed, 1 is
subtracted.
The count is printed when the calculated result is obtained.
Pressing of clears the counter.,
2) When the grand total/rate setting mode selector is in the ON
position (GT), the counter will count the number of times that the
calculation results have been stored in the grand total memory.
To print and clear the count, press the key.
3) The memory item counter will count the number of times that the
key has been pressed in the addition.
Note: Each time the key is used in the subtraction, 1 will be
subtracted from the count.
The count is printed when the memory is recalled.
Pressing of the key clears the counter.
Note: The counter has a maximum capacity of 3 digits (up to ±999). If the
count exceeds the maximum, the counter will recount from zero.
ROUNDING SELECTOR:
Example: Set Decimal Selector to 2.
4 ÷ 9 = 0.444 ... , 5 ÷ 9 = 0.555 ...
Note: The decimal point floats during successive calculation by the use of
or .
If the decimal selector is set to then the answer is always rounded down“ ”F
( ).
GT
RATE
SET
GRAND TOTAL / RATE SETTING MODE SELECTOR:
“ ”GT : Grand Total
“ ”: Neutral
RATE SET: To set the date, time, and tax rate, set this switch at the RATE
SET position.
Date:
Enter in the order of day month, and year, then press to complete the
entry.
Use to separate day, month, and year.
When is pressed, the number entered is evaluated and displayed as
“ ” date if the value is within the following range; Error is displayed
otherwise, and the previously set date is restored.
Day: 1 - 31; Month: 1 - 12; Year: 2000 - 2099 (in 4 digits) or 00 - 99 (in 2
digits)
Time:
Enter in the order of hour, minutes, then press to complete the entry.
(There is no entry available for the seconds value. The clock starts at zero
second.)
If the hour/minute digit is less than 10, it is not necessary to enter the first
digit “ ”0 .
Use to separate hour and minute values.
When is pressed, the number entered is evaluated and displayed as
“ ” time if the value is within the following range; Error is displayed
otherwise, and the previously set time is restored.
Hour: 0 - 23 (24-hour system for the hour entry), Minute: 0 - 59
Tax rate:
Press three times, enter the tax rate, followed by .
A maximum of 4 digits can be stored (decimal point is not counted as a
digit).
Only one rate can be stored. If you enter a new rate, the previous rate will
be cleared.
F 6 3 2 1 0 A
DECIMAL / ADD MODE SELECTOR:
“ ”6 3 2 1 0 : Presets the number of decimal places in the answer.
“ ”F : The answer is displayed in the floating decimal system.
“ ”A : The decimal point in addition and subtraction entries is automatically
positioned to the 2nd digit from the lowest digit of entry number. Use of
the add mode permits addition and subtraction of numbers without entry
of the decimal point. Use of and will automatically,
override the add mode and decimally correct answers will be printed.
CLOCK / CALENDAR KEY:
Each time this key is pressed, the mode switches.
Calculation mode Date display mode Clock display mode → →
Calculation mode
Use this key also to adjust date and time (see GRAND TOTAL /
RATE SETTING MODE SELECTOR).
4 5 9 9
0.45 0.56
5/4 0.44 0.56
0.44 0.55
ENGLISH
2
PAPER FEED KEY
LAST DIGIT CORRECTION KEY
NON-ADD / SUBTOTAL KEY:
Non-add When this key is pressed right after an entry of a number in
the Print mode, the entry is printed on the left-hand side with the symbol
“ ”# . This key is used to print out numbers not subjects to calculation
such as code, date, etc.
Subtotal Used to get subtotal(s) of additions and/or subtractions.
When pressed following the or key, the subtotal is printed with
the symbol
and the calculation may be continued.
By pressing this key even in the Non-print mode, the displayed
number is printed without any symbol.
When the POWER SWITCH; PRINT / ITEM CO UNT MODE
SELECTOR is set or position, and Date or Clock is, “ ”P“ •P IC
displayed, press this key to print the displayed contents, including “ ”#
symbol, from the left side of the paper roll.
Example:
Date printing
#15 09 2005 • • • • • •
(when the date is 15 September, 2005)
Clock printing
#10 30 • • • • • • • • • •
(when the time is 10:30 a.m.)
#18 25 • • • • • • • • • •
(when the time is 6:25 p.m.)
When the Date / Clock printing is complete, the Calculation mode is
restored.
CLEAR / CLEAR ENTRY KEY:
Press this key twice, followed by , to print the set tax rate.
TOTAL KEY
EQUAL KEY
CHANGE SIGN KEY:
Changes the algebraic sign of a number (i.e., positive to negative or
negative to positive).
RECALL AND CLEAR MEMORY KEY
RECALL MEMORY KEY
TAX-INCLUDING KEY
PRE-TAX KEY
AVERAGE KEY:
Used to calculate the average.
GRAND TOTAL KEY
COST PRICE ENTRY KEY:
Press this key to enter the cost price.
SELLING PRICE ENTRY KEY:
Press this key to enter the selling price.
MARGIN ENTRY KEY:
Press this key to enter the margin.
DISPLAY SYMBOLS:
M : Appears when a number is in the memory.
: Appears when a number is negative.
:Appears when a number is in the grand total memory.
E : Appears when an overflow or other error is detected.
INK ROLLER REPLACEMENT
If printing is blurry even when the ink roller is in the proper position, replace
the roller.
Ink roller: Type EA-772R
WARNING
APPLYING INK TO WORN INK ROLLER OR USE OF UNAPPROVED INK
ROLLER MAY CAUSE SERIOUS DAMAGE TO PRINTER.
1) Set the power switch to OFF.
2) Remove the printer cover. (Fig. 1)
3) Hold the top of the ink roller and remove the roller by pulling it toward you and
then upward. (Fig. 2)
Fig. 1 Fig. 2 Fig. 3
PAPER ROLL REPLACEMENT
Never insert paper roll if torn. Doing so will cause paper to jam.
Always cut leading edge with scissors first.
1) Insert the leading edge of the paper roll into the opening. (Fig. 1)
2) Turn the power on and feed the paper by pressing . (Fig. 2)
3) Lift the attached metal paper holder up and insert the paper roll to the paper
holder. (Fig. 3)
Fig. 1
Fig. 3Fig. 2
4) Install the new ink roller in the correct position. Make sure that the roller is
securely in place. (Fig. 3)
5) Put back the printer cover.
Cleaning the printing mechanism
If the print becomes dull after long time usage, clean the printing wheel
according to the following procedures:
1) Remove the printer cover and the ink roller.
2) Install the paper roll and feed it until it comes out of the front of the printing
mechanism.
3) Put a small brush (like a tooth brush) lightly to the printing wheel and clean it
by pressing .
4) Put back the ink roller and the printer cover.
Note: Do not rotate the printing mechanism manually, this may damage the
printer.
DO NOT PULL PAPER BACKWARDS AS THIS MAY CAUSE DAMAGE
TO PRINTING MECHANISM.
ERRORS
There are several situations which will cause an overflow or an error condition.
When this occurs, will be displayed. The contents of the memory at the“ ”E
time of the error are retained.
If an is displayed at the time of the error, will be printed in“ ”0 E“– –” –––––
red and must be used to clear the calculator.
Also, in rare cases, printing may stop midway and the indication appear on“ ”E
the display. This is not a malfunction but is caused when the calculator is
exposed to strong electromagnetic noise or static electricity from an external
source. Should this occur, press the key and then repeat the calculation
from the beginning.
Error conditions:
1. When the integer portion of an answer exceeds 12 digits.
2. When the integer portion of the contents of the memory or grand total memory
exceeds 12 digits.
(Ex. 999999999999 1 )
3. When any number is divided by zero. (Ex. 5 0 )
3
REPLACEMENT OF BATTERY
FOR MEMORY PROTECTION
Time for battery replacement
Life of the memory protection battery is approximately 2,500 hours at
25 C(77° °F) with the power plug not connected to the socket.
* When the memory protection battery is weak, the date/time setting is initialized
(1/1/2006, 12:00:00 a.m.).
Verify the date/time setting in the date/clock display mode when connecting
the power plug to the socket.
If the date/time setting is modified or incorrect, promptly replace the memory
protection battery with new one.
(The life of the pre-installed battery may be shorter than expected because of
the time the calculator spends during shipment.)
Method of battery replacement
Use one lithium battery (CR2032).
Caution: Replacing the battery will clear the date and time settings, and the
stored tax rate.
1) Turn the power switch and unplug the power supply plug from theOFF
outlet.
2) Remove the battery cover on the back of the unit. (Fig. 1)
3) Remove the exhausted battery and install one new lithium battery. Wipe the
battery well with a dry cloth and place the plus side upward. (Fig. 2)“ ”+
4) Replace the battery cover by reversing the removal procedure.
5) Press the RESET switch on the back of the unit (See RESETTING THE
UNIT ).
After battery replacement
Connect the power supply plug to an outlet and turn the power switch “ ”ON .
Check that is displayed. If is not displayed, remove the battery,0.” “0.
reinstall it, and check the display again.
Readjust date, time, and tax rate settings.
On the battery replacement date label found on the back of the unit, write
down the month and year when the battery is replaced, as a reference for
the next battery replacement.
Precautions on battery use
Do not leave an exhausted battery in the equipment.
Do not expose the battery to water or flame, and do not take it apart.
Store batteries out of the reach of small children.
Fig. 1 Fig. 2
SPECIFICATIONS
Operating capacity: 12 digits
Power supply:
Operating: AC: 220V-230V, 50Hz
Memory backup: 3V ... (DC) (Lithium battery CR2032 × 1)
Memory Protection Battery lifespan:
About 2,500 hours (While at 25 C (77 F), and the power plug is not° °
connected to the socket.)
CLOCK SECTION
Accuracy: Within ±90 seconds per month average (at 25°C(77 F))°
Items to be displayed: day, month, year, hour, minute, second
Items to be printed: day, month, year, hour, minute
Time system: 24 hour
PRINTING SECTION
Printer: Mechanical printer
Printing speed: Approx. 2.1 lines/sec.
(At temperature 25 C (77 F), when 9 + is printed. The printing speed° ° 741• ”
will vary with the number of rows and the figure types to be printed.)
Printing paper: 57 mm(2-1/4") - 58 mm(2-9/32") wide 80 mm(3-5/32") in
diameter (max.)
Operating temperature: 0 40 C (32 104°C – ° °F – °F)
Power consumption: 51 mA
RESETTING THE UNIT
Strong impacts, exposure to electrical fields, or other unusual conditions may
render the unit inoperative, and pressing the keys will have no effect. If this
occurs, you will have to press the RESET switch on the bottom of the unit.
The RESET switch should be pressed only when:
an abnormal event occurs and all keys are disabled.
Notes:
Pressing the RESET switch will clear the date and time settings, the tax
rate setting, and the contents of memory.
Use only a ballpoint pen to press the RESET switch. Do not use anything
breakable or anything with a sharp tip, such as a needle.
After pressing the RESET switch, connect the power supply plug to an
outlet. Turn the power switch and check that is displayed.ON” “0.
Dimensions: 193 mm (W) 255 mm (D) 60.5 mm (H)× ×
(7-19/32" (W) 10-1/32" (D) 2-3/8" (H))× ×
Weight: Approx. 1.02 kg (2.25 lb.) (with battery)
Accessories:
1 lithium battery(installed), 1 battery replacement date label (attached on
the unit's back body), 1 paper roll, 1 ink roller (installed), and operation
manual
WARNING
THE VOLTAGE USED MUST BE THE SAME AS SPECIFIED ON THIS
CALCULATOR. USING THIS CALCULATOR WITH A HIGHER VOLTAGE
THAN THAT WHICH IS SPECIFIED IS DANGEROUS AND MAY RESULT
IN A FIRE OR OTHER TYPE OF ACCIDENT CAUSING DAMAGE. WE
ARE NOT RESPONSIBLE FOR ANY DAMAGE RESULTING FROM USE
OF THIS CALCULATOR WITH A VOLTAGE OTHER THAN THAT WHICH
IS SPECIFIED.
4
BETRIEBSHINWEISE
Um störungsfreien Betrieb Ihres SHARP-Rechners zu gewährleisten,
beachten Sie Folgendes:
1. Der Rechner muss an einem Ort aufgestellt werden, der von extremen
Temperaturschwankungen, Feuchtigkeit und Staub geschützt ist.
2. Zur Reinigung muss ein weicher, trockener Lappen verwendet werden. Keine
Lösungsmittel oder feuchte cher verwenden.
3. Da dieses Produkt nicht wasserdicht ist, sollten Sie es nicht an Orten benutzen
oder lagern, die extremer Feuchtigkeit ausgesetzt sind. Schützen Sie das
Get vor Wasser, Regentropfen, Sprühwasser, Saft, Kaffee, Dampf, Schwe
usw., da der Eintritt von irgendwelchen Flüssigkeiten zu Funktionsstörungen
hren kann.
4. Falls Wartung notwendig ist, sollte nur ein SHARP-Händler, eine von SHARP
empfohlene Servicestelle oder ein SHARP-Kundendienst diesen Service
vornehmen.
5. Betreiben Sie dieses Gerät nicht bei angebrachtem Isolierblatt; das Isolierblatt
verhindert Batterieverschleiß beim Versand und befindet sich an der Rückseite
des Gehäuses. Wenn das Isolierblatt nicht entfernt wird, werden das vorher
eingestellte Datum und die Zeit, ebenso wie die Steuerraten-Information
gelöscht, sobald der Netzstecker versehentlich abgezogen wird.
6. Wickeln Sie nicht das Netzkabel um das Gehäuse oder biegen oder verdrehen
es gewaltsam.
SHARP übernimmt keine Verantwortung oder Haftung für irgendwelche
zufälligen oder aus der Verwendung folgenden wirtschaftlichen oder
sachlichen Schäden, die aufgrund der falschen Verwendung bzw. durch
Fehlfunktionen dieses Gerätes und dessen Zubehör auftreten,
ausgenommen diese Haftung ist gesetzlich festgelegt.
15 9 2005 15.09.2005
15 38 15-38 00
0.
Betrieb Anzeige
GT
RATE
SET
(siehe GESAMTSUMMEN-/RATE-MODUSWAHLSCHALTER“ ”)
* Wenn die Einstellung abgeschlossen ist, startet die Uhr bei 3:38:00 p.m.
INBETRIEBNAHME DES RECHNERS
Ziehen Sie zuerst das Isolierblatt von der Speicherschutzbatterie ab
(eingesetzt zur Bewahrung von Datum-/Zeit-/Steuerraten-Information). Setzen
Sie den Rechner zur ck, um ihn zu initialisieren, und stellen Sie dann Datumü
und Zeit vor der Inbetriebnahme ein.
Entfernen des Isolierblatts und Rückstellung
1. Ziehen Sie das Isolierblatt von der Speicherschutzbatterie ab.
2. Drücken Sie den RESET-Schalter an der R ckseite des Ger ts.ü ä
(Siehe "ZURÜ ÄCKSETZEN DES GER TS".)
* Die Uhr beginnt zu laufen und zeigt das aktuelle Datum und die aktuelle
Zeit als 1. Januar 2006, 12:00:00 vormittags an.
Einstellen von Datum und Zeit
Beispiel: Wenn das Datum der 15. September 2005 und die Zeit 3:38
nachmittags ist.
BEDIENELEMENTE
OFF P P ICON
NE T Z S C H A LT E R; DR U C K - / ART I K EL Z Ä H L E R-
MODUSWAHLSCHALTER:
“ ”OFF : Ausgeschaltet
“ ”: Eingeschaltet. Auf Nicht-Drucken-Modus schalten.
“ ”P : Eingeschaltet. Auf Drucken-Modus schalten.
“ • P IC : Eingeschaltet. Auf Drucken- und Artikelz hlung-Modus schalten.ä
1) Für Addition oder Subtraktion wird gedr ckt, 1 wird zumü
Artikelzähler hinzugefügt, und bei jedem Drücken von wird 1
abgezogen.
Die Zählung wird gedruckt, wenn das berechnete Ergebnis
erhalten ist.
Durch Drü ä öcken von wird der Z, hler gel scht.
2) Wenn der Gesamtsumme/Rate-Moduswahlschalter in Stellung
ON (GT) steht, z hlt der Z hler, wie oft die Berechnungser-ä ä
gebnisse im Gesamtsummenspeicher abgelegt wurden. Zum
Drucken und L schen der Z hlung dr cken Sie die Taste ö ä ü .
3) Der Speicherartikelz hler z hlt, wie oft die Taste bei derä ä
Addition gedr ckt wurde.ü
Hinweis: Jedesmal, wenn die Taste bei der Subtraktion
gedrückt wird, wird 1 von der Zählung abgezogen.
Die Zählung wir d gedruckt, wenn der Speicher
abgerufen wird.
Durch Drücken der Taste wird der Z hler gel scht.ä ö
Hinweis: Der Zähler hat eine Maximalkapazität von 3 Stellen (bis zu ±999).
Wenn die Z hlung das Maximum berschreitet, z hlt der Zä ü ä ähler
erneut von Null.
RUNDUNGSSCHALTER:
Beispiel: Stellen Sie den Dezimalschalter auf 2.
4 ÷ 9 = 0.444 ... , 5 ÷ 9 = 0.555 ...
Hinweis:
Der Dezimalpunkt gleitet bei sukzessiver Berechnung mit Anwendung
von oder .
Wenn der Dezimalschalter auf "F" gestellt ist, wird das Ergebnis immer
abgerundet ( ).
GT
RATE
SET
G E S A M T S U M M E N - / R AT E - M O D U S W A H L S C H A LT E R
EINSTELLEN:
“ ”GT : Gesamtsumme
“ ”: Neutral
RATE SET: Zum Einstellen von Datum, Zeit und Steuerrate stellen Sie
diesen Schalter in Stellung RATE SET“ ”.
Datum:
Nehmen Sie die Eingabe in der Reihenfolge Tag, Monat und Jahr vor und
dr en.ücken Sie , um die Eingabe abzuschließ
Verwenden Sie zur Trennung von Tag, Monat und Jahr.
Wenn gedrü “ ”ckt wird, wird die eingegebene Zahl bewertet und als date
angezeigt, wenn der Wert innerhalb des folgenden Bereichs ist; andernfalls
er s ch e i n t Er r o r“ ”, un d da s vo r h e r ei n g e g e be n e D a t um w i r d
wiederhergestellt.
Tag: 1 - 31; Monat: 1 - 12; Jahr: 2000 - 2099 (in 4 Stellen) oder 00 - 99 (in 2
Stellen)
Zeit:
Nehmen Sie die Eingabe in der Reihenfolge Stunde, Minuten vor und
dr en.ücken Sie , um die Eingabe abzuschließ
(Es gibt keine Eingabem glichkeit f r Sekunden. Die Uhr beginnt mit nullö ü
Sekunden zu laufen.)
Wenn die Ziffer fü ör Stunde/Minute unter 10 ist, ist es nicht n tig, die erste
Ziffer “ ”0 einzugeben.
Verwenden Sie zur Trennung von Stunde und Minute.
Wenn gedrü “ ”ckt wird, wird die eingegebene Zahl bewertet und als time
angezeigt, wenn der Wert innerhalb des folgenden Bereichs ist; andernfalls
erscheint Error“ ”, und die vorher eingegebene Zeit wird wiederhergestellt.
Stunde: 0 - 23 (24-Stunden-System f r die Stundeneingabe), Minute: 0 - 59ü
Steuerrate:
Drücken Sie dreimal, geben Sie die Steuerrate ein, gefolgt von .
Maximal 4 Ziffern können gespeichert werden (der Dezimalpunkt wird nicht
als Ziffer gezählt).
Nur eine Rate kann gespeichert werden. Wenn Sie eine neue Rate
eingeben, wird die vorherige Rate gelöscht.
F 6 3 2 1 0 A
DEZIMAL- / ADDIEREN-MODUS-SCHALTER:
“ ”6 3 2 1 0 : Legt die Anzahl der Dezimalstellen im Ergebnis fest.
“ ” ßF : Das Ergebnis wird im Flie punkt-Dezimalsystem angezeigt.
“ ”A : Der Dezimalpunkt bei Addition und Subtraktion wird automatisch an der
2. Stelle von der niedrigsten Eingabestelle positioniert. Verwendung des
4 5 9 9
0.45 0.56
5/4 0.44 0.56
0.44 0.55
DEUTSCH


Produkt Specifikationer

Mærke: Sharp
Kategori: kalkulator
Model: EL-2901PIII

Har du brug for hjælp?

Hvis du har brug for hjælp til Sharp EL-2901PIII stil et spørgsmål nedenfor, og andre brugere vil svare dig