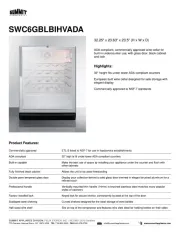
Summit ALWC15 Manual
Læs gratis den danske manual til Summit ALWC15 (33 sider) i kategorien Vinskab. Denne vejledning er vurderet som hjælpsom af 21 personer og har en gennemsnitlig bedømmelse på 4.8 stjerner ud af 11 anmeldelser. Har du et spørgsmål om Summit ALWC15, eller vil du spørge andre brugere om produktet?
Side 1/33

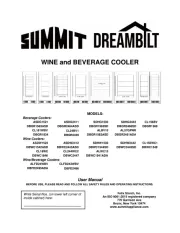
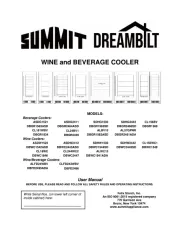
WINE and BEVERAGE COOLER
MODELS:
Beverage Coolers:
ASDG1521
ASDG2411
SDHG1533
SDHG2443
CL156BV
DBGR1563ASD
DBGR2464ASD
DBGR1565SD
DBGR2466SD
DBGR1569
CL181WBV
CL24BV1
ALBV15
AL57GPNR
DBGR1834
DBGR2435
DBGR1562ASD
DBGR2461ADA
Wine Coolers:
ASDW1522
ASDW2412
SDHW1532
SDHW2442
CL155WC1
DBWC1542ASD
DBWC2443ASD
DBWC1544SD
DBWC2445SD
DBWC1549
CL18WC
CL244WC2
ALWC15
DBWC1846
DBWC2447
DBWC1541ADA
Wine/Beverage Coolers:
ALFD24WBV
CLFD243WBV
DBFD2495ADA
DBFD2496
User Manual
BEFORE USE, PLEASE READ AND FOLLOW ALL SAFETY RULES AND OPERATING INSTRUCTIONS.
Felix Storch, Inc.
An ISO 9001:2015 registered company
770 Garrison Ave
Bronx, New York 10474
www.summitappliance.com
Write Serial Nos. (on lower left corner of
inside cabinet) here:

2
TABLE OF CONTENTS
Appliance Safety 3
Important Safeguards 3-5
Disposal 5
Location of Parts 6-8
Installation Instructions 9-14
Before Using your Appliance 9
Installation of your Appliance 9- 11
Electrical Connection -11 12
Reversing the Door Swing of your Appliance 12
Adjusting the Kick Plate 13
Installing the Stainless Steel Handle 13
Full Overlay Panel Installation Instructions 14-16
Operating your Appliance 16-26
Recommended Temperature Setting for Wine Cellars 16
Control Panel 16-22
Settings Mode 22-23
Interior Light 23
Sabbath Mode 23
Temperature Memory Function 23
Temperature Alarm/Door Alarm 23- 24
Dynamic Cooling and Silent Mode 24
Door Lock 24
Shelves 24-25
Defrosting 25
Storage 26
Care and Maintenance 27
Cleaning your Appliance 27
Power Failure 27
Vacations 27
Moving your Appliance 27
Energy-Saving Tips 27
Troubleshooting 28-29
Limited Warranty 32

4
• In the event of any damage:
- Avoid open flames and anything which creates a spark,
- Disconnect from the power supply,
- Air the room in which the appliance is located for several minutes and
- Contact the Service Department for advice.
• The more coolant there is in an appliance, the larger the room it should be installed in. In the event of
a leakage, if the appliance is in a small room, there is the danger of combustible gases building up.
For every ounce of coolant at least 325 cubic feet of room space is required. The amount of coolant in
the appliance is stated on the data plate inside the appliance It is hazardous for anyone other than .
an Authorized Service Person to carry out servicing or repairs to this appliance.
• Take serious care when handling, moving, and using the appliance to avoid either damaging the
refrigerant tubing or increasing the risk of a leak.
• Replacing component parts and servicing shall be done by factory authorized service personnel, so
as to minimize the risk of possible ignition due to incorrect parts or improper service.
• This appliance is not intended for use by persons (including children) with reduced physical, sensory,
or mental capabilities, or lack of experience and knowledge, unless they have been given supervision
or instruction concerning use of the appliance by a person responsible for their safety.
• Children should be supervised to ensure that they do not play with the appliance.
FOLLOW WARNING CALLOUTS BELOW ONLY WHEN APPLICABLE TO YOUR MODEL
• Use two or more people to move and install appliance. Failure to do so can result in back or other injury.
• Keep ventilation openings, in the appliance enclosure or in the built-in structure, clear of WARNING:
obstruction.
• Do not use means to accelerate the defrosting process or to WARNING: mechanical devices or other
clean, other than those recommended by the manufacturer.
• The appliance shall be stored in a room without continuously operating ignition sources WARNING:
(for example: open flames, an operating gas appliance or an operating electric heater.
• Do not pierce or burn. WARNING: Do not damage the refrigerant circuit.
• Be aware that refrigerants may not contain an odor. WARNING:
• Do not use electrical appliances inside the food storage compartments of the appliance, WARNING:
unless they are of the type recommended by the manufacturer.
• To avoid a hazard due to instability of the appliance, it must be xed in accordance with WARNING:
the instructions.
• Danger of injury from LED lamp. If the cover is defective: do not look directly into the WARNING:
illumination with optical lenses from close proximity. The eyes can be injured.
• Use this appliance only for its intended purpose. CAUTION: This equipment is intended for the storage
and display of packaged products only.
• To ensure proper ventilation for your appliance, the front of the unit must be completely unobstructed.
Choose a well-ventilated area with temperatures above 72°F ( C) and below 78°F (26°C). 23°
• The appliance should not be located next to ovens, grills, or other sources of high heat.
• The appliance must be installed with all electrical, water and drain connections in accordance with
state and local codes. A standard electrical supply (115 V AC only, 60 Hz), properly grounded in
accordance with the National Electrical Code and local codes and ordinances, is required.
• not kink or pinch the power supply cord of the appliance. Do
• The size of the fuse (or circuit breaker) should be 15 amperes.
• is important the appliance be leveled in order to work properly. You may need to make several It that
adjustments to level it.
• All installations must be in accordance with local plumbing code requirements.
• Make certain that the pipes are not pinched, kinked, or damaged during installation.
• Check for leaks after connection.
• Never allow children to operate, play with or crawl inside the appliance.

5
• not use solvent-based cleaning agents or abrasives on the interior. These cleaners may damage Do
or discolor the interior.
• Use this appliance only for its intended purpose as described in this . Instruction Manual
• fingers out of the “pinch point” areas. Clearances between the door and cabinet are necessarily Keep
small. Be careful closing the door when children are in the area.
- SAVE THESE INSTRUCTIONS -
DISPOSAL
Dispose of your appliance packaging properly. Ensure that any plastic wrappings, bags, etc., are disposed
of safely and kept out of the reach of babies and young children. Danger of suocation!
Refrigeration equipment must be properly disposed of in a professional and appropriate way, in accordance
with the current local regulations and laws which protect the environment. This applies to your old appliance
and to your new unit once it has reached the end of its service life.
WARNING: Please ensure that old, worn appliances are rendered unusable before disposal by removing
the doors, removing the plug, cutting the network cable, and removing or destroying any snap fastenings
or bolts. Leave shelving in place. You will thus prevent children from locking themselves in the appliance
during play (risk of suocation) or endangering their lives in any other way. DO NOT dispose of the
appliance in landll as the insulation (Cyclopentane) and refrigerant gas (R600a) contained in these
appliances are ammable.
Disposal instructions:
• The appliance must not be disposed of in the dustbin or with normal household rubbish.
• The coolant circuit, particularly the heat exchanger at the back/bottom of the unit, must not be damaged.
• The appliance is not to be handled as normal household waste but is to be taken to a recycling collection
point for electrical and electronic goods. By correctly disposing of this product, you are contributing to
the protection of the environment and to the health of your fellow human beings. Improper disposal
endangers health and the environment. Further information about the recycling of the product may be
obtained from your town hall, refuse collection department or the store where you purchased the product.
Risk of child entrapment!
Child entrapment and suocation are not problems of the past. Junked or abandoned appliances are
still dangerous, even if they will “just sit for a few days”.
Before discarding your old refrigerator:
• Take o the doors
• Leave the shelves in place so that children may not easily climb inside.
LOCATION OF PARTS

6
Wine Cooler ALWC15 / CL155WC1 / CL18WC / DBWC1541ADA
Shelves (5)
Ventilation
Grille
Adjustable
Legs
Security
Lock
LED Light
Digital Control
Panel
Door
Handle
Beverage Cooler ALBV15 / AL57GPNR / CL156BV / CL181WBV / CL24BV1 /
DB1562ASD / DBGR2461ADA
Shelves (3)
Ventilation Grille
Adjustable Legs
Security Lock
LED Light
Digital Control
Panel
Door
Handle
Wine Cooler ASDW1522 / SDHW1532 / ASDW2412 / SDHW2442 / DBWC1542ASD /
DBWC1544SD / DBWC2443ASD / DBWC2445SD / DBWC1549 /
DBWC1846

7
Shelves
Digital Control
Panel Grille
LED Light
Handle
Door
Adjustable
Legs
Security
Lock
Beverage Cooler ASDG1521 / SDHG1533 / ASDG2411 / SDHG2443 /
DBGR1563ASD / DBGR1565SD / DBGR2464ASD / DBGR2466SD /
DBGR1569 / DBGR1834 / DBGR2435
Handle
Door
Security
Lock
Shelves (3)
Digital Control
Panel
Ventilation
Grille
LED Light
Adjustable
Legs
Wine Cooler CL244WC2 / DBWC2447

8
Kick-plate
Adjustable
Legs
DoorShelves (5)
Handle
Digital Control
Panel
Security
Lock
Wine/Beverage Cooler ALFD24WBV / CLFD243WBV / DBFD2495ADA / DBFD2496
Shelves (6)
Security
Lock
Ventilation
Grille
Adjustable
Legs
Digital Control
Panel
Shelves (2)
LED Light
Handle
Door
INSTALLATION INSTRUCTIONS

9
Before Using your Appliance
• Remove the exterior and interior packing.
CAUTION: After unpacking you MUST allow this appliance to stand upright for at least 2 hours to
allow the lubricant and refrigerant to drain back into the compressor and stabilize. Failure
to do so may adversely affect performance and the lifetime of this unit.
• Clean the interior surface with lukewarm water using a soft cloth.
• Install the handle on the door. (See Installing the Stainless Steel Handle.)
Installation of your Appliance
CAUTION: This appliance is designed for storing and cooling beverages and drinks. Do not store
perishable food, medicine, or other medical products.
• The appliance is designed for built-in, recessed, or free-standing installation for indoor use only.
• The appliance is intended for the storage and display of non-time / temperature control for safety
foods bottled or canned products only.
NOTE: Do not store or install the appliance outdoors.
• Place your appliance on a oor that is strong enough to support it when it is fully loaded. To level
the unit, adjust the front leveling legs.
• For freestanding installation, 5” (127mm) of space at the back and sides of the unit and
4“(102mm) at the top are suggested, which allows the proper air circulation to cool the
compressor and condenser for energy saving. Even for built-in installation, it is better to keep at
least ¼" (5mm) of space on each side, 2" (50mm) at the back and ⅛" (3mm) at the top to ensure
proper service access and ventilation. And the air vent at the front of the appliance must never
be covered or blocked in any way.
CAUTION: Make sure that the socket and ON/OFF switch are easily accessible after the appliance
has been installed.
• Avoid locating the unit in moist areas.
• Plug the appliance into an exclusive, properly grounded wall outlet. Do not under any
circumstances cut or remove the third (ground) prong from the power cord. Any questions
concerning power and/or grounding should be directed toward a certied electrician or an
authorized service center.
NOTE: It is recommended that you do not install the appliance near an oven, radiator, or other
heating source. Direct sunlight may aect the acrylic coating and heat sources may increase
electrical consumption. Do not install in a location where the temperature will fall below 60°F
(16°C). For best performance, do not install the appliance behind a cabinet door or block the
base grille.

11
NOTE: If the unit is relocated, the bracket must be removed and installed in the new location.
Securing the Appliance (If available)
Pop out the cover cap on the opposite side of hinge and
secure the appliance in the niche by tightening the screws
through the attachment bracket if the unit is provided with
an attachment bracket.
Electrical Connection
This appliance should be properly grounded for your safety. The power cord of this appliance is
equipped with a three-prong plug which mates with standard three-prong wall outlets to minimize the
possibility of electrical shock.
Do not under any circumstances cut or remove the third (ground) prong from the power cord
supplied. For personal safety, this appliance must be properly grounded.
This appliance requires a standard 115/120 Volt AC ~60Hz three-prong grounded electrical outlet.
Have the wall outlet and circuit checked by a qualied electrician to make sure the outlet is properly
grounded. When a standard 2-prong wall outlet is encountered, it is your responsibility and obligation
to have it replaced with a properly grounded 3-prong wall outlet.
To prevent accidental injury, the cord should be secured behind the appliance and not left exposed
or dangling.
WARNING
Improper use of the grounded plug can result in the risk of electrical shock. If the power cord is
damaged, have it replaced by a qualied electrician or an authorized service center.

12
The appliance should always be plugged into its own individual electrical outlet which has a voltage
rating that matches the rating label on the appliance. This provides the best performance and also
prevents overloading house wiring circuits that could cause a re hazard from overheating. Never
unplug the appliance by pulling on the power cord. Always grip the plug rmly and pull straight out
from the receptacle. Repair or replace immediately all power cords that have become frayed or
otherwise damaged. Do not use a cord that shows cracks or abrasion damage along its length or at
either end. When moving the appliance, be careful not to damage the power cord.
Extension Cord
Because of potential safety hazards under certain conditions, it is strongly recommended that you do
not use an extension cord with this appliance. However, if you must use an extension cord it is
absolutely necessary that it be a UL/CUL-Listed, 3-wire grounding type appliance extension cord
having a grounding type plug and outlet and that the electrical rating of the cord be 115 volts and at
least 10 amperes.
Reversing the Door Swing of your Appliance
This unit has the capability of the door opening from either the left or right side. The unit is delivered
to you with the door opening from the left side. Should you desire to reverse the opening direction,
please follow the reversal instructions shown on the following page.
NOTE: All parts removed must be saved to allow the door swing to be reversed.
1 3 1
2 3
2
1. Remove the cover caps (3) and then remove the glass door by unscrewing the four screws (1) and
(2). Be careful to hold the glass door rmly after removing the screws and place it on a padded
surface to avoid the risk of damage.
2. Pop out the cover caps on the left side of cabinet and use them to cover the screw holes on the
right-hand side.
3. Rotate the glass door 180° remove the lock holder reinstall it to the bottom of the door frame. , and
4. Ret the glass door to the opposite side. Then screw and tighten it after the door is leveled.
WARNING
Use extreme caution with the articulated hinges. The hinge is self-closing, and many pinch
points exist prior to built-in installation.

13
Adjusting the Kick Plate (Only for ADA
models)
The pre-tted kick-plate of the appliance includes an
adjustable kick-plate section that is initially seated
behind the upper section. In order to adjust the kick-
plate height, follow the instructions below:
1. Remove the screws (1) from both the top left- and
top right-hand sides of the kick-plate.
2. Loosen or remove the screws (2) from both the
bottom left- and bottom right-hand sides of the kick-
plate. Failure to loosen the bottom screws
suciently may cause damage to the lower trim
when adjusting it.
3. Carefully guide the lower trim down until the desired
height is achieved.
4. Reinsert screws and tighten them.
Installing a Stainless Steel Handle
This appliance includes a stainless steel handle that is
not required to operate the unit. To install the handle,
follow the instructions below:
Locate the handle (1) over the mounting stub (3) of the
door and using the supplied Allen key, tighten the
securing grub screws (2) to x the handle.
12 3
1
2
Produkt Specifikationer
Mærke: | Summit |
Kategori: | Vinskab |
Model: | ALWC15 |
Har du brug for hjælp?
Hvis du har brug for hjælp til Summit ALWC15 stil et spørgsmål nedenfor, og andre brugere vil svare dig
Vinskab Summit Manualer
19 Juni 2025
2 Februar 2025
2 Februar 2025
2 Februar 2025
1 Februar 2025
30 September 2024
30 September 2024
30 September 2024
30 September 2024
30 September 2024
Vinskab Manualer
- ADE
- Premium Levella
- Artevino
- Sub-Zero
- Thor
- Magic Chef
- Boretti
- Landmark
- Blaupunkt
- Whirlpool
- Primo
- PKM
- Hyundai
- True
- Lamona
Nyeste Vinskab Manualer
10 August 2025
9 August 2025
9 August 2025
7 August 2025
6 August 2025
6 August 2025
6 August 2025
6 August 2025
5 August 2025
5 August 2025