TC Electronic Flashback Triple Delay Manual

TC Electronic Ikke kategoriseret Flashback Triple Delay

Læs gratis den danske manual til TC Electronic Flashback Triple Delay (11 sider) i kategorien Ikke kategoriseret. Denne vejledning er vurderet som hjælpsom af 11 personer og har en gennemsnitlig bedømmelse på 4.7 stjerner ud af 6 anmeldelser. Har du et spørgsmål om TC Electronic Flashback Triple Delay, eller vil du spørge andre brugere om produktet?

Side 1/11
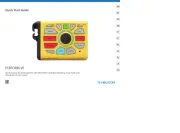
Quick Start Guide
FLASHBACK TRIPLE DELAY
V 1.0
Visit musictribe.com to download the full manual
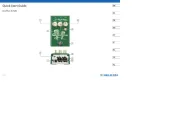
(3) (4)(2)(1) (5) (6) (7)
(8) (9)
(10) (11) (12) (13) (15) (16)(14)
2 3
FLASHBACK TRIPLE DELAY FLASHBACK TRIPLE DELAY
(EN) Controls
(1) DELAY TYPE – Selects between a wide range of delays – from classic
tape delays to the pristine sound of a TC 2290. The TP1, TP2, TP3 and
TP4 slots are reserved for TonePrints, and you can load one TonePrint
into each slot.
(2) TIME – Adjust the delay time for the currently-selected Delay Engine.
(3) DELAY 1/2/3 Choose which of the three Delay Engines is available
for editing with the DELAY TYPE, TIME, REPEATS, MIX and SUBDIV controls.
(4) REPEATS – Control the number of delay repeats for the Delay Engine
currently selected for editing with the DELAY 1/2/3 selector switch.
(5) MIX – Control the amount of delay mixed with the original dry signal.
(6) SERIAL/PARALLEL Choose the signal path for the three delay
engines. Serial Mode sends the output from Delay Engine 1 into
Delay Engine 2, which then sends its output to Delay Engine 3.
In Parallel Mode, each Delay Engine outputs separately.
(7) SUBDIV – Select the rhythmic subdivision (e.g., dotted quarter
notes, quarter notes, eighth notes, and so on) used to create
the delay repetitions. The basic pulse used for subdivision
is controlled by the TIME knob or the TAP footswitch.
(8) DELAY ENGINE/PRESE T (1/2/3) – Use these footswitches to turn
the Delay Engines (1, 2 and 3) on or o. The three Delay Engines can
each be activated separately (on = LED is lit). Switching a Delay Engine
o and then on again will recall the stored Preset for that Delay Engine.
(9) TAP – This footswitch sets the desired delay time (as an alternative
to the TIME knob). Tap the TAP footswitch rhythmically to set up
the basic tempo used by the SUBDIV knob to generate the delays.
(10) INPUT (MONO/STEREO) – Connect one ¼" TS cable for mono
operation, or 2 cables for stereo.
(11) OUTPUT (MONO/STEREO) – Connect one ¼" TS cable for mono
operation, or 2 cables for stereo.
(12) EXP PEDAL – Connect an expression pedal (optional/not included).
We recommend that you use a 25 kΩ linear pot expression pedal.
Once you have connected and congured an expression pedal, you can
use the pedal to control Delay Time, Delay Repeats or the Delay Mix.
(13) POWER INPUT – Connect a 9 V power supply providing 300 mA
or more (included).
(14) USB – Use a standard Mini-B USB to connect your pedal
to a computer for TonePrints and rmware updates.
(15) MIDI IN – Connect a computer/DAW (or another device generating
a MIDI Clock signal) to control the pedal’s delay tempo.
(16) MIDI THRU – Forward the incoming MIDI signal to another
MIDI-equipped device. Connect the MIDI THRU jack to the MIDI input
of another device further down the signal chain.
IMPORTANT SAFETY INSTRUCTION
Before operating the device, please see “Important Safety Instructions”
on page 3 of the full manual.
Visit musictribe.com to download the full manual.
(ES) Controles


Produkt Specifikationer

Mærke: TC Electronic
Kategori: Ikke kategoriseret
Model: Flashback Triple Delay

Har du brug for hjælp?

Hvis du har brug for hjælp til TC Electronic Flashback Triple Delay stil et spørgsmål nedenfor, og andre brugere vil svare dig