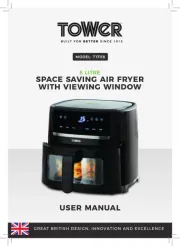
Tower Vortx T17128 Manual

Tower Frituregryde Vortx T17128

Læs nedenfor 📖 manual på dansk for Tower Vortx T17128 (16 sider) i kategorien Frituregryde. Denne guide var nyttig for 12 personer og blev bedømt med 4.8 stjerner i gennemsnit af 6.5 brugere

Side 1/16
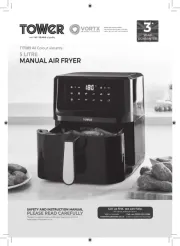
T17128
12L 5-in-1
Digital Air
Fryer Oven
with Rotisserie
SAFETY AND INSTRUCTION MANUAL
PLEASE READ CAREFULLY
*Subject to registering your Extended Guarantee online at www.towerhousewares.co.uk.
2
Technical Data:
This box contains:
Instruction Manual
12L Digital Air Fryer Oven
Oil drip tray
Rotisserie fork and handle
3 x air flow racks
8 x mini skewers
Rotating cage
2 locking screws
1. Air Inlet
2. Control panel
3. Vents (side of unit)
4. Door Handle
5. Door
6. Cooking cavity
7. Oil drip tray
8. Rotisserie fork
9. Rotisserie handle
10. Air flow racks
11. 8 Skewers
2 Retaining Wheels
12. Rotating Basket
Specifications:
7 10
11 12
8 9
1
2
4
3
5
6
Description: 12L 5-in-1 Digital Air Fryer Oven with Rotisserie
Model: T17128
Rated Voltage: 220 - 240V~
Frequency: 50/60Hz
Power consumption: 1800W
3
1. + / - Increase / decrease the temperature keys
2. 12 Program Keys
3. LED display screen (alternating display of temperature and remaining cooking time during
operation)
4. + / - Increase / decrease the cooking time keys
5. Light ON/OFF key
6. ON/ OFF key
7. Rotating function (rotating basket, rotating) ON/OFF key
Control Panel:
1 2 3 4
5 76
PRESETS
The symbols represent the following preset settings
Symbol Programme Temp (oC) Cooking Time (Minutes)
Chips 200 15
Steak/Cutlets 175 25
Fish 165 15
Shrimp 160 12
Pizza 180 15
Chicken 185 40
Baking 160 30
Rotary Grilling
(with automatic rotating function) 190 30
Dehydrate 30 120
Heating Up 115 12
Heat Up 80 5
Defrost 200 20
4
Wiring Safety for UK Use Only
IMPORTANT
As the colours in the mains lead of this
appliance may not correspond with the
coloured markings identifying the terminals in
your plug, please proceed as follows:
The wires in the mains lead are labelled in
accordance with the following code:
Blue neutral [N] Brown live [L] Green/
Yellow [EARTH]
Plug Fitting Details (Where Applicable).
The wire labelled blue is the neutral and must
be connected to the terminal marked [N].
The wire labelled brown is the live wire and
must be connected to the terminal marked [L].
The wire labelled green/yellow must be
connected to the terminal marked with the
letter [E].
On no account must either the brown or the
blue wire be connected to the [EARTH] terminal.
Always ensure that the cord grip is fastened
correctly.
The plug must be fitted with a fuse of the same
rating already fitted and conforming to BS 1362
and be ASTA approved.
If in doubt consult a qualified electrician who
will be pleased to do this for you.
Non-Rewireable Mains Plug.
If your appliance is supplied with a non-
rewireable plug fitted to the mains lead and
should the fuse need replacing, you must use
an ASTA approved one (conforming to BS 1362
of the same rating).
If in doubt, consult a qualified electrician who
will be pleased to do this for you.
If you need to remove the plug - disconnect it
from the mains - then cut it off of the mains
lead and immediately dispose of it in a safe
manner. Never attempt to reuse the plug or
insert it into a socket outlet as there is a danger
of an electric shock.
Earth
(Green/Yellow)
Fuse
Neutral
(Blue)
Live
(Brown)
WARNING:
This appliance MUST be earthed!
DISPOSAL OF THE UNIT
Appliances bearing the symbol shown here may not be disposed of in domestic rubbish.
You are required to dispose of old electrical and electronic appliances like this separately.
Please visit www.recycle-more.co.uk or www.recyclenow.co.uk for access to information about the
recycling of electrical items.
Please visit www.weeeireland.ie for access to information about the recycling of
electrical items purchased in Ireland.
The WEEE directive, introduced in August 2006, states that all electrical items must be
recycled, rather than taken to landfill.
Please arrange to take this appliance to your local Civic Amenity site for recycling,
once it has reached the end of its life.
5
Check that the voltage
of the main circuit
corresponds with the
rating of the appliance
before operating.
If the supply cord or
appliance is damaged,
stop using the appliance
immediately and
seek advice from the
manufacturer, its service
agent or a similarly
qualified person.
WARNING: DO NOT
let the cord hang over
the edge of a table or
counter, serious burns
may result from the air
fryer being pulled off the
counter where it may be
grabbed by children or
become entangled with
the user.
DO NOT carry the
appliance by the power
cord.
DO NOT use any
extension cord with this
appliance.
DO NOT pull the plug
out by the cord as this
may damage the plug
and/or the cable.
Switch off and
unplug before fitting
or removing tools/
attachments, after use
and before cleaning.
Close supervision is
necessary when any
appliance is used by or
near children.
Children should not play
with the appliance.
This appliance can
be used by children
aged from 16 years and
above and persons with
reduced physical, sensory
or mental capabilities or
lack of experience and
knowledge if they have
been given supervision
or instruction concerning
use of the appliance in a
safe way and understand
the hazards involved.
Cleaning and user
maintenance should
not be undertaken
by children without
supervision.
Take care when any
appliance is used near
pets.
DO NOT use this product
for anything other than
its intended use.
Please read these notes carefully using your
BEFORE
Tower appliance
Important Safety Information:
6
This appliance is for
household use only.
Please ensure that the
appliance is used on a
stable, level, and heat
resistant surface.
DO NOT immerse cords,
plugs or any part of the
appliance in water or any
other liquid.
DO NOT use the
appliance outdoors.
DO NOT place the
air fryer on or near
combustible materials
such as a tablecloth or
curtain.
DO NOT place the air
fryer against a wall or
against other appliances.
Leave at least 10cm
free space on the back
and sides and 10cm
free space above the
appliance.
Allow the air fryer to cool
down for approximately
30 minutes before you
handle or clean it.
Make sure the food
prepared in the air fryer
comes out golden-yellow
instead of dark brown.
Remove burnt remnants.
During hot air frying,
hot steam is released
through the air outlet
openings. Keep your
hands and face at a safe
distance from the steam
and from the air outlet
openings.
Any baking trays or
oven dishes used in the
air fryer will become
hot. Always use oven
gloves when handling or
removing anything from
the air fryer.
DO NOT place anything
on top of the air fryer.
In the unlikely event
the appliance develops
a fault, stop using
it immediately and
seek advice from the
Customer Support Team.
+44 (0) 333 220 6066
7
Before First Use:
Read all instructions and safety information carefully before first use. Please retain this
information for future reference. If the appliance is given to someone else, it should always
be accompanied by these operating instructions. As they form an integral part of the
appliance.
1. Remove your appliance from the packaging.
2. Check that there is no damage to the cord or any visible damage to the body.
3. Check that all listed parts are present.
4. Dispose of the packaging in a responsible manner.
5. Remove any stickers or labels from the appliance. DO NOT remove the rating plate or
any warnings.
6. The device should be used for the first time without any food in it as it may produce
some smoke or odours due to coating residues. Allow the device to heat up on the
highest temperature setting for approx. 15 minutes without any food in it (see the
Using your Appliance section).
7. Thoroughly clean the fryer following the Cleaning and Care Section with hot water,
some washing-up liquid and a non-abrasive sponge and rinse thoroughly.
8. Wipe the inside and outside of the appliance with a damp cloth.
9. DO NOT fill the fryer with oil or frying fat. This fryer operates using hot air and
requires very little to no oil.
10. Familiarise yourself with the control panel.
Using Your Appliance.
Oil Drip Tray:
Insert the fat collecting tray into the bottom of the cooking space so that any dripping fat,
crumbs or other food residues can be collected in it.
Air Flow Racks:
1. The air flow racks are intended for drying. However, they can also be used for crisping,
warming up etc.
2. Slide the air flow racks onto the rails in the cooking space. The heating element is
located at the top of the cooking space. Therefore the higher up a air flow rack is
placed, the more intense the heat is from above.
3. In the top section, the food is cooked faster and crispier. The middle position should
be chosen to achieve even heating from all sides. The bottom rails are suitable for
gentle cooking.
Rotisserie:
The rotisserie consists of the shaft and two rotisserie forks. The rotisserie is suitable for
grilling large pieces of meat, e.g. chicken, pork.
Assemble the rotisserie and insert it into the appliance:
1. Slide one of the rotisserie forks onto the shaft and lock it with the locking screw. The
shaft contains a small round notch for the tip of the locking screw. In the case of
smaller pieces of food, the rotisserie forks can be secured more centrally on the shaft
(see Illustration A).
2. Slide the food for grilling onto the rotisserie fork.
3. Slide the other rotisserie fork onto the shaft and food and lock it with the locking
screw.
4. Plug one end of the shaft into the round holder on the left-hand side of the cooking
space. Then hang the other end of the shaft into the support on the right-hand side
of the cooking space.
5. Check that it fits securely. The rotisserie must not be able to rotate about its own axis
when the device is switched off. If this is not the case, plug the left-hand end of the
shaft deeper into the holder.
6. After use, remove the hot rotisserie from the cooking space using the removal tool
(see the ‘Removal Tool section). Always use oven gloves to remove the rotisserie forks
and take off the grilled items.
Note: The shaft contains two small round notches marking the outermost position of the
locking screws. These must not be attached any further than the outer ends of the shaft to
ensure smooth operation.
DO NOT place any pieces of meat that are too large onto the rotisserie as this could hinder
rotation.
8
Rotating Basket:
The rotating basket, turns during cooking to ensure that the food crisps on all sides. The
rotating basket is particularly suitable for preparing chips or other potato products, small
pieces of vegetables and meat as well as frozen products, e.g. chicken nuggets or squid
rings.
Fill the rotating basket and insert it into the device:
1. Open the flap of the rotating basket (see
Illustration B).
2. To ensure food is cooked evenly fill the rotating
basket no more than ¾ full with food.
3. Close the flap and ensure that it is shut
correctly so that it does not open during use:
4. Insert the left-hand side of the rotating basket
(with the L marking) into the cooking space. To
do this, plug the left end (with just one notch)
of the shaft as far as it will go into the holder
on the left-hand side of the cooking space.
Then hang the other end of the shaft (with two
notches) into the support on the right-hand
side of the cooking space (see Illustration C).
5. Check that the rotating basket fits securely. It
must not be able to rotate about its own axis
when the device is switched off. If this is not
the case, plug the left-hand end of the shaft
deeper into the holder.
6. After use, remove the hot rotating basket from
the cooking space using the removal tool (see
the ‘Removal Tool section). Always use oven
gloves to open and empty the rotating basket.
Removal Tool:
Use the removal tool to take out the hot rotating basket or rotisserie from the cooking
space:
1. Place the ends of the removal tool under the shaft (see Illustration D).
2. First lift up the right-hand side of the shaft and move it forwards a little until the left
end of the shaft is released from the holder.
3. Carefully lift the rotating basket or rotisserie out of the cooking space and place down
on a heat-resistant surface.
Using the oven:
The appliance is suitable for frying, baking, grilling, drying, keeping warm or de-
frosting food.
DO NOT place food that is still packed in plastic wrap or plastic bags in the device.
Always place the hot accessories on a heat-resistant surface.
DO NOT allow food to come into contact with the heating element of the device.
Keep the device clean. Food residue could start to burn and possibly cause faults.
Note: The appliance door must be closed for settings to be made and keys to be pressed.
1. Slide the drip tray into the bottom of the cooking space.
2. Select a suitable accessory for the food that is to be prepared. You can use a small
casserole or baking dish to place on a air flow rack or attach the chosen accessory
into the appliance.
3. Close the door.
4. Press the ON/OFF key. The displays on the control panel will illuminate. The preset
temperature and time are 185 °C and 15 minutes.
Set the temperature and cooking time either:
- manually with the + / - temperature and time keys and start the cooking process by
pressing the ON/OFF key Or
5. - select one of the 10 programs .
Select a program:
1. Touch the required program symbol.
2. When the symbol flashes, the program is activated and the device will turn on a few
seconds later or press the ON/OFF key to start the cooking process immediately.
Note: Whilst the symbol is still flashing it is possible to change the program.
9
3. If the rotating basket or the rotisserie is used, touch the rotating function ON/OFF
key to start the rotating function. (Touching the rotating function ON/OFF key
again will stop the rotating function.)
4. Whilst familiarising yourself with the appliance it is advisable to check the condition
of the food in between times to ensure that it does not burn. To do this, switch on
the light using the light ON/OFF key or open the door. When the door is opened,
operation will be interrupted automatically and the light will switch on. Operation will
resume once the door is closed.
5. Once the cooking time has elapsed, the device will switch off automatically and there
will be an audible signal.
6. Carefully open the door and take the cooked items out of the appliance. Always take
out the rotating basket or rotisserie using the removal tool.
7. After switching off the device, the fan continues to run for a few seconds to cool down
the device. The fan symbol flashes.
8. Remove the mains plug from the plug socket after use.
9. Allow the used accessories and device to cool down before cleaning them (see the
‘Cleaning and Care’ section).
Tips:
The preparation time will depend on the size of your ingredients. Smaller sizes may
require a shorter cooking time.
Add some oil to fresh potatoes for a crispy result. Fry your ingredients in the air
fryer within a few minutes after you added the oil. For best fluffy results, parboil the
potatoes before frying.
Be cautious of using extremely greasy ingredients such as sausages in the air fryer.
Snacks that can be prepared in an oven can also be prepared in the air fryer.
The optimal amount for preparing crispy fries is 700 grams.
Use pre-made dough to prepare filled snacks quickly and easily. Pre-made dough
also requires a shorter preparation time than home-made dough.
Place a baking tin or oven dish in the air fryer oven if you want to bake a cake or
quiche, or if you want to fry fragile ingredients or filled ingredients.
Troubleshooting:
PROBLEM POSSIBLE CAUSE SOLUTION
The air fryer does not
work
The appliance is not plugged in. Plug the appliance into an earthed wall
socket.
The appliance is not turned on. Press the On/Off button to switch on the
appliance.
Fried snacks are not
crispy when they come
out of the air fryer.
Wrong type of snacks used. Use oven snacks or lightly brush some
oil onto the snacks for a crispier result.
The fryer contains grease from
previous use.
White smoke is caused by grease
heating up inside the fryer. Make sure
you clean the fryer properly after each
use.
10
PROBLEM POSSIBLE CAUSE SOLUTION
The fried ingredients
are not done.
There is a large batch of
ingredients in the air fryer.
Put smaller batches of ingredients in the
air fryer. Smaller batches are fried more
evenly.
The set temperature is too low.
Set the temperature to the required
temperature setting.
(Refer to the ‘Settings’ section under
‘Using the appliance’ for a temperature
reference guide).
The preparation time is too short.
Set unit to the required preparation
time (refer to the ‘Settings’ section
under ‘Using the Appliance’ for a timer
reference guide).
Fresh fries are fried
unevenly in the air fryer.
Wrong type of potatoes used. Use fresh potatoes and make sure they
stay firm during frying.
The potato sticks were not rinsed
adequately before frying.
Rinse the potato sticks properly to
remove starch from the outside.
Fresh fries are not crispy
when they come out of
the air fryer.
The crispiness of the fries depends
on the amount of oil and water in
the fries.
Make sure you dry the potato sticks
properly before you add the oil.
Cut the potato sticks smaller for a crisp-
ier result.
Add slightly more oil for a crispier result.
Error message E1 or E2
is displayed
Contact the customer service
department.
Cleaning & Care:
WARNING! DO NOT IMMERSE THE APPLIANCE IN WATER OR ANY OTHER LIQUID.
Unplug the appliance from the mains and allow to cool down.
Clean the main unit and the used accessories after each use. DO NOT allow food
residues to dry on.
DO NOT immerse the main unit in water or other liquids.
Wipe the main unit clean with a damp cloth and a little detergent.
Clean all other used parts with detergent and warm water. In the case of stubborn
dirt, soak the accessories in warm water and detergent beforehand.
DO NOT use any metal kitchen utensils, caustic or abrasive cleaning agents or
scouring sponges for cleaning.
Do not place the main unit in the dishwasher.
Allow all parts to dry completely or dry with a tea towel before reusing or storing.
Store the appliance in a cool, dry place.
11
Weights & Measures:
Check these charts for basic imperial to metric conversions of weights.
Metric Imperial US cups
250ml 8 floz 1 cup
180ml 6 fl oz 3/4 cup
150ml 5 floz 2/3 cup
120ml 4 floz 1/2 cup
75ml 2 1/2 floz 1/3 cup
60ml 2 floz 1/4 cup
30ml 1 floz 1/8 cup
15ml 1/2 floz 1 tablespoon
Imperial Metric
1/2 oz 15g
1 oz 30g
2 oz 60g
3 oz 90g
4 oz 110g
5 oz 140g
6 oz 170g
7 oz 200g
8 oz 225g
9 oz 255g
10 oz 280g
11 oz 310g
12 oz 340g
13 oz 370g
14 oz 400g
15 oz 425g
1 lb 450g
Food Allergies
Important Note: Some of the recipes contained in this document may contain nuts and/or other
allergens. Please be careful when making any of our sample recipes that you ARE NOT allergic
to any of the ingredients. For more information on allergies, please visit the Food Standards
Agency’s website at: www.food.gov.uk
12
Ingredients
2 large potatoes
½ tbsp. paprika
Pinch of salt
Pinch of pepper
1 tbsp. Sunflower oil
Ingredients
1 whole chicken (1-1.5lbs /
500-700g)
1 tbsp olive oil
¼ tsp sea salt
1 tsp paprika
1tbsp dried thyme
1 tbsp dried mustard
½ tsp onion powder
½ tsp garlic powder
Ingredients
12 chicken wings
2 tbsp soy sauce
2 tbsp honey
1 ½ tsp salt
¼ tsp white pepper
¼ tsp black pepper
2 tbsp fresh lime juice
Homemade Fries
Classic Roast Chicken
Honey Lime Chicken Wings
Method
1. Wash, peel and slice the potatoes.
2. Dry with kitchen paper.
3. Cut the potatoes into your desired length and thickness.
4. Bring a large pot of water to the boil with a pinch of salt. Add the
chips and allow to part boil for 10 minutes.
5. Strain the fries and immediately run under cold water to stop
them from cooking any more.
6. Pour the oil in a bowl, with the paprika, salt and pepper. Put the
fries on top and mix until all the fries are coated.
7. Remove the fries from the bowl with your fingers or kitchen
utensil so that the excess oil stays behind in the bowl.
8. Place the fries in the air fryer and then set the fryer to the French
Fries setting.
Variations: Try replacing ½ tbsp. of paprika with ½ tbsp. garlic powder,
or ½ tbsp. of grated parmesan cheese.
Method
1. Place the chicken in a medium-sized bowl.
2. In a separate bowl, mix together the olive oil, sea salt, paprika,
dried thyme, dried mustard, onion powder and garlic powder.
3. Rub the chicken with the spice mix, put it on the rotisserie fork
and place the fork into the air fryer.
4. Cook on the Chicken pre-set.
5. Use a meat thermometer to ensure the chicken has reached a
safe internal temperature before removing from the rotisserie.
6. Allow 5 minutes’ standing time before serving.
Method
1. Place all the ingredients inside a large mixing bowl or zip-locked
sealing bag and mix them well. Marinate in the refrigerator for at
least 4 hours (preferably overnight)
2. Line a baking tray with baking paper and evenly scatter the
chicken wings across it.
3. Air-fry on the Chicken setting, turning halfway through.
13
Ingredients
4 skin-on salmon fillets
4 tbsp butter
1 clove garlic, minced
1 tsp salt
1 tsp fresh dill, chopped
1 tbsp fresh parsley, chopped
Juice of 1 lemon
Ingredients
100g dark chocolate chips
100g unsalted butter
1 ½ tbsp. self-raising flour
2 eggs
2 ½ tbsp. sugar
Lemon Garlic Salmon
Molten Chocolate Lava Cake
Method
1. Melt the butter and mix in the remaining ingredients to create
a butter sauce.
2. Coat the fish in the sauce on both sides and place it on a baking
tray lined with baking paper.
3. Place the baking tray inside the air fryer and cook on the Fish
setting.
Method
1. Melt the chocolate and the butter, stirring all the time.
2. Stir the flour into the mixture, mix it in lightly and set the
mixture aside.
3. In a separate mixing bowl, mix together the eggs and sugar
until light and frothy. Mix in the chocolate sauce slowly until the
ingredients are well blended together.
4. Pour the batter into an oven-safe cup or ramekin and place it
inside the air fryer.
5. Turn the air fryer on in the Cake setting or at 190 degrees for 6
minutes.
6. When ready, top with ice-cream and serve immediately.


Produkt Specifikationer

Mærke: Tower
Kategori: Frituregryde
Model: Vortx T17128

Har du brug for hjælp?

Hvis du har brug for hjælp til Tower Vortx T17128 stil et spørgsmål nedenfor, og andre brugere vil svare dig