TP-Link VIGI C540S Manual


Læs gratis den danske manual til TP-Link VIGI C540S (2 sider) i kategorien Overvågningskamera. Denne vejledning er vurderet som hjælpsom af 21 personer og har en gennemsnitlig bedømmelse på 3.6 stjerner ud af 11 anmeldelser. Har du et spørgsmål om TP-Link VIGI C540S, eller vil du spørge andre brugere om produktet?

Side 1/2
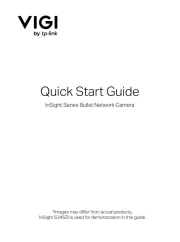
Quick Start Guide
*Images may dier from actual products.
Appearance
Power Supply Interface
(12V DC)
5
Built-in Microphone
RJ45 Network Interface
(supports PoE)*
1
2
4
Package Contents
Network Camera
Waterproof Cable
Attachments
Quick Start Guide
Quick
Start
Guide
Option 1: Wall/Ceiling Mounting
1. Stick the mounting template to the desired mounting place. Drill 4 screw holes
according to the template.
2. Insert the anchors into the holes, use the provided screws to x the camera’s
bracket to the wall or ceiling.
Installing Waterproof Cable Attachments
Install the waterproof cable attachments for the network interface when the camera is installed outdoors.
Note: Make sure each part is securely attached and the waterproof rings are ush to keep out water.
1. Route the network cable through the following components in order: x nut,
waterproof ring, and then the waterproof jacket.
2. Fix the O-ring to the network interface of the camera and connect the network
cables.
1
Mount Camera
Fix Nut
Waterproof
Ring
O-ring
Network
Interface
Waterproof
Jacket
OR
Mounting Template
Anchor
Self-tapping Screw
Anchor
Self-tapping Screw
Mounting Template
Option 2: Pole Mounting
1. Thread each of the two cable ties through the slits on the back of the camera’s
bracket indicated below.
2. Slip the two cable ties through the pole. Tighten them to rmly attach the pole.
Cable Tie
Cable Tie
3
Speaker
6
microSD Card Slot
Insert a microSD card for local storage. Initialize the SD card via VIGI app or other
management tools before recording videos.
7
Reset Button
Long press the button to reset the camera to factory settings.
6
7
Note: Before inserting the microSD card or resetting the
camera, rotate the sphere and unfasten the two xed
screws to remove the cover.
3. Attach the network interface with the waterproof jacket, then twist to lock.
4. Insert the waterproof ring into the waterproof jacket. Rotate the x nut to secure
it to the waterproof jacket.
Mounting Template
Anchors x 4
Screws x 4
Note: Make sure that the wall is strong enough to withstand 3 times the
weight of the camera and mounting bracket .
Φ6 mm Φ3.5 mm
When installing with anchors
Φ = 6 mm (15/64 in.)
When installing with screws only
Φ = 3 mm (1/8 in.)
Appropriate drilling size (Φ)


Produkt Specifikationer

Mærke: TP-Link
Kategori: Overvågningskamera
Model: VIGI C540S

Har du brug for hjælp?

Hvis du har brug for hjælp til TP-Link VIGI C540S stil et spørgsmål nedenfor, og andre brugere vil svare dig


Overvågningskamera TP-Link Manualer

TP-Link

TP-Link Tapo C410 Manual

18 Oktober 2025
TP-Link

TP-Link Tapo C425 Manual

15 September 2025
TP-Link

TP-Link VIGI C230I Manual

7 September 2025
TP-Link

TP-Link VIGI C430I Manual

7 September 2025
TP-Link

TP-Link VIGI C420I Manual

7 September 2025
TP-Link

TP-Link Tapo TC41 Manual

2 September 2025
TP-Link

TP-Link Tapo C402 Manual

2 September 2025
TP-Link

TP-Link Tapo C202 Manual

16 August 2025
TP-Link

TP-Link Tapo TC42 Manual

12 August 2025

Overvågningskamera Manualer

Nyeste Overvågningskamera Manualer