Fonctionnalités du produit
AUX / Stream / Xbox One Chat Cable
Câble auxiliaire/flux audio
1. Right Click on Taskbar Speaker Icon, Select Playback Devices
a. Set Turtle Beach ELITE GAME as your default device.
b. Select Configure, set Turtle Beach ELITE GAME to 7.1 Surround Sound.
c. Set Turtle Beach ELITE CHAT as your default communication device.
d. (In Recording Tab) Set Turtle Beach ELITE CHAT as your default device.
1. Dans le Panneau de configuration, ouvrez Matériel et
a. Sélectionnez le casque Turtle Beach ELITE GAME
comme appareil par défaut
b. Sélectionnez le casque Turtle Beach Elite Game,
cliquez sur le bouton Configurer pour sélectionner
c. Sélectionnez le casque Turtle Beach ELITE Chat
comme appareil par défaut dans
d. Sélectionnez le casque Turtle Beach ELITE Chat
comme appareil par défaut dans
1. Ve al Panel de control >> Sonido
a. Configura Turtle Beach ELITE GAME como
dispositivo predeterminado
b. Selecciona Configurar y configura el juego de élite de
Turtle Beach a sonido envolvente 7.1
c. Configura el chat de Turtle Beach ELITE como
dispositivo de comunicación predeterminado.
d. (En la pestaña de grabación) Configura el chat de
élite de Turtle Beach como tu
dispositivo predeterminado
1. Accedere a Pannello di controllo >> Audio
a. Impostare Turtle Beach ELITE GAME come
b. Selezionare Configura, impostare Turtle Beach Elite
Game su Audio surround 7.1
c. Impostare Turtle Beach ELITE Chat come dispositivo
di comunicazione predefinito
d. (Nella scheda Registrazione) Impostare Turtle Beach
ELITE Chat come dispositivo predefinito
1. Dirija-se ao Painel de Controlo >> Som:
a. Defina o Turtle Beach ELITE GAME como o seu
b. Selecione Configurar, associe o Turtle Beach Elite
c. Defina o Turtle Beach ELITE como o seu dispositivo
de comunicação predefinido
d. (No separador Gravação) Defina o Turtle Beach
ELITE Chat como o seu dispositivo predefinido
1. Gå til Kontrolpanel >> Lyd
a. Angiv Turtle Beach ELITE GAME som
b. Vælg konfigurér, indstil Turtle Beach ELITE
Game til 7.1 surroundsound
c. Vælg Turtle Beach ELITE Chat som din
standardkommunikationsenhed
d. (På fanen Optagelse) Vælg Turtle Beach ELITE
Chat som din standardenhed
1. Ga naar het Configuratiescherm > Geluid
a. Selecteer Turtle Beach ELITE GAME
b. Selecteer Configureren en stel Turtle Beach
ELITE Game in op 7.1 Surround
c. Selecteer Turtle Beach TAC ELITE als
standaardcommunicatieapparaat
d. Selecteer op het tabblad Opnemen Turtle Beach
ELITE Chat als standaardapparaat
1. Gå till Kontrollpanelen >> Ljud
a. Välj Turtle Beach ELITE GAME som
b. Klicka på Konfigurera och ställ in Turtle Beach
ELITE GAME till 7.1-surround
c. Välj Turtle Beach ELITE som din standardenhet
d. Välj Turtle Beach ELITE Chat som din
standardenhet i fliken Inspelning
1. Wählen Sie Steuerung >> Sound
a. Wählen Sie Turtle Beach ELITE GAME als Standardgerät
b. Wählen Sie „Konfigurieren“, stellen Sie Turtle Beach
Elite Game auf 7.1 Surround Sound ein
c. Legen Sie Turtle Beach ELITE Chat als
Standardkommunikationsgerät fest
d. Legen Sie (im Register „Aufnahme“) Turtle Beach
ELITE Chat als Standardgerät fest
1. Go to Settings >> Accessory Settings >> Audio Device Settings
a. Select Turtle Beach ELITE CHAT for both Input Device & Output Device
2. Go to Settings >> Sound Settings >> Audio Output Settings
a. Select Optical Digital
b. Select ONLY Dolby Digital 5.1 Ch
c. Set Audio MultiOutput to On
1. Ouvrez Paramètres >> Paramètres accessoires >>
Paramètres périphériques audio
a. Dans Périphérique d'entrée et Périphérique de
sortie, sélectionnez Turtle Beach Elite Chat
2. Ouvrez Paramètres >> Paramètres son >>
Paramètres de sortie audio
a. Sélectionnez Numérique optique
b. Cochez UNIQUEMENT Dolby Digital 5.1 canaux
c. Cochez Connecteur AV MULTI OUT
1. Dirija-se a Definições >> Definições dos Acessórios >>
Definições de Dispositivo Áudio:
a. Selecione Turtle Beach Elite Chat tanto para o
Dispositivo de Entrada como de Saída
2. Dirija-se a Definições >> Definições de Som >>
Definições de Saída de Áudio:
a. Selecione Digital Ótica
b. Selecione APENAS Dolby Digital 5.1 C
c. Ative a Saída Múltipla de Áudio
1. Ga naar Instellingen > Randapparatuurinstellingen >
Instellingen audioapparaat
a. Selecteer Turtle Beach Elite Chat voor zowel
invoer- als uitvoerapparaat
2. Ga naar Instellingen > Geluidsinstellingen >
Instellingen audio-uitvoer
a. Selecteer Optisch digitaal
b. Selecteer ALLEEN Dolby Digital 5.1 Ch
c. Zet Meervoudige audio-uitvoer Aan
1. Gå til Indstillinger >> Audioenhedsindstillinger >>
a. Vælg Turtle Beach Elite Chat som input- og
2. Gå til Indstillinger >> Lydindstillinger >>
Audio output-indstillinger
b. Vælg KUN Dolby Digital 5.1 Ch
c. Sæt Audio MultiOutput TIL
1. Ve a Configuración >> Configuración de accesorios >>
Configuración de los dispositivos de audio
a. Selecciona el chat de élite de Turtle Beach para los
dispositivos de entrada y de salida
2. Ve a Configuración >> Ajustes de sonido >>
Configuración de la salida de audio
a. Selecciona digital óptica
b. Selecciona SOLO Dolby Digital 5.1 Ch
c. Configura a encendido la salida de sonido múltiple
1. Selezionare Impostazioni >> Impostazioni degli accessori >>
Impostazioni dei dispositivi audio
a. Selezionare Turtle Beach Elite Chat come
dispositivo di ingresso e di uscita
2. Selezionare Impostazioni >> Impostazioni dell’audio >>
Impostazioni di uscita audio
a. Selezionare Digitale ottica
b. Selezionare SOLO Can. Dolby Digitale 5.1
c. Impostare Uscita audio multipla su Attiva
1. Gå till Inställningar >> Tillbehörsinställningar >>
Inställningar för ljudenhet
a. Välj Turtle Beach Elite Chat som både indataenhet
2. Gå till Inställningar >> Ljudinställningar >>
Inställningar för ljudutdata
b. Välj endast Dolby Digital 5.1 kan
c. Ställ in Multi-utdata till På
1. Wählen Sie Einstellungen >> Peripheriegeräte-Einstel
lungen >> Audio-Gerät-Einstellungen
a. Wählen Sie Turtle Beach Elite Chat als Eingabe-und
2. Wählen Sie Einstellungen >> Sound-Einstellungen >>
Audioausgabe-Einstellungen
a. Wählen Sie Optisches Digitalkabel
b. Wählen Sie NUR die Option „Dolby Digital 5.1 K.“
c. Stellen Sie die Option „Audio-Mehrfachausgang“
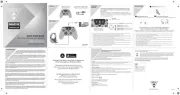
TACTICAL AUDIO CONTROLLER
GUIDE DE DÉMARRAGE RAPIDE
turtlebeach.com/eliteprotac I turtlebeach.com/support
Any questions? Des questions?
Con igurf ation PlayStation
1. Go to Settings » Sound and Screen Audio Output Settings»
a. Select Primary Output Port > Digital Out (OPTICAL) > ONLY Dolby Digital 5.1ch
b. Select Audio Format (Priority) > Bitstream (Dolby)
2. Go to Settings >> Devices >> Audio Devices
a. Select USB Headset(Turtle Beach ELITE CHAT for Input & Output Device
b. Set Output to Headphones to Chat Audio
c. Set Volume Control (Headphones) level to maximum
1. Ouvrez Paramètres >> Son et écran >> Paramètres de sortie audio
a. Sélectionnez ensuite Port de sortie principal > DIGITAL OUT (OPTICAL),
puis cochez uniquement Dolby Digital 5.1 canaux
b. Sélectionnez Format audio (Priorité) > BitStream (Dolby)
2. Ouvrez Paramètres >> Périphériques >> Périphériques audio
a. Dans Périphérique d'entrée et Périphérique de sortie, sélectionnez Casque USB
(Turtle Beach ELITE CHAT)
b. Dans Sortie vers le casque, sélectionnez Audio du Chat
c. Le niveau de volume du paramètre Réglage du volume (casque) doit être au maximum
1. Ve a Configuración » Sonido y pantalla » Configuración de la salida de audio
a. Selecciona Puerto de salida principal > Salida digital (ÓPTICA) > Solo Dolby Digital 5.1ch
b. Selecciona Formato de audio (Prioridad) > Bitstream (Dolby)
2. Ve a Configuración >> Dispositivos >> Dispositivos de sonido
a. Selecciona los auriculares USB (CHAT DE ÉLITE de Turtle Beach) para los dispositivos
b. Configura la salida de los auriculares al audio del chat
c. Configura el nivel del control de volumen (auriculares) al máximo
1. Wählen Sie Einstellungen » Sound und Bildschirm » Audioausgabe-Einstellungen
a. Wählen Sie Primärer Ausgabeport > Digital Out (OPTICAL) > Nur die Option „Dolby Digital 5.1 K“
b. Wählen Sie Audioformat (Priorität) > „Bitstream (Dolby)“
2. Wählen Sie Einstellungen >> Geräte >> Audiogeräte
a. Wählen Sie USB-Headset (Turtle Beach ELITE CHAT) als Eingabe- und Ausgabe-Gerät
b. Stellen Sie die Ausgabe an Kopfhörer auf Chat-Sound ein
c. Stellen Sie die Lautstärkeregelung (Kopfhörer) auf Maximum ein
1. Selezionare Impostazioni >> Audio e schermo >> Impostazioni uscita audio
a. Selezionare Uscita principale > DIGITAL OUT (OPTICAL) > Solo Can. Dolby Digital 5.1
b. Selezionare Formato audio (priorità) > Bitstream (Dolby)
2. Selezionare Impostazioni >> Dispositivi >> Dispositivi audio
a. Selezionare USB Headset (Turtle Beach ELITE CHAT) come dispositivo di ingresso e di uscita
b. Impostare l’opzione Riproduci l’audio tramite cuffie su Audio della chat
c. Impostare il livello di Controllo del volume (cuffie) al massimo
1. Dirija-se a Definições >> Som e Ecrã >> Definições de Saída de Áudio:
a. Selecione Porta de Saída Principal > Saída digital (ÓTICA) > Apenas Dolby Digital 5.1c
b. Selecione Formato de Áudio (Prioridade) >> Bitstream (Dolby)
2. Dirija-se a Definições >> Dispositivos >> Dispositivos de Áudio:
a. Selecione Auscultador USB (Turtle Beach ELITE CHAT) no Dispositivo de Entrada e Saída
b. Defina a Saída nos Auscultadores para Chat Áudio
c. Defina o nível do Controlo de Volume (Auscultadores) no máximo
1. Gå till Inställningar » Ljud och bildskärm » Inställningar för ljudutdata
a. Välj Primär utdataport > Digital Out (OPTICAL) > Endast Dolby Digital 5 kan
b. Välj Ljudformat (prioriterat) > Bitström (Dolby)
2. Gå till Inställningar >> Enheter >> Ljudenheter
a. Välj USB-headset (Turtle Beach ELITE CHAT) som både indataenhet och utdataenhet
b. Ställ in Utdata till hörlurar till Chattljud
c. Ställ in Volymkontroll (hörlurar) till maximal nivå
1. Gå til Indstillinger >> Lyd og skærm >> Indstillinger for audio-output
a. Vælg Primære udgangsport > Digital Out (OPTICAL) > Kun Dolby Digital 5.1ch
b. Vælg Audioformat (prioritet) > Bitstream (Dolby)
2. Gå til Indstillinger >> Enheder >> Lydenheder
a. Vælg USB-headset (Turtle Beach ELITE CHAT) som input- og outputenhed
b. Indstil Output til hovedtelefoner til Chatlyd
c. Indstil Lydstyrkekontrol (hovedtelefoner) til maksimalt niveau
1. Ga naar Instellingen > Geluid en scherm > Instellingen audio-uitvoer
a. Selecteer Primaire uitvoeraansluiting > Digital Out (OPTICAL) > Alleen Dolby Digital 5 Ch
b. Selecteer Audio-indeling (prioriteit) > Bitstream (Dolby)
2. Ga naar Instellingen > Apparaten > Audioapparaten
a. Selecteer USB-headset (Turtle Beach ELITE CHAT) voor invoer- en uitvoerapparaat
b. Stel de uitvoer in op Hoofdtelefoon naar chataudio
c. Stel Volumebediening (hoofdtelefoon) in op maximaal
Regulatory Compliance Statements for the Turtle Beach Elite Pro Tactical Audio Controller Model
Federal Communications Commission (FCC) Compliance Notices
Class B Interference Statement
This equipment has been tested and found to comply with the limits for a Class B digital device, pursuant to
Part 15, Subpart B of the FCC Rules. These limits are designed to provide reasonable protection against
harmful interference in a residential installation. This equipment generates, uses, and can radiate radio
frequency energy and, if not installed and used in accordance with the instructions, may cause harmful
interference to radio communications. However, there is no guarantee that interference will not occur in a
particular installation. If this equipment does cause harmful interference to radio or television reception,
which can be determined by turning the equipment off and on, the user is encouraged to try to correct the
interference by one or more of the following measures:
• Reorient or relocate the receiving antenna.
• Increase the separation between the equipment and receiver.
• Connect the equipment into an outlet on a circuit different from that to which the receiver is connected.
• Consult the dealer or an experienced radio/TV technician for help.
This device complies with Part 15 of the FCC Rules. Operation is subject to the following two conditions:
(1) This device may not cause harmful interference, and (2) this device must accept any interference received,
including interference that may cause undesired operation.
Canadian Department of Communications Radio Interference Regulations
This digital apparatus does not exceed the Class B limits for radio-noise emissions from a digital apparatus
as set out in the Radio Interference Regulations of the Canadian Department of Communications. This Class
B digital apparatus complies with Canadian ICES-003.
Règlement sur le brouillage radioélectrique du ministère des Communications
Cet appareil numérique respecte les limites de bruits radioélectriques visant les appareils numériques de
classe B prescrites dans le Règlement sur le brouillage radioélectrique du ministère des Communications du
Canada. Cet appareil numérique de la Classe B est
conforme à la norme NMB-003 du Canada.
European Union and European Fair Trade Association (EFTA) Regulatory Compliance
Declaration of Conformity
indicates compliance with the Essential Requirements of the EMC Directive of the European Union (2004/108/EC).
This equipment meets the following conformance standards:
EN 60950-1: 2006 + A11: 2009 + A1: 2010 + A12: 2011 (T-Mark License)
IEC 60950-1: 2005 (2nd Edition) + Am 1: 2009 (CB Scheme Report/Certificate),
Also Licensed for Standards:
UL 60950-1: 2007 R12.11, CAN/CSA-C22.2 No. 60950-1-07 + A1: 2011
Additional licenses issued for specific countries available on request
EN 55022: 2010 + AC: 2011, CISPR 22: 2008
EN 55024: 2010, CISPR 24: 2010
EN 61000-4-2: (2009), EN 61000-4-3: (2010), EN61000-4-4: 2010, EN 61000-4-6: 2009,
The products are licensed, as required, for additional country specific standards for the International Marketplace.
Additional issued licenses available upon request.
Low Voltage Directive 2006/95/EC, RoHS 2011/65/EU,
REACH 2006/1907/EC, WEEE 2012/19/EU, Packaging 94/62/EC,
Toys Safety Directive 2009/48/EC
1. Wählen Sie Einstellungen >> Anzeige & Sound
a. Wählen Sie Optisches Audio>> Bitstrom aus
b. Wählen Sie Bitstromformat>> Dolby Digital
Xbox One Controller mit 3,5-mm-Klinke
1. Wählen Sie Einstellungen >> Geräte & Zubehör >>
Xbox One Wireless Controller > > Lautstärke
a. Stellen Sie die Headset-Lautstärke auf 50 – 75 % ein
b. Stellen Sie die Ausgabe der Chat-Abmischung des
c. Stellen Sie den Mikromonitor auf Minimum ein
Xbox One Controller mit Headset Audio Controller
1. Stellen Sie die HAC-Ausgabe auf „nur Chat-Audio“ ein
2. Halten Sie die Mikrofonstummschaltung gedrückt, um
den HAC-Mikromonitor ein- oder abzustellen
1. Accedere a Impostazioni >> Schermo e audio
a. Selezionare Audio ottico >> Bitstream out
b. Selezionare Formato Bitstream >> Dolby Digital
Controller Xbox One con connettore da 3,5 mm
1. Accedi a Impostazioni >> Dispositivi e accessori >>
Controller wireless Xbox One >> Volume
a. Regola il volume delle cuffie al 50-75%
b. Configura il mixer per la chat delle cuffie sull'uscita
c. Imposta il controllo microfono al minimo.
Controller Xbox One con controller audio per cuffie
1. Regola il controller audio per cuffie in modo che l’uscita
sia solo per la chat vocale
2. Tieni premuto Mic Mute (disattivazione microfono) per
regolare e spegnere il controllo microfono
1. Dirija-se a Definições >> Imagem e Som:
a. Selecione Áudio Ótico >>Saída de Bitstream
b. Selecione Formato de Bitstream >> Dolby Digital.
Comando da Xbox One com conector de 3,5 mm
1. Dirige-te a Definições >> Dispositivos e acessórios >>
Comando sem fios da Xbox One >> Volume
a. Define o volume dos auscultadores entre 50-75%
b. Configura o editor de som do chat dos auriculares
para enviar apenas o som do chat
c. Coloca a monitorização de microfone no mínimo
Comando da Xbox One com controlador de áudio
1. Ajusta o controlador de áudio do auscultador para
enviar apenas áudio do chat
2. Mantém premido o silenciador de microfone para
ajustar e desligar a monitorização de microfone
do controlador de áudio do auscultador
1. Gå till Settings >> Display & Sound
a. Välj Optical Audio >> Bistream Out
b. Välj Bitstream Format >> Dolby Digital
Xbox One-handkontroll med 3,5 mm-uttag
1. Gå till Inställningar > Enheter och tillbehör >
Xbox One trådlös handkontroll > Volym
a. Ställ in headsetets volym på 50–75 %
b. Ställ in headsetets chattmixer att bara
c. Sänk mikrofonåterspelning till lägsta
Xbox One-handkontroll med Headset Audio Controller
1. Ändra HAC till att endast skicka ut chattljud
2. Håll ned Mic Mute för att stänga av
1. Gå til Settings >> Display & Sound
a. Vælg Optical Audio >> Bistream Out
b. Vælg Bitstream Format >> Dolby Digital
Xbox One-controller med 3,5 mm-stik
1. Gå ind i Indstillinger >> Enheder & tilbehør >>
Trådløs controller til Xbox One >> Lydstyrke
a. Indstil headsettets lydstyrke til 50-75 %
b. Indstil headsettets chat-mixer til kun at
c. Indstil mikrofonmonitorering til minimum
Xbox One-controller med lydstyrkecontroller
1. Indstil lydstyrkecontrolleren til kun at afspille chat
2. Hold Sluk mikrofon-knappen nede for at indstille eller
slukke for mikrofonmonitorering
1. Ga naar Settings (instellingen) >
Display & Sound (weergave en geluid)
a. Selecteer Optical Audio (optisch geluid) >
Bitstream Out (bitstream uit)
b. Selecteer Bitstream Format (bitstream-indeling) >
Xbox One-controller met 3,5 mm-stekker
1. Ga naar Settings >> Devices & accessories >>
Xbox One Wireless Controller >> Volume
a. Headsetvolume instellen op 50-75%
b. Laat de headset alleen chatgeluid doorgeven
c. Stel Mic monitoring in op Minimum
Xbox One-controller met audiocontroller voor headset
1. Stel de audiocontroller voor de headset (HAC) in
op uitsluitend uitvoer van Chat Audio
2. Houd Mic Mute ingedrukt om Mic Monitoring van de
HAC aan te passen of uit te schakelen
1. Go to Settings >> All Settings >> Display & Sound >>Audio Output
a. Select Optical Audio >> Bitstream Out
b. Select Bitstream Format >> Dolby Digital
Xbox One Controller with 3.5mm Jack
1. Go to Settings >> All Settings >> Kinect & Devices >>
Devices & Accessories >> Xbox One Wireless Controller >> Volume
a. Set Headset Volume to 50-75%
b. Set Headset Chat Mixer to output Chat Only
c. Set Mic monitoring to Minimum
Xbox One Controller with Headset Audio Controller
1. Adjust the HAC to output only Chat Audio
2. Hold down Mic Mute to adjust and turn off the HAC
FR: 1. Ouvrez Paramètres >> Affichage et son
a. Dans Son numérique, sélectionnez sortie Bitstream
b. Dans Format Bitstream, sélectionnez Dolby Digital
Manette Xbox One avec prise jack 3,5mm
1. Ouvrez Paramètres >> Appareils et accessoires >>
Manette sans fil Xbox One >> Volume
a. Régler le volume du casque à 50-75%
b. Configurer la sortie audio du casque sur audio
c. Paramétrez le retour micro au minimum
Manette Xbox One avec adaptateur audio pour casque
1. Ajustez l'adaptateur audio pour casque pour ne
conserver que la sortie audio de chat
2. Maintenez enfoncé le bouton micro muet pour régler
ou désactiver le retour micro de l'adaptateur audio
1. Ve a Configuración >> Pantalla y sonido
a. Selecciona Sonido óptico >> Salida Bitstream
b. Selecciona Formato Bitstream >> Dolby Digital
Mando de Xbox One con entrada de 3,5 mm
1. Ve a Configuración >> Dispositivos y accesorios >> Mando
inalámbrico de Xbox One >> Volumen
a. Configura el volumen de tus auriculares al 50-75%
b. Configura el mezclador de chat de los auriculares a salida
c. Configura el monitor de micrófono al mínimo
Mando de Xbox One con adaptador de sonido para auriculares
1. Ajusta el adaptador de sonido para salida solo de chat
2. Mantén pulsado el botón de silencio del micrófono para
ajustar y apagar el monitor de micrófono del adaptador
Se branche directement à la nouvelle manette Xbox One grâce à une prise jack de
3,5 mm. Les autres manettes Xbox One nécessitent un adaptateur audio pour casque
Pour des performances optimales, utilisez uniquement des manettes sans fil Xbox One
officielles. Les manettes avec câble ou devant être chargées ne sont pas recommandées.
AUDIO CONTROLS ADVANCED FEATURES I COMMANDES AUDIO I FONCTIONNALITÉS AVANCÉES
Background Noise Limiter:
Réduction du bruit ambiant:
Ajustez le niveau de bruit sur votre micro
CONFIGURATION POUR LE CHAT LOCAL
Rotate to adjust the overall volume
of Game/Chat Audio. Press to mute audio
Réglage du volume principal:
faites tourner pour ajuster le volume principal
de l'audio du jeu et du chat. Appuyez pour
Adjust the level of your voice
Ajustez le volume de votre voix
Augmentez le niveau sonore
Mix in Music and take calls while you game.
Écoutez de la musique et répondez à des appels
téléphoniques tout en jouant.
Créez un réseau de chat garanti sans latence entre plusieurs TAC grâce à un câble ethernet* standard.
Create a local lag-free chat network between multiple TACs using a standard ethernet cable*.
Réglage de l'audio en jeu/chat vocal:
Réglez le volume du jeu et du chat vocal
Please visit the following URL for a complete copy of the declaration of conformity: http://www.turtlebeach.com/homologation
This symbol on the product or its packaging indicates that this product must not be disposed of with your other household waste.
Instead, it is your responsibility to dispose of your waste equipment by handing it over to a designated collection point for the
recycling of waste electrical and electronic equipment. The separate collection and recycling of your waste equipment at the time of
disposal will help conserve natural resources and ensure that it is recycled in a manner that protects human health and the
environment. For more information about where you can drop off your waste for recycling, please contact your local authority, or
where you purchased your product.
Unlock the power of pro level chat with the
Turtle Beach Elite Pro Tournament Noise
Cancelling Microphone and the Elite Pro
Headset and Elite Pro TAC.
For more information please go to:
Découvrez un chat de qualité supérieure
avec le microphone Turtle Beach Elite Pro,
le casque Elite Pro et le Elite Pro TAC. Pour
plus d'informations, rendez-vous sur :
sonore utilisé en tournoi
*Ethernet Cable Sold Separately, In order to comply with regulatory standards, the Ethernet Cable
used cannot be longer than 3 meters
*Câble ethernet vendu séparément. Conformément aux règles en vigueur, la longueur du
câble ethernet utilisé ne peut dépasser 3 mètres.
turtlebeach.com/eliteprotac
It is important to always run the most up-to-date firmware.
For detailed Preset Customization and firmware update instructions visit:
Pour obtenir les informations d'installation les plus récentes, consultez:
AUDIO CUSTOMIZATION I PERSONNALISATION SONORE
MOVIE MODE MUSIC MODE SURROUND OFF | MODE FILM | MODE MUSIQUE | DÉSACTIVÉ
MUSIC MODE | MODE MUSIQUE
Press Surround Mode to cycle DTS Headphone: X Surround Modes.
Appuyez sur Surround Mode pour parcourir les modes DTS surround Headphone: X
Press Presets to cycle Turtle Beach Signature Audio Presets.
Appuyez sur Presets pour parcourir les presets audio de Turtle Beach.
In order to comply with regulatory standards, the Power Cable used (USB Mini) cannot be longer than 3 meters.
Always keep the Micro USB Port Cap installed when not in use.
Conformément aux règles en vigueur, la longueur du câble d'alimentation utilisé (mini USB) ne peut dépasser 3 mètres.
Insérez toujours le cache de protection lorsque vous n'utilisez pas le port micro USB
*Primary Output Port should be set to when setup with HDMI PS4
For more information visit turtlebeach.com/ps4compatibility
*Primary Output Port should be set to when setup with HDMI PS4
For more information visit turtlebeach.com/ps4compatibility
Compatible out-of-the-box with the new Xbox One controller with 3.5mm jack.
Other Xbox One controllers require a EAR FORCE
For best performance only use with official wireless Xbox One controllers.
Wired/Charging controllers are not recommended.