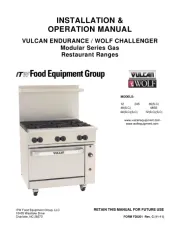
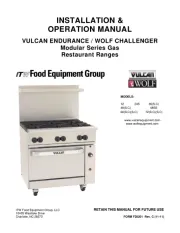
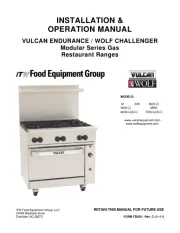
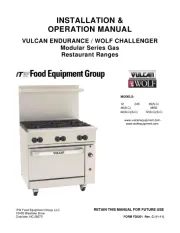
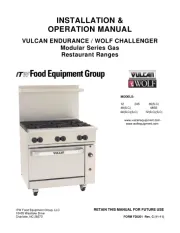
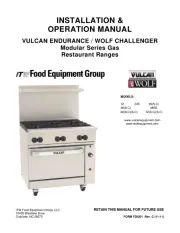
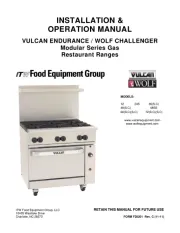
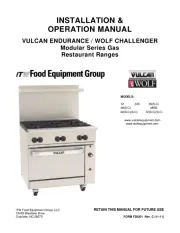
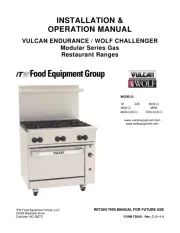
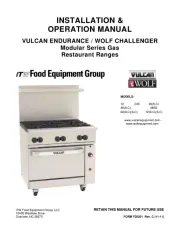
Vulcan V4B36 Manual
Læs gratis den danske manual til Vulcan V4B36 (36 sider) i kategorien Komfur. Denne vejledning er vurderet som hjælpsom af 5 personer og har en gennemsnitlig bedømmelse på 4.7 stjerner ud af 3 anmeldelser. Har du et spørgsmål om Vulcan V4B36, eller vil du spørge andre brugere om produktet?
Side 1/36

F-37418 (12-09) Rev 2
VULCAN-HART
DIVISION OF ITW FOOD EQUIPMENT GROUP, LLC
WWW.VULCANHART.COM
3600 NORTH POINT BLVD.
BALTIMORE, MD 21222
TOPS
Open Top
Hot Top
Griddle Top
Work Surface
BASES
Standard Oven
Convection Oven
Cabinet Base
ONE POWERFUL PACKAGE
SERVICE MANUAL
V SERIES HDR
GAS RANGES
- NOTICE -
This manual is prepared for use by trained service technicians and
should not be used by those not properly qualified. If you have
attended a service school for this product, you may still be qualified to
perform the procedures described in this manual. This manual is not
intended to be all encompassing. If you have not attended a service
school for this product, you should read, in its entirety, the repair
procedure you wish to perform to determine if you have the necessary
tools, instruments and skills required to perform the procedure.
Procedures for which you do not have the necessary tools,
instruments and skills should be performed by a trained service
technician.
For additional information on Vulcan- Hart or to locate an authorized parts and service
provider in your area, visit our website at www.VulcanHart.com.

Page 2 of 36
IMPORTANT FOR YOUR SAFETY
THIS MANUAL HAS BEEN PREPARED FOR PERSONNEL QUALIFIED TO INSTALL GAS
EQUIPMENT, WHO SHOULD PERFORM THE INITIAL FIELD START-UP AND
ADJUSTMENTS OF THE EQUIPMENT COVERED BY THIS MANUAL.
POST IN A PROMINENT LOCATION THE INSTRUCTIONS TO BE FOLLOWED IN THE
EVENT THE SMELL OF GAS IS DETECTED. THIS INFORMATION CAN BE OBTAINED
FROM THE LOCAL GAS SUPPLIER. IN THE EVENT OF A POWER FAILURE, DO NOT
ATTEMPT TO OPERATE THIS DEVICE.
IMPORTANT
IN THE EVENT A GAS ODOR IS DETECTED, SHUT DOWN UNITS AT MAIN SHUTOFF
VALVE AND CONTACT THE LOCAL GAS COMPANY OR GAS SUPPLIER FOR SERVICE.
FOR YOUR SAFETY
DO NOT STORE OR USE GASOLINE OR OTHER FLAMMABLE VAPORS OR LIQUIDS IN
THE VICINITY OF THIS OR ANY OTHER APPLIANCE.
WARNING: SHUT OFF THE GAS BEFORE SERVICING THE UNIT.
WARNING: PRIOR TO LIGHTING, CHECK ALL JOINTS IN THE GAS SUPPLY LINE
FOR LEAKS. USE SOAP AND WATER SOLUTION. DO NOT USE AN OPEN FLAME.
A. CHECK ALL JOINTS PRIOR TO THE GAS VALVE (SOLENOID)
BEFORE LIGHTING UNIT.
B. CHECK ALL JOINTS BEYOND GAS VALVE (SOLENOID)
AFTER UNIT IS LIT.
WARNING: IMPROPER INSTALLATION, ADJUSTMENT, ALTERATION, SERVICE OR
MAINTENANCE CAN CAUSE PROPERTY DAMAGE, INJURY OR DEATH. READ THE
INSTALLATION, OPERATING AND MAINTENANCE INSTRUCTIONS THOROUGHLY
BEFORE INSTALLING OR SERVICING THIS EQUIPMENT.
WARNING: ELECTRICAL AND GROUNDING CONNECTIONS MUST COMPLY WITH
THE APPLICABLE PORTIONS OF THE NATIONAL ELECTRICAL CODE AND/OR
OTHER LOCAL ELECTRICAL CODES.
WARNING: APPLIANCES EQUIPPED WITH A FLEXIBLE ELECTRIC SUPPLY CORD
ARE PROVIDED WITH A THREE-PRONG GROUNDING PLUG. IT IS IMPERATIVE
THAT THIS PLUG BE CONNECTED INTO A PROPERLY GROUNDED THREE-PRONG
RECEPTACLE. DO NOT REMOVE THE GROUNDING PRONG FROM THIS PLUG.
IN THE EVENT OF A POWER FAILURE, DO NOT ATTEMPT TO OPERATE THIS DEVICE.

Page 3 of 36
TABLE OF CONTENTS
GENERAL
Introduction
Installation
Operation
Cleaning
Lubrication
Tools
Specifications
REMOVAL AND REPLACEMENT OF PARTS
Electrical Lockout / Tagout Procedure
Gas Lockout / Tagout Procedure
Units Mounted On Casters
Covers and Panels
Manifold Cover
Kick Panel
Component Removal
Oven Control Panel(S Model)
Oven Control Panel (C Model)
Pilot Safety Valve and temperature Control Assembly (S Model)
Pilot Safety Valve (S Model)
Temperature Control (S Model)
Temperature Control (C Model)
Solenoid, Pilot Safety and Manual Gas Shut-Off Valve Assembly (C Model)
Solenoid (C Model)
Pilot Safety Valve (C Model)
Manual Gas Shut-Off Valve (C Model)
Oven Pilot Assembly
Oven Burner Assembly
Oven Burner Nozzle and Gas Orifice
Pilot Quick Disconnect Valve
Top Section Burner (Open Top)
Top Section Burner (Char Broiler)
Top Section Burner (French/Hot Top and Griddle)
Top Section Burner Valve
Fan Control Switch (C Model)
Convection Motor (C Model)
Oven Door Microswitch (C Model)
SERVICE PROCEDURES AND ADJUSTMENTS
Gas Leak Check
Gas Pressure Check
Gas Pressure Regulator Adjustment
Oven Pilot Flame Check and Adjustment
Oven Burner Nozzle and Gas Orifice Check
Air Shutter Adjustment

Page 6 of 36
Gas Line Pressures
Operating Pressures
Natural - Recommended (in. W.C.) 6.0
Propane - Recommended (in. W.C.) 10.0
Incoming Pressure
Natural - Recommended (in. W.C.) 7.0 min.
Propane - Recommended (in. W.C.) 11.0 min
REMOVAL AND REPLACEMENT OF PARTS
ELECTRICAL LOCKOUT/TAGOUT
Electrical Lockout/Tagout procedures are used to protect personnel working on an electrical
appliance. Perform the following steps when performing any type of maintenance or service on
an electrically operated appliance.
WARNING: Always perform the Lockout/Tagout procedure before removing any sheet
metal panels or attempting to service this equipment. Failure to comply with this
procedure can cause property damage, injury or death.
1. In electrical box, place the unit's circuit breaker to the OFF position.
2. Place a lock or other device on the electrical box cover to prevent someone from placing
the circuit breaker ON.
3. Place a tag on the electrical box cover to indicate that the unit has been disconnected for
service and that power should not be restored until the tag is removed by maintenance
personnel.
4. Disconnect the unit power cord from electrical outlet.
5. Place a tag on the power cord to indicate that oven has been disconnected for service
and power should not be restored until the tag is removed by maintenance personnel.

Page 7 of 36
GAS LOCKOUT/TAGOUT
The Gas Lockout/Tagout procedure is used to protect personnel working on a gas appliance.
Before performing any maintenance or service that requires gas disconnections, follow these
steps:
WARNING: All gas joints disturbed during servicing must be checked for leaks. Do not
use an open flame. Use a hazardous gas tester or a soap and water solution (Bubbles
indicate a gas leak). Failure to comply can cause property damage, injury or death.
WARNING: Do not operate a gas-fueled appliance if a gas leak is present.
1. Locate the gas valve or inlet.
2. Place the valve in the OFF position.
3. Place a tag on the valve indicating that service is being performed on the equipment and
that the gas must remain off until service is complete.
4. Place a locking device on the gas valve or inlet, preventing connection until the lock is
removed.
5. On the appliance, make sure all flame sources are extinguished and/or removed.
6. Bleed residual gas from the unit inlet line and allow time for the gas to dissipate before
beginning service on the appliance.
UNITS MOUNTED ON CASTERS
WARNING: Units mounted on casters must use a flexible connector (not supplied by
manufacturer) that complies with the Standard for Connectors for Movable Gas
Appliances, ANSI Z21.69, CSA 6.16 and a quick-disconnect device that complies with the
Standard for Quick-Disconnect Devices for Use with Gas Fuel, ANSI-Z21.41, CSA 6.9.
WARNING: If disconnection of the restraint is necessary, turn off the gas supply before
disconnection. Reconnect restraint prior to turning the gas supply on and returning the
unit to its operating location.
NOTE: The unit must be releveled front to back and side to side if it is moved for any reason.
COVERS AND PANELS
Manifold Cover (All Models)
WARNING: Always perform the Electrical Lockout/Tagout procedure before removing
any sheet metal panels or attempting to service this equipment. Failure to comply with
this procedure can cause property damage, injury or death.

Page 8 of 36
WARNING: Perform the GAS LOCKOUT/TAGOUT procedure before servicing the unit.
1. Perform the ELECTRICAL LOCKOUT/TAGOUT Procedure.
2. Rotate the yellow gas shut-off knob to the OFF position.
Figure 1: Gas Shut-Off Valve Knob
3. Loosen the setscrew in the burner control knobs and remove the knobs.
4. Remove the two (2) drive screws securing the manifold cover in place and remove the
manifold cover.
5. Reverse the procedure to install the manifold cover.
Figure 2: Manifold Cover Removal
Kick Panel (All Models)
WARNING: Always perform the Electrical Lockout/Tagout procedure before removing
any sheet metal panels or attempting to service this equipment. Failure to comply with
this procedure can cause property damage, injury or death.
WARNING: Perform the GAS LOCKOUT/TAGOUT procedure before servicing the unit.
1. Perform the ELECTRICAL LOCKOUT/TAGOUT procedure.
2. Open the kick panel.
3. Remove the two (2) screws securing the left hinge and remove the hinge.
4. Slide the kick panel to the left to disengage it from the hinge.
5. Reverse the procedure to install the kick panel.
Figure 3: Kick Panel Removal

Page 10 of 36
3. Rotate the yellow gas shut-off knob to the OFF position.
Figure 6: Gas Shut-Off Valve Knob
4. Open the kick panel to gain access to the screw securing the control panel.
5. Loosen the setscrew from the yellow gas shut-off knob and remove the knob.
6. Loosen the setscrew from the temperature control knob and remove the knob.
7. Remove the oven knob ring.
8. Remove the two (2) screws from the temperature control mount bracket located in the
front of the control panel.
9. Remove the screw securing the control panel.
10. Raise the lower end of the control panel to gain access to the fan control switch tabs.
11. Remove the fan control switch by compressing the tabs and pulling the switch out of the
front of the control panel.
12. Tag and disconnect the fan control switch electrical connectors.
13. Remove the control panel by lifting the bottom up and removing it from the tab located at
the top of the control panel.
14. Reverse the procedure to install the oven control panel.
15. Test the oven to verify proper operation.
Figure 7: C Model Control Panel Removal
Pilot Safety Valve and Temperature Control Assembly (S Model)
WARNING: Always perform the Electrical Lockout/Tagout procedure before removing
any sheet metal panels or attempting to service this equipment. Failure to comply with
this procedure can cause property damage, injury or death.
WARNING: Perform the GAS LOCKOUT/TAGOUT procedure before servicing the unit.
1. Perform the OVEN CONTROL PANEL removal procedure for the standard oven.
2. Disconnect the flex line(s) from the pilot safety valve
3. Disconnect the 3/8" union from the bottom of the pilot safety valve.
4. Disconnect the flex line from the top of the temperature control.

Page 11 of 36
5. Tag and disconnect the electrical connectors to the temperature control.
6. Remove the screws securing the gas mount bracket to the oven.
7. Remove the gas mount bracket, pilot safety valve and temperature control assembly
from the oven.
WARNING: All gas joints disturbed during servicing must be checked for leaks.
Do not use an open flame. Use a hazardous gas tester or a soap and water
solution (Bubbles indicate a gas leak). Failure to comply can cause property
damage, injury or death.
8. Reverse the procedure to install the pilot safety valve and temperature control assembly.
9. Test the oven to verify proper operation.
Figure 8: S Model Pilot Safety Valve and Temperature Control Assembly Removal
Pilot Safety Valve (S Model)
WARNING: Always perform the Electrical Lockout/Tagout procedure before removing
any sheet metal panels or attempting to service this equipment. Failure to comply with
this procedure can cause property damage, injury or death.
WARNING: Perform the GAS LOCKOUT/TAGOUT procedure before servicing the unit.
1. Perform the PILOT SAFETY VALVE AND TEMPERATURE CONTROL
ASSEMBLY removal procedure.
2. Remove the two (2) flex line fittings from the pilot safety valve.
3. Remove the pipe nipple and union fitting from the bottom of the pilot safety valve.
4. Remove the pipe nipple from the top of the pilot safety valve.
5. Remove the screw, lock washer and nut securing the pilot safety valve to the gas mount
bracket and remove the pilot safety valve.
6. Remove any residual tape from the fitting and the pipe nipple and install with new gas-
rated (Yellow) Teflon tape.
WARNING: All gas joints disturbed during servicing must be checked for leaks.
Do not use an open flame. Use a hazardous gas tester or a soap and water
solution (Bubbles indicate a gas leak). Failure to comply can cause property
damage, injury or death.
7. Reverse the procedure to install the pilot safety valve.

Page 12 of 36
8. Test the oven to verify proper operation.
Figure 9: S Model Pilot Safety Valve Removal
Temperature Control (S Model)
WARNING: Always perform the Electrical Lockout/Tagout procedure before removing
any sheet metal panels or attempting to service this equipment. Failure to comply with
this procedure can cause property damage, injury or death.
WARNING: Perform the GAS LOCKOUT/TAGOUT procedure before servicing the unit.
1. Perform the PILOT SAFETY VALVE AND TEMPERATURE CONTROL
ASSEMBLY removal procedure.
2. Remove the fitting from the top of the temperature control.
3. Remove the screw securing the temperature control to the gas mount bracket.
4. Remove the temperature control from the pipe nipple.
5. Remove any residual tape from the fitting and the pipe nipple and install with new gas-
rated (Yellow) Teflon tape.
WARNING: All gas joints disturbed during servicing must be checked for leaks.
Do not use an open flame. Use a hazardous gas tester or a soap and water
solution (Bubbles indicate a gas leak). Failure to comply can cause property
damage, injury or death.
6. Reverse the procedure to install the temperature control.
7. Test the oven to verify proper operation.
Figure 10: S Model Temperature Control Removal
Temperature Control (C Model)
WARNING: Always perform the Electrical Lockout/Tagout procedure before removing
any sheet metal panels or attempting to service this equipment. Failure to comply with
this procedure can cause property damage, injury or death.
WARNING: Perform the GAS LOCKOUT/TAGOUT procedure before servicing the unit.

Page 13 of 36
1. Perform the OVEN CONTROL PANEL removal procedure for the convection oven.
2. Tag and disconnect the electrical connectors from the top of the temperature control.
3. Remove the temperature control from the mount bracket.
4. Reverse the procedure to install the temperature control.
5. Test the oven to verify proper operation.
Figure 11: C Model Temperature Control Removal
Solenoid, Pilot Safety and Gas Shut-Off Valve Assembly (C Model)
WARNING: Always perform the Electrical Lockout/Tagout procedure before removing
any sheet metal panels or attempting to service this equipment. Failure to comply with
this procedure can cause property damage, injury or death.
WARNING: Perform the GAS LOCKOUT/TAGOUT procedure before servicing the unit.
1. Perform the OVEN CONTROL PANEL removal procedure for the convection oven.
2. Disconnect the flex line from the tee fitting below the manual gas shut-off valve.
3. Disconnect the flex line from the top of the solenoid.
4. Tag and disconnect the electrical connectors to the solenoid.
5. Remove the two (2) screws securing the gas mount bracket.
6. Remove the gas mount bracket with the solenoid, pilot safety and manual gas shut-off
valve assembly from the oven.
7. Remove any residual tape from the pipe nipples and fittings and coat the threads with
new gas-rated (yellow) Teflon tape.
WARNING: All gas joints disturbed during servicing must be checked for leaks.
Do not use an open flame. Use a hazardous gas tester or a soap and water
solution (Bubbles indicate a gas leak). Failure to comply can cause property
damage, injury or death.
8. Reverse the procedure to install the solenoid, pilot safety and manual gas shut-off valve
assembly.
9. Test the oven to verify proper operation.
Figure 12: C Model Solenoid, Pilot Safety and Gas Shut-Off Valve Assembly Removal

Page 14 of 36
Solenoid (C Model)
WARNING: Always perform the Electrical Lockout/Tagout procedure before removing
any sheet metal panels or attempting to service this equipment. Failure to comply with
this procedure can cause property damage, injury or death.
WARNING: Perform the GAS LOCKOUT/TAGOUT procedure before servicing the unit.
1. Perform the SOLENOID, PILOT SAFETY AND GAS SHUT-OFF VALVE ASSEMBLY
removal procedure.
2. Remove the flex line fitting from the top of the solenoid.
3. Remove the solenoid from the pipe nipple.
4. Remove any residual tape from the pipe nipples and fittings and coat the threads with
new gas-rated (yellow) Teflon tape.
WARNING: All gas joints disturbed during servicing must be checked for leaks.
Do not use an open flame. Use a hazardous gas tester or a soap and water
solution (Bubbles indicate a gas leak). Failure to comply can cause property
damage, injury or death.
5. Reverse the procedure to install the solenoid.
6. Test the oven to verify proper operation.
Figure 13: C Model Solenoid Removal
Pilot Safety Valve (C Model)
WARNING: Always perform the Electrical Lockout/Tagout procedure before removing
any sheet metal panels or attempting to service this equipment. Failure to comply with
this procedure can cause property damage, injury or death.
WARNING: Perform the GAS LOCKOUT/TAGOUT procedure before servicing the unit.
1. Perform the SOLENOID, PILOT SAFETY AND GAS SHUT-OFF VALVE ASSEMBLY
removal procedure.
2. Remove the flex line and flex line fitting from the pilot safety valve.
3. Remove the screw, lock washer and nut securing the pilot safety valve to the gas mount
bracket.

Page 15 of 36
4. Remove the pipe nipple and manual gas shut-off valve from the pilot safety valve.
5. Remove any residual tape from the pipe nipples and fittings and coat the threads with
new gas-rated (yellow) Teflon tape.
WARNING: All gas joints disturbed during servicing must be checked for leaks.
Do not use an open flame. Use a hazardous gas tester or a soap and water
solution (Bubbles indicate a gas leak). Failure to comply can cause property
damage, injury or death.
6. Reverse the procedure to install the pilot safety valve.
7. Test the oven to verify proper operation.
Figure 14: C Model Pilot Safety Valve Removal
Manual Gas Shut-Off Valve (C Model)
WARNING: Always perform the Electrical Lockout/Tagout procedure before removing
any sheet metal panels or attempting to service this equipment. Failure to comply with
this procedure can cause property damage, injury or death.
WARNING: Perform the GAS LOCKOUT/TAGOUT procedure before servicing the unit.
1. Perform the SOLENOID, PILOT SAFETY AND GAS SHUT-OFF VALVE ASSEMBLY
removal procedure.
2. Remove the flex line and tee fitting from the bottom of the manual gas shut-off valve.
3. Remove the screw from the bracket securing the manual gas shut-off valve to the gas
mount bracket.
4. Remove the manual gas shut-off valve from the pilot safety valve.
5. Remove any residual tape from the pipe nipples and fittings and coat the threads with
new gas-rated (yellow) Teflon tape.
WARNING: All gas joints disturbed during servicing must be checked for leaks.
Do not use an open flame. Use a hazardous gas tester or a soap and water
solution (Bubbles indicate a gas leak). Failure to comply can cause property
damage, injury or death.
6. Reverse the procedure to install the manual gas shut-off valve.
7. Test the oven to verify proper operation.

Page 17 of 36
Oven Burner Assembly
WARNING: Always perform the Electrical Lockout/Tagout procedure before removing
any sheet metal panels or attempting to service this equipment. Failure to comply with
this procedure can cause property damage, injury or death.
WARNING: Perform the GAS LOCKOUT/TAGOUT procedure before servicing the unit.
1. Perform the OVEN PILOT ASSEMBLY removal procedure STEPS 1-7.
2. Remove the oven burner assembly from the oven.
3. Remove any residual tape from the fittings and coat the threads with new gas-rated
(yellow) Teflon tape.
WARNING: All gas joints disturbed during servicing must be checked for leaks.
Do not use an open flame. Use a hazardous gas tester or a soap and water
solution (Bubbles indicate a gas leak). Failure to comply can cause property
damage, injury or death.
4. Reverse the procedure to install the oven burner assembly.
5. Test the oven to verify proper operation.
Figure 18: Oven Burner Assembly Removal
Oven Burner Nozzle and Gas Orifice
WARNING: Always perform the Electrical Lockout/Tagout procedure before removing
any sheet metal panels or attempting to service this equipment. Failure to comply with
this procedure can cause property damage, injury or death.
WARNING: Perform the GAS LOCKOUT/TAGOUT procedure before servicing the unit.
1. Perform the OVEN BURNER ASSEMBLY removal procedure.
2. Remove the burner nozzle from the oven burner assembly.
3. Remove the orifice hood and gas orifice from the oven burner assembly.
4. Remove any residual tape from the fittings and coat the threads with new gas-rated
(yellow) Teflon tape.
WARNING: All gas joints disturbed during servicing must be checked for leaks.
Do not use an open flame. Use a hazardous gas tester or a soap and water
solution (Bubbles indicate a gas leak). Failure to comply can cause property
damage, injury or death.
5. Reverse the procedure to install the oven burner nozzle and gas orifice.
6. Test the oven to verify proper operation.

Page 19 of 36
3. Remove the bowl deflector.
4. Remove the burner heads.
5. Disconnect the burner tubes from the pilot coupler.
6. To remove the burner, lift the rear of the burner, slide the burner back and lift to
disengage it from the burner control valves.
7. Repeat the above steps for any remaining burners to be replaced.
8. Remove any residual tape from the fittings and coat the threads with new gas-rated
(yellow) Teflon tape.
WARNING: All gas joints disturbed during servicing must be checked for leaks.
Do not use an open flame. Use a hazardous gas tester or a soap and water
solution (Bubbles indicate a gas leak). Failure to comply can cause property
damage, injury or death.
9. Reverse the procedure to install the top section burner.
10. Test the oven to verify proper operation.
Figure 21: Open Top Burner Removal
Top Section Burner (Char Broiler)
WARNING: Always perform the Electrical Lockout/Tagout procedure before removing
any sheet metal panels or attempting to service this equipment. Failure to comply with
this procedure can cause property damage, injury or death.
WARNING: Perform the GAS LOCKOUT/TAGOUT procedure before servicing the unit.
1. Perform the MANIFOLD COVER removal procedure.
2. Remove the burner grates.
3. Remove the radiant from the top of the burner.
4. To remove the burner, lift the rear of the burner with the deflector attached, slide the
burner back and lift to disengage it from the burner control valve.
5. Remove the deflector from the bottom of the burner.
6. Repeat the above steps for any remaining burners to be replaced.
7. Remove any residual tape from the fittings and coat the threads with new gas-rated
(yellow) Teflon tape.
WARNING: All gas joints disturbed during servicing must be checked for leaks.
Do not use an open flame. Use a hazardous gas tester or a soap and water
solution (Bubbles indicate a gas leak). Failure to comply can cause property
damage, injury or death.

Page 20 of 36
8. Reverse the procedure to install the top section burner.
9. Test the oven to verify proper operation.
Figure 22: Char Broiler Top Burner Removal
Top Section Burner (French/Hot Top/Griddle)
WARNING: Always perform the Electrical Lockout/Tagout procedure before removing
any sheet metal panels or attempting to service this equipment. Failure to comply with
this procedure can cause property damage, injury or death.
WARNING: Perform the GAS LOCKOUT/TAGOUT procedure before servicing the unit.
1. Perform the MANIFOLD COVER removal procedure.
2. Remove the burner top plate.
3. Remove the burner head.
4. Remove the burner plate(s).
5. Tag and remove the burner insulation.
6. Remove the gas flex lines to the burners.
7. Remove the two (2) screws securing the burner nozzle mount bracket.
8. Remove the burner nozzle bracket and burner nozzles.
9. Remove the outer burner ring.
10. Remove the middle burner ring.
11. Remove the inner burner ring.
12. Remove any residual tape from the fittings and coat the threads with new gas-rated
(yellow) Teflon tape.
WARNING: All gas joints disturbed during servicing must be checked for leaks.
Do not use an open flame. Use a hazardous gas tester or a soap and water
solution (Bubbles indicate a gas leak). Failure to comply can cause property
damage, injury or death.
13. Reverse the procedure to install the top section burner.
14. Test the oven to verify proper operation.
Figure 23: French/Hot/Griddle Top Burner Removal

Page 21 of 36
Top Section Burner Control Valve
WARNING: Always perform the Electrical Lockout/Tagout procedure before removing
any sheet metal panels or attempting to service this equipment. Failure to comply with
this procedure can cause property damage, injury or death.
WARNING: Perform the GAS LOCKOUT/TAGOUT procedure before servicing the unit.
1. Perform the MANIFOLD COVER removal procedure.
2. Remove the burner grates and deflectors.
3. Remove the burner head(s).
4. Carefully move the burner assembly away from the top section burner control valve.
5. Remove the top burner control valve from the gas manifold.
6. Remove any residual tape from the fittings and coat the threads with new gas-rated
(yellow) Teflon tape.
WARNING: All gas joints disturbed during servicing must be checked for leaks.
Do not use an open flame. Use a hazardous gas tester or a soap and water
solution (Bubbles indicate a gas leak). Failure to comply can cause property
damage, injury or death.
7. Reverse the procedure to install the top burner control valve.
8. Test the oven to verify proper operation.
Figure 24: Top Burner Control Valve Removal
Convection Motor Fan Control Switch (C Model)
WARNING: Always perform the Electrical Lockout/Tagout procedure before removing
any sheet metal panels or attempting to service this equipment. Failure to comply with
this procedure can cause property damage, injury or death.
1. Perform the CONTROL PANEL removal procedure for the convection oven steps 1-12.
2. Connect the electrical connector to the convection motor fan control switch through the
hole in the control panel.
3. Insert the convection motor fan control switch into the slot in the control panel until the
lock tabs click into place.
4. Reverse the CONTROL PANEL removal procedure for the convection oven to reinstall
the control panel.

Page 22 of 36
5. Test the oven to verify proper operation.
Figure 25: Convection Motor Fan Control Switch Removal
Convection Motor (C Model)
WARNING: Always perform the Electrical Lockout/Tagout procedure before removing
any sheet metal panels or attempting to service this equipment. Failure to comply with
this procedure can cause property damage, injury or death.
1. Perform the ELECTRICAL LOCKOUT/TAGOUT procedure.
2. Remove the two (2) screws securing the junction box cover and remove the cover.
3. Tag and disconnect the convection motor electrical wires at the junction box.
Figure 26: Convection Motor Electrical Junction Box
4. Remove the motor guard.
5. Inside the oven, remove the pans, oven racks and oven side racks to gain access.
6. Remove the three (3) drive screws securing the flue intake assembly and remove the
flue intake assembly from the oven interior.
Figure 27: Convection Oven Flue Intake Assembly Removal
7. Remove the four (4) 1/4" cap screws, lock washers and spacers attaching the motor
grate to the motor mount plate and remove the motor grate.
8. Remove the setscrew from the rotor blower and remove the rotor blower from the motor
shaft.
9. Remove the four (4) 1/4" cap screws and spacers from the motor mount plate and
remove the motor mount plate.
10. Remove the four (4) 1/4" machine screws from the motor insulation and remove the
motor insulation.
11. Remove the four (4) hex nuts from the two (2) motor two (2) mount brackets and remove
the convection motor.
12. Reverse the procedure to install the convection motor.
13. Test the oven to verify proper operation.
Figure 28: Convection Motor Removal

Page 23 of 36
Oven Door Microswitch (C Model)
WARNING: Always perform the Electrical Lockout/Tagout procedure before removing
any sheet metal panels or attempting to service this equipment. Failure to comply with
this procedure can cause property damage, injury or death.
1. Perform the CONTROL PANEL removal procedure for the convection oven.
2. Tag and disconnect the two (2) electrical wires to the oven door microswitch.
3. Remove the two screws, lock washers and nuts securing the microswitch to the mount
bracket.
4. Reverse the procedure to install the oven door microswitch.
5. Reverse the CONTROL PANEL removal procedure to install the control panel.
6. Test the oven to verify proper operation.
Figure 29: Oven Door Microswitch Removal
SERVICE PROCEDURE AND ADJUSTMENTS
In order to provide maximum performance, proper operation, and insure the safety of the
operator, the oven should be serviced at least once a year by an authorized technician. If an
oven has not been in use or has been in storage for extended period, the unit should be
inspected by an authorized technician prior to reinstallation and/or operation.
WARNING: Certain procedures in this section require electrical tests or measurements
while power is applied to the unit. Exercise extreme caution at all times. If test points are
not easily accessible, disconnect power and follow Lockout/Tagout procedures, attach
test equipment and reapply power to test.
When troubleshooting, always reference the schematic and wiring diagrams to assist in isolating
the problem.

Page 24 of 36
Gas Leak Check
WARNING: All gas joints disturbed during servicing must be checked for leaks. Do not
use an open flame. Use a hazardous gas tester or a soap and water solution (Bubbles
indicate a gas leak). Failure to comply can cause property damage, injury or death.
WARNING: If a gas leak is detected, do not operate this or any other equipment until the
leak has been properly repaired. Failure to comply can cause property damage, injury or
death.
After completing service on any gas equipment, all gas joints disturbed during service must be
checked for leaks. DO NOT USE AN OPEN FLAME. Use a hazardous gas tester or use a soap
and water solution as follows:
1. Apply a soap and water solution to gas joint and check for bubbles.
2. If bubbles are present, the joint is leaking and must be repaired before using the
equipment.
Gas Pressure Check
WARNING: Always perform the Electrical Lockout/Tagout procedure before removing
any sheet metal panels or attempting to service this equipment. Failure to comply with
this procedure can cause property damage, injury or death.
1. Perform the MANIFOLD COVER REMOVAL procedure.
2. Turn off the gas supply.
3. Remove one of the plugs from the gas manifold.
4. Connect the manometer to the gas manifold.
Figure 30: Gas Pressure Check Manometer Connection
NOTE: In a battery arrangement, connect the manometer to the center unit of the battery.
NOTE: If the pressure reading is taken at the oven burner or anywhere other than the main gas
manifold pipe, the pressure reading will not be valid.
5. Turn on the gas supply.
6. Check manometer reading. The reading should be 5.0" W.C. for natural gas and 11.0"
W.C. for propane gas.

Page 25 of 36
WARNING: All gas joints disturbed during servicing must be checked for leaks. Do
not use an open flame. Use a hazardous gas tester or a soap and water solution
(Bubbles indicate a gas leak). Failure to comply can cause property damage, injury or
death.
7. Perform either:
a. If pressure is correct, no adjustment is necessary. Remove the manometer and
replace the manifold cover.
b. If pressure is NOT correct, perform the GAS PRESSURE ADJUSTMENT
procedure.
Gas Pressure Regulator Adjustment
WARNING: Always perform the Electrical Lockout/Tagout procedure before removing
any sheet metal panels or attempting to service this equipment. Failure to comply with
this procedure can cause property damage, injury or death.
NOTE: Before adjusting the regulator, check incoming gas line pressure.
1. Perform the GAS PRESSURE CHECK procedure.
2. The manometer is already connected.
3. Remove the regulator closing nut.
Figure 31: Gas Pressure Regulator Adjustment
4. Insert a flat-edge screwdriver through the top of the regulator. Turn the adjusting screw
clockwise to increase pressure and counterclockwise to decrease pressure.
5. While watching the manometer, turn the adjusting screw for proper regulator outlet
pressure, typically 5.0" W.C. for natural gas and 11.0" W.C. for propane.
6. Perform the following to check for insufficient gas volume:
a. Fire up one burner and take a reading, then fire up all the burners on the range
and take a reading.
b. Fire up all the gas appliances on that supply line and take a reading.
NOTE: At no time should the pressure drop more than 1/2" W.C.
c. If pressure drop is greater than 1/2" W.C., go to the next step.
d. Turn off all the gas valves. Adjust the regulator to no more than 1/2" W.C. above
specifications, which would be 5.5" W.C. for natural gas or 11.5" W.C. for

Page 27 of 36
Oven Burner Nozzle and Gas Orifice Check
The oven burner nozzle is mounted between the oven gas manifold and the u-burner assembly.
If burner operation seems poor and other systems have been checked, remove the burner
nozzle and check for blockage or damage as follows:
WARNING: Always perform the Electrical Lockout/Tagout procedure before removing
any sheet metal panels or attempting to service this equipment. Failure to comply with
this procedure can cause property damage, injury or death.
WARNING: Perform the GAS LOCKOUT/TAGOUT procedure before servicing the unit.
1. Perform the OVEN BURNER NOZZLE AND GAS ORIFICE REMOVAL procedure.
2. Remove the burner hood.
3. Check for blockage or damage.
WARNING: All gas joints disturbed during servicing must be checked for leaks. Do
not use an open flame. Use a hazardous gas tester or a soap and water solution
(Bubbles indicate a gas leak). Failure to comply can cause property damage, injury or
death.
4. Reverse the procedure to install the oven burner nozzle and gas orifice.
5. Test the oven to verify proper operation.
Figure 33: Oven Burner Nozzle and Gas Orifice Check
Air Shutter Adjustment
The efficiency of the burners depends upon a delicate balance between the air supply and the
volume of gas. When this balance is disturbed, poor operating characteristics and excessive
gas consumption will occur.
An air shutter on the front of each burner controls the air-gas mixture. With natural gas, the air
shutter will be approximately 50% open. On propane (LP) the air shutter will be approximately
90% open.
If the flame is soft, lazy, or yellow:
There is not enough primary air. To correct this condition:
1. Rotate the air shutter open until the burner flame begins to lift from the burner, then
close the shutter slightly.

Page 28 of 36
2. If this does not solve the problem, check the burner for obstructions and clear as
necessary.
If the flame is lifting off the burner:
There is too much primary air. Close the air shutter slightly and retest.
NOTE: If the grates, hot tops or oven bottoms have been removed, recheck flame adjustments
with these items in place.
If burner operation still seems poor and other systems have been checked, refer to the NOZZLE
AND ORIFICE CHECK procedure.
Figure 34: Examples Of Burner Flames
Top Burner Adjustment
1. Perform the MANIFOLD COVER REMOVAL procedure.
2. Loosen the screw on the air shutter.
3. Light the burners and observe the quality of the flame.
4. Adjust the air shutter as per the AIR SHUTTER ADJUSTMENT procedure.
5. Repeat the above steps for all remaining burners.
6. Tighten the screw for the air shutter.
7. Replace the manifold cover, burner bezels and knobs.
Figure 35: Top Burner Adjustment
Oven Burner Adjustment
1. Perform the KICK PANEL REMOVAL procedure.
2. Remove the food deflector.
3. Loosen the screw on the burner hood.
4. Light the oven and observe the quality of the flame (figure 34).
5. To adjust the burner, either rotate the burner hood clockwise to decrease the air or
counterclockwise to increase the burner air.
6. Tighten the screw on the burner hood.
7. Replace the kick panel.
Figure 36: Oven Burner Adjustment

Page 29 of 36
Oven Door Microswitch Test (C Model)
The oven door microswitch lever should be depressed when the oven door is closed.
WARNING: Always perform the Electrical Lockout/Tagout procedure before removing
any sheet metal panels or attempting to service this equipment. Failure to comply with
this procedure can cause property damage, injury or death.
1. Verify that the pin attached to the oven door hinge contacts the oven door microswitch
lever when the oven door is closed. An audible click should be heard when the
microswitch lever is depressed and the microswitch contacts close.
2. Perform the OVEN DOOR MICROSWITCH removal procedure.
3. Use a VOM to perform a continuity test on the microswitch.
4. The rear contact on the bottom of the microswitch is the COMMON connector. The other
two connectors are the NORM CLOSED and NORM OPEN connectors.
5. Check continuity between the rear (COMMON) connector and one of the two other
contacts. If it is open, (no continuity) depressing the switch lever should close the
connection. If it is closed (continuity) depressing the switch should cause the connection
to open.
6. Repeat this procedure for the other microswitch contact.
7. If either contact fails to switch from open to closed (normally open contact) or fails to
switch from closed to open (normally closed contact), replace the microswitch.
8. Reverse the OVEN DOOR MICROSWITCH removal procedure to install the switch.
Figure 37: Oven Door Microswitch Test
Fan Control Switch Test (C Model)
WARNING: Always perform the Electrical Lockout/Tagout procedure before removing
any sheet metal panels or attempting to service this equipment. Failure to comply with
this procedure can cause property damage, injury or death.
1. Perform the CONTROL PANEL removal procedure.
2. Use a VOM to perform a continuity test on the fan control switch.
3. With the fan control switch in the OFF position, verify there is no continuity between the
contacts on either side of the switch.

Page 30 of 36
4. Place the fan control switch in the ON position. Verify continuity is present between the
contacts for wires 62 & 13 and wires 63 & 64. Verify there is no continuity between wires
63 & 61.
5. Place the fan control switch in the COOL DOWN position. Verify continuity is present
between the contacts for wires 63 & 61. Verify there is no continuity between wires 62 &
13 and wires 63 & 64.
6. If the fan control switch fails any of the continuity tests, perform the FAN CONTROL
SWITCH removal procedure and replace the switch.
7. Test the oven to verify proper operation.
Figure 38: Fan Control Switch Test
Convection Motor Test (C Model)
The Convection Motor should operate when the oven door microswitch contacts are closed and
the fan control switch is in the ON or COOL DOWN position.
WARNING: Always perform the Electrical Lockout/Tagout procedure before removing
any sheet metal panels or attempting to service this equipment. Failure to comply with
this procedure can cause property damage, injury or death.
1. Perform the OVEN DOOR MICROSWITCH TEST to verify it is operating properly.
2. Perform the FAN CONTROL SWITCH TEST to verify it is operating properly.
3. Remove the two (2) screws securing the electrical junction box cover, remove the
junction box cover and check that all the wiring is correct.
4. Connect a multimeter and check for AC voltage at the convection motor terminals.
5. If voltage is present and the convection motor is not running, perform the CONVECTION
MOTOR REPLACEMENT procedure.
Figure 39: Convection Motor Test
Solenoid Test (C Model)
The convection oven solenoid is mounted behind the oven control panel between the gas
supply and oven burner assembly.

Page 31 of 36
WARNING: Always perform the Electrical Lockout/Tagout procedure before removing
any sheet metal panels or attempting to service this equipment. Failure to comply with
this procedure can cause property damage, injury or death.
WARNING: Perform the GAS LOCKOUT/TAGOUT procedure before servicing the unit.
1. Perform the CONTROL PANEL REMOVAL procedure for the convection oven.
2. Locate the solenoid.
3. Place the fan control switch in the ON position. An audible click should occur when the
switch is activated. If the solenoid does not cycle, check for proper voltage and ground at
the solenoid as follows:
a. Place a multimeter in the appropriate AC range (220 volts AC or 120 volts AC).
Check for voltage at the solenoid. If voltage is not available, shut off electrical
power to the oven and check continuity between the power switch and solenoid.
b. If voltage is available, shut off electrical power to the oven. Place the multimeter
in the continuity range. Check for continuity between the solenoid ground
connection and a ground. If continuity is not available, check and repair ground
connections.
c. If continuity is available, perform the SOLENOID REMOVAL procedure and
check for solenoid orifice obstruction.
WARNING: All gas joints disturbed during servicing must be checked for leaks. Do
not use an open flame. Use a hazardous gas tester or a soap and water solution
(Bubbles indicate a gas leak). Failure to comply can cause property damage, injury or
death.
4. Reverse the procedures to install the solenoid.
5. Test the oven to verify proper operation.
Figure 40: Convection Oven Solenoid Test

Page 33 of 36
control switch is placed in the ON position. The convection motor should shut off when the oven
door is opened unless the fan control switch is placed to the COOL DOWN position. In the
COOL DOWN position the oven door microswitch is bypassed so that the convection motor will
run while the oven door is open to rapidly lower the oven temperature.
SEQUENCE OF OPERATION (C Model)
Refer to schematic diagram
Initial Conditions
1. Conditions.
A. The oven has been properly installed and the power plug is plugged into a wall
outlet that agrees with the required voltage on the rating plate.
B. The oven manual gas shutoff valve is in the OPEN position.
C. The oven door is open.
D. The oven pilot is lit.
E. The temperature control is set to the desired temperature.
2. Turn the fan control switch to ON.
A. Power is applied to one side of the convection motor.
B. Power is applied to one side of the solenoid.
3. Oven door closed.
A. Oven door microswitch contacts will close.
B. Power is applied to the other side of the convection motor and it will begin to
rotate.
i. The convection motor centrifugal switch will close.
ii. Power will flow to the solenoid and the thermostat.
iii. The solenoid will open the gas valve and gas will flow to the burner.
iv. Oven temperature will be controlled by the oven control valve.
4. Oven door opened.
A. With the fan control switch in ON, the oven door microswitch contacts will open
and power will be removed from one side of the convection motor.
i. The centrifugal switch will open and power will be removed from the
solenoid and the thermostat.
ii. The solenoid will close the gas valve and shutoff the gas to the burner.
iii. Pilot remains lit.
B. With the fan control switch in COOL DOWN, the oven door microswitch is
bypassed to the convection motor.
i. The convection motor will continue to run.
ii. The oven door microswitch will remove power to one side of the

Page 35 of 36
TROUBLESHOOTING
SYMPTOM
POSSIBLE CAUSES
Pilot does not remain lit.
1. Low gas pressure.
2. Thermocouple not positioned correctly or malfunctioning.
3. Control valve malfunction.
Burner flame too yellow
1. Orifice incorrect size or obstructed.
2. Air Shutter not adjusted correctly.
3. Incorrect gas pressure.
4. Incorrect gas type.
CONVECTION OVENS ONLY
Convection motor does not
operate; Burner does not light.
1. Main power supply not on.
2. Incorrect voltage.
3. Oven door switch open or inoperative.
4. Fan control switch open or inoperative.
Convection motor does not
operate,; Burner lit.
1. Convection motor inoperative.
Convection motor operates but no
gas flow to burner. Pilot lit.
1. Thermocouple not positioned correctly or malfunctioning.
2. Solenoid malfunction.
3. Oven control valve malfunction.
Convection motor noisy.
1. Fan mounting loose.
2. Blower loose on motor shaft.
3. Motor malfunction.
Produkt Specifikationer
Mærke: | Vulcan |
Kategori: | Komfur |
Model: | V4B36 |
Har du brug for hjælp?
Hvis du har brug for hjælp til Vulcan V4B36 stil et spørgsmål nedenfor, og andre brugere vil svare dig
Komfur Vulcan Manualer
16 Juni 2025
15 Juni 2025
15 Juni 2025
15 Juni 2025
15 Juni 2025
15 Juni 2025
15 Juni 2025
15 Juni 2025
15 Juni 2025
15 Juni 2025
Komfur Manualer
- Rival
- Fisher & Paykel
- DeLonghi
- Elro
- Nordic Fire
- Termozeta
- Esatto
- Porter & Charles
- Zelmer
- Mill
- Stover
- Fagor
- Presto
- Ilve
- Campomatic
Nyeste Komfur Manualer
18 Juni 2025
18 Juni 2025
18 Juni 2025
18 Juni 2025
18 Juni 2025
17 Juni 2025
17 Juni 2025
17 Juni 2025
17 Juni 2025
17 Juni 2025