Accucold AIWD450FLTR Manual
Læs nedenfor 📖 manual på dansk for Accucold AIWD450FLTR (30 sider) i kategorien Ismaskine. Denne guide var nyttig for 21 personer og blev bedømt med 4.2 stjerner i gennemsnit af 11 brugere
Side 1/30

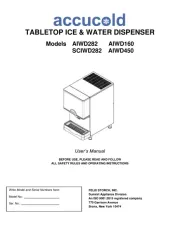
TABLETOP ICE & WATER DISPENSER
Models AIWD282 AIWD160
SCIWD282 AIWD450
User’s Manual
BEFORE USE, PLEASE READ AND FOLLOW
ALL SAFETY RULES AND OPERATING INSTRUCTIONS
FELIX STORCH, INC.
Summit Appliance Division
An ISO 9001:2015 registered company
770 Garrison Avenue
Bronx, New York 10474
Write Model and Serial Numbers here:
Model No.:
Ser. No.:

2
Table of Contents
Important Safeguards ............................................................................................. 3-5
Product Specication .............................................................................................. 6-9
Product Rating… .................................................................................................. 6
Location of Parts… ................................................................................................. 7-9
Unpacking, etc. ........................................................................................................... 10
Product Installation ..................................................................................................... 10- 14
General Instructions ............................................................................................... 10
Requirements for plumbing .................................................................................... 11
Water Quality… ....................................................................................................... 11
Requirements for Power Supply ..............................................................................12
Panel disassembly method ..................................................................................... 13
Connection method for water supply and drainage… ................... …………………..14
How to start the product ........................................................................................... 15 17-
Button operation… ............................................................................................... 15
Function button description (FND display window) … ........................................... 16
Three drainage functions (forced drainage, automatic draining, water 17 drainage)…
Stop switch…....................................................................................................... 17
Product Maintenance ................................................................................................ 18- 23
Actions required to prevent frost ........................................................................... 18
Emptying the drainage gutter (AIWD450)…………………………………………….18
Maintenance, repair, and disinfection… ............................................................... 19
Maintenance schedule… ...................................................................................... 20
Cautions when cleaning exterior panel (stainless steel)…………… ...................... 21
How to clean and disinfect .................................................................................. - 22 23
Circuits Diagram ....................................................................................................... 24-25
Product Troubleshooting ......................................................................................... 26-27
Before Requesting Service ................................................................ ………………..29
Product Warranty ......................................................................................................30

3
Your safety and the safety of others are very important.
We have provided many important safety messages in this manual and on your appliance.
Always read and obey all safety messages.
This is the Safety Alert Symbol. This symbol alerts you to potential hazards
that can injure or kill you and others.
Safety messages will follow the Safety Alert Symbol and either the words
"DANGER", "WARNING" OR "CAUTION".
DANGER means that failure to heed this safety statement may
result in severe personal injury or death.
WARNING means that failure to heed this safety statement
may result in extensive product damage, serious personal injury
or death.
CAUTION means that failure to heed this safety statement may
result in minor or moderate personal injury, or property or
equipment damage.
What you must obey
Prohibited
Disassembly
Prohibited
No Contact
Remove Power
Plug
Grounding
All safety messages will alert you to what the potential hazard is, tell you how to reduce the
chance of injury, and let you know what can happen if the instructions are not followed.
IMPORTANT SAFETY INSTRUCTIONS
WARNING: To reduce the risk of re, electric shock or injury when using
your ice maker, follow these basic precautions:
·
Plug into grounded 3-prong outlet. Disconnect power before cleaning.
·
Do not remove grounding prong. ·Disconnect power before servicing.
·
Do not use an adapter. ·Replace all panels before operating.
·
Do not use an extension cord. · Use two or more people to move & install ice maker.
SAVE THESE INSTRUCTIONS

4
Before the ice/water dispenser is used, it must be properly positioned and installed as described
in this manual, so read the manual carefully. Accucold® by Summit Appliance strongly recommends that
you have a professional install your new machine. The warranty may be aected or voided by an incorrect
installation. To reduce the risk of re, electrical shock or injury when using the ice/water dispenser follow
basic precautions, including the following:
• Plug into a grounded 3-prong outlet; do not remove
grounding prong, do not use an adapter, and do not use
an extension cord.
•
It is recommended that a separate circuit, serving only your ice maker, be provided. Use receptacles
that cannot be turned o by a switch or pull chain.
•
Do not connect or disconnect the electric plug when your hands are wet.
•
Never unplug the dispenser by pulling on the power cord. Always grip the plug rmly and pull straight
out from the outlet.
•
Never clean dispenser parts with flammable uids. Do not store or use gasoline or other ammable
vapors and liquids in the vicinity of this or any other appliance. The fumes can create a re hazard or
explosion.
•
Before proceeding with cleaning and maintenance operations, make sure the power line of the unit is
disconnected and the water line is shut o.
•
Before operating, put all panels back into place.
•
Never allow children to operate, play with the ice dispenser.
•
Do not touch the evaporator with your hand when the machine is operating.
•
Unplug the ice dispenser or disconnect power before cleaning or servicing. Failure to do
so can result in electrical shock or death.
•
Do not attempt to repair or replace any part of your ice dispenser unless it is specically recommended
in this manual. All other servicing should be referred to a qualied technician.
•
Use two or more people to move and install the ice maker.
Failure to do so can result in back or other injury.
•
Never install or operate the unit in an enclosed area, such as a closed cabinet. To ensure proper
ventilation for your ice maker, the front of the unit must be completely unobstructed. Choose a well-
ventilated area with temperatures above 50°F (10°C) and below 100°F (38°C). The optim supplied um
water temperature would be below 50°F. This unit MUST be installed in an area protected from the
elements, such as wind, rain, water spray or drips.
•
The dispenser is for indoor use only.
•
The dispenser should not be located next to ovens, grills or other sources of high heat.
•
The dispenser must be installed with all electrical and water connections in accordance with state and
local codes. A standard electrical supply (115 V AC, 60 Hz, 15 A), properly grounded in accordance with
the National Electrical Code and local codes and ordinances, is required.
•
Do not kink or pinch the power supply cord between the dispenser and cabinet.
•
The fuse (or circuit breaker) size should be 15 amperes.
•
It is important for the dispenser to be leveled in order to work properly. Otherwise water may not ow
properly through the evaporator (ice mold). The ice production will be less than normal. You may need
to make several adjustments to level it.
•
All installations must be in accordance with local plumbing code requirements.

5
•
Make certain that hoses are not pinched, kinked or damaged during installation.
•
Check for leaks after water line is connected.
•
Although the unit has been tested and cleaned at the factory, due to long-term transit and storage, the
rst batch of cubes must be discarded.
•
Remove the packing materials and clean the dispenser before using.
•
Turn on the water supply tap before switching on the ice maker. Never turn the water supply tap o
when the dispenser is working.
•
Except to take ice from the unit, keep the door closed in order to reduce ice melting and to promote
proper ice formation.
•
If the dispenser will not be used for a long time, before the next use it must be thoroughly cleaned.
Follow carefully any instructions provided for cleaning or use of sanitizing solution. Do not leave any
solution inside the dispenser after cleaning.
•
Do not touch the condenser ns. They are sharp and can be easily damaged.
•
DO NOT use solve -based cleaning agents or abrasives on the interior. These cleaners may transmit nt
taste to the ice cubes, or damage or discolor the interior.
•
The ice machine cleaner contains acids. Do not use or mix with any other solvent-based cleaning
products. Use rubber gloves to protect hands. Carefully read the safety instructions on the container of
the ice machine cleaner.
•
Do not use the apparatus other than for its intended purpose.
•
Do not place heavy objects or containers containing water on the ice maker. The objects or
containers may fall and cause water to leak and the insulation may be weakened, resulting in a re
due to a short circuit.
•
Do not install the product in a humid place or where there is a risk of water splashing. Insulation may
be weakened, resulting in short circuit, electric shock, or re.
•
Do not use: If the product malfunctions, such as smoke or burning smell, unplug the power cord to
stop operation. If you continue operating in abnormal conditions, there is a risk of re or electric
shock.
•
Do not use: Do not use if the outlet is loose or has a problem. There is a risk of re due to electric
shock or short circuit.
•
Do not modify or repair the product yourself. Ignition or abnormal operation is dangerous and may
cause more trouble.
•
Do not allow electrical cords or plugs to be pinched or twisted. The cord or plug may be peeled and
there is a risk of re or electric shock. If the cord or plug is peeled or damaged, be sure to ask the
service to replace it.
•
Do not damage the inside of the dispenser with a sharp tool. The ice reservoir may break or become
damaged.
•
When not in use for a long time, remove ice and water (to prevent winter frost), and unplug the power
cord from the outlet.
•
If there is a risk of slippery water or oil on the oor near the ice maker, please wipe it. There is a risk of
injury if you slip on the dispenser or get hands or feet in the bottom of the side.
•
When transferring this dispenser to another person, please hand it along with the instruction manual.
New users need a manual for safe use.
•
Do not put your hands or feet on the bottom of the ice maker. The bottom of the dispenser has iron
plates and various parts which may cause injury.
•
If you unplug the power plug from the wall outlet and plug it back in again, wait at least 5 minutes
before reinserting. If it is plugged in immediately, it may cause a trouble in operation of the freezer and
it may cause malfunction of the ice maker.
•
In areas where there is a lot of lime content in the water, please install a lime removal lter at the
entrance of the product water supply (the product life may be shortened by calcareous).
• Do not let children hang on the product. There is a danger of the
dispenser twitching or falling, resulting in injury. In particular, do not let children hang on the reservoir
not xed to the product. Never allow children to operate, play with, or crawl inside the dispenser.

6
Product Specications
WATER/ICE DISPENSER
Model
AIWD282/SCIWD282
AIWD450
AIWD160
AC Supply Voltage:
115 V 60 Hz, 1 PH
115 V 60 Hz, 1 PH
115 V 60 Hz, 1 PH
Refrigerant:
R404A
R404A
R134A
Amount of refrigerant:
11.29 oz
14.10oz
6.35 oz
Design Pressure: High
Side
360 PSIG
375 PSIG
250 PSIG
Design Pressure: Low
Side
190 PSIG
193 PSIG
150 PSIG
Compressor
LRA 40A
LRA 20A
LRA 53A
Fan Motor
115 V, 0.7 A
115 V, 1.1A
115 V, 0.2A
Geared Motor
115V, 1.6A
115V, 1.6A
115V, 1.6A
Maximum Fuse Size
20A
15A
20A
Max. HACR Breaker
(USA Only)
20A
15A
20A
Max. HACR Breaker
(Canada Only)
20A
15A
20A
Min. Circuit Ampacity
5.8A (570W)
14.47A (840W)
2.8A (322W)
FCC Identier
ICTR- -E191162- TR OA
ICERT- -E213 - TR 382 0A
Condensation Method
Air-cooled
Air-cooled
Air-cooled
Ice Shape
Nugget
Nugget
Nugget
Discharging method
Solenoid
Solenoid
Solenoid
SAVE THESE INSTRUCTIONS

7
Location of Parts (AIWD282/SCIWD282)
Front Top/Bottom

8
Location of Parts (AIWD450)
Front Rear
Top
Bottom

12
Requirements for power supply
120VAC, 60Hz, 15-amp circuit breaker and electric power are required. A separate circuit is required for
grounding.
The power cord of the product should be inserted into a suitable 3-prong grounding-type socket.
Important Information: A Ground Fault Circuit Interrupter (GFCI) is not recommended because it could cause
the operation of the product to stop.
Important Information: The provisions of the National Electric Code as well as any local laws and instructions
should be observed when installing the product.
Electrical Connection
Do not, under any circumstances, cut or remove the third (ground) prong from the power cord. For personal
safety, this appliance must be properly grounded. The power cord of this appliance is equipped with a 3-
prong grounding plug that mates with a standard 3-prong grounding wall outlet to minimize the possibility
of electric shock hazard from the appliance. Have the wall outlet and circuit checked by a qualied
electrician to make sure the outlet is properly grounded. When a standard 2-prong wall outlet is
encountered, it is your responsibility and obligation to have it replaced with a properly grounded 3-prong
wall outlet. The dispenser should always be plugged into its own individual electrical outlet which has a
voltage rating that matches the rating label on the appliance. This provides the best performance and also
prevents overloading house wiring circuits which could cause a re hazard from overheated wires. Never
unplug your dispenser by pulling on the power cord. Always grip the plug rmly and pull straight out from
the outlet. Repair or replace immediately all power cords that have become frayed or otherwise damaged.
Do not use a cord that shows cracks or abrasion damage along its length or at either end. When moving
the ice maker, be careful not to damage the power cord.
Extension Cord
Because of potential safety hazards under certain conditions, it is strongly recommended that you do not
use an extension cord with this dispenser.
Warning!
Do not use extension cords or 2-prong adapters. The product must be grounded.
Never cut o the grounding terminal of the 3-prong grounding plug.

13
Panel Disassembly Method
1.
Upper panel: Open the front door and lift the upper panel, then the back magnets will be separated and
disassembled.
2.
Front panel: Remove the lower set screws of the drain box, then loosen the set screws on the top of
the front panel and pull out the front panel taking both sides.
3.
Side panel: Open the door, loosen the screws on the top of the front panel, push the front panel
forward, and slide the side panel forward to remove it.
•
Precede the assembly work in the reverse order of disassembly.
Side Panel

16
Function Button Description (FND Display Window)
F. 1
Maximum Discharge
Time
① SOLENOID Maximum operating time adjustment function.
②3rd, 4thdigits: 20 seconds (5 seconds ~ 30 seconds, Set Unit of one
second)
F. 2
Complete removal of
ice in the reservoir
①This function can be entered in "OFF" state of ICE MAKING-OFF-WASH
switch.
②Press two buttons (WATER, ICE) simultaneously for 3 seconds and Button
part LED lights up.
③ Press the discharge lever for continuous operation of SOLENOID and the
motor. Keep 'ON' state.
F. 3
Automatic ice
discharge function
① When ICE, WATER &ICE button is selected, ice is automatically emitted
for the set time.
② Automatic operation is not possible when OFF is set. (Manual operation)
③ Automatic discharge is performed for the set time of At01 ~ 99.
F. 4
Initial water
subtraction function
① It operates rst when "ICE MAKING" switch is operated.
② FND 1st, 2nddigits (drain time) 30 seconds (oF ~ 99 seconds, Set Unit of
one second)
③ Water supply operation after drainage to high water level.
④ FND 3rd, 4th digits (number of repetitions) Standard: 3 times (1 ~ 9 times)
F. 5
Automatic drain
function
It operates when "ICE MAKING" switch is operated.
② FND 1st, 2nddigits (drain time): 2 seconds (oF ~ 9 seconds, Set Unit of one
second)
③ FND 3rd, 4th digits (drain interval): 1.0 hour (0.5 ~ 9.5 hours, every 30
minute s)
F. 6
ICE + WATER
volume control
①1st, 2nd
digits Ice time Default 5 seconds (up to 99 seconds)
②3rd, 4thdigits Water time Default 5 seconds (up to 99 seconds)
F. 7
UV LAMP time
adjustment
①1st, 2nd
digit lighting time Default 3minutes (99 minutes possible)
②3rd, 4thdigits o time Default 1 hour (9 hours available)
F. 8
Notify service period
setting
① A.1.0 After using 10,000 hours, the corresponding mode LED blinks for 5
seconds (for the rst 5 seconds during ice making)
② A.1.1 After using 11,000 hours, all LEDs blink for 5 seconds (1 hour cycle)
F. 9
Cumulative uptime
① The FND display is displayed in year, month, day, and hour, and is
displayed in order from right to left.
② Cumulative operation time of product is expressed in hour unit.
③ Calculation example: 12 months for 1 year, 30 days for 1 month, 24 hours
for 1 day.
F. 10
Change temperature
unit
Function of setting the unit of temperature in degrees Celsius or Fahrenheit
F. 11
Evaporation inlet
temperature display
F. 12
Evaporation outlet
temperature display
F. 13
Choose ice water
discharge method
ordE : Discharge ice rst and then discharge water
join : Simultaneous discharge of ice and water

18
Actions required to prevent frost
(Water Removal in Water Tank and Evaporator)
•
If the ambient temperature falls below 0°C/32 o
F, water will freeze inside the machine and machine
operation will be impossible.
•
If not use for a long period of time in the winter, be sure to completely remove the water inside the in
body by following the instructions below. If you do not remove the water or if it is insucient, it will cause
serious damage to the product. This shall not be guaranteed by the manufacturer and may result in
repair costs. Please observe the following point s.
1. Turn on the power switch and press the DOWN + SET
button at the same time for 3 seconds with any signal
on the FND window. Forced drainage will be done for
30 seconds.
2. Turn o the power switch and disconnect the power
plug from the outlet.
3. Remove the uppe r panel → the front panel.
4. Remove the evaporator cylinder drain hose clamp
and remove the hose, and wait until the ice in the
evaporator cylinder completely melts down. It is
possible to remove internal water quickly by using
compressed air gun etc.
5. Reassemble the evaporator cylinder drain hose
and tighten the clamp.
6. Assemble in the order of left panel → upper
panel → front panel.
• AIWD450: back panel → upper panel
Emptying the drainage gutter (AIWD450)
• When the water in the front drain is full, a white oat comes up, so empty out the drain and
pour water.
• (If water overows, it may ow onto the oor, so empty it from time to time).

19
Maintenance, repair, and disinfection
※
Please keep the product according to the instruction manual and label provided.
● Be sure to have a qualied service technician service the product.
● To reduce the risk of electric shock, do not touch or disassemble the parts of the ice maker.
● Before service
- Turn o the power switch of the dispenser and the earth leakage breaker, and disconnect the power
plug from the outlet.
● Choking hazard - After performing maintenance and repair, make sure that all components (such as
xtures, screws, bolts, etc.) are completely assembled.
- Be careful not to let any components fall into the ice making compartment and ice reservoir.

20
Maintenance Schedule
※
The following maintenance schedule is guideline.a
※
Maintenance and repair should be done more frequently according to water quality, equipment usage
environment and local hygiene regulations.
Inspection
Schedule
Area
Contents
Daily
Chute
1. Clean the ice scoops with a neutral detergent.
2. Rinse thoroughly after cleaning.
Weekly
Air Filters (air-cooled)
1. Inspect for dust and wash dirt with warm water and neutral detergent.
Monthly
External water lter
1. Make sure that the pressure is adequate and make changes if needed.
Outside of the icemaker
1. Wipe it with a clean, soft cloth, and use a cloth dampened with a neutral
detergent to wipe away any accumulated dust or grease.
2. non Clean the chlorine dye (green spots) with -abrasive detergent.
The bottom of the ice
maker
1. Wipe clean with clean cloth and warm water.
Every six
months
Dispenser and reservoir
1. Clean and disinfect according to the disinfection instructions given in the
instruction manual.
Evaporator condensate
drain pan and Geared
motor drain pan
1. Wipe clean with clean cloths and warm water, and slowly pour a cup of
disinfectant solution (prepared as described in the instructions for disinfection
in the manual) into the evaporator condensate drain pan.
2. Take care not to overow the drain pan.
3. This disinfectant solution will ow out through the geared motor drain pan and
drain passage.
4. Rinse repeatedly with a glass of clean water.
Ice maker and reservoir
1. Always check that it is kept clean.
Ice exit xing
seal bolt
1. Check for leaks around the seal bolt. Tighten if necessary and replace O-rings.
2. Always replace the O-ring when loosening the seal bolt and tighten it again. If
there O-ring, apply Loctite 243 equivalent xing agent that does not is no or so it
leak.
Every year
Water supply valve and
Drain valve
1. Close the shuto valve to shut o the water supply line and drain the water.
2. Clean the inlet of the water supply valve and check the water supply valve and
drain valve for leakage and operation.
Water hose
1. Check the water hose and clean it if necessary.
Condenser (air-cooled)
1. Inspect for cleaning. If necessary, clean with a brush or vacuum cleaner
2. If the dust adhesion is severe, spray the pin cleaning agent, clean the dust,
spray it with clean water, rinse and dry with air gun.
Ice maker
1. Inspect for oil marks, loose components, tightening parts and wires.
Upper bearing
(Ice exit head)
1. Check that 0.5mm (0.02 for AIWD160 model) round bar or pin gauge (or mm
clearance gauge) is inserted into auger and bearing clearance, and replace all upper
and lower bearings (ice exit head and lower housing) (Paid service)
Mechanical seal
1. Check for leaks in the bottom housing, and if there is a leak, disassemble the
auger to replace the mechanical seal. (Paid service) (Water with a lot of calcium
will shorten the life of replacement parts.)
Every three
years
Upper and lower
bearings,
Housing O-ring,
Mechanical seals,
Evaporator cylinder,
Auger
1. Please check if the auger and bearing clearance exceeds the factory
recommended value (0.5mm or less (0.02mm or less for AIWD160 model)), and
replace both the upper and lower bearings.
If the contact surface of the mechanical seal is worn, cracked, or scratched,
replace it.

22
How to Clean and Disinfect
The dispenser should be cleaned and disinfected at least twice a year. More frequent cleaning and
disinfection may be required.
Washing
solution
Use a scale remover that is not harmful to the human body by diluting with water, and add
more if necessary.
It is important to use the diluted cleaning solution immediately for safety and maximum
eect.
Washing
procedure
1) Shut o the water supply by locking the valve of the waterline of the ice maker.
2) Switch the ICE MAKING-OFF-WASH switch to the "WASH" position.
3) The water in the water tank is drained through the evaporator cylinder and washing is
done by this (max. 5 minutes).
4) Turn the ICE MAKING-OFF-WASH switch to "OFF" position.
5) Remove all ice from the ice maker and reservoir.
6) Pour the wash solution into the wash solution inlet until the evaporator assembly and the
water tank are full. (Until the wash solution overows to the drain box)
7) Leave the ice maker for 10 minutes before starting the operation. If the water supply
hose is clogged, remove it before operation.
8) As described below, please disassemble and clean the water level sensor (high and low) if
it is in bad water condition.
If not, proceed to step 9.
□
Remove the water level sensor from the water tank cover.
□
Clean the level sensor with washing solution.
□
Wash the water level sensor thoroughly with clean water.
□
Fix the level sensor to the correct position.
9) Switch the ICE MAKING-OFF-WASH switch to the " ICE MAKING" position to start the
ice maker. Keep it running until ice making stops.( Water supply valve should be ※
locked so that water is not supplied.)
10) Switch the front ICE MAKING-OFF-WASH switch to the "WASH" position, and drain the
remaining water in the water tank and evaporator cylinders for 5 minutes.
11) Switch the ICE MAKING-OFF-WASH switch to the "OFF" position.
12) Open the water supply valve of the ice maker, and switch the ICE MAKING-OFF- WASH
switch to the " ICE MAKING" position so that water can be supplied to the water tank.
13) When the geared motor is activated, switch the ICE MAKING-OFF-WASH switch to the
"WASH" position and drain the water (drain is possible for 5 minutes).
14) Turn OFF the power switch and disconnect the power cord from the outlet.
Please observe the following points.
•
Do not use ammonia-type detergents to prevent personal injury or damage to the ice maker.
•
Disinfection and cleaning should be handled according to the instructions provided.
•
Always wear protective eyewear and waterproof gloves to prevent skin or eye contact with water and
disinfectant.
•
After cleaning and disinfection, do not use ice made from cleaning agent and disinfectant. Be careful that no
disinfectant remains in the dispenser and any parts in the reservoir.
Produkt Specifikationer
Mærke: | Accucold |
Kategori: | Ismaskine |
Model: | AIWD450FLTR |
Har du brug for hjælp?
Hvis du har brug for hjælp til Accucold AIWD450FLTR stil et spørgsmål nedenfor, og andre brugere vil svare dig
Ismaskine Accucold Manualer

28 September 2024

28 September 2024

28 September 2024

6 September 2024

6 September 2024

5 September 2024
Ismaskine Manualer
- Ismaskine H.Koenig
- Ismaskine Silhouette
- Ismaskine TriStar
- Ismaskine Maxxfrost
- Ismaskine Domoclip
- Ismaskine ECG
- Ismaskine Manitowoc
- Ismaskine Petra Electric
- Ismaskine Krups
- Ismaskine DeLonghi
- Ismaskine Temptech
- Ismaskine Whirlpool
- Ismaskine Sencor
- Ismaskine Cuisinart
- Ismaskine G3 Ferrari
Nyeste Ismaskine Manualer

4 April 2025

4 Marts 2025

24 Februar 2025

24 Februar 2025

23 Februar 2025

20 Februar 2025

19 Februar 2025

12 Januar 2025

12 Januar 2025

11 Januar 2025