Aiphone AX-DV Manual
Læs gratis den danske manual til Aiphone AX-DV (12 sider) i kategorien Samtaleanlæg. Denne vejledning er vurderet som hjælpsom af 25 personer og har en gennemsnitlig bedømmelse på 5.0 stjerner ud af 13 anmeldelser.
Har du et spørgsmål om Aiphone AX-DV, eller vil du spørge andre brugere om produktet?
Produkt Specifikationer
| Mærke: | Aiphone |
| Kategori: | Samtaleanlæg |
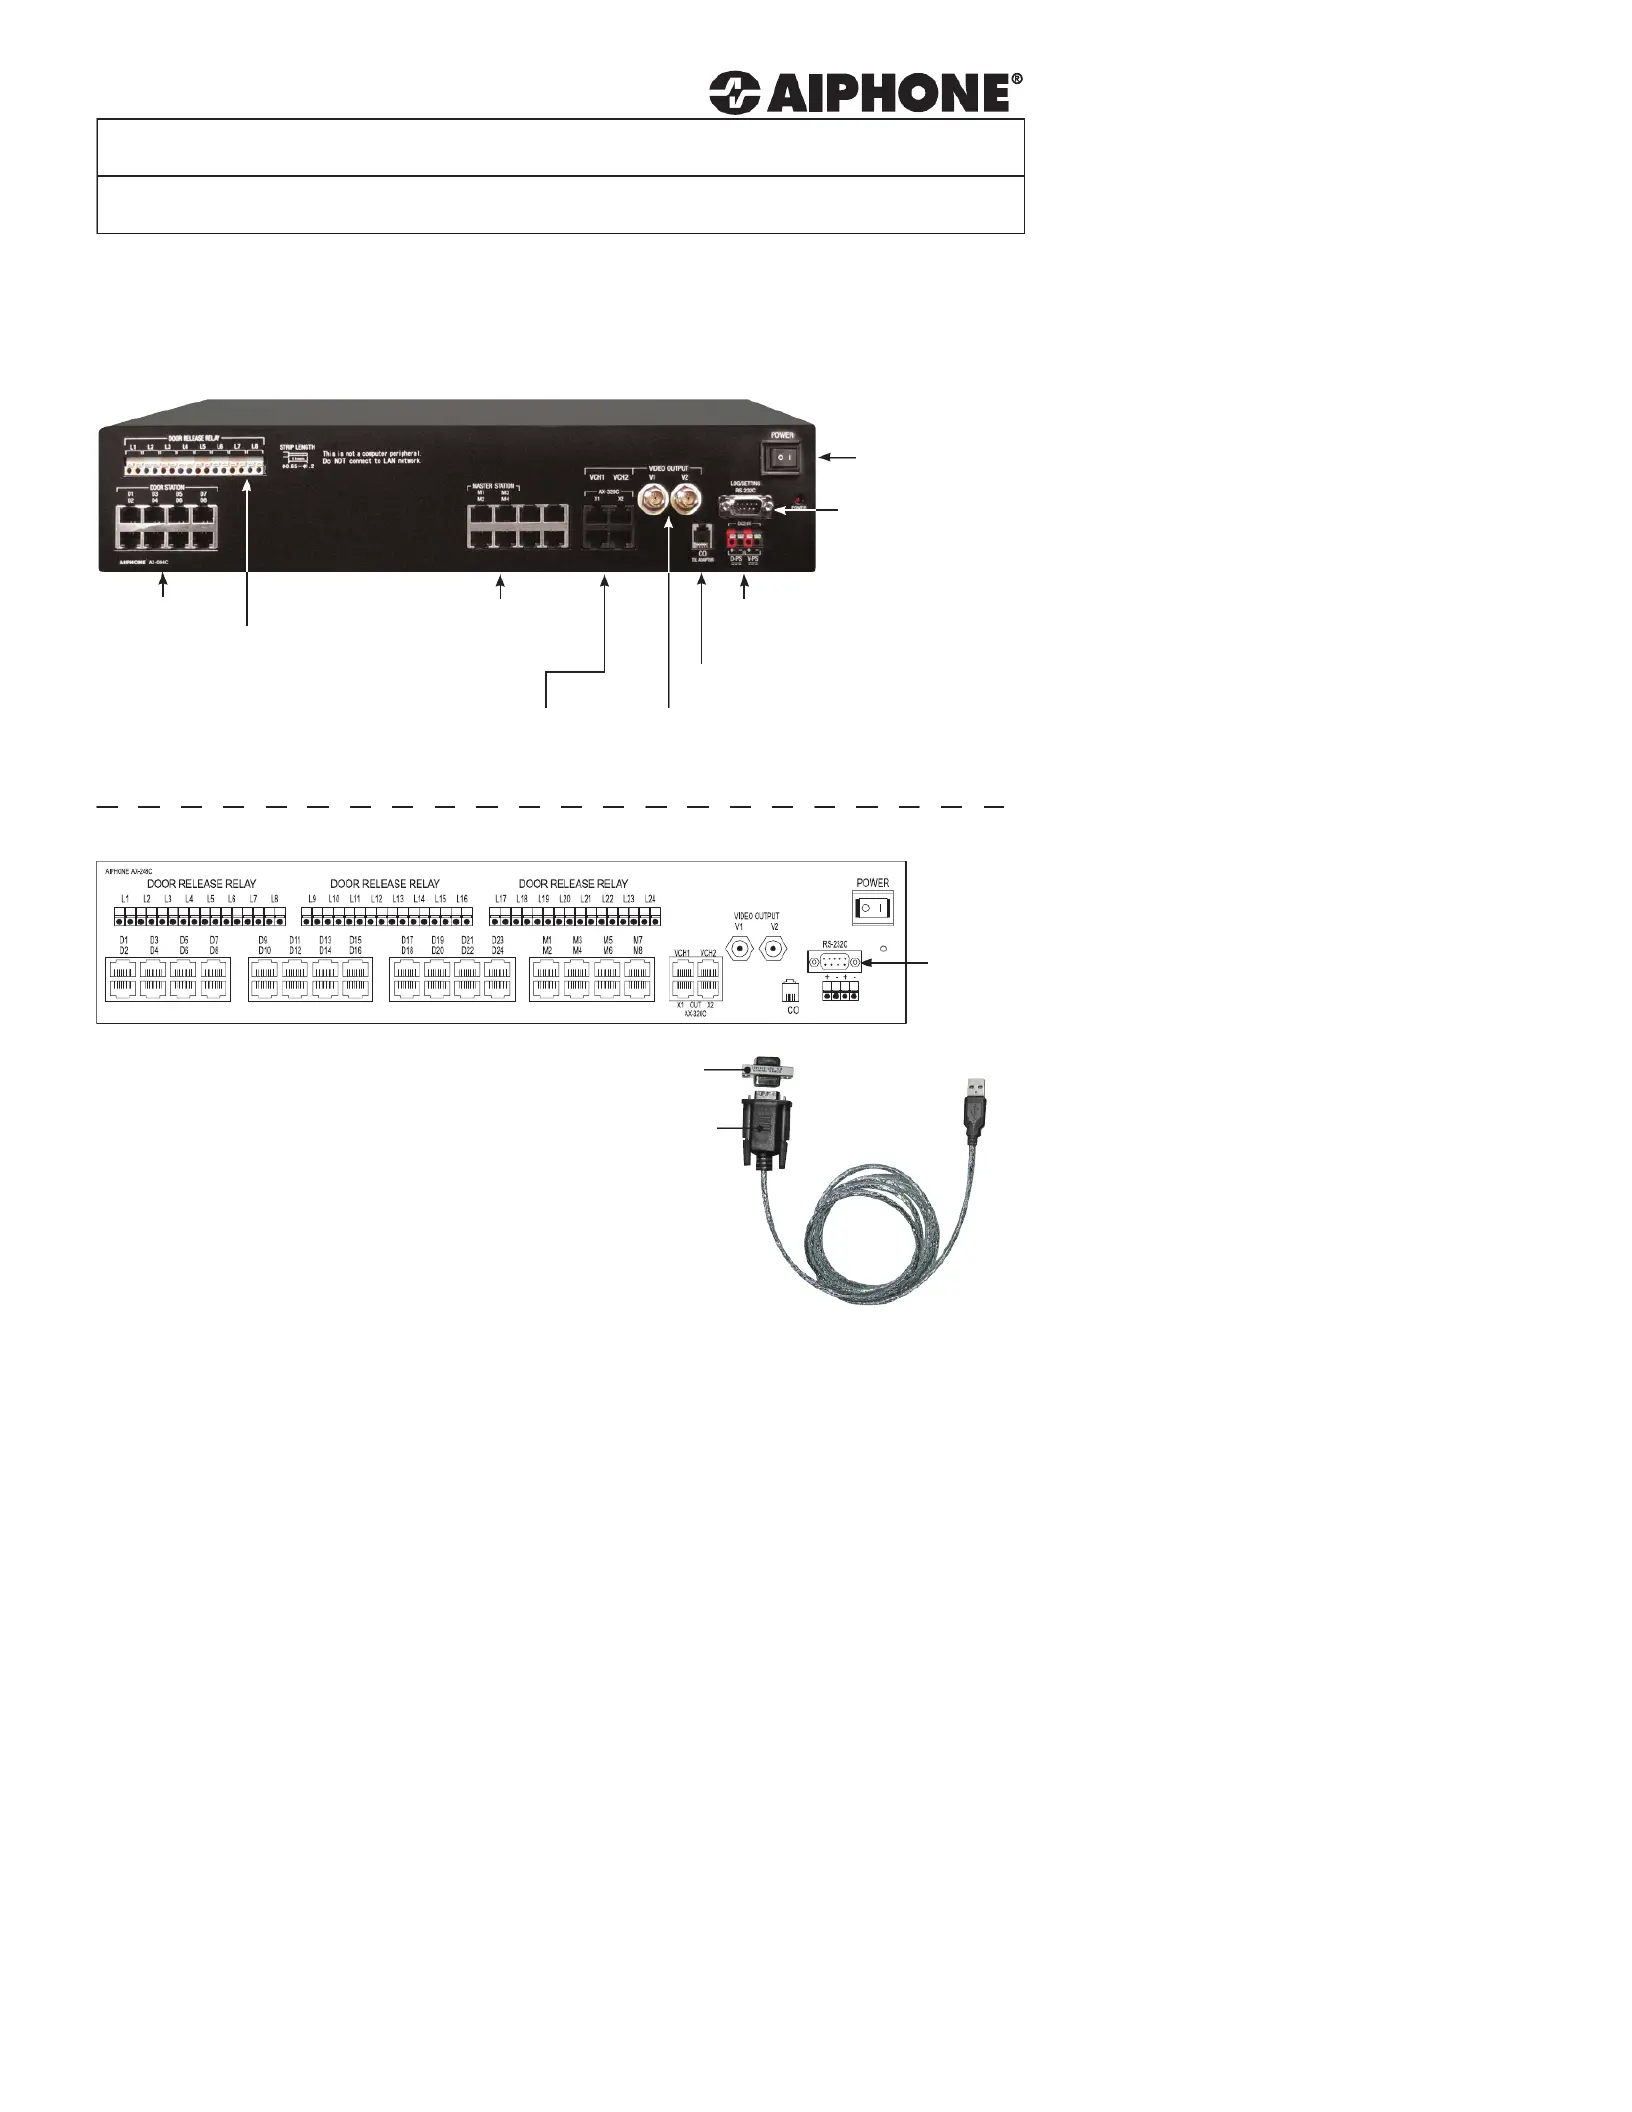
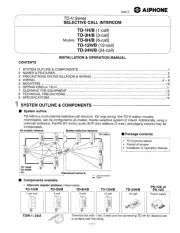
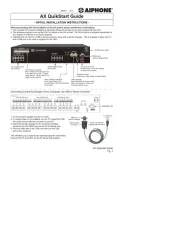
| Model: | AX-DV |
| Bredde: | 100 mm |
| Dybde: | 25 mm |
| Højde: | 195 mm |
| Vægt: | 400 g |
| Produktfarve: | Black, Stainless steel |
| Produkttype: | Kameramodul |
| Driftstemperatur (T-T): | -10 - 60 °C |
| Materiale: | Aluminium, Polycarbonate |
| Monteringstype: | Overflade |
| Mærke kompatibilitet: | Aiphone |
Har du brug for hjælp?
Hvis du har brug for hjælp til Aiphone AX-DV stil et spørgsmål nedenfor, og andre brugere vil svare dig
Samtaleanlæg Aiphone Manualer


Samtaleanlæg Manualer
- Hikvision
- Nedis
- Akuvox
- Vimar
- Chamberlain
- Wuloo
- Chacon
- ORNO
- Kocom
- ACTi
- Busch-Jaeger
- Ikan
- ME
- Neview
- Gira
Nyeste Samtaleanlæg Manualer