Asus Pen 2.0 SA203H Manual
Asus
Ikke kategoriseret
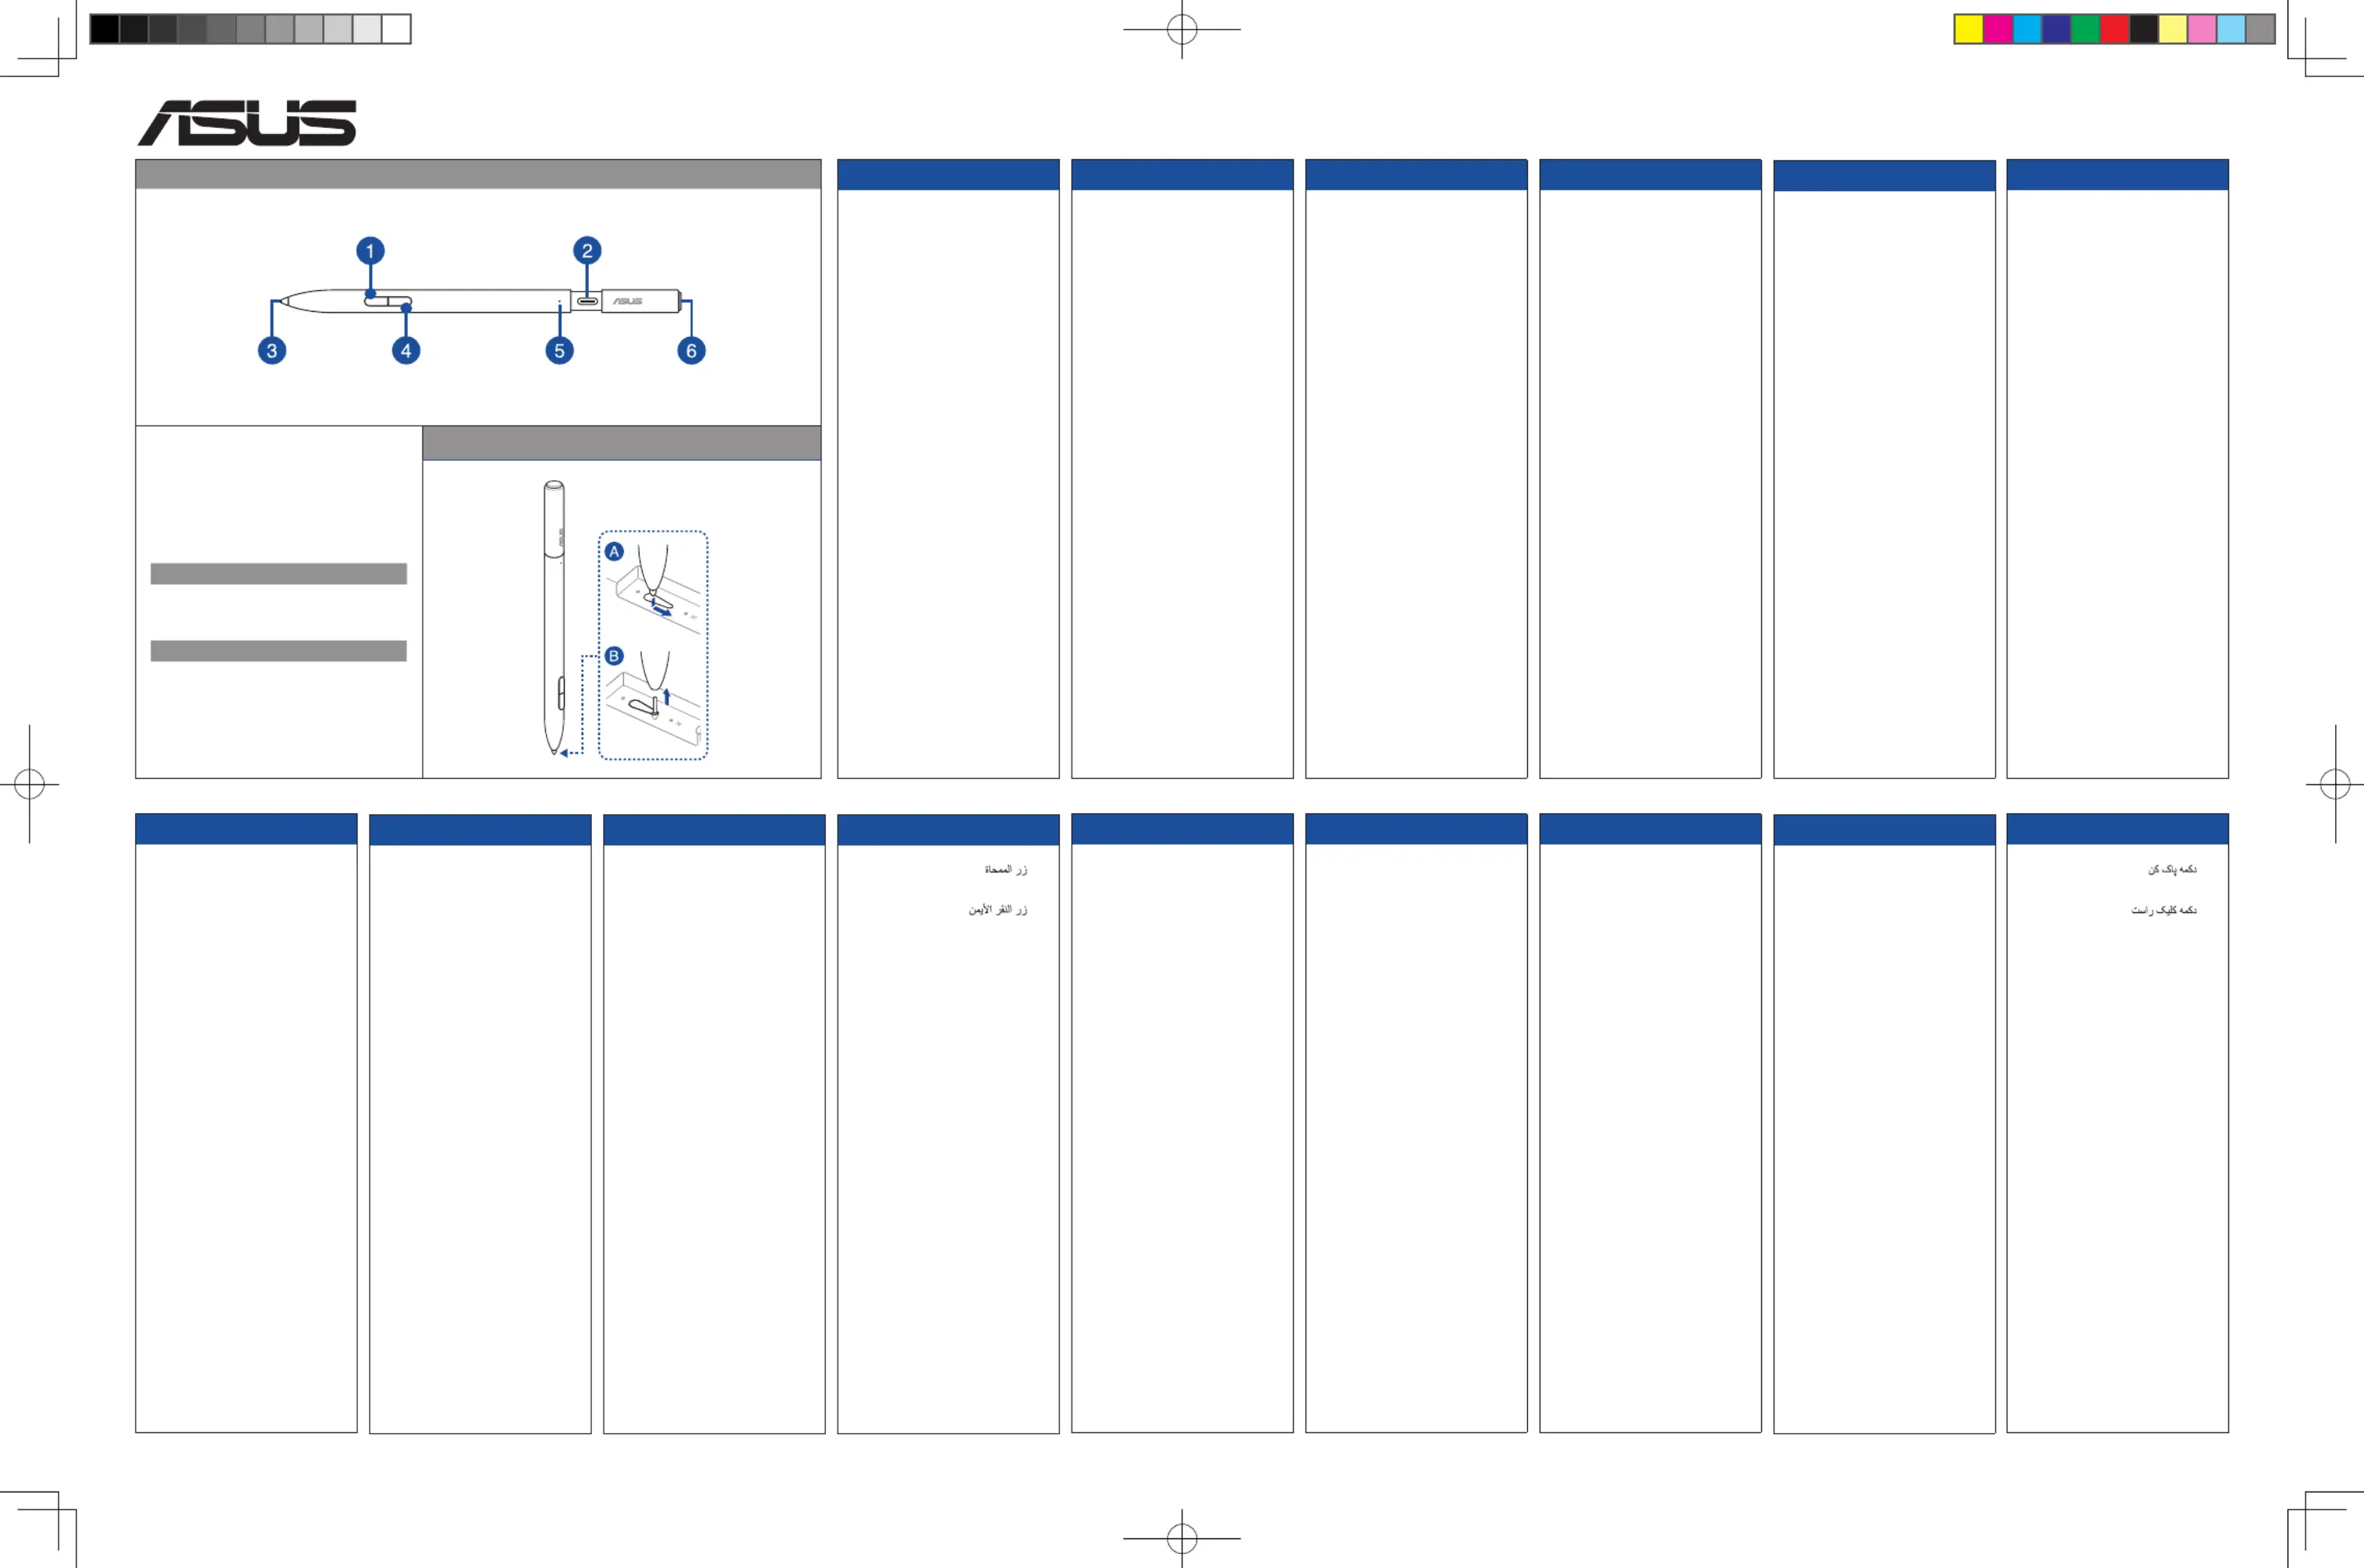
Pen 2.0 SA203H
| Mærke: | Asus |
| Kategori: | Ikke kategoriseret |
| Model: | Pen 2.0 SA203H |
| Bredde: | 176 mm |
| Dybde: | 10 mm |
| Vægt: | 16.5 g |
| Antal pr. pakke: | 1 stk |
| Brugervejledning: | Ja |
| Produktfarve: | Sort |
| Bluetooth: | Ja |
| Husmateriale: | Metal, Plastic |
| Emballageindhold: | Active stylus pen x1 / QSGx1/ Pen Tip x4 / C to A cable x1 /Warranty Booklet x1 |
| Antal knapper: | 3 |
| Kapabilitet: | T3300KA, TN3402QA, TP3402ZA, UM5401RA, UM3402YA, UM5302TA, UP5401ZA, UP6502ZA, UP6502ZD, UX3402ZA, UX5400ZB, UX5401ZA, UX5401ZAS, UX582ZM, UX8402ZA, UX8402ZE, UX8402VA, UX8402VE, UX5400ZF, UM3402YAR, T3304GA, UX3404VA, UP3404, TP3604VA, TN3604YA, UX6404VV/VI, W7604J3D, H7604JV, H7604JI, GZ301VV/VU/VJ/VA, GX650PI/PZ/PY/PV, GV601VV/VU/VI, GV302XV/XU/XI/XA |
| Mærke kompatibilitet: | Asus |
| Enheds kompatibel: | Laptop |
Har du brug for hjælp?
Hvis du har brug for hjælp til Asus Pen 2.0 SA203H stil et spørgsmål nedenfor, og andre brugere vil svare dig
Ikke kategoriseret Asus Manualer
29 September 2025
28 September 2025
28 September 2025
28 September 2025
27 August 2025
26 August 2025

26 August 2025
26 August 2025
26 August 2025

26 August 2025
Ikke kategoriseret Manualer
- Darkglass
- Jackery
- GLP
- Venom
- Pardini
- Solis
- Starburst
- Sparco
- Simpson
- ORCA
- Owlkrown
- Bytecc
- BLUEPALM
- Applico
- Revamp
Nyeste Ikke kategoriseret Manualer

4 December 2025

4 December 2025

4 December 2025

4 December 2025

4 December 2025

4 December 2025

4 December 2025

4 December 2025

4 December 2025

4 December 2025