ATOLL ELECTRONIQUE
OWNER’S MANUAL ~ CD PLAYER
CD PLAYER EVO
ATOLL ELECTRONIQUEPage 5Page 4
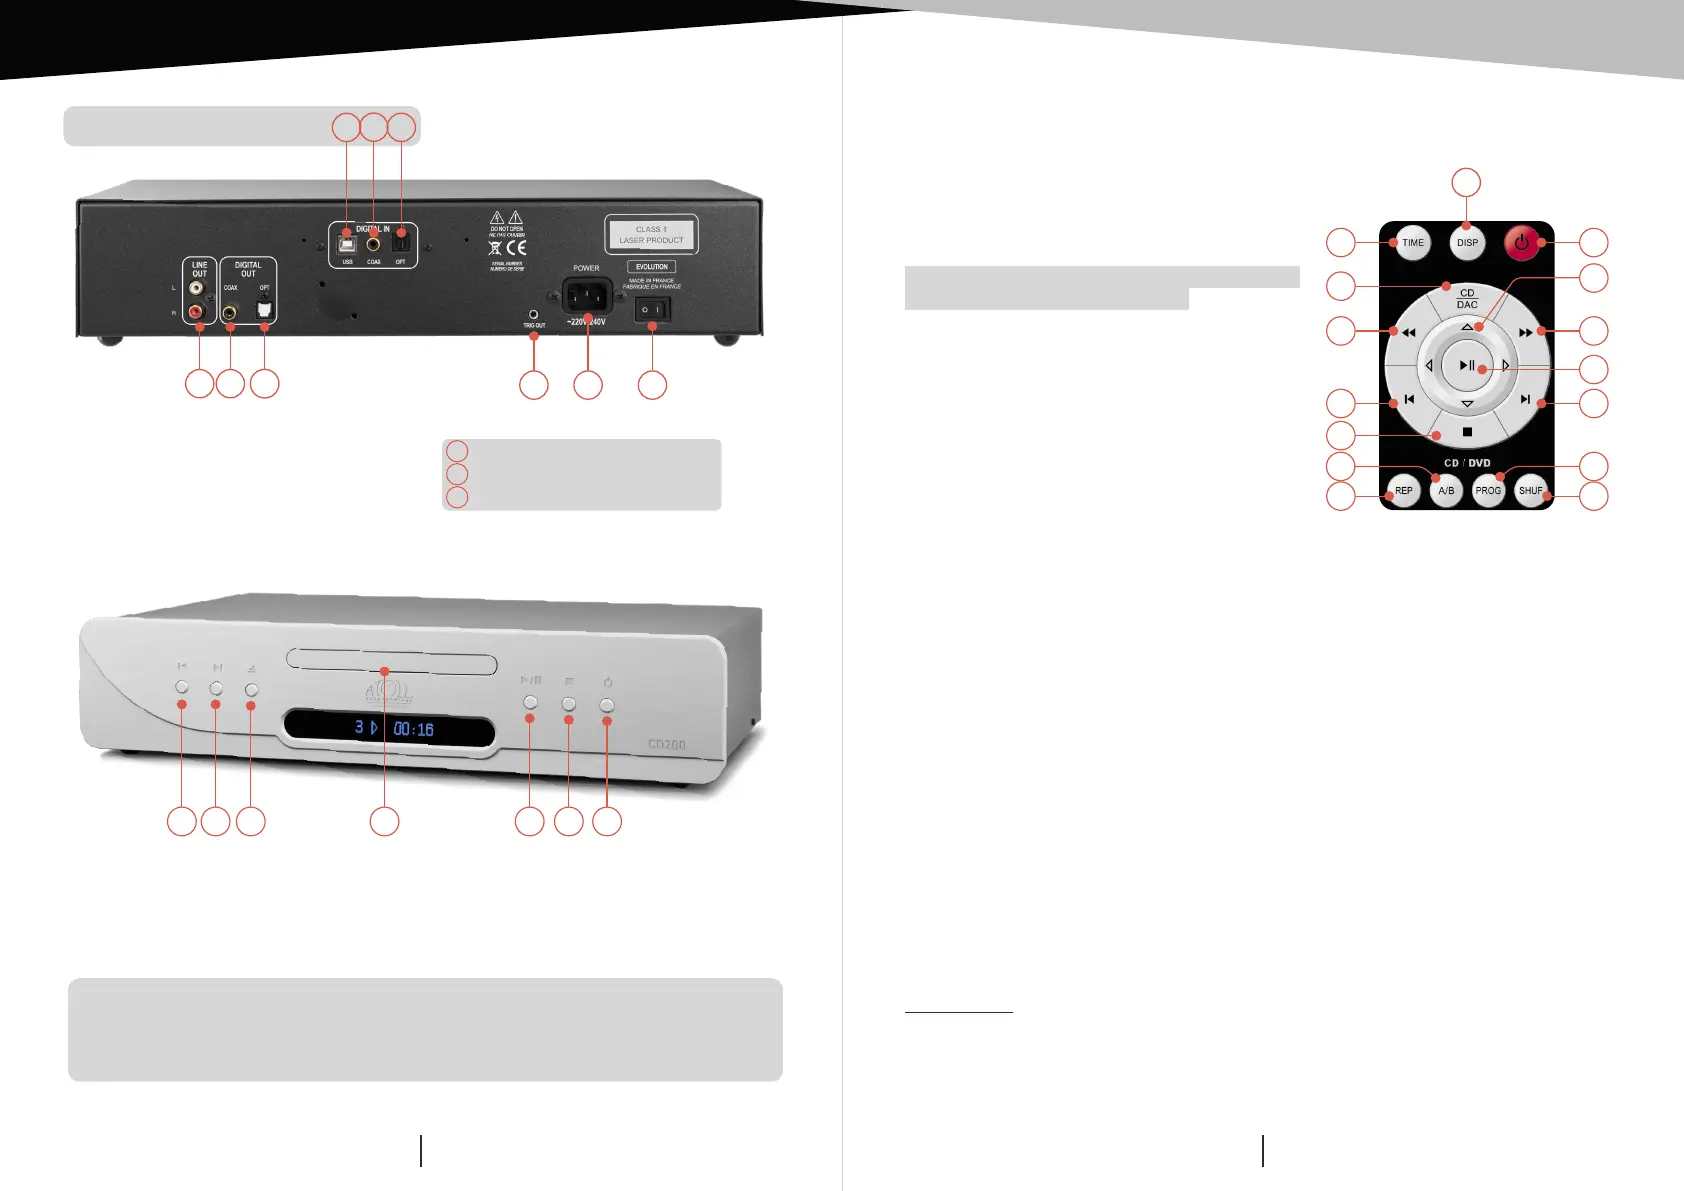
Keys 7 to 13 have the same functions as on the front panel.
14) TIME: displays the running time of each track.
With one press, display the remaining time of the
track.
15) CD - DAC: selection of digital inputs: COAX –
OPT – USB with Left & Right keys (9).
16) Rear fast search key.
17) Forward fast search key.
18) A-B repeat: allows to select a specific reading
zone from point A to point B. While playing, press
this key to start the beginning of the zone A, press
a second time to select the end B. Selected zone
will be played until you press again the A/B. key.
19) REP: Repeat Mode (This function is also available while reading the disc).
— R1: makes a repetition of the same track. Confirm by pressing the ENTER key. The
display shows R1 between the number and the time of the track.
— R: makes a repetition of the complete disc. Confirm by pressing the ENTER key. The
display shows R between the number and the time of the track. STOP key (and keys 7 &
8 on R1 mode) also cancels all REPEAT modes.
20) PROGRAM (PROG):
— Press on PROG. The display shows on the Left the number of selected tracks (Nb 0)
and on the Right the choice of tracks (Tr 1).
— Choose the first track of the program with the selection keys 7 & 8. Confirm
by pressing on PROG. Select all tracks needed for the program, using the same
procedure.
— The display shows the number of tracks (on the Left), P symbol. The total time of the
program is seen by a press on TIME. Press PLAY to start playing the program.
— Press 2 times to cancel the program.
21) SHUFFLE: press on SHUF. The display shows S between the number and the time of
the track. The disc goes on play. All tracks will be played once in random mode. Press
STOP to cancel the random play.
Combination: it is possible to combine a program with the REPEAT function (display shows
RP) and SHUFFLE functions (display shows RS). SHUFFLE and PROG menus are not
available while reading the disc.
22) DISP: allows the display to turn off.
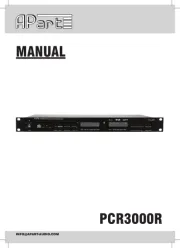
1) Line outputs left (L) and right (R) channels.
2) Coaxial output (to a converter D/A).
3) Optical output (to a converter D/A).
4) 12V Trigger output.
5) Mains socket.
7) Previous track.
8) Next track.
9) Open/close.
13) ON/STANDBY: this
key cancels all functions.
CONNECTING
REMOTE CONTROL
DETAILS OF FUNCTIONS
To use the digital inputs (USB, optical or coaxial), press and hold key 13 on the front
panel for two seconds. Then use keys 7 and 8 to select the digital Inputs.
Selection of Digital Inputs (Optional):
10) Disk tray.
11) Play & Pause.
12) Stop: stop functions.
22
13
17
8
21
10
14
16
7
19
15
11
18 20
9
Optional Digital Board
7 108 9 11 12 13
6) ON/OFF power switch.
a
USB input (optional).
b
Digital input (coax.) (optional).
c
Digital input (optical) (optional).
1 2 3
54 6
a
b
c