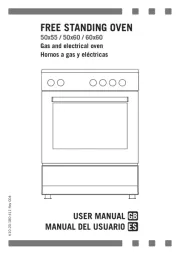
Becken S 6060 IX Manual

Becken Ovn S 6060 IX

Læs gratis den danske manual til Becken S 6060 IX (64 sider) i kategorien Ovn. Denne vejledning er vurderet som hjælpsom af 8 personer og har en gennemsnitlig bedømmelse på 4.4 stjerner ud af 4.5 anmeldelser. Har du et spørgsmål om Becken S 6060 IX, eller vil du spørge andre brugere om produktet?

Side 1/64
Cooker
..............................................................................2
Cocina
.............................................................................22
Fogão de Livre Instalação
....................44
2
Cooker BECKEN
Instruction Manual
Dear client,
We thank you for purchasing this product.
This appliance was submitted to several laboratorial tests, which certify its quality. To
simplify the use of this appliance, this instruction manual has been provided. The
instructions must ensure a quick and safe use.
Please read carefully the instructions and safety measures described in this manual.
We wish our clients great satisfaction in using their new appliance.
3
Index
1. Safety Instructions .................................................................................................. 4
1.1. Energy Supply.................................................................................................. 5
1.2. Power Cord and Other Cables ......................................................................... 5
1.3. Moisture and Water.......................................................................................... 5
1.4. Cleaning........................................................................................................... 5
1.5. General Precautions ........................................................................................ 6
2. Use and Operation ................................................................................................. 9
2.1. Gas Connection ............................................................................................... 9
2.2.1 Cookers with Bottle Compartment............................................................ 10
2.2. Conversion to other type of Gas .................................................................... 10
2.3. Gas Valves Maintenance and Cleaning ......................................................... 12
2.4. How to Use the Gas Burners ......................................................................... 13
2.4.1. Burners of the Cooking Surface............................................................... 13
2.4.2. Ignition of the Hot Plate Burners.............................................................. 13
2.4.3. Gas Oven Burner..................................................................................... 14
2.4.4. Ignition of the Oven gas........................................................................... 14
2.5. Recommendations for Use............................................................................. 15
2.6. Instructions for Maintenance and Cleaning .................................................... 15
2.6.1. Burners Cleaning..................................................................................... 16
2.6.2. Oven Cleaning......................................................................................... 16
2.6.3. How to Remove the Interior Glass of the Oven’s Door for Cleaning........ 16
2.7. Tables ............................................................................................................ 18
3. Technical Data...................................................................................................... 19
4. Aftermarket........................................................................................................... 20
5. Environment Conservation ................................................................................... 21
4
1. Safety Instructions
ATTENTION
Risk of Electric Shock
Do Not Open
Attention: to avoid the risk of electric shock, do not
remove the cover. The interior does not contain any
parts that may be repaired by the user. Ask for
assistance to qualified personnel.
Important Warnings
Before using your appliance, read carefully this instruction manual and keep it in a
safe place, as you may need it for future consultations.
Before you start your appliance, and to ensure a correct use, do not use it if:
- It has fallen on the ground;
- You notice any evidence of damage;
- Any anomaly occurs during its operation;
To avoid hazards and deterioration of your appliance by an incorrect use, it is
advisable to read the instructions carefully and attentively.
Your appliance must not be used to other ends than the ones foreseen in the
instructions manual. Your safety is only guaranteed in a household use and not for
commercial use. The incorrect use will not be covered and automatically cancels the
right to warranty.
Assistance
Be sure that, in case of malfunction, you take your appliance to a qualified technician
for assistance.
5
DO NOT ALLOW CHILDREN TO USE ELECTRIC APPLIANCES WITHOUT SUPERVISION.
DO NOT ALLOW CHILDREN OR ADULTS WITH REDUCED PHYSICAL, SENSORIAL OR
MENTAL CAPACITIES, OR PEOPLE WITHOUT EXPERIENCE/KNOWLEDGE, TO USE
ELECTRICAL APPLIANCES WITHOUT SUPERVISION.
1.1. Energy Supply
Check if the voltage of the electric power is compatible with the one mentioned on
the appliance. If not, please contact your seller or the Customer Service.
1.2. Power Cord and Other Cables
Unplug your appliance whenever you are not using it.
Do not roll nor pull the cable to unplug the appliance. Keep the power cord away from
hot surfaces.
Never use this appliance if it has a damaged cord or plug, nor if it is not working
correctly.
If the power cord is damaged, do not use your appliance, take it to an authorized
technical assistance to be replaced.
1.3. Moisture and Water
Do not use your appliance in moist environments. Do not let your appliance subject
to get wet in any way, since it may be dangerous. TO AVOID FIRE OR ELECTRIC
HAZARD DO NOT EXPOSE THE APPLIANCE TO WATER NOR MOISTURE. Do
not put your appliance under water (for example, to wash it).
1.4. Cleaning
Unplug the appliance before you clean it. Later, clean it with a soft and dry cloth. Do
not use cleaning products.
6
This appliance must be installed and connected according to the installation
rules in force.
The gas conditions are indicated on the labels near the gas inlets.
The cooker installation should be executed only by qualified and authorised
personnel.
The walls of the sided furniture must resist to a temperature 75ºC higher than
the ambient temperature.
The back wall must be of non-combustible material.
Combustible materials, like curtains, must be at a minimum distance of
500mm.
The furniture on the side of the cooker, if higher than the cooking plan, must
be at a minimum distance of 150mm from the side of the appliance.
In case there is a suspended element over the cooker, it must be placed at a
minimum distance of 700mm from the cooking plan.
The furniture over and on the sides of the appliance must have a minimum
clear space of 420mm from the cooking surface.
Any range hood above the cooker must be installed according to the
manufacturer’s instructions, with a minimum distance of 650mm from the
cooking surface.
The walls adjacent to the appliance must have a minimum distance of 10mm
from the sides of it that are below the desk.
The appliance must be installed in places with proper conditions related with
dimensions, ventilation and exhaust of combustion products.
This appliance is not designed to be connected to an exhaust combustion
products device.
1.5. General Precautions
This appliance belongs to class 1 (gas equipment) kitchen appliance isolated
and free installation and is designed for non-professional use by private,
adults, and within installations
6
10
700
500
10
420
150
6
The accessible parts of the cooker can be hot, especially when the oven is
operating.
Do not let children get close to the appliance.
The cooker should always be installed by qualified and authorised personnel.
This appliance is of type X: category for overheating.
Before switching on the appliance check that it is correctly regulated for the
type of gas available.
When burners are on check if the flames are always regular.
Before removing the saucepans from the cooker turn off the burners.
The use of a gas appliance requires regular air ventilation. Make sure that the
installation complies with the respective instructions.
The airflow should be exit directly through permanent openings made in walls
separating the compartment with the outside or the air supply ducts.
The airflow can also be obtained indirectly from the installation local, provided
that such sites have direct vent, do not present fire dangers and are not
sleeping rooms.
The flow of air between the adjacent site and the installation local must be
carried out freely through permanent openings (which can be obtained by
increasing the space between the door and the floor, for example).
The air intake openings must have a minimum section of 100cm
2
and must not
be blocked accidentally.
For devices without safety valves on the desktop, the air intake openings must
have a minimum section of 200 cm
2
.
Before installing the device you must remove the adhesive plastic film that
protects the metal parts.
If the appliance is placed on a base, you must ensure that the base does not slide.
7
The appliance must be firm and levelled (with the help of the supplied foot).
8
Before using the oven for the first time, pre-heat an empty oven at the
maximum temperature for about 30 minutes to remove residual smells and
smokes caused by the manufacturing process, without passing them to the
food.
Gas appliance produces warm and the products of combustion get moist.
Be sure that the location is well vented: keep a window open or install a range
hood or exhaust fan which vents to the outside.
In the case of intensive and prolonged use, it may be necessary to increase
the ventilation by opening more windows or increasing the speed setting of the
range hood or exhaust fan, if one is installed.
The materials surrounding this appliance must be resistant to a temperature of
90º C.
Use the cover only to protect the cooker and for no other purpose.
Pay attention if cooking with grease or oil as they can ignite if overheated.
During cooking the appliance becomes very hot. Never touch any parts on the
top or inside of the oven without wearing protective heatproof gloves.
All waste resulting from oil spills should be removed before closing the lid.
WARNING: The glass lid must always be opened when the cooker is
operating and also while the burners are hot.
Use exclusively pots and pans with a flat base.
Use containers that do not exceed the edges of the cooking surface.
The glass lid has the screen-printed symbol, which means it must not
close the lid while the burners are functioning and while they do not have
cooled
The manufacturer does not recommend the use of protection at the table,
and warns that the use of these when inappropriate can cause accidents
9
2. Use and Operation
2.1. Gas Connection
The cooker is provided with a label placed on the rear panel near the gas inlet,
showing the type of gas and pressure for which the appliance has been
originally adjusted.
Before connecting this appliance check if it is prepared for the type of gas and
pressure available in your home. If not, it is necessary to convert the appliance
to another gas as indicated in section 2.2.
All possible types of gas and pressures are shown on the data plate and in
table nr. 1.
The butane gas bottles are unable to function in places with low temperatures.
In this case it is advisable to replace the Butane for Propane gas (operation to
be done by a qualified installer). Never place a propane gas bottle inside a
building.
You may connect the appliance to a gas bottle fitted with its respective
regulator or to a gas network tap. Since this is a movable unit, the following
types of tubes can be used:
- Flexible rubber or elastomeric tube certified according an applicable
standard fixed to an adequate inlet gas connection and held tight by a
clamp on both ends.
- Flexible stainless steel tube certified according an applicable standard,
with threaded connections.
- Flexible rubber or elastomeric tube certified according an applicable
standard, with threaded connections.
Notes:
Ensure that the tube is not bent or twisted.
Ensure that the tube is not in contact with the rear panel.
The tube must be replaced before the expiring date.
You must check that the cable goes along the whole length
of the tube.
The clamps should be adequate for a good tight.
10
The maximum length of the flexible rubber tube must be of 1500mm.
The connection to the cooker must be done on the same side of the point of feeding,
in a way that the tube doesn't cross the back of appliance. If necessary, change the
gas inlet or request to the technical assistance the adaptation tube so that the
entrance of gas in the appliance is done on the correct side.
After connecting the unit, check for eventual leaks with a frothy product. Never use a
flame.
2.2.1 Cookers with Bottle Compartment
The maximum high of the bottle with reducer must be of 610mm and the maximum
width of 310mm.
In these cookers the flexible rubber tube must have a minimum of 400mm and a
maximum of 1150mm and must never touch the left side of the bottle compartment.
2.2. Conversion to other type of Gas
This appliance has been designed to function with Butane Propane or Natural gas.
This appliance is provided with a label on the rear panel, near the gas inlet, indicating
the type of gas and pressure for which the cooker has been adjusted.
The indication of the gas and pressure that the cooker has been adjusted to, can also
be found on the data label or on the package of the appliance.
In order to convert from one type of gas to another, proceed as follows:
1. Back Shield
2. Commutator
3. Extension of the Commutator
11
a) Choose the inlet gas connection according to the type of gas available in your
home.
b) Cooking top burners:
Remove the pan supports from the hob, the burner covers, the
burner spreaders and the burner skirts.
Unscrew and remove the injectors and replace them with those
corresponding to the available gas (see table 1).
Replace all burner components and the pan supports.
c) Oven
Open the oven door and remove all internal accessories and the oven bottom.
Remove the burner by losing the screw placed in the front and turning it up.
Unscrew and remove the injector and replace it with those corresponding to
the available gas see (table 1).
Screw the burner and put in place the oven bottom and the internal
accessories.
d) Minimum flow adjustmentoven burner only
Put the burner for a few minutes at maximum.
With the screwdriver loose the screw fixing the burner.
Move the burner forward or backward until the flame is present with a bluish
color, stable, without noise and without yellow tips.
Tighten the screw to fix the burner.
e) Low flow adjustment
Light the burner on and put the knob in the Low Position.
Regulating the primary air - oven burner only
12
In this position, remove the knob of the tap.
With a screwdriver adjust the taps screw until the flame is conveniently
regulated to the low position and stable.
Reassemble the knob and pass quickly from the Full On Position to the Low
Position, several times, to ensure that the flame remains stable.
f) After connecting the unit, check for gas leaks with a soap and water solution. Never
Use A Flame.
g) Near the inlet gas connection, place a label indicating the type of gas for which the
appliance is now prepared. “Appliance prepared for...”
2.3. Gas Valves Maintenance and Cleaning
If the gas valve is hard to turn, do not force it. It might need lubrication.
This operation must be executed always by qualified and authorised personnel.
To access the valves, pull the burner heads and remove the cooking top.
To lubricate the valves, follow these instructions:
With a screwdriver, remove the cover.
Pull the cone out of its housing.
Clean the cone with a dry lint-free cloth.
Lubricate the cone carefully, with recommended grease (Molykote, Staburgs
N32, Rocol HT, Optitemp HT2 EP), and take off the excess grease to avoid
obstructing the gas passages.
Introduce the cone and the spring and screw the cover.
Turn the cone several times, to ensure it is not stuck.
Check for gas leaks, with the tap opened and closed. Never use a flame.
13
2.4. How to Use the Gas Burners
If the gas supply is deficient or if the flame is extinguished accidentally, the gas circuit
will be automatically closed. To restart it is necessary user intervention. In this case
and after verifying that there isn’t a gas supply problem, wait at least one minute and
repeat the lighting.
For ignite this type of burner it is necessary to maintain the knob under pressure for
10 seconds. After this time release the knob of the burner which must be in function.
2.4.1. Burners of the Cooking Surface
If you use the burners properly, the consequence will be a maximum efficiency, thus
saving energy. The power of the burners is shown on table 1.
In order to obtain this, you must choose pans according to the size of the burner (see
table 2). If the flame is wider than the pan you are wasting energy.
IMPORTANT - In models with triple burner pay attention to this point: put in the
correct position the cover spreader of the middle and screw down the cover
spreader, to guarantee a good burning.
2.4.2. Ignition of the Hot Plate Burners
To ignite the burners proceed as follows:
Bring a burner flame.
Select the burner to use, push the corresponding knob and turn it counter
clockwise to the “full position”, indicated by a large flame and keep the knob
pressed for about 10 seconds.
By the end of this time release the knob and it should remain lit. Otherwise
repeat the operation.
YES NO
14
To reduce the power turn the knob to the “low position”, indicated by a small
flame.
To switch off the burner turn the knob clockwise to the “off position”, indicated
by a black circle in the upper position of the panel.
2.4.3. Gas Oven Burner
If you use the burners properly, the consequence will be a maximum efficiency, thus
saving energy. To achieve this, during the oven operation the oven door must rest
completely closed. The power of the oven burner is shown on table 1.
2.4.4. Ignition of the Oven gas
To ignite the burners proceed as follows:
Bring a burner flame.
Press the knob of the oven valve placed under the symbol and turn it
counterclockwise until the maximum position indicated by a large flame and
keep the knob pressed for about 10 seconds.
By the end of this time release the knob and it should remain lit. Otherwise
repeat the operation.
To reduce the power turn the knob to the “low position”, indicated by a small
flame.
To switch off the burner turn the knob clockwise to the “off position”, indicated
by a black circle in the upper position of the panel.
15
2.5. Recommendations for Use
The accessible parts of the cooker can be hot if the oven
is in operation. Do not let children get close to the
appliance.
Do not let children sit down or play with the oven door.
Do not use the open door as a stool to reach above
cabinets.
Pre-heat of the oven until it reaches the temperature before you put the food
into the oven.
Never use low-edged containers or trays as baking-pan
for roasts in order to soil the minimum possible the walls
of the oven, thus preventing fat splashes, sauce burning
and smoke production.
If the grease falls down into the oven burner it could
inflame.
When the food is directly on the grate, you must put the
basin for collecting.
Never use the oven without the rubber seal.
During the functioning of the oven the oven door must
rest completely closed.
It is advisable to place the cooking tray on the middle
level of the oven.
Avoid opening the door during while cooking, since the temperature changes
will spoil your cooking and increase energy consumption.
The oven can be turned off some minutes before the food is completely
roasted; the residual temperature will be enough for completing the roasting.
2.6. Instructions for Maintenance and Cleaning
Before maintenance or cleaning of the cooker, switch off the circuit breaker,
turn off the isolating gas valve or the gas mains and allow the cooker to cool
down.
18
2.7. Tables
TABLE 1 - BURNERS
GAS
BUTANE PROPANE NATURAL
Pressure nominal operation, mbar 28 - 30 37 20
Pressure nominal operation, mbar 35 45 25
Pressure nominal operation, mbar 20 25 17
Power W (P.C.S.) Rate Injector Rate Injector Rate
Burners Normal Minimum g/h mm g/h mm L/h
Auxiliary 1000 300 73 0,50 72 0,72 95
Semi Rapid 1750 500 127 0,65 125 0,97 167
Rapid 3000 700 218 0,85 215 1,15 286
4000 1500 295 236 1,50 314
Oven 2750 1100 200 0,80 197 1,20 262
TABLE 2 - TABLE OF RECIPIENTS (To use pots with a plane base)
Recommended diameters (cm)
Burners minimum maximum
Auxiliary Ø 42 10 16
Semi-rapid Ø 62 15 22
Rapid Ø 92 22 28
24 30
Important: the containers used must not exceed the edge of the cooking surface.
Wok 0,10
Wok Ø 130
500
1250
19
3. Technical Data
This appliance belongs to class 1: isolated kitchen appliance, free-standing
installation.
POWER (W) MODELS
BURNERS EE
Burner
%
GAS
Auxiliary 67 1000 1 1 1
Semi - rapid 66 1750 2 2 2
Rapid 64 3000 1 1 1
Wok 61 4000 --- --- 1
Oven --- 2750 G G G
Oven volume (l) 55 55 55
IEE Oven (%) – classe energética 96,8 - A 96,8 - A 96,8 - A
EE Gas Work table (%) 66 66 65
Maximum gas power KW (PCS) 10,25 10,25 14,25
Maximum consumption butane gas - G 30 (g/h) 745 745 1040
Maximum consumption propane gas - G 31(g/h) 734 734 970
Maximum consumption natural gas - G 20 (L/h -
1013 mbar, 15º C) 977 977 1291
Dimensions: L x F x A mesa (mm) Coocker 535x565x850 600x600x850 880x545x820
Dimensions: L x F x A mesa (mm) Package 570x610x900 660x690x900 940x635x900
Weight: Net / Gross ( kg ) 45/48 45/48 59/63
EE Burner – EE Table IEE Oven – According ( EU 66/2014 )
S 5050 IX A
S 6060 IX A
S 9055 IX A
S 5050 IX S 6060 IX S 9055 IX
20
4. Aftermarket
BECKEN has designed this appliance in order to guarantee the maximum reliability.
Do not attempt to open the appliance – there is a risk of electrical shock.
If you are not able to solve the problem, please contact your seller or manufacturer.
WARNING: any attempt of fixing the appliance without contacting the manufacturer
will nullify the warranty.
In case the problem persists, take your appliance to an aftermarket section of any
Worten, Modelo or Continente store in order to solve the problem.
Worten Equipamentos para o Lar ensures for a period of 2 years, counting from the
date of purchase of this appliance, a warranty against any found manufacturing
defect. The warranty supposes a correct use and maintenance of the appliance,
namely according to the instructions expressed in this manual. In case otherwise
identified, the malfunctions will not be under the warranty.
The repairing of electrical appliances must only be made by qualified technicians, as
otherwise there may occur future complications on the appliances.
To avoid unnecessary dangers, in case there are malfunctions on the cables or other
components, repairing must be done by specialized technical assistance, due to the
need of appropriate tools.
https://www.suporteworten.pt/
Worten, Equipamentos para o Lar, S.A.
Rua João Mendonça nº 505 4464-503 Senhora da Hora - Portugal
5. Environment Conservation
Aiming to protect the environment, we try to reduce to a
maximum the volume of the packages which are confined to
three easy separation materials: cardboard, paper and
plastic.
The appliance is made of recyclable material, once
disassembled by a specialized company. Follow the local
legislation concerning recycling of all materials.
Product Information ( Regulation UE 66/2014 )
(Gas Oven - EN15181;UE65/2014)
Model Type of oven Nº Cavities Heat Source V (L)
EC
Conventional
kWh
MJ -> kWh EC forced kWh MJ -> kWh
ECauxiliar
(kWh)
Energetic
Class
EEI
S 5050 IX A
N60 1 Gás 55 5,76 1,60 - - A 96,8
S 6060 IX A
N60 1 Gás 55 5,76 1,60 - - A 96,8
S 9055 IX A
N60 1 Gás 55 5,76 1,60 - - A 96,8
21
22
Cocina BECKEN
Manual de Instrucciones
Estimado(a) cliente,
Agradecemos su preferencia en la compra de este producto.
Este aparato fue sometido a diversos tests que prueban su calidad. Para que el uso
de aparato sea más fácil, enviamos en anexo sus instrucciones. Éstas deberán
asegurar una utilización rápida y segura.
Haga el favor de leer atentamente las instrucciones así como las medidas de
seguridad descritas en este manual.
Deseamos que nuestros clientes se sientan plenamente satisfechos con el
funcionamiento de su nuevo aparato.
23
Índice
1. Instrucciones de Seguridad .................................................................................. 24
1.1. Energía de Alimentación................................................................................ 25
1.2. Cable de Alimentación y Otros Cables........................................................... 25
1.3. Humedad y Agua ........................................................................................... 25
1.4. Limpieza......................................................................................................... 25
1.5. Precauciones Generales................................................................................ 26
2. Utilización y Funcionamiento................................................................................ 30
2.1. Conexión de da Parte a Gas.......................................................................... 30
2.2.1. Cocinas con Compartimento para las Bombonas de Gas ....................... 31
2.2. Transformación para los Diferentes Tipos de Gas ......................................... 32
2.3. Mantenimiento y Limpieza de las Válvulas .................................................... 33
2.4. Utilización de los Quemadores de Gas .......................................................... 34
2.4.1. Quemadores de la Encimera de Trabajo................................................. 34
2.4.2. Encendido de los Quemadores de Gas de la Encimera de Trabajo ........ 35
2.4.3. Quemador del Horno ............................................................................... 36
2.4.4. Encender el Horno................................................................................... 36
2.5. Recomendaciones para la Utilización ............................................................ 37
2.6. Instrucciones de Mantenimiento y Limpieza .................................................. 37
2.6.1. Limpieza de los Quemadores.................................................................. 38
2.6.2. Limpieza del Horno.................................................................................. 38
2.6.3. Retirar la Puerta del Horno para Limpiar el Cristal Interior ...................... 38
2.7. Cuadros ......................................................................................................... 40
3. Características Técnicas ...................................................................................... 41
4. Postventa.............................................................................................................. 42
5. Conservación del Medio-ambiente ....................................................................... 43
24
1. Instrucciones de Seguridad
ATENCIÓN
Riesgo de electrocución
No Abrir
Atención: para reducir el riesgo de electrocución, no
abra esta unidad. No contiene elementos que deba
reemplazar el usuario. Solicite la asistencia de
personal especializado.
Avisos Importantes
Antes de usar su aparato lea atentamente este manual de instrucciones y guárdelo
en un lugar seguro, puede volver a necesitarlo en el futuro.
Antes de poner el aparato en funcionamiento y de forma a garantizar su correcta
utilización, no lo utilice si:
Cayó al suelo;
Nota algún vestigio de daño;
Surge alguna anomalía durante su funcionamiento;
Para evitar peligro y deterioro de su aparato debido a su uso incorrecto, se aconseja
que se lea atenta y cuidadosamente las instrucciones.
Este aparato no deberá ser utilizado para otros fines que no sean los previstos en el
manual de instrucciones. Su seguridad está prevista para el uso doméstico y no para
su uso comercial. Su uso incorrecto anula automáticamente el derecho a la garantía.
Asistencia
Compruebe que, en caso de avería, entrega su aparato a personal especializado.
1.5. Precauciones Generales
26
Este aparato pertenece a la categoría II2H3+, país de destino directo ES.
Este aparato pertenece a la classe 1 (parte de gas): Aparato de cocina
aislado, de libre instalación y está diseñado para su uso privado por parte
de adulto, y dentro de la vivienda
Este aparato debe ser instalado y conectado conforme a las reglas de
instalación en vigor.
Las condiciones de regulación de este aparato están contenidas en una
etiqueta que encontrará junto a la entrada de gas.
La instalación del aparato debe efectuarse siempre por un Técnico
Especializado y portador de la licencia que lo acredite como “Mecánico de
Aparatos as Gas” o “Técnico de gas”.
Las paredes de los muebles deben poder soportar una temperatura superior a
75ºC en relación a la temperatura ambiente.
El aparato no puede estar junto a paredes de material combustible.
Materiales combustibles, como por ejemplo cortinas, deben de estar a una
distancia mínima de 500 mm.
La distancia mínima con respecto a una pared adyacente s alta que el
plano de trabajo, a la que este aparato debe ser instalado, es de 150 mm.
Si el aparato es instalado debajo de un mueble pensil, este debe de estar a
una altura mínima de 700 mm con respecto a la encimera de trabajo.
Los muebles colocados por encima y al lado de este aparato deben estar a
una altura mínima de 420 mm con respecto a la encimera de trabajo.
El extractor de evacuación debe ser instalado siguiendo sus normas, a una
distancia mínima de 650 mm con respecto a la encimera de trabajo.
Las paredes adyacentes al aparato deben estar a una distancia nima de 10
mm con respecto a los lados del mismo que están por debajo de la encimera
de trabajo o debajo de la de la tapa de cierre (para aquellos aparatos que
cuentan con esta tapa de cierre exterior).
Este aparato debe ser instalado solamente en locales adecuados en cuanto a
dimensiones así como a una correcta ventilación y evacuación de los
productos de combustión.
Este aparato no está pensado para ser conectado a un dispositivo de
evacuación de los productos de combustión hacia el exterior.
La tapa de vidrio tiene el mbolo serigrafiado, que significa que lo
no se debe cerrar la tapa mientras que los quemadores están funcionando
y mientras no se enfríen
El fabricante no recomienda el uso de proteccn en la mesa, y advierte que
el uso de estos cuando inadecuado puede causar accidentes
27
El flujo de aire debe conseguirse directamente a través de aberturas
permanentes efectuadas en las paredes de separación del local de instalación
con el exterior o por conductos de alimentación de aire.
El caudal de aire también puede evacuarse por vía indirecta a través de las
habitaciones adyacentes al local de instalación, siempre que estas posean
ventilación directa y no sean locales con peligro de incendio o dormitorios.
10
700
500
10
420
150
El caudal de aire entre el local adyacente y el local de la instalación debe ser
evacuado libremente a través de aberturas (que podrá realizar aumentando el
espacio la puerta y el pavimento del suelo, por ejemplo).
Las aberturas de entrada de aire deben tener una sección mínima de 100 cm
2
y no pueden quedar obstruidas accidentalmente.
Para los aparatos sin válvulas de seguridad en los quemadores situados en la
encimera de trabajo, las aberturas de entrada de aire deben tener una
sección mínima de 200 cm
2
.
Antes de proceder a la instalación del aparato, debe retirar la película de
plástico adhesiva que protege ciertas partes metálicas.
Si coloca la cocina sobre una base, debe prever el uso de dispositivos para
evitar que se deslice de la base.
p
Los aparatos deben quedar bien asentados y nivelados (con la ayuda de las
atas suministradas).
Las partes accesibles pueden estar calientes cuando el horno está en
funcionamiento.
Los niños deben mantenerse apartados del aparato.
El aparato debe ser instalado por un Técnico Autorizado.
Este aparato es de tipo X: protección contra calentamiento.
Antes de conectar el aparato, verifique si está preparado para el tipo de gas y
presión de que dispone.
Cuando los quemadores están en funcionamiento, compruebe que la llama es
regular.
La utilización del aparato a gas necesita de una regulación en el intercambio
de aire. Asegúrese de que la instalación cumple con los requisitos
mencionados en la sección correspondiente.
Se aconseja, antes de la primera utilización del horno, que se ponga el mismo
en funcionamiento durante aproximadamente 30 minutos y a la potencia
máxima, a fin de eliminar esos olores sin transmitirlos a los alimentos.
La utilización de un aparato de gas produce calor y humedad en el local
donde está instalado.
Asegure una buena ventilación de la cocina: mantenga abiertos los orificios de
ventilación natural o instale un dispositivo de ventilación mecánico (extractor
de ventilación mecánica).
Los quemadores deben quedar bien asentados y nivelados (con la ayuda
de las patas suministradas).
28
Un uso intensivo y prolongado del aparato puede requerir que haya
ventilación adicional conseguida, por ejemplo, con la abertura de una ventana
o con el fomento de una ventilación más eficaz aumentando la potencia de
ventilación mecánica – siempre que esta exista.
Los materiales que se encuentran en las proximidades de la cocina deben
poder soportar temperaturas de hasta 90º C.
Utilice la tapa de la cocina solo para proteger la encimera y no para otro fin.
Debe prestar mucha atención durante la preparación de las comidas que
lleven grasa o aceite, pues pueden inflamar si se calientan en exceso.
Durante su uso, el aparato se calienta. Debe tomar precauciones para evitar
tocar los elementos de calentamiento que se encuentran en el interior del horno.
Debe retirar todos los residuos que se produzcan al verterse líquidos antes de
cerrar la tapa.
29
Las tapas de cierre en vidrio se pueden romper cuando se calientan. Apague
los quemadores antes de bajar esta cubierta.
Utilice sólo recipientes de fondo plano.
Utilice envases que no excedan los bordes de la encimera de trabajo.
30
2. Utilización y Funcionamiento
2.1. Conexión de da Parte a Gas
El aparato lleva una etiqueta que encontrará en la parte trasera de la cocina
en la que se especifican todas las indicaciones sobre el gas y la presión para
la que fue preparado en la fábrica.
Antes de conectar el aparato, verifique si está preparado para el tipo de gas y
la presión de que dispone. En caso contrario, deberá efectuar la
transformación necesaria, obedeciendo a todas las reglas que se le indicarán
más adelante (ver sección 2.2).
Todas las indicaciones sobre los tipos de gas y las presiones utilizables están
contenidas en una placa de características colocada en la parte trasera del
aparato y en el cuadro 1.
Las bombonas de gas butano no funcionan en lugares con temperaturas
bajas. En estas situaciones, recomendamos que contacte con un Técnico
Especializado para substituir el gas butano por propano. Las bombonas de
propano nunca deben ser instaladas en el interior de edificios.
El aparato puede ser conectado tanto a una bombona de gas equipada con el
respectivo reductor, como a un grifo de suministro en una red de gas. Como
se trata de un aparato móvil, pude utilizar los siguientes tipos de tubos:
- Tubo flexible de goma o elastómero, certificado de acuerdo con la
norma aplicable, conectado a la boquilla adecuada. Debe llevar
abrazaderas en los dos extremos.
- Tubo flexible de acero inoxidable, con terminales de apretado mecánico
certificado de acuerdo con la norma aplicable.
- Tubo flexible de goma o elastómero, con terminales de apretado
mecánico, certificado de acuerdo con la norma aplicable.
Notas:
El tubo utilizado no debe quedar doblado o torcido.
No debe estar en contacto con la parte trasera del aparato.
Debe ser sustituido antes de finalizar su plazo de
caducidad.
32
2.2. Transformación para los Diferentes Tipos de Gas
El aparato está concebido para poder funcionar con gas butano, propano o natural.
El aparato lleva una etiqueta, localizada en la parte trasera del mismo, con la
indicación del tipo de gas y la presión para la que fue preparado en la fábrica.
La indicación del tipo de gas y la presión para la que fue preparado en la fábrica
también se encuentra en la etiqueta del embalaje de la concina.
Para hacer la transformación de un tipo de gas a otro, deberá proceder del siguiente
modo
a) En caso necesario, coloque la boquilla correspondiente al tipo de gas disponible
(diámetro pequeño para gas butano o propano; diámetro grande para gas natural).
b) Quemadores de la encimera de trabajo:
Retire las rejillas de la encimera de trabajo, las tapas
esparcidoras y los distribuidores de los quemadores.
Retire los inyectores y substitúyalos por los adecuados según
el tipo de gas con el cual el aparato va a funcionar (ver cuadro
1).
Vuelva a montar los distribuidores de los quemadores, las tapas esparcidoras
y las rejillas.
c) Horno
Abra la puerta del horno y retire todos los accesorios y el fondo del horno.
Retire el quemador aflojando los tornillos de fijación tirando de él hacia
delante y levantándolo.
Retire el inyector de su soporte y substitúyalo por el adecuado según el tipo
de gas con el cual el aparato va trabajar (ver cuadro 1).
Coloque el quemador en su sitio y recoloque el fondo del horno y todos los
accesorios internos.
32
33
d) Regulación del aire primario. Solamente en el quemador del horno
Ponga el quemador a funcionar durante algunos minutos en el máximo.
Con un destornillador, afloje el tornillo de fijación del quemador.
Deslice el quemador hacia atrás o hacia delante hasta que la llama se
presente con un color azulado, estable, sin ruido y sin puntas amarillas.
Apriete el tornillo de fijación del quemador.
e) Regulación del caudal mínimo
Encienda el quemador y gire el mando hasta alcanzar la posición de
"mínimo".
En esta posición, retire el mando del asta de la válvula del gas.
Mueva con un destornillador el tornillo existente en el cuerpo de la válvula
hasta que la llama quede lo más corta y estable posible.
Monte el mando y pase rápidamente del "mínimo" al "máximo" (y viceversa),
varias veces, para verificar si la llama permanece estable.
f) Después de efectuadas las alteraciones, debe proceder a la localización de
eventuales fugas con un producto espumoso. Nunca utilice una llama.
g) Coloque junto a la entrada de gas la etiqueta con la indicación del tipo de gas
para el cual el aparato fue preparado en la fábrica, completando el mensaje:
“Aparato preparado para...”
2.3. Mantenimiento y Limpieza de las Válvulas
Si se verifica que cualquier válvula de gas en su movimiento de rotación queda
presa, no la fuerce.
Es posible que necesite ser lubricada.
Esta intervención debe ser siempre efectuada por un Técnico Acreditado.
35
La cacerola usada debe tener un diámetro apropiado con respecto al quemador (ver
cuadro 2). La llama no debe ser mayor que el fondo del recipiente p35-ya que, de este
modo, una parte de la energía es consumida sin producir trabajo y acaba por
perderse.
IMPORTANT - En los modelos con quemador triple debe tener cuidado con lo
siguiente: coloque bien la tapa esparcidora en el medio del quemador triple para
garantizar una buena llama.
2.4.2. Encendido de los Quemadores de Gas de la Encimera de Trabajo
El encendido de estos quemadores se efectúa del siguiente modo:
Aproxime una llama a la cabeza del quemador.
Seleccione el quemador que se quiere utilizar, presione el mando de la
respectiva válvula y gire, en el sentido opuesto a las agujas del reloj, hasta
alcanzar la posición de "máximo", que es representada por una llama grande.
Mantenga el mando presionado durante cerca de 10 segundos.
Terminado este tiempo, suelte el mando del horno, que debe permanecer en
funcionamiento. En caso contrario, repita la operación.
Para reducir la potencia del quemador, gire el mando de la lvula hasta la
posición de "mínimo", representada por una llama pequeña.
Para apagar la llama del quemador, gire tan lo el mando en el sentido de
las agujas del reloj hasta alcanzar la posición de "apagado" representada por
un círculo negro colocado en la parte superior del panel.
NO
37
2.5. Recomendaciones para la Utilización
Las partes accesibles pueden estar calientes cuando el
horno está en funcionamiento. Los niños deben
mantenerse apartados del aparato.
No deje que los niños se sienten en la puerta del horno.
Antes de colocar los alimentos en el horno, es necesario
hacer un precalentamiento para alcanzar la temperatura
deseada.
Nunca utilice la bandeja de recogida de salsas como
bandeja de asados. Si lo hace, la acumulación de salsas
en el fondo podrá provocar riesgo de incendio, debido a
las temperaturas que se alcanzan dentro del horno. Además de esto, quema
las salsas, provoca humos y salpica grasa.
Siempre que utilice la rejilla para colocar los alimentos,
coloque la bandeja en la parte inferior para recoger las
salsas que gotean.
Nunca utilice el horno sin la goma aislante de cierre colocada.
Durante el funcionamiento del horno, la puerta del mismo
debe quedar completamente cerrada.
La rejilla porta bandejas debe ser colocada a media altura del
horno.
Evite abrir la puerta durante la cocción para no provocar variaciones de
temperatura que perjudicarán el cocinado y aumentarán el consumo de
energía.
El horno se puede apagar algunos minutos antes de que los alimentos estén
completamente asados; la temperatura residual será suficiente para que
acaben de asarse.
2.6. Instrucciones de Mantenimiento y Limpieza
Antes de proceder a cualquier acción de mantenimiento y limpieza debe
desconectar el aparato de la red eléctrica y cerrar la válvula de la bombona de
gas o la llave de paso de la red de gas.
40
2.7. Cuadros
CUADRO 1 - QUEMADORES
GAS
BUTANO PROPANO NATURAL
Presión nominal de funcionamiento, mbar 28 - 30 37 20
Presión máxima de funcionamiento, mbar 35 45 25
Presión mínima de funcionamiento, mbar 20 25 17
Potencia W (P.C.S.) Caudal Inyector Caudal Inyector Caudal
Quemadores Normal Reducida g/h mm g/h mm L/h
Auxiliar 1 000 300 73 0,50 72 0,72 95
Semi-rápido 1 750 500 127 0,65 125 0,97 167
Rápido 3 000 700 218 0,85 215 1,15 286
Horno 2 750 1100 200 0,80 197 1,20 262
CUADRO 2- CUADRO DE RECIPIENTES (Utilizar cacerolas con fondo plano)
Diámetros recomendados, cm
Quemador mínimo máximo
Auxiliar Ø 42 10 16
Semi-rápido Ø 62 15 22
Rápido Ø 92 20 26
24 30
Wok 4 000 1500 295 0,10 236 1,50 314
Wok Ø 130
500
1250
41
3. Características cnicas
Este aparato pertenece a la clase 1: aparato de cocina aislado, de libre instalación.
POTENCIA
(W) MODELOS
QUEMADORES EE
Quemador
%
GAS
Auxiliar 67 1000 1 1 1
Semi-rapido 66 1750 2 2 2
Rápido 64 3000 1 1 1
Wok 61 4000 --- --- 1
Horno --- 2750 G G G
Volumen útil del horno, L 55 55 55
IEE horno (%) classe energética 96,8 - A 96,8 - A 96,8 - A
EE Mesa trabalho gas 66 66 65
Potencia máxima gas KW (PCS) 10,25 10,25 14,25
Consumo máximo de gas butano - G 30 (g/h) 745 745 1040
Consumo máximo de gas propano - G 31(g/h) 734 734 970
Consumo máximo de gas natural - G 20 (L/h -
1013 mbar, 15° C) 977 977 1291
Dimensiones: LxFxA Encimera(mm) Cocina 535X565X850 600X600X850 880X545X820
Dimensiones: LxFxA Encimera(mm) Embalaje 570X610X900 660X690X900 940X635X900
Peso: Liquido / Bruto ( kg ) 45/48 45/48 59/63
EE Quemador – EE mesa – IEE horno De acuerdo ( EU 66/2014 )
S 5050 IX A
S 6060 IX A
S 9055 IX A
S 5050 IX S 6060 IX S 9055 IX
42
4. Postventa
Becken concibió este aparato de manera a garantizar la máxima fiabilidad.
No abra el equipo, corre peligro de electrocución.
Si no consigue resolver el problema contacte con el vendedor o con el fabricante.
AVISO: cualquier intento de arreglar el aparato sin haber contactado al fabricante
invalidará la garantía.
En caso de que el problema persista, lleve su equipo para un puesto de servicio
postventa de cualquier tienda Worten, Modelo o Continente, para solucionar el
problema.
Worten Equipamentos para o Lar da garantía, por un periodo de 2 años, desde el
momento de compra de este artículo, contra cualquier defecto de fabricación que
pueda surgir. La garantía presupone una manutención y uso correctos de este
producto, concretamente conforme a las instrucciones establecidas en este manual.
En caso de que no se verifiquen estas condiciones, las averías surgidas no estarán
cubiertas por la garantía.
Las reparaciones de aparatos eléctricos deberán efectuarse apenas por personal
especializado pudiendo, en caso contrario, surgir posteriores complicaciones en el
equipamiento.
Para evitar peligros innecesarios, en caso de que surjan averías p42-ya sea en los
cables o en otro tipo de componentes, las reparaciones deben ser efectuadas en los
puestos de asistencia técnica especializados p42-ya que es necesario el uso de
herramientas propias para su reparación.
https://www.suporteworten.pt/
Worten, Equipamentos para o Lar, S.A.
Rua João Mendonça nº 505 4464-503 Senhora da Hora - Portugal
5. Conservación del Medio-ambiente
Intentamos reducir al máximo el volumen de los embalajes
que se limitan a 3 materiales de fácil separación: cartón,
papel y plástico.
O equipo está constituido por material reciclable debiendo
ser desmontado por una empresa especializada. Siga la
respectiva legislación local sobre el reciclaje de todo el
material.
Ficha de Produto ( Regulamiento UE 66/2014 )
( Hornos Gas - EN15181;UE65/2014)
Modelo Horno
Fonte Aquecimiento
da cavidade
Volume (L)
Consumo
Convencional
(MJ ou kWh)
MJ -> kWh
Consumo
Ventilación
forçada (MJ ou
kWh)
MJ -> kWh
Consumo
Auxiliar
(kWh)
Classe
Energética
IEE
S 5050 IX A
N60 1 Gás 55 5,76 1,60 - - A 96,8
S 6060 IX A
N60 1 Gás 55 5,76 1,60 - - A 96,8
S 9055 IX A
N60 1 Gás 55 5,76 1,60 - - A 96,8
43
44
Fogão de Livre Instalação
BECKEN
Manual de Instruções
Caro(a) cliente,
Agradecemos a sua compra deste artigo.
Este aparelho foi sujeito a diversos testes laboratoriais, que atestam a sua
qualidade. Para que a utilização do aparelho seja mais fácil, junto enviamos as
instruções detalhadas do mesmo. Estas deverão assegurar uma rápida e segura
utilização.
Queira ler atentamente as instruções e medidas de segurança que se encontram
descritas neste manual.
Desejamos aos nossos clientes uma grande satisfação na utilização do seu novo
aparelho.
46
1. Instruções de Segurança
ATENÇÃO
Risco de choque eléctrico
Não Abrir
Atenção: para evitar o risco de choque eléctrico não
retire a tampa. O interior não contém peças que
possam ser reparadas pelo utilizador. Solicite
assistência a pessoal qualificado.
Avisos Importantes
Antes de utilizar o seu aparelho, leia atentamente este manual de instruções e
guarde-o num sítio seguro, pois poderá precisar dele para consultas futuras.
Antes de pôr o seu aparelho em funcionamento, e de forma a garantir uma utilização
correcta, não o utilize se:
- Caiu ao chão;
- Notar algum vestígio de dano;
- Durante o seu funcionamento surgir alguma anomalia;
Para evitar perigos e deterioração do seu aparelho por utilizações incorrectas,
aconselha – se uma leitura atenciosa e cuidadosa das instruções.
O seu aparelho não deverá ser utilizado para outros fins que não estejam previstos
no manual de instruções. A sua segurança está prevista apenas para uso doméstico
e não para uso comercial. A utilização incorrecta não será abrangida e cancela
automaticamente o direito da garantia.
Assistência
Certifique-se que, em caso de avaria, entrega o seu aparelho para assistência a um
técnico qualificado.


Produkt Specifikationer

Mærke: Becken
Kategori: Ovn
Model: S 6060 IX

Har du brug for hjælp?

Hvis du har brug for hjælp til Becken S 6060 IX stil et spørgsmål nedenfor, og andre brugere vil svare dig