Bosch PKB651F17 Manual
Bosch
Kogesektioner
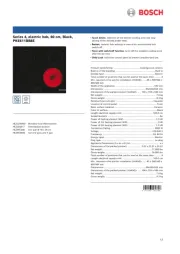
PKB651F17


| Mærke: | Bosch |
| Kategori: | Kogesektioner |
| Model: | PKB651F17 |
Har du brug for hjælp?
Hvis du har brug for hjælp til Bosch PKB651F17 stil et spørgsmål nedenfor, og andre brugere vil svare dig
Kogesektioner Bosch Manualer

5 Oktober 2022
5 Oktober 2022
5 Oktober 2022

5 Oktober 2022

5 Oktober 2022

5 Oktober 2022

5 Oktober 2022
5 Oktober 2022
5 Oktober 2022
5 Oktober 2022
Kogesektioner Manualer
- AEG
- Bauknecht
- Brandt
- Logik
- Cata
- KitchenAid
- Rosieres
- Progress
- Whirlpool
- Küppersbusch
- Falmec
- Bertazzoni
- Smeg
- Fisher & Paykel
- Constructa
Nyeste Kogesektioner Manualer

5 Oktober 2022

5 Oktober 2022
5 Oktober 2022

5 Oktober 2022

5 Oktober 2022

5 Oktober 2022

5 Oktober 2022

5 Oktober 2022

5 Oktober 2022

5 Oktober 2022