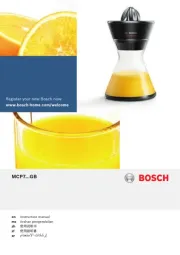
Bosch VitaJuice 2 MES25A0 Manual

Bosch Saftpresser VitaJuice 2 MES25A0

Læs nedenfor 📖 manual på dansk for Bosch VitaJuice 2 MES25A0 (137 sider) i kategorien Saftpresser. Denne guide var nyttig for 67 personer og blev bedømt med 4.6 stjerner i gennemsnit af 34 brugere

Side 1/137
Register your new Bosch now:
www.bosch-home.com/welcome
de Gebrauchsanleitung
en Instruction manual
fr Mode d’emploi
it Istruzioni per l’uso
nl Gebruiksaanwijzing
da Brugsanvisning
no Bruksanvisning
sv Bruksanvisning
fi yttöohje
es Instrucciones de uso
pt Instruções de serviço
el Οδηγίεςχρήσης
tr Kullanımkılavuzu
pl Instrukcjaobsługi
uk Інструкціязексплуатації
ru Инструкцияпоэксплуатации
ar 
MES25..
MES35..
de  Deutsch  3
en  English  10
fr  Français  17
it  Italiano  24
nl  Nederlands  31
da  Dansk  38
no  Norsk  45
sv  Svenska 52
  Suomi  59
es  Español  66
pt  Português  74
el  Ελληνικά  81
tr  Türkçe  89
pl  Polski  98
uk  Українська  105
ru  Pycckий  112
arةيبرعلا   129
  3
de
  Bestimmungsgemäßer Gebrauch
Bestimmungsgemäßer Gebrauch
Dieses Gerät ist nur für den privaten Haushalt und das häusliche 
Umfeld bestimmt. 
Dieses Gerät ist zum Entsaften von Obst (z. B. Äpfel, Birnen, 
entsteinte Pflaumen und Kirschen) und Gemüse (z. B. Tomaten, 
Möhren) geeignet. Es ist nicht zur Verarbeitung von besonders 
hartem, faserigem oder stärkehaltigem Obst und Gemüse 
(z. B. Zuckerrohr, Bananen, Papayas, Avocados, Feigen, Mangos) 
geeignet. Das Gerät nur in Innenräumen bei Raumtemperatur und 
bis zu 2000 m über Meereshöhe verwenden.
Wichtige Sicherheitshinweise
Die Gebrauchsanleitung sorgfältig durchlesen, danach handeln und
aufbewahren! Bei Weitergabe des Geräts diese Anleitung beilegen. 
Das Nichtbeachten der Anweisungen für die richtige Anwendung
des Gerätes schließt eine Haftung des Herstellers für daraus 
resultierende Schäden aus.
Dieses Gerät kann von Personen mit reduzierten physischen, 
sensorischen oder mentalen Fähigkeiten oder Mangel an Erfahrung 
und/oder Wissen benutzt werden, wenn sie beaufsichtigt oder 
bezüglich des sicheren Gebrauchs des Gerätes unterwiesen 
wurden und die daraus resultierenden Gefahren verstanden haben. 
Kinder sind vom Gerät und der Anschlussleitung fernzuhalten und
dürfen das Gerät nicht bedienen. Kinder dürfen nicht mit dem Gerät 
spielen. Reinigung und Benutzer-Wartung dürfen nicht durch Kinder 
vorgenommen werden.
WStromschlaggefahr und Brandgefahr!
■ Gerät nur gemäß Angaben auf dem Typenschild anschließen 
und betreiben. Nur benutzen, wenn Zuleitung und Gerät keine 
Beschädigungen aufweisen. Reparaturen am Gerät, wie z. B. 
eine beschädigte Netzanschlussleitung auswechseln, dürfen 
nur durch unseren Kundendienst ausgeführt werden, um 
Gefährdungen zu vermeiden.
■ Gerät niemals an Zeitschaltuhren oder fernbedienbaren 
Steckdosen anschließen. Das Gerät während des Betriebs stets 
beaufsichtigen! 
■ Gerät nicht auf oder in die Nähe heißer Oberflächen, wie z. B. 
Herdplatten, stellen. Das Netzkabel nicht mit heißen Teilen in 
Berührung bringen oder über scharfe Kanten ziehen. 
■ Das Grundgerät niemals in Flüssigkeiten tauchen oder unter 
fließendes Wasser halten und nicht im Geschirrspüler reinigen. 
Keinen Dampfreiniger benutzen. Das Gerät nicht mit feuchten
Händen benutzen. 
4 
de Wichtige Sicherheitshinweise 
■ Das Gerät muss nach jedem Gebrauch, bei nicht vorhandener 
Aufsicht, vor dem Zusammenbau, Auseinandernehmen oder 
Reinigen und im Fehlerfall stets vom Netz getrennt werden.
WVerletzungsgefahr!
■ Vor jeder Benutzung das Gerät, insbesondere Sieb und 
Siebschale, auf Beschädigungen (Risse, Sprünge) prüfen. Gerät 
nicht benutzen, falls das Sieb oder der Deckel beschädigt ist oder 
sichtbare Risse aufweist.
■ Vor dem Auswechseln von Zubehör oder Zusatzteilen, die im 
Betrieb bewegt werden, muss das Gerät ausgeschaltet und vom 
Netz getrennt werden. Nach dem Ausschalten läuft der Antrieb 
kurze Zeit nach. Vollständigen Stillstand des Antriebs abwarten.
■ Betreiben Sie das Gerät nur in zusammengebautem Zustand. 
Vorsicht beim Schließen des Verschlussbügels, um Einklemmen
der Finger zu vermeiden.
■ Das Gerät ist für die Benutzung durch eine Person vorgesehen.
■ Nicht mit den Fingern in den Einfüllschacht greifen. 
Ausschließlich den mitgelieferten Stopfer benutzen! 
■ Vorsicht beim Umgang mit den Raspelklingen, bei der Entleerung 
des Behälters und bei der Reinigung. Raspelklingen am Boden
des Siebes nicht berühren. Zum Reinigen das Sieb zuerst 
mit einer Bürste, dann unter fließendem Wasser oder in der
Spülmaschine reinigen. 
WErstickungsgefahr!
Kinder nicht mit Verpackungsmaterial spielen lassen.
WAchtung!
■ Es wird empfohlen, das Gerät niemals länger eingeschaltet zu 
lassen, wie für die Verarbeitung der Lebensmittel notwendig. 
Nicht im Leerlauf betreiben.
■ Gerät ausschließlich mit dem Drehschalter ein- und ausschalten.
WWichtig!
■ Nur ausgereiftes und nicht gefrorenes Obst und Gemüse 
verarbeiten. Nicht ausgereiftes Obst und Gemüse verstopft das 
Sieb sehr schnell. 
■ Tresterbehälter entleeren, bevor der Trester den Rand der 
Siebschale erreicht.
■ Gerätevibrationen beim Entsaften deuten auf ein verstopftes 
oder beschädigtes Sieb hin. Gerät sofort ausschalten. Sieb
kontrollieren. Ein beschädigtes Sieb nicht mehr verwenden!
■ Das Gerät nach jeder Verwendung oder nach längerem 
Nichtgebrauch unbedingt gründlich reinigen (X „Reinigung und
Pflege“ siehe Seite 7).
  5
de
  Inhalt
Herzlichen Glückwunsch zum Kauf Ihres
neuen Gerätes aus dem Hause Bosch.
Weitere Informationen zu unseren
Produkten finden Sie auf unserer
Internetseite.
Inhalt
Bestimmungsgemäßer Gebrauch...............3
Wichtige Sicherheitshinweise .....................3
Auf einen Blick ............................................5
Einschaltsicherung .....................................5
Bedienen ....................................................5
Reinigung und Pflege .................................7
Rezepte ......................................................8
Entsorgung .................................................9
Garantiebedingungen .................................9
9 Einfüllschacht
10 Stopfer
11 Saftbecher
12 Schaumtrenner
13 Deckel für Saftbecher
14 Reinigungsbürste
Einschaltsicherung
Das Gerät lässt sich nur einschalten, wenn
Siebschale und Deckel richtig
aufgesetzt sind und
die Verschlussbügel richtig verriegelt 
und eingerastet sind.
Deckelverriegelung vor jeder Benutzung 
prüfen!
Bedienen
XBild B
Zusammensetzen
W Verletzungsgefahr
Nur benutzen, wenn Zuleitung und 
Gerät keine Beschädigungen aufweisen. 
Vor jeder Benutzung das gesamte 
Gerät, insbesondere Sieb und 
Siebschale, auf Beschädigungen (Risse, 
Sprünge) prüfen. 
Raspelklingen/Klingen am Boden des 
Siebes nicht berühren.
■ Verschluss (mit dem Griff nach links) bis 
zum Anschlag auf den Auslauf schieben 
und um 90° nach oben drehen. Darauf
achten, dass der Dichtring am Auslauf 
vorhanden ist!
■ Siebschale in die Motoreinheit 
einsetzen.
■ Sieb einsetzen und bis zum hörbaren
Einrasten nach unten drücken. Das Sieb 
muss fest auf dem Antrieb sitzen! Vorher 
auf Beschädigungen prüfen!
■ Tresterbehälter in die Motoreinheit 
einsetzen.
■ Deckel aufsetzen.
■ Beide Verschlussbügel in die 
Deckelnasen einhängen (1.) 
und bis zum hörbaren Einrasten 
hinunterdrücken (2.).
Auf einen Blick
Bitte Bildseiten ausklappen.
XBild A
1 Motoreinheit (mit Kabelfach)
2 Schalter
fGerät ausschalten 
1 = Gerät einschalten / 
Niedrige Geschwindigkeit 
2 = Gerät einschalten / 
Hohe Geschwindigkeit
3 Verschlussbügel
4 Tresterbehälter
5 Verschluss für den Auslauf
(Tropf-Stopp)
Wichtiger Hinweis
Beim Einschalten des Gerätes muss der 
Verschluss geöffnet sein (Verschluss 
ganz vorn). Bei geöffnetem Verschluss 
fließt der Saft in den Saftbecher. 
Beim Entleeren des Saftbechers das 
Gerät ausschalten ( ) und den f
Verschluss schließen (nach hinten 
schieben). So wird das weitere
Austreten von Saft gestoppt und damit 
eine Verschmutzung der Arbeitsfläche 
verhindert.
6 Siebschale mit Auslauf
7 Sieb
8 Deckel
6 
de Bedienen 
Entsaften
W Verletzungsgefahr
Nicht mit den Fingern in den Einfüllschacht 
greifen. Ausschließlich den mitgelieferten 
Stopfer benutzen!
■ Zusammengesetztes Gerät auf glatte,
saubere Arbeitsfläche stellen.
■ Netzkabel bis zur benötigten Länge aus 
dem Kabelfach herausziehen.
■ Netzstecker einstecken.
■ Verschluss am Auslauf zum Öffnen nach
vorn schieben.
■ Gerät einschalten. 
Stufe   ist besonders für weiches 1
Obst / Gemüse, z. B. Wassermelonen,
Weintrauben, Tomaten, Gurken und
Himbeeren geeignet. 
Stufe   eignet sich für hartes, festes 2
Obst und Gemüse, z. B. Karotten. 
Die Nutzungsdauer des Gerätes 
beträgt 10 Minuten für alle Obst- und 
Gemüsesorten, wie z. B. Möhren, Gurken, 
Äpfel und Birnen. Anschließend Gerät 
ausschalten und abkühlen lassen.
■ Obst / Gemüse bei laufendem Motor in 
den Einfüllschacht geben.
■ Zum Nachschieben ausschließlich den 
Stopfer verwenden. Niemals mit den 
Fingern in den Einfüllschacht greifen! 
Nur leichten Druck auf den Stopfer 
ausüben. Dies erhöht die Saftausbeute 
und schont das Gerät.
■ Gerät ausschalten. Schalter auf  f
stellen. Gerät erst ausschalten, wenn 
kein Saft mehr ausläuft.
Achtung!
Vor dem Öffnen des Gerätes unbedingt 
Stillstand des Motors abwarten.
■ Saftbecher mit dem Ausgießer unter 
den Auslauf stellen. Schaumtrenner aus 
dem Saftbecher entfernen, wenn Saft 
mit Schaum bevorzugt wird. Deckel auf 
den Saftbecher aufsetzen, um Spritzer 
zu vermeiden.
■ Stopfer in den Einfüllschacht setzen. 
Stopfer hat eine Führungsrille!
Obst und Gemüse vorbereiten
Achtung!
Nur ausgereiftes und nicht gefrorenes Obst 
und Gemüse verarbeiten. Nicht ausgereiftes 
Obst und Gemüse verstopft das Sieb sehr 
schnell.
■ Obst und Gemüse erst waschen.
■ Steinobst entsteinen. Grobe Stiele 
entfernen.
■ Größeres Obst und Gemüse soweit 
zerkleinern, dass es durch den 
Einfüllschacht passt.
■ Nur frisches Obst und Gemüse 
verarbeiten.
■ Früchte mit dicken und harten Schalen
(z. B.Ananas, Melonen, Apfelsinen, rote 
Rüben) vorher schälen. Weiße Haut von 
Zitrusfrüchten entfernen!
■ Die Konsistenz von Apfelsaft hängt 
von der verwendeten Apfelsorte ab. Je
saftiger die Äpfel, desto dünnflüssiger 
der Saft. Dem Apfelsaft einige Tropfen 
Zitronensaft hinzufügen, um das 
Braunwerden des Saftes zu verzögern.
■ Blätter und Stiele (z. B. Strunk vom 
Blattsalat) können ebenfalls in diesem 
Entsafter verarbeitet werden.
■ Saft möglichst sofort nach der 
Zubereitung trinken, da der Saft schnell 
Geschmack und Nährwert verliert.
■ Der Entsafter eignet sich nicht zum 
Verarbeiten von besonders hartem, 
faserigem und stärkehaltigem Obst und 
Gemüse (z. B. Zuckerrohr, Bananen, 
Papayas,Avocados, Feigen und 
Mangos).
  7
de
  Reinigung und Pege
Wichtige Hinweise
Tresterbehälter entleeren, bevor der 
Trester den Rand der Siebschale 
erreicht.
Gerätevibrationen beim Entsaften 
deuten auf ein verstopftes oder 
beschädigtes Sieb hin. Gerät sofort 
ausschalten. Sieb kontrollieren. 
Ein beschädigtes Sieb nicht mehr 
verwenden!
Tresterbehälter und Sieb
entleeren
XBild C
Tresterbehälter entleeren, bevor der Trester 
den Rand der Siebschale erreicht. Dazu
das Gerät ausschalten:
■ Schalter auf   stellen.f
■ Tresterbehälter beim Herausnehmen an 
der Griffmulde greifen und nach außen 
schwenken. Vor dem Fortsetzen der 
Arbeit Tresterbehälter wieder einsetzen.
Sieb entleeren, wenn
die Motordrehzahl erheblich nachlässt,
der Saft dickflüssiger wird,
das Gerät anfängt, spürbar zu vibrieren.
Empfehlung: Tresterbehälter und Sieb
gleichzeitig entleeren.
Wichtig!
Wenn Saft unter die Siebschale gelaufen 
ist, diesen sofort mit einem feuchten Tuch 
entfernen.
Auseinander nehmen
W Stromschlaggefahr
Vor allenArbeiten am Gerät Netzstecker 
ziehen.
W Verletzungsgefahr
Gerät erst auseinander nehmen, wenn 
der Motor steht. 
Raspelklingen / Klingen am Boden des 
Siebes nicht berühren.
XBild D
■ Gerät ausschalten und Netzstecker 
ziehen.
■ Warten, bis Motor steht (ca. 10-12 Sek.).
■ Verschluss am Auslauf zum Schließen 
nach hinten schieben.
■ Stopfer und Tresterbehälter entnehmen.
■ Beide Verschlussbügel unten nach 
außen ziehen. Anschließend oben von 
den Deckelnasen abheben.
■ Deckel abnehmen.
■ Siebschale mit beiden Händen 
aus der Motoreinheit anheben und 
herausnehmen.
■ Sieb aus der Siebschale herausnehmen.
■ Verschluss nach links drehen und vom 
Auslauf ziehen.
Reinigung und Pflege
Wichtiger Hinweis
Das Gerät ist wartungsfrei. Gründliche 
Reinigung bewahrt das Gerät vor Schäden 
und erhält die Funktionsfähigkeit.
W Stromschlaggefahr
Vor allenArbeiten am Gerät Netzstecker 
ziehen. 
Das Grundgerät nie in Flüssigkeiten 
tauchen und nicht in der Spülmaschine 
reinigen.
W Verletzungsgefahr
Raspelklingen/Klingen am Boden des 
Siebes nicht berühren.
Zum Reinigen eine Bürste benutzen!
Achtung!
Keine scheuernden Reinigungsmittel 
verwenden. Oberflächen können beschädigt 
werden.
■ Sieb zuerst mit der Bürste reinigen, 
dann unter fließendem Wasser abspülen 
oder in der Spülmaschine reinigen.
■ Motoreinheit feucht abwischen, bei 
Bedarf etwas Spülmittel benutzen. 
Motoreinheit sofort abtrocknen.
■ Alle anderen Teile sind 
spülmaschinengeeignet.
Verfärbungen (z. B. von Karotten, Rote 
Bete) an den Kunststoffteilen lassen sich 
leicht mit etwas Pflanzenöl entfernen. Teile 
anschließend in den Geschirrspüler geben 
(soweit geeignet).
8 
de Rezepte 
Sieb austauschen
Tauschen Sie das Sieb bei den ersten 
Anzeichen von Verschleiß oder 
Beschädigungen aus, um jegliche 
Bruchgefahr zu vermeiden. Bei täglichem 
Gebrauch sollte das Sieb ungefähr nach 
5 Jahren ausgetauscht werden.
Wichtiger Hinweis
Ein Sieb kann über den Kundendienst 
bestellt werden (Bestell-Nr. 00648221).
Rezepte
Melonen-Joghurt-Smoothie
(Für 4 Getränke)
200 g Naturjoghurt
2 Msp. Vanillemark
2 EL Honig, nach Belieben
400 g Wassermelonenfruchtfleisch, 
ohne Schale und Kerne
■ Den Joghurt mit dem Vanillemark und 
dem Honig glatt rühren und in ein hohes 
Glas geben.
■ Die Melone in passende Stücke 
schneiden und entsaften.
■ Auf den Joghurt gießen und nach 
Belieben mit einem Stück Melone als 
Garnitur servieren.
Gurken-Kefir-Drink
(Für 4 Getränke)
2 Gurken
800 g Kefir
200 g Joghurt
2 TL Olivenöl
2 EL Zitronensaft
4 EL frisch gehackter Dill
Meersalz
Pfeffer, aus der Mühle
■ Die Gurken waschen, putzen und mit 
einem Sparschäler vier Längs-Scheiben 
abschneiden.
■ Den Rest der Gurken entsaften.
■ Anschließend den Saft zusammen 
mit Kefir, Joghurt, Öl und Zitronensaft 
mixen.
■ Dann den Dill unterrühren und den Drink 
mit Salz und Pfeffer abschmecken.
■ Die Gurkenstreifen wellig auf 
Holzspieße stecken. Den Drink in 
Gläser füllen und die Gurkenspieße 
darüber legen.
Paprika-Gemüse-Smoothie
(Für 4 Getränke)
2 rote Paprikaschoten
8 vollreife Tomaten
1 TL Paprikapulver, edelsüß
½ TL Olivenöl
Salz
Cayennepfeffer
2 TL Zitronensaft
Szechuanpfeffer zum Garnieren
■ Die Paprikaschoten waschen, halbieren,
von Kernen und weißen Innenhäuten 
befreien und in grobe Stücke schneiden.
■ Die Tomaten waschen, den Stielansatz 
herausschneiden und in Stücke 
schneiden.
■ Tomaten und Paprikaschoten entsaften.
■ Mit dem Paprikapulver und dem Olivenöl 
verrühren und mit Salz, Cayennepfeffer 
und Zitronensaft abschmecken.
■ In ein kaltes Glas füllen und mit 
zerriebenem Szechuanpfeffer garniert 
servieren.
Saft „Tropical“
1 Orange
½ Mango
1 ScheibeAnanas
1 Scheibe Wassermelone
5 Beeren (z. B. Erdbeeren)
■ Schalen von Orange, Ananas und
Wassermelone sowie den Stein der 
Mango entfernen.
Alles auf Stufe   entsaften.1
■ Das Getränk im Glas servieren.
  9
de
  Entsorgung
Möhrenkuchen
4 Eier
4 EL warmes Wasser
200 g Zucker
100 g Mehl
500 g Möhren 
Es werden nur die Rückstände 
(200-300 g) vom Entsaften der 
Möhren verwendet – man findet sie 
im Tresterbehälter.
200 g gemahlene Haselnüsse
1 TL Backpulver
■ Die Möhren auf höchster 
Geschwindigkeit in ca. 5 Sekunden 
entsaften. (Bei der Verarbeitung 
größerer Mengen das Gerät nach jeder 
Entleerung des Tresterbehälters auf 
Raumtemperatur abkühlen lassen.)
■ Eier, Wasser und Zucker für ca. 
5 Minuten verrühren. Die Mischung 
muss schaumig aussehen.
■ Langsam Mehl, Backpulver, Haselnüsse 
und Möhren dazugeben. Die 
Möhrenstücke dürfen nicht zu groß sein.
■ Den Teig in eine Form (z. B. Springform 
260 mm Durchmesser) geben und bei 
180 Grad für 30-35 Minuten backen.
Entsorgung
J Entsorgen Sie die Verpackung 
um weltgerecht. Dieses Gerät ist 
entsprechend der europäischen
Richtlinie 2012/19/EU über Elektro- 
und Elektronikaltgeräte (waste 
electrical  and electronic equip-
ment – WEEE) gekennzeichnet. 
Die Richtlinie gibt den Rahmen für 
eine EU-weit gültige Rücknahme 
und Verwertung der Altgeräte vor.
Über aktuelle Entsorgungswege 
bitte beim Fachhändler informieren.
Garantiebedingungen
Für dieses Gerät gelten die von unserer 
jeweils zuständigen Landes vertretung
herausgegebenen Garantie bedingungen 
des Landes, in dem das Gerät gekauft 
wurde. Sie können die Garantiebedin-
gungen jederzeit über Ihren Fachhändler, 
bei dem Sie das Gerät gekauft haben, 
oder direkt bei unserer Landesvertretung 
anfordern. Die Garantie bedingungen für 
Deutschland und dieAdressen fi nden 
Sie auf den letzten vier Seiten dieses 
Heftes. Darüber hinaus sind die Garantie-
bedingungen auch im Internet unter der 
benannten Webadresse hinterlegt. 
Für die Inanspruchnahme von Garantie-
leistungen ist in jedem Fall die Vorlage des 
Kauf beleges erforderlich.
Änderungen vorbehalten.
10 
en Intended use 
Intended use
This appliance is intended for domestic use only. 
The appliance is suitable for extracting the juice from fruit 
(e.g. apples, pears, pitted plums and cherries) and vegetables 
(e.g. tomatoes, carrots). It is not suitable for processing particularly 
hard, fibrous or starchy fruit and vegetables (e.g. sugar cane, 
bananas, papayas, avocados, figs, mangos). 
Only use the appliance indoors at room temperature and up to 
2000 m above sea level.
Important safety information
Read and follow the instruction manual carefully and keep for later 
reference! Enclose these instructions when you give this appliance 
to someone else. If the instructions for correct use of the appliance 
are not observed, the manufacturer’s liability for any resulting 
damage will be excluded.
This appliance can be used by persons with reduced physical, 
sensory or mental capabilities or lack of experience and/or
knowledge if they have been given supervision or instruction 
concerning use of the appliance in a safe way and if they 
understand the hazards involved. Keep children away from the 
appliance and connecting cable and do not allow them to use the 
appliance. Do not let children play with the appliance. Cleaning and 
user maintenance must not be performed by children.
WRisk of electric shock and fire!
■ Connect and operate the appliance only in accordance with the 
specifications on the rating plate. Do not use the appliance if the 
power cord and/or appliance are damaged. Only our customer 
service may repair the appliance, e.g. by replacing a damaged 
power cord, in order to avoid hazards.
■ Never connect the appliance to timer switches or remote- 
controllable sockets. Never leave the appliance unattended while 
it is switched on! 
■ Do not place the appliance on or near hot surfaces, e.g. hobs. 
The power cord must not come into contact with hot parts or be
pulled across sharp edges. 
■ Never immerse the base unit in liquids or hold under running 
water and do not clean in the dishwasher. Do not steam-clean the 
appliance. Do not use the  appliance with damp hands. 
■ After each use, whenever the appliance is unsupervised, prior to 
assembly, prior to disassembly, prior to cleaning and in the event 
of an error, the appliance must always be disconnected from the
mains.
  11
en
  Important safety information
WRisk of injury!
■ Before use, always check the entire appliance, in particular
the filter and filter tray, for damage (cracks, flaws). Do not use the 
appliance if the filter or the lid is damaged or if there are visible 
cracks.
■ Before replacing accessories or additional parts which move 
during operation, the appliance must be switched off and dis-
connected from the power supply. After switching off, the drive 
continues for a short time. Wait until the drive has come to 
a standstill. 
■ Only operate the appliance in its fully assembled state. Be careful 
when closing the catch, otherwise you may trap your fingers.
■ The appliance is intended to be used by one person.
■ Do not place fingers in the filling shaft. Use the supplied pusher 
only! 
■ Care should be taken when handling the shredding blades, 
emptying the container and during cleaning. Do not touch 
shredding blades on the base of the filter. First clean the filter 
with the brush, then rinse under running water or wash 
in the dishwasher. 
WRisk of suffocation!
Do not allow children to play with packaging material.
WCaution!
■ We recommend that the appliance is never switched on for longer 
than is necessary to process the ingredients. Do not operate 
at no-load.
■ Use only the rotary switch to switch the appliance on or off.
WImportant!
■ Process ripe and unfrozen fruit and vegetables only. Fruit and 
vegetables which are not ripe will block the filter very quickly.
■ Empty the pulp container before the pulp reaches the edge 
of the filter tray.
■ If the appliance vibrates during the juicing process, the filter 
is blocked or damaged. Switch off the appliance immediately. 
Check the filter. No longer use a damaged filter!
■ It is essential to clean the appliance thoroughly after each use or
after it has not been used for an extended period. X “Cleaning
and maintenance” see page 14
12 
en Contents 
Congratulations on the purchase of
your new Bosch appliance. You can find
further information about our products
on our website.
Contents
Intended use .............................................10
Important safety information.....................10
Overview...................................................12
Start lock-out ............................................12
Operation ..................................................12
Cleaning and maintenance .......................14
Recipes.....................................................15
Disposal ....................................................16
Guarantee.................................................16
Start lock-out
The appliance cannot be switched
on unless
the filter tray and lid have been attached 
correctly and
the catch has been locked and engaged 
correctly.
Before using the appliance, always check 
that the lid is locked!
Operation
XFig. B
Assembly
W Risk of injury
Do not use the appliance if the power 
cord and/or appliance are damaged. 
Before use, always check the entire 
appliance, in particular the filter and filter 
tray, for damage (cracks, flaws). 
Do not touch shredding blades / 
blades on the base of the filter.
■ Push lock (with the handle to the left) 
all the way onto the outlet and turn 
upwards by 90°. Ensure that the sealing 
ring is on the outlet!
■ Insert filter tray into the motor unit.
■ Insert filter and press down until it 
clicks into position. The filter must fit 
firmly on the drive! Check for damage 
beforehand!
■ Insert the pulp container into the 
motor unit.
■ Attach the lid.
■ Attach both catches to the lugs 
on the lid (1.) and press down until they 
click into position (2.).
■ Place juice jug with the spout under 
the outlet. Remove foam separator 
from the juice jug if you prefer juice 
with foam. Place lid on the juice jug to
prevent splashes.
■ Insert pusher into the filling shaft. 
Pusher has a guide groove!
Overview
Please fold out the illustrated pages.
XFig. A
1 Motor unit (with cord store)
2 Switch
f = Switch off appliance 
1 = Switch on appliance / low speed 
2 = Switch on appliance / high speed
3 Catch
4 Pulp container
5 Lock for the outlet (drip stop)
Important information
When switching on the appliance, 
ensure that the lock is open (lock at the 
very front). When the lock is open, the
juice flows into the juice jug. 
Before emptying the juice jug, switch 
off the appliance ( ) and close the f
lock (push backwards). This will stop 
more juice from running out and prevent
soiling of the work surface.
6 Filter tray with outlet
7 Filter
8 Lid
9 Filling shaft
10 Pusher
11 Juice jug
12 Foam separator
13 Lid for juice jug
14 Cleaning brush
  13
en
  Operation
Setting   is particularly suitable for soft 1
fruit / vegetables, e.g. watermelons, 
grapes, tomatoes, cucumbers and 
raspberries. 
Setting   is suitable for hard, firm fruit 2
and vegetables, e.g. carrots. 
Do not use the appliance for more than 
10 minutes for all kinds of fruit and 
vegetables e.g. carrots, cucumbers, apples 
and pears. Then switch off appliance and 
leave to cool down.
■ When the motor is running, put fruit / 
vegetables in the filling shaft.
■ Only use the pusher when adding more 
ingredients. Never insert fingers into 
the filling shaft! Apply only light pressure 
to the pusher. This increases juice yield 
and protects the appliance.
■ Switch off the appliance. Move 
the switch to  . Do not switch off f
the appliance until all the juice has 
run out.
Caution!
Before opening the appliance, wait until 
the motor has stopped.
Important information
Empty the pulp container before the 
pulp reaches the edge of the filter tray.
If the appliance vibrates during 
the juicing process, the filter is blocked 
or damaged. Switch off the appliance 
immediately. Check the filter. No longer 
use a damaged filter!
Emptying the pulp container
and filter
XFig. C
Empty the pulp container before the pulp 
reaches the edge of the filter tray. Switch off 
the appliance.
■ Move the switch to  .f
■ To remove the pulp container, take
hold of it with the recessed grip and
swivel out. Before continuing to operate 
the appliance, re-insert the pulp 
container.
Preparing fruit and vegetables
Caution!
Process ripe and unfrozen fruit and 
vegetables only. Fruit and vegetables which 
are not ripe will block the filter very quickly.
■ First, wash the fruit and vegetables.
■ Remove stones from fruit. Remove 
large stalks.
■ Chop up large fruit and vegetables so 
that they fit the filling shaft.
■ Process only fresh fruit and vegetables 
because they are juicier.
■ Peel fruit beforehand if it has thick and 
hard peel (e.g. pineapples, melons, 
oranges, grapefruits and raw beetroot). 
Remove the pith from citrus fruits!
■ The consistency of apple juice depends 
on the kind of apple used. The juicier 
the apples, the thinner the juice. Add 
a few drops of lemon juice to the apple 
juice to delay the juice from turning 
brown.
■ Leaves and stems (e.g. stalks from leaf 
salad) can also be processed in this 
juicer.
■ If possible, drink juice immediately after 
preparation, as it loses its flavour and 
nutritional value quickly.
■ Hard and starchy fruits and vegetables 
(e.g. sugar cane, bananas, papayas, 
avocados, figs and mangos) are not 
suitable for juicing in this appliance.
Extracting juice
W Risk of injury
Do not place fingers in the filling shaft. Use 
the supplied pusher only!
■ Place the assembled appliance 
on a smooth, clean worktop.
■ Pull power cord to the required length
out of the cord store.
■ Plug the mains plug into the mains.
■ To open, push the lock on the outlet 
forwards.
■ Switch on the appliance. 
14 
en Cleaning and maintenance 
Empty the filter if
the motor speed drops significantly,
the juice becomes thick,
the appliance begins to vibrate 
noticeably.
Recommendation: Empty the pulp 
container and filter at the same time.
Important!
If juice has run under the filter tray, 
immediately remove with a damp cloth.
Dismantling
W Risk of electric shock
Before working on the appliance, pull out 
the mains plug.
W Risk of injury
Do not dismantle the appliance until 
the motor has stopped. 
Do not touch shredding blades / 
blades on the base of the filter.
XFig. D
■ Switch off the appliance and pull out the
mains plug.
■ Wait until the motor stops (approx. 
10-12 sec.).
■ To close, push the lock on the outlet 
backwards.
■ Remove the pusher and pulp container.
■ Pull both lower catches outwards. Then 
lift the catches off the lugs on the lid.
■ Remove the lid.
■ Lift the filter tray with both hands and 
take out of the motor unit.
■ Take the filter out of the filter tray.
■ Turn lock to the left and pull off the 
outlet.
Cleaning and maintenance
Important information
The appliance requires no maintenance. 
Thorough cleaning protects the appliance 
from damage and keeps it functional.
W Risk of electric shock
Before working on the appliance, pull 
out the mains plug. 
Never immerse the base unit in liquids 
and do not clean in the dishwasher.
W Risk of injury
Do not touch shredding blades / 
blades on the base of the filter.
Clean with a brush!
Caution!
Do not use abrasive cleaning agents. 
Surfaces may be damaged.
■ First clean the filter with the brush, 
then rinse under running water or wash
in the dishwasher.
■ Wipe the motor unit with a damp cloth, 
if required use a little washing-up liquid. 
Dry the motor unit immediately.
■ All other parts are dishwasher-safe.
Discolouration on plastic parts (e.g. caused
by carrots, beetroot) can easily be removed
with a few drops of vegetable oil. Put 
parts in the dishwasher (provided they are 
dishwasher-safe).
Replacing the filter
Replace the filter at the first signs of wear 
or damage in order to prevent any risk 
of breakage. If the appliance is used daily, 
the filter should be replaced after approx. 
5 years.
Important information
A filter can be ordered from customer 
service (order no. 00648221).
  15
en
  Recipes
Recipes
Melon and yoghurt smoothie
(For 4 beverages)
200 g natural yoghurt
2 pinches vanilla pulp
2 tbsp honey to taste
400 g watermelon fruit pulp, without skin
and pips
■ Mix the yoghurt with the vanilla pulp and 
honey until smooth and pour into a tall 
glass.
■ Cut the melon into suitable pieces and 
juice.
■ Pour onto the yoghurt and garnish with 
a piece of melon if required.
Cucumber kefir drink
(For 4 beverages)
2 cucumbers
800 g kefir
200 g yoghurt
2 tsp olive oil
2 tbsp lemon juice
4 tbsp freshly chopped dill
Sea salt
Freshly ground pepper
■ Wash the cucumbers, clean and cut off 
four strips with a peeler.
■ Juice the rest of the cucumber.
■ Then mix the juice with the kefir, 
yoghurt, oil and lemon juice.
■ Then stir in the dill and season the drink 
with salt and pepper to taste.
■ Thread the cucumber strips in a 
concertina shape onto wooden skewers. 
Pour the drink into glasses and place 
the cucumber skewers over the glasses.
Pepper and vegetable smoothie
(For 4 beverages)
2 red peppers
8 fully ripe tomatoes
1 tsp ground paprika, sweet
½ tsp olive oil
Salt
Cayenne pepper
2 tsp lemon juice
Szechuan pepper, to garnish
■ Wash and halve the peppers, remove
the seeds and white inner peel and cut 
into rough pieces.
■ Wash the tomatoes, cut out the core 
and cut into pieces.
■ Juice the tomatoes and peppers.
■ Mix with the ground paprika and the
olive oil and season with salt, cayenne
pepper and lemon juice to taste.
■ Pour into a cold glass and serve with a
garnish of grated Szechuan pepper.
Tropical juice
1 orange
½ mango
1 slice pineapple
1 slice watermelon
5 berries (e.g. strawberries)
■ Peel orange, pineapple and watermelon 
and remove stone from the mango.
Juice everything on setting  .1
■ Serve the drink in a glass.
Carrot cake
4 eggs
4 tbsp warm water
200 g sugar
100 g flour
500 g carrots 
Use only the leftover juiced carrots 
(200-300 g) – they can be found in 
the pulp container.
200 g ground hazelnuts
1 tsp baking powder
■ Juice the carrots at the highest speed in 
approx. 5 seconds. (When processing 
larger quantities, leave the appliance 
to cool down to room temperature each 
time after emptying the pulp container.)
■ Mix eggs, water and sugar for approx. 
5 minutes. The mixture must have a 
frothy appearance.
■ Slowly add flour, baking powder, 
hazelnuts and carrots. The pieces of 
carrot must not be too large.
■ Put the dough into a tin (e.g. springform 
tin with a diameter of 260 mm) and bake
at 180 °C for 30-35 minutes.
16 
en Disposal 
Disposal
J
Dispose of packaging in an environ-
mentally-friendly manner. This 
appliance is labelled in accordance 
with European Directive 2012/19/EU 
concerning used electrical and 
electronic appliances (waste electrical
and electronic equipment – WEEE). 
The guideline determines the frame-
work for the return and recycling
of used appliances as applicable 
throughout the EU. Please ask your 
specialist retailer about current 
disposal facilities.
Guarantee
The guarantee conditions for this appliance 
are as de ned by our representative in the 
country in which it is sold. Details regarding 
these conditions can be obtained from 
the dealer from whom the appliance was 
purchased. The bill of sale or receipt must 
be produced when making any claim under 
the terms of this guarantee.
Changes reserved.
  17
fr
  Conformité d’utilisation
Conformité d’utilisation
Cet appareil est destiné exclusivement à une utilisation domestique 
et non professionnelle. 
Cet appareil convient pour centrifuger les fruits (par exemple
pommes, poires, prunes et cerises dénoyautées) et les légumes 
(par exemple tomates, carottes). Il ne convient pas pour traiter les 
fruits et légumes particulièrement durs, fibreux ou contenant de 
l'amidon (par exemple canne à sucre, bananes, papayes, avocats, 
figues, mangues). 
N’utiliser l’appareil que dans des pièces intérieures à température 
ambiante et jusqu’à 2 000 m au-dessus du niveau de la mer.
Consignes de sécurité importantes
Lire attentivement cette notice d’utilisation. Respecter les 
instructions qu’elle contient et la ranger soigneusement ! Si l’appareil 
change de propriétaire, lui remettre cette notice. Le non-respect 
des instructions permettant d’utiliser correctement l’appareil dégage 
le fabricant de toute responsabilité envers les dommages qui 
pourraient en résulter.
Cet appareil peut être utilisé par des personnes aux capacités 
physiques, sensorielles ou mentales réduites ou des personnes 
inexpérimentées, à condition qu’elles soient surveillées ou qu’elles 
aient été informées de l’utilisation sûre de l’appareil et qu’elles 
comprennent les risques inhérents à son usage. Il faut tenir les 
enfants à l’écart de l’appareil et du cordon de branchement et ne 
pas leur permettre d’utiliser l’appareil. Ne pas laisser les enfants 
jouer avec l’appareil. Le nettoyage et l’entretien incombant à 
l’utilisateur ne doivent pas être effectués par des enfants.
WRisque de chocs électriques et d’incendie !
■ Ne brancher et n’utiliser l’appareil que conformément aux 
indications figurant sur la plaque signalétique. N’utiliser 
l’appareil que si son cordon d’alimentation et l’appareil lui-même 
ne présentent aucun dommage. Afin d’écarter tout danger, 
seul notre service après-vente est habilité à réparer l’appareil, 
comme par exemple procéder au remplacement d’un cordon
d’alimentation endommagé.
■ Ne jamais raccorder l’appareil à des minuteries ou à des prises 
pouvant être commandées à distance. Surveiller toujours 
l’appareil pendant son fonctionnement ! 
■ Ne jamais poser l’appareil sur des surfaces chaudes (tables 
de cuisson p. ex.) ou à proximité de celles-ci. Ne pas mettre le
cordon d’alimentation en contact avec des éléments brûlants et 
ne pas le faire glisser sur des arêtes vives. 
18 
fr Consignes de sécurité importantes 
■ Ne jamais plonger l’appareil de base dans des liquides, ne jamais 
le tenir sous l’eau du robinet et ne pas le laver au lave-vaisselle. 
Ne jamais utiliser de nettoyeur à vapeur. Ne pas utiliser l’appareil 
avec les mains humides. 
■ L’appareil doit toujours être débranché du secteur, après chaque 
utilisation, lorsqu’il n’est pas sous surveillance, lorsqu’il doit être
monté ou démonté, avant de le nettoyer et en cas de panne.
WRisques de blessures !
■ Avant chaque utilisation, vérifiez que l’ensemble de l’appareil, 
en particulier le filtre et le panier filtre, ne présente aucun 
dégât (fissures, fêlures). N'utilisez pas l'appareil si le filtre ou le 
couvercle est endommagé ou présente des fissures apparentes.
■ L’appareil doit être éteint et débranché du secteur avant 
de procéder au changement d’accessoires ou de pièces 
complémentaires mobiles en fonctionnement. Après extinction de 
l’appareil, son moteur continue de tourner brièvement. Attendre 
l’arrêt complet de l’entraînement. 
■ N’utilisez l’appareil que lorsqu’il est entièrement assemblé. 
Attention, au moment de refermer l'étrier, de ne pas vous pincer 
les doigts.
■ L’appareil est desti à être utilisé par une seule personne à la fois.
■ Ne mettez pas les doigts dans l’orifice d’ajout. Utilisez 
exclusivement le pilon-poussoir fourni ! 
■ Attention quand vous manipulez les lames-râpes lors du vidage 
du récipient ou du nettoyage. Ne touchez pas les lames-
râpes situées au fond du filtre. Commencez par nettoyer le 
filtre avec une brosse, puis rincez-le sous l’eau du robinet 
ou lavez-le au lave-vaisselle. 
WRisque d’asphyxie !
Ne jamais laisser les enfants jouer avec les emballages.
WAttention !
■ Ne jamais laisser l’appareil allumé plus longtemps que 
nécessaire au traitement des produits alimentaires. Ne pas faire 
tourner l’appareil à vide.
■ Allumez et éteignez l’appareil uniquement par l’interrupteur 
rotatif.
WImportant !
■ Utilisez uniquement des fruits et des légumes mûrs et non 
surgelés. Les fruits et légumes qui ne sont pas mûrs obstruent 
très rapidement le filtre.
■ Videz le réservoir à pulpe avant que cette dernière n’atteigne le 
bord du panier filtre.
  19
fr
  Consignes de sécurité importantes
Vous venez d’acheter ce nouvel appareil
Bosch et nous vous en félicitons
cordialement. Vous trouverez sur notre
site web plus d’informations sur nos
produits.
Sommaire
Conformité d’utilisation .............................17
Consignes de sécurité importantes ..........17
Vue d’ensemble ........................................19
Sécurité anti-enclenchement ....................19
Utilisation ..................................................19
Nettoyage et entretien ..............................21
Recettes ...................................................22
Mise au rebut ............................................23
Garantie ....................................................23
Au moment de vider le gobelet à jus,
éteignez l’appareil ( ) et fermez le f
bouchon (poussez-le vers l’arrière). Ceci 
empêche le jus de continuer à sortir et 
ainsi de salir le plan de travail.
6 Panier filtre avec bec d’écoulement
7 Filtre
8 Couvercle
9 Orifice d’ajout
10 Pilon poussoir
11 Gobelet à jus
12 Palette pour séparer la mousse
13 Couvercle du gobelet à jus
14 Brosse de nettoyage
Sécurité
anti-enclenchement
L’appareil ne peut être allumé que si
le panier filtre et le couvercle ont été 
correctement posés et si
les étriers de fermeture sont 
correctement verrouillés et enclenchés.
Avant chaque utilisation, vérifiez 
le verrouillage du couvercle !
Utilisation
XFigure B
Assemblage
W Risques de blessures
N’utiliser l’appareil que si son cordon
d’alimentation et l’appareil lui-même ne 
présentent aucun dommage. 
Avant chaque utilisation, vérifiez que
l’ensemble de l’appareil, en particulier 
le filtre et le panier filtre, ne présente 
aucun dégât (fissures, fêlures). 
Ne touchez pas les lames-râpes/lames 
situées au fond du filtre.
Vue d’ensemble
Veuillez déplier les volets illustrés.
XFigure A
1 Bloc moteur
(avec logement pour cordon)
2 Interrupteur
fÉteindre l’appareil 
1 = Allumer l’appareil / Vitesse faible 
2 = Allumer l’appareil / Vitesse élevée
3 Étrier de fermeture
4 Réservoir à pulpe
5 Bouchon pour le bec d’écoulement
(stoppe-gouttes)
Remarque importante
Lors de l’allumage de l’appareil, il faut 
que le bouchon se trouve en position 
ouverte (bouchon complètement en
avant). Lorsque le bouchon est ouvert, 
le jus coule dans le gobelet à jus.
■ Si des vibrations se manifestent, cela signifie que le filtre est 
obstrué ou endommagé. Éteignez immédiatement l’appareil. 
Contrôlez le filtre. Ne réutilisez pas un filtre abîmé !
■ Nettoyer soigneusement l’appareil après chaque utilisation 
ou après une longue durée sans utilisation. X « Nettoyage et
entretien » voir page 21
20 
fr Utilisation 
■ La consistance du jus de pommes 
dépend de la variété de pommes 
utilisée. Plus les pommes sont juteuses 
et plus leur jus sera liquide. Versez 
quelques gouttes de jus de citron dans 
le jus de pommes pour retarder son 
brunissement.
■ Cette centrifugeuse accepte aussi les 
feuilles et les tiges (celles des feuilles 
de salade par exemple).
■ Buvez le jus de préférence tout de suite 
après l’extraction car il perd vite son 
goût et sa valeur nutritive.
■ Cette centrifugeuse ne convient 
pas pour traiter les fruits et légumes 
particulièrement durs, fibreux et
contenant de l’amidon (par exemple 
canne à sucre, bananes, papayes, 
avocats, figues et mangues).
Extraction du jus
W Risques de blessures
Ne mettez pas les doigts dans l’orifice 
d’ajout. Pour cela, utiliser uniquement le
pilon poussoir fourni !
■ Posez l’appareil assemblé sur une 
surface de travail lisse et propre.
■ Sortez la longueur de cordon requise de 
son logement.
■ Branchez la fiche dans la prise de 
courant.
■ Pour ouvrir le bouchon du bec 
d’écoulement, poussez-le en avant.
■ Allumez l’appareil. 
Le niveau   convient aux fruits et 1
légumes particulièrement tendres, 
par exemple aux pastèques, raisins, 
tomates, concombres et framboises. 
Le niveau   convient aux fruits et 2
légumes durs et fermes, par exemple 
aux carottes. 
La durée d’utilisation de l’appareil est de 
10 minutes pour toutes les variétés de 
fruits et légumes comme par exemple les 
carottes, concombres, pommes et poires. 
Ensuite, éteignez l’appareil et laissez-le 
refroidir.
■ Poussez le bouchon (avec la poignée 
vers la gauche) jusqu’à la butée sur 
le bec d’écoulement puis tournez le 
bouchon de 90° vers le haut. Veillez 
à ce que la bague d’étanchéité soit 
présente sur le bec d’écoulement !
■ Placez le panier filtre dans le bloc 
moteur.
■ Mettez le filtre en place et poussez-le 
vers le bas jusqu’à son enclenchement 
audible. Le filtre doit tenir fermement 
sur l’entraînement ! Vérifiez auparavant 
l’absence de dégâts !
■ Placez le réservoir à pulpe dans le bloc 
moteur.
■ Mettez le couvercle en place.
■ Accrochez les deux étriers de fermeture 
dans les saillies du couvercle (1.) puis 
appuyez jusqu’à leur enclenchement
audible (2.).
■ Placez le gobelet à jus sous le bec 
d’écoulement. Si vous aimez le jus avec 
sa mousse, retirez la palette servant à 
séparer la mousse. Placez le couvercle 
sur le gobelet à jus pour éviter les 
projections de liquide.
■ Introduisez le pilon-poussoir dans 
l’orifice d’ajout. Le pilon poussoir 
comporte une rainure de guidage!
Préparation de fruits et légumes
Attention !
Utilisez uniquement des fruits et des 
légumes mûrs et non surgelés. Les fruits 
et légumes qui ne sont pas mûrs obstruent 
très rapidement le filtre.
■ Commencez par laver les fruits et 
légumes.
■ Dénoyautez. Enlevez les queues 
volumineuses.
■ Hachez les fruits et légumes 
relativement gros de manière à ce qu’ils 
passent par l’orifice d’ajout.
■ N’utilisez que des fruits et légumes frais.
■ Épluchez au préalable les fruits à peau 
épaisse et dure (par exemple ananas, 
melons, oranges, betteraves rouges). 
Enlevez la peau blanche des agrumes !
  21
fr
  Nettoyage et entretien
■ Moteur en marche, versez les fruits / 
légumes dans l’orifice d’ajout.
■ Pour remplir l’appareil, servez-vous 
uniquement du pilon poussoir. 
N’introduisez jamais les doigts dans 
l’orifice d’ajout ! Exercez seulement une 
pression légère sur le pilon poussoir. 
Ceci accroît la production de jus et 
ménage l’appareil.
■ Éteignez l’appareil. Placez l’interrupteur 
sur  . Éteignez l’appareil seulement f
lorsque le jus a fini de s’écouler.
Attention !
Avant d’ouvrir l’appareil, attendez 
impérativement que son moteur se soit 
arrêté.
Remarques importantes
Videz le réservoir à pulpe avant que 
cette dernière n’atteigne le bord du 
panier filtre.
Si des vibrations se manifestent, 
cela signifie que le filtre est obstrué 
ou endommagé. Éteindre l’appareil 
immédiatement. Contrôlez le filtre. Ne 
réutilisez pas un filtre abîmé !
Vider le réservoir à pulpe et le
filtre
XFigure C
Videz le réservoir à pulpe avant que cette 
dernière n’atteigne le bord du panier filtre. 
Pour ce faire, éteignez l’appareil :
■ Placez l’interrupteur sur  .f
■ Pour retirer le réservoir à pulpe, 
saisissez-le par la poignée puis faites-le 
pivoter vers l’extérieur. Avant de 
poursuivre, remettez le réservoir à pulpe 
en place.
Videz le filtre lorsque
la vitesse du moteur baisse nettement,
le jus devient épais,
des vibrations commencent à se faire 
sentir.
Recommandation : videz en même temps 
le réservoir à pulpe et le filtre.
Important !
Si du jus a coulé sous le panier filtre, 
essuyez-le tout de suite avec un essuie-tout 
humide.
Démontage
W Risque d’électrocution
Avant d’effectuer toute opération sur 
l’appareil, débranchez sa fiche secteur.
W Risque de blessures
Démontez l’appareil seulement après 
l’arrêt de son moteur. 
Ne touchez pas les lames-râpes/lames 
situées au fond du filtre.
XFigure D
■ Éteignez l’appareil et débranchez la
fiche secteur.
■ Attendez l’arrêt du moteur (environ 10 à
12 secondes).
■ Pour fermer le bouchon du bec 
d’écoulement, poussez-le en arrière.
■ Retirez le pilon poussoir et le réservoir 
à pulpe.
■ Tirez les deux étriers de fermeture en 
bas vers l’extérieur. Ensuite, détachez-
les en haut des saillies du couvercle.
■ Retirez le couvercle.
■ Avec les deux mains, soulevez le panier 
filtre hors du bloc moteur, puis sortez-le.
■ Ôtez le filtre du panier filtre.
■ Tournez le bouchon vers la gauche puis 
retirez-le du bec d’écoulement.
Nettoyage et entretien
Remarque importante
L’appareil ne nécessite aucun entretien. Un 
nettoyage soigné protège l’appareil contre 
les dommages et le maintient fonctionnel.
W Risque d’électrocution
Avant d’effectuer toute opération sur 
l’appareil, débranchez sa fiche secteur. 
Ne plongez jamais l’appareil de base 
dans des liquides et ne le lavez pas au 
lave-vaisselle.
  23
fr
  Mise au rebut
■ Mélangez avec le piment en poudre et 
l’huile d’olive, puis rectifiez le goût avec 
le sel, le poivre de Cayenne et le jus de 
citron.
■ Versez dans un verre froid puis servez 
après avoir garni de poivre du Sichuan
râpé.
Jus « Tropical »
1 orange
½ mangue
1 tranche d’ananas
1 tranche de pastèque
5 baies (fraises par exemple)
■ Retirez les peaux de l’orange, de 
l’ananas et de la pastèque ainsi que le 
noyau de la mangue.
Centrifugez le tout sur le niveau  .1
■ Versez la boisson dans un verre.
Gâteau aux carottes
4 œufs
4 c. à soupe d’eau chaude
200 g de sucre
100 g de farine
500 g de carottes 
Ici nous utilisons ce qui est resté 
(200 à 300 g) de la centrifugation des 
carottes ; ces restes se trouvent dans 
le réservoir à pulpe.
200 g de noisettes moulues
1 c. à café de levure chimique
■ Centrifugez les carottes à la vitesse 
maximale pendant environ 5 secondes. 
(Si vous traitez des quantités assez 
importantes, laissez l’appareil revenir 
à la température ambiante après avoir 
vidé le réservoir à pulpe.)
■ Mélangez les œufs, l’eau et le sucre 
pendant environ 5 minutes. Il faut que 
le mélange prenne la consistance d’une 
mousse.
■ Rajoutez lentement la farine, le levure 
chimique, les noisettes et les carottes. 
Veillez à ce que les morceaux de carotte 
ne soient pas trop gros.
■ Versez la pâte dans un moule (par 
exemple un moule démontable de 
260 mm de diamètre) et cuisez-la à 
180 degrés pendant 30 à 35 minutes.
Mise au rebut
J
Eliminez lemballage en respectant 
l’environnement. Cet appareil est 
marqué selon la directive européenne 
2012/19/UE relative aux appareils 
électriques et électroniques usagés 
(waste electrical and electronic equip-
ment – WEEE). La directive définit 
le cadre pour une reprise et une 
récupération des appareils usagés 
applicables dans les pays de la CE. 
S’informer auprès du revendeur sur la 
procédure actuelle de recyclage.
Garantie
Les conditions de garantie applicables 
sont celles publiées par notre distributeur 
dans le pays où a été e ectué l’achat. Le 
revendeur chez qui vous vous êtes procuré 
l’appareil fournira les modalités de garantie 
sur simple demande de votre part. En cas 
de recours en garantie, veuillez toujours 
vous munir de la preuve d’achat.
Sous réserve de modifi cations.
24 
it Uso corretto 
Uso corretto
Questo apparecchio è pensato esclusivamente per l’utilizzo in 
abitazioni private e in ambito domestico.
Questo apparecchio è idoneo per estrarre il succo di frutta 
(ad es. mele, pere, prugne e ciliegie snocciolate) e verdura 
(ad es. pomodori, carote). Non è idoneo per lavorare frutta e 
verdura particolarmente dure, fibrose e contenenti amido (ad es. 
canna da zucchero, banane, papaia, avocado, fichi e mango). 
Usare l’apparecchio solo in ambienti interni a temperatura ambiente 
e ad un’altitudine massima di 2000 m s.l.m.
Importanti avvertenze di sicurezza
Leggere attentamente le istruzioni per l’uso, osservarle e 
conservarle! Se l’apparecchio viene ceduto, allegare anche le 
presenti istruzioni. L’inosservanza delle istruzioni per l’uso corretto 
dell’apparecchio esclude la responsabilità del costruttore per i danni 
da essa derivanti.
Questo apparecchio può essere usato da persone con ridotte 
facoltà psichiche, sensoriali o mentali o con conoscenze e/o
esperienza insufficienti, purché siano sotto il controllo di persone
adulte o siano state istruite sull’uso sicuro dell’apparecchio e 
abbiano compreso i pericoli connessi all’uso dello stesso. I bambini 
devono essere tenuti lontani dall’apparecchio e dal cavo di 
alimentazione e non devono utilizzare l’apparecchio. I bambini non 
devono giocare con l’apparecchio. La pulizia e la manutenzione a 
cura dell’utente non devono essere eseguite da bambini.
WPericolo di scossa elettrica e pericolo d’incendio!
■ Collegare e usare l’apparecchio solo rispettando i dati della 
targhetta d’identificazione. Usare l’apparecchio solo se il cavo di
alimentazione e l’apparecchio stesso non presentano danni. Al 
fine di evitare pericoli, le riparazioni dell’apparecchio, come ad es. 
la sostituzione di un cavo di alimentazione danneggiato, devono 
essere eseguite solo dal nostro servizio assistenza clienti.
■ Non collegare mai l’apparecchio a timer o a prese telecomandate. 
Sorvegliare sempre l’apparecchio durante il funzionamento! 
■ Non disporre l’apparecchio sopra oppure in prossimità di superfici 
molto calde, come per es. fornelli. Non mettere mai il cavo 
d’alimentazione a contatto con parti calde o tirarlo sopra spigoli 
vivi. 
  25
it
  Importanti avvertenze di sicurezza
■ Non immergere mai l’apparecchio base in liquidi, non metterlo 
mai sotto l’acqua corrente e non lavarlo in lavastoviglie. Non
pulire con il vapore. Non usare l’apparecchio con le mani 
bagnate. 
■ L’apparecchio va sempre scollegato dalla corrente elettrica dopo 
ogni utilizzo, se lasciato incustodito, prima del montaggio, dello 
smontaggio, della pulizia e in caso di guasti.
WPericolo di lesioni!
■ Prima di ogni uso controllare che l’apparecchio non sia 
danneggiato (crepe, incrinature), in particolare il filtro e la 
vaschetta del filtro. Non usare l’apparecchio se il filtro o il 
coperchio sono danneggiati o presentano crepe visibili.
■ Prima di sostituire accessori o parti aggiuntive che durante il 
funzionamento si muovono, l’apparecchio deve essere spento 
e staccato dalla corrente. Dopo avere spento l’apparecchio, 
l’ingranaggio continua brevemente a girare. Attendere l’arresto 
completo dell’ingranaggio. 
■ Utilizzare l’apparecchio soltanto quando è assemblato. Prestare
attenzione nel chiudere la leva di chiusura, per evitare di 
schiacciarsi le dita.
■ L’apparecchio è stato progettato per essere usato da una 
persona.
■ Non introdurre le dita nel pozzetto di carico. Utilizzare solo 
il pestello fornito in dotazione! 
■ Prestare cautela nel maneggiare le lame grattugia durante lo 
svuotamento del contenitore e durante la pulizia. Non toccare 
le lame grattugia sul fondo del filtro. Pulire il filtro prima con una
spazzola, sciacquarlo poi sotto acqua corrente oppure lavarlo in 
lavastoviglie. 
WPericolo di soffocamento!
Non lasciare che i bambini giochino con il materiale di imballaggio.
WAttenzione!
■ Si consiglia di non lasciare mai l’apparecchio acceso più a lungo 
di quanto è necessario per la lavorazione dell’alimento. Non fare 
girare a vuoto l’apparecchio.
■ Accendere e spegnere l’apparecchio solo con la manopola.
WImportante!
■ Lavorare solo frutta e verdura mature e non congelate. La frutta e 
verdura non completamente mature intasano molto rapidamente 
il filtro.
■ Svuotare il contenitore residui prima che il residuo
di centrifugazione raggiunga il bordo della vaschetta del filtro.


Produkt Specifikationer

Mærke: Bosch
Kategori: Saftpresser
Model: VitaJuice 2 MES25A0
Tænd-/slukkontakt: Ja
Vekselstrømsindgangsspænding: 220 - 240 V
Vekselstrømsindgangsfrekvens: 50 - 60 Hz
Bredde: 310 mm
Dybde: 312 mm
Højde: 180 mm
Vægt: 5000 g
Brugervejledning: Ja
Produktfarve: Black, White
Kontroltype: Dreje
Antal hastigheder: 2
Produkttype: Frugtpresser
Strøm: 700 W
Pakkevægt: 5300 g
Pakkedybde: 355 mm
Pakkebredde: 255 mm
Pakkehøjde: 450 mm
Variabel hastighed: Ja
Husmateriale: Plast
Farve på kontrolpanel: Sort, sølv
Dele der tåler opvaskemaskine: Ja
Produkter pr. palle: 36 stk
Nem at rengøre: Ja
Skridsikre fødder: Ja
Ledningsopbevaring: Ja
Oprindelsesland: Tyskland
Rengøringsbørste: Ja
Filtermateriale: Rustfrit stål
Anti-dryp funktion: Ja
Omvendt: Ingen
Beholder til frugtkød: 2 L
Impulsfunktion: Ingen
Låg med påfyldningshul: Ja
Sikkerhedsafbryder: Ja
Sikkerhedsklemmer: Ja
Diameter på påfyldningsrør: 73 mm
Hastighedskontrol type: Trin
Pulpbeholder: Ja
Saftbeholder: Ja
Juice beholder kapacitet: 1.25 L
Aftagelig saftbeholder: Ja
Materiale, knive: Rustfrit stål
Kande: Ja
Måling af væske: Ingen
Lågmateriale: Plast
Skum separator: Ja
Aftagelig pulpbeholder: Ja
Antal tryk kegler: 1
Tilbehør, der tåler opvaskemaskine: Ja
Mad pusher: Ja
Velegnet til frugt/græntsager type: Blød/hård
Kontinuerlig påfyldning: Ja
Låsesystem: Sikkerhedsklemme
Garantiperiode: 2 År
Materiale, skubber: Plast
Materiale, kande: Plast
Automatisk udslyngning af pulp: Ja
Gennemsigtigt låg: Ja

Har du brug for hjælp?

Hvis du har brug for hjælp til Bosch VitaJuice 2 MES25A0 stil et spørgsmål nedenfor, og andre brugere vil svare dig