Bretford MDMLAP20NR Manual


Læs gratis den danske manual til Bretford MDMLAP20NR (2 sider) i kategorien Ikke kategoriseret. Denne vejledning er vurderet som hjælpsom af 13 personer og har en gennemsnitlig bedømmelse på 4.5 stjerner ud af 7 anmeldelser. Har du et spørgsmål om Bretford MDMLAP20NR, eller vil du spørge andre brugere om produktet?

Side 1/2
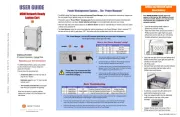
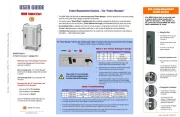
The “Power Manager” has two LED indicator lights that let you know what it is happening
The left light is Amber and the right one is Red
Amber
Red
1. When the power button is switched to the “On” position, both
indicator lights will light up for approximately 2 seconds.
2. Both lights will then turn off while the “Power Manager” evaluates
the power required to charge the first set of devices.
3. The Amber light will come on and stay lit indicating that the “Power
Manager” is now in “Smart Charge” mode. This means that laptops
will be charged in groups, three minutes at a time.
4. Once the power needed to charge all of the devices in the cart
reaches a level that will not trip the circuit, the “Power Manager”
enters “All Charge” mode and both lights will be off. All devices are
now charging.
1. If the Amber light displays single blinks, it means the current required to power the auxiliary outlet is too high. Unplugging whatever
is in the auxiliary outlet should allow the “Power Manager” to resume charging the devices.
2. If both the Amber and Red lights start to blink, it means one set of devices is drawing too much current and the “Power Manager”
needs to be reset by turning it off and back on. If the problem persists there may be a faulty device that needs to be removed.
3. If the Amber light displays double blinks, the internal temperature of the cart is too high. Open the doors of the cart and/or move the
cart to a cooler room. The cart should cool down without having to turn off the “Power Manager”
MDMLAP20NR
20 Laptop Computers in Vertical Slots
Maximize your Tech Investment
The MDM Network Ready Laptop Cart provides
you the infrastructure to secure, charge and
update 20 computers.
The cart ships fully assembled with:
21 Ethernet cables pre-wired and ready to
plug into your laptops
Dedicated space for your 19” rack-mounted
network switch
Two thermally-controlled fans to dissipate
heat while your computers are updating
Save time and money by sending patches,
updates and content to all of the devices in the
cart at once.
Adding your Network Switch
Upon Delivery
The MDMLAP20NR Laptop Cart has
space in the top for the addition of your
network switch. Below are step by step
instructions for installation of the
network switch.
Open the rear door of the cart and remove the 2
Phillips screws from upper right and upper left
corners on rear side of cart.
Lift off top cover.
Set (purchaser provided) rack mounted network
switch on provided shelf and attach with 4
Phillips rack mount screws.
The MDM Laptop Cart features the new and improved Power Manager, which is designed to continuously charge even
the most power hungry laptops using only one wall outlet.
The system uses a “Round Robin” charging cycle that constantly evaluates the demand for power and allows each
electrical strip time to cool down. Cooler batteries last longer, and extended battery life saves you money.
When the total draw of the devices allows it, the Network Switch will turn on automatically and receive continuous power
until the unit is powered off.
Two Heat Sensors inside the cart communicate the internal temperature to the Power Manager. When it exceeds 77°F
the fans will turn on and if it gets above 100°F the system will stop sending power until the cart cools down.
Power Management System … The “Power Manager
11000 Seymour Avenue Franklin Park, IL 60131 USA 800 521 9614
www.bretford.com
Lock the two locking wheel casters to
prevent the unit from moving.
Open front door of the cart and remove the 2
Phillips screws from upper right and upper
left corners on front side of cart, with narrow
handled screwdriver. (see pictures below)
If preferred, connect the LAN cables to the
switch before replacing top cover.
Plug your network switch into the dedicated
outlet located on the rear of the power
manager.
Replace the top cover and screw in the 4
Phillips screws in front and back corners.
Cut Here - Finished size = 16W x 11H - Folded three times, like a map
!" #$%&'"()*+," -&."()*+," /&01)1*" 2345631"
7" 2)1*4&"84)19:" ;<" #5=)4)0'>"?'0@)1*"A33"/5B+"C3@&'" D1E45*"#5=)4)0'>"
F" 2)1*4&"84)19:" 2)1*4&"84)19:" ;1&"2&,"?'0@)1*"A33"/5B+"C3@&'" A5'1";<"G"80B9";1"
H" ?35%4&"84)19:" ;<" I1,&'104"A&$E"3J"K0',"A33"L)*+" ;E&1"?33':M/3N&"K0',"
!" #$%&'"()*+," -&."()*+," /&01)1*"
7" ;1" ;1" 2,0',ODE"
F" ;<" ;<" 2&4JOA&:,"
H" ;1" ;<" 2$0',"K+0'*&"/3.&"
P" ;<" ;<" #44"K+0'*&"/3.&"
Please Note: It is recommended that
nothing be plugged into the Auxiliary
outlet while charging
What is the “Power Manager” doing?
Basic Troubleshooting
Part #: 031-9498 10/08/2012
MDM Network Ready
Laptop Cart
USER GUIDE
®


Produkt Specifikationer

Mærke: Bretford
Kategori: Ikke kategoriseret
Model: MDMLAP20NR

Har du brug for hjælp?

Hvis du har brug for hjælp til Bretford MDMLAP20NR stil et spørgsmål nedenfor, og andre brugere vil svare dig


Ikke kategoriseret Bretford Manualer
Ikke kategoriseret Manualer

Nyeste Ikke kategoriseret Manualer