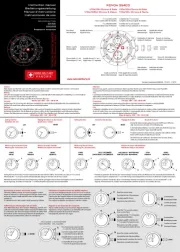
Casio GS-1100-1AER Manual
Læs nedenfor 📖 manual på dansk for Casio GS-1100-1AER (5 sider) i kategorien Ur. Denne guide var nyttig for 34 personer og blev bedømt med 3.7 stjerner i gennemsnit af 17.5 brugere
Side 1/5

Operation Guide 4777
1
MO0905-EB
Getting Acquainted
Congratulations upon your selection of this CASIO watch. To get the most out of your
purchase, be sure to read this manual carefully.
•••• • This watch does not have a city code that corresponds to the Greenwich
Mean Time differential of –3.5 hours. Because of this, the radio-controlled
atomic timekeeping function will not display the correct time for
Newfoundland, Canada.
l
l
l
l
l
l
l
l
l
l
l
Bright light
Solar cell
Keep the watch exposed to bright light
The electricity generated by the solar cell of the watch is
stored by a built-in battery. Leaving or using the watch
where it is not exposed to light causes the battery to run
down. Make sure the watch is exposed to light as much as
possible.
• When you are not wearing the watch on your wrist,
position the face so it is pointed at a source of bright
light.
• You should try to keep the watch outside of your sleeve
as much as possible. Even if the face of the watch is
blocked only partially from light, charging will be reduced
significantly.
• The watch continues to operate, even when it is not exposed to light. Leaving the
watch in the dark can cause the battery to run down, which will cause some watch
functions to be disabled. If the battery goes dead, you will have to re-configure watch
settings after recharging. To ensure normal watch operation, be sure to keep it
exposed to light as much as possible.
Bright light
Electrical
energy
All
functions
enabled.
LEVEL 1
LEVEL 2
LEVEL 3
Charge
Solar cell
(Converts light to
electrical power.)
Rechargeable battery
LEVEL 1
LEVEL 2
LEVEL 3 All
functions
disabled.
All functions disabled,
except for analog timekeeping
and stopwatch.
Dis-
charge
Battery charges in the light. Battery discharges in the dark.
• The actual level at which some functions are disabled depends on the watch model.
• Be sure to read “Power Supply” for important information you need to know
when exposing the watch to bright light.
If the analog hands aren t moving...’
If the analog hands aren’t moving, it means that the power saving mode has stopped
them to save battery power.
• See “Power Saving” for more information.
• The hands also stop whenever the battery level reaches Level 3.
About This Manual
• Button operations are indicated using the letters shown
in the illustration.
• Each section of this manual provides you with the
information you need in order to perform operations in
each mode. Further details and technical information
can be found in the “Reference” section.
30
Hour hand
Minute hand
Date
Second hand
Stopwatch second hand
24-hour hand
Day of the
week hand
30
30
30
Stopwatch ModeTimekeeping Mode
World Time Mode
Press
B D or .
Press D.
(When the stopwatch
is reset to all zeros.)
Press C.
General Guide
30
30
30
30
Manual Receive Receive Status Check
Transmitter Change
Timekeeping Mode
▲
▲
Press any button.
Hold down A
for about two seconds.
▲
▲
Press .A
Hold down A
for about five seconds.
Press .A
Time/Date Adjustment
▲
▲
3
0
Alarm Mode
▲
Press .C
▲
▲
Press .C
▲
▲
• About 1.5 seconds after you enter the World Time Mode or Alarm Mode from
another mode, the watch’s hands will start to move to the time setting for the mode
you entered. All button operations are disabled while the hands are moving. If you
need to pass through the World Time Mode or the Alarm Mode to get to another
mode, press (mode change) to advance to the next mode before the hands startC
moving.
Radio-controlled Atomic Timekeeping
This watch receives a time calibration signal and updates its time setting accordingly.
• Supported time calibration signals: Germany (Mainflingen), England (Anthorn),
United States (Fort Collins), Japan (Fukushima or Fukuoka/Saga).
• See the information under “Signal Reception Troubleshooting” if you experience
problems with time calibration signal reception.
Current Time Setting
This watch adjusts its time setting automatically in accordance with a time calibration
signal. You also can perform a manual procedure to set the time and date, when
necessary.
• The first thing you should do after purchasing this watch is to specify your
Home City, which is the city where you will normally use the watch. For more
information, see “To specify your Home City”.
• When using the watch outside the areas covered by the time calibration signal
transmitters, you will have to adjust the current time setting manually as required.
See “Timekeeping” for more information about manual time settings.
• The U.S. time calibration signal can be picked up by the watch while in North
America. The term “North America” in this manual refers to the area that consists of
Canada, the continental United States, and Mexico.
To specify your Home City
1. In the Timekeeping Mode, hold down A for about five
seconds. The watch will beep once after about two
seconds, and then twice after about three more seconds.
• This indicates the watch is in the setting mode.
•
Entering the setting mode will cause the stopwatch
second hand to move to the city code of the currently
selected Home City.
2. Use D to change the Home City setting.
• Each press of D causes the stopwatch second hand
to advance clockwise to the next city code.
• All hands (except for the second hand) and the date
display will change automatically to the applicable
settings for the currently selected city code. All button
operations are disabled while the hands and date
display are changing.
• Time calibration signal reception is supported when
any one of the city codes shown in the table below is
selected as your Home City.
30
30
City codeStopwatch
second hand
• In addition to the above, you also can select city codes that are outside the ranges
of the time calibration signal transmitters supported by this watch.
• Note that this watch does not have a city code that corresponds to Newfoundland.
3. After the Home City setting is the way you want, press to return to theA
Timekeeping Mode.
• Normally, your watch should show the correct time as soon as you specify your Home
City code. If it does not, it should adjust automatically after the next auto receive
operation. You also can perform manual receive or you can set the time manually.
German/U.K. Signal Japan Signal U.S. Signal
City
Code
LON
PAR
ATH
City Name
London
Paris
Athens
City
Code
HNL
ANC
LAX
City Name
Honolulu
Anchorage
Los Angeles
City
Code
DEN
CHI
NYC
City Name
Denver
Chicago
New York
City
Code
HKG
TYO
City Name
Hong Kong
Tokyo
• Even if the time calibration signal is received correctly, there are some times when
the analog hands may not indicate the correct time. If this happens, use the
procedures under “Adjusting the Home Positions” to check the home positions of the
hands, and make adjustments as required.
• You can also change the Home City setting by swapping the current Home City and
the currently selected World Time City. For details, see “Swapping your Home City
and World Time City”.
Daylight Saving Time (DST)
Daylight Saving Time (summer time) advances the time setting by one hour from
Standard Time. Remember that not all countries or even local areas use Daylight
Saving Time.
The time calibration signals transmitted from Mainflingen (Germany), Anthorn
(England), or Fort Collins (the United States) include both Standard Time and DST
data. When the Auto DST setting is turned on, the watch switches between Standard
Time and DST (summer time) automatically in accordance with the signals.
• Though the time calibration signal transmitted by the Fukushima and Fukuoka/Saga,
Japan transmitters include summer time data, summer time currently is not
implemented in Japan (as of 2007).
•The default DST setting is Auto DST ( ) whenever you select AUTO/AT LON, ,PAR
ATH, ANC, LAX, DEN, CHI, NYC, or TYO as your Home City code.
• If you experience problems receiving the time calibration signal in your area, it
probably is best to switch between Standard Time and Daylight Saving Time (summer
time) manually. For more information, see “To set the time and date manually”.

Operation Guide 4777
2
Time Calibration Signal Reception
There are two different methods you can use to receive the time calibration signal:
auto receive and manual receive.
• Auto Receive
With auto receive, the watch receives the time calibration signal automatically up to six
times a day. When any auto receive is successful, the remaining auto receive
operations are not performed. For more information, see “About Auto Receive”.
• Manual Receive
Manual receive lets you start a time calibration receive operation with the press of a
button. For more information, see “To perform manual receive”.
Important!
• When getting ready to receive the time calibration signal, position the watch as
shown in the nearby illustration, with its 12 o’clock side facing towards a window.
Make sure there are no metal objects nearby.
12 o’clock
or
• Make sure the watch is facing the right way.
• Proper signal reception can be difficult or even impossible under the conditions listed
below.
• Signal reception normally is better at night than during the day.
• Time calibration signal reception takes from two to seven minutes, but in some
cases it can take as long as 14 minutes. Take care that you do not perform any
button operations or move the watch during this time.
Inside or
among
buildings
Inside a
vehicle
Near a
construction
site, airport, or
other sources
of electrical
noise
Near high-
tension
power lines
Among or
behind
mountains
Near
household
appliances,
office
equipment,
or a mobile
phone
• The time calibration signal the watch will attempt to pick up depends on its current
Home City code setting as shown below. If you use the watch in Japan or Europe
(each of which has two different transmitter locations), it will try to receive the time
calibration signal from one of the transmitters in your current location. If it cannot
receive the signal, it will then try to receive the time calibration signal from the other
transmitter.
Home City Code
LON, PAR, ATH
HKG*, TYO
HNL*, ANC*, LAX,
DEN, CHI, NYC
Frequency
60.0 kHz
77.5 kHz
40.0 kHz
60.0 kHz
60.0 kHz
Transmitter
Anthorn (England)
Mainflingen (Germany)
Fukushima (Japan)
Fukuoka/Saga (Japan)
Fort Collins, Colorado
(the United States)
Home City Codes and Transmitters
* The areas covered by the HKG HNL, , and ANC city codes are quite far from the
time calibration signal transmitters, and so certain conditions may cause problems
with signal reception.
Reception Ranges
Anthorn
Mainflingen
500 kilometers
Fort Collins
600 miles
(1,000 kilometers)
Fukuoka/Saga
500 kilometers Fukushima
500 kilometers
U.K. and German Signals
U.S. Signal
Japan Signal
1,500 kilometers 2,000 miles
(3,000 kilometers)
1,000 kilometers
1,000 kilometers
• Signal reception may not be possible at the distances noted below during certain
times of the year or day. Radio interference may also cause problems with reception.
Mainflingen (Germany) or Anthorn (England) transmitters: 500 kilometers (310
miles)
Fort Collins (United States) transmitter: 600 miles (1,000 kilometers)
Fukushima or Fukuoka/Saga (Japan) transmitters: 500 kilometers (310 miles)
• Even when the watch is within the reception range of the transmitter, signal
reception will be impossible if the signal is blocked by mountains or other geological
formations between the watch and signal source.
• Signal reception is affected by weather, atmospheric conditions, and seasonal
changes.
About Auto Receive
The watch receives the time calibration signal automatically up to six times a day.
When any auto receive is successful, the remaining auto receive operations are not
performed. The reception schedule (calibration times) depends on your currently
selected Home City, and whether standard time or Daylight Saving Time is selected
for your Home City.
Your Home City Auto Receive Start Times
123456
LON
PAR
ATH
HKG, TYO
HNL, ANC, LAX,
DEN, CHI, NYC
Standard Time
Daylight
Saving Time
Standard Time
Daylight
Saving Time
Standard Time
Daylight
Saving Time
Standard Time
Standard Time
Daylight
Saving Time
1:00 am
2:00 am
2:00 am
3:00 am
3:00 am
4:00 am
Midnight
Midnight
2:00 am
3:00 am
3:00 am
4:00 am
4:00 am
5:00 am
1:00 am
1:00 am
3:00 am
4:00 am
4:00 am
5:00 am
5:00 am
Midnight
next day
2:00 am
2:00 am
4:00 am
5:00 am
5:00 am
Midnight
next day
Midnight
next day
1:00 am
next day
3:00 am
3:00 am
5:00 am
Midnight
next day
Midnight
next day
1:00 am
next day
1:00 am
next day
2:00 am
next day
4:00 am
4:00 am
Midnight
next day
1:00 am
next day
1:00 am
next day
2:00 am
next day
2:00 am
next day
3:00 am
next day
5:00 am
5:00 am
Note
• Auto receive is supported in all modes except while a stopwatch elapsed time
operation is in progress.
• Auto receipt of the calibration signal is designed to be performed early in the
morning, while you sleep (provided that the Timekeeping Mode time is set correctly).
Before going to bed for the night, remove the watch from your wrist, and put it in a
location where it can receive the signal easily.
• The watch receives the calibration signal for two to 14 minutes every day when the
time in the Timekeeping Mode reaches each of the calibration times. Do not perform
any button operation within 14 minutes before or after any one of the calibration
times. Doing so can interfere with correct calibration.
• Remember that reception of the calibration signal depends on the current time in the
Timekeeping Mode.
• Signal receive is cancelled if an alarm operation starts while it is being performed.
To perform manual receive
1. Place the watch on a stable surface so its 12 o’clock
side is facing towards a window.
2. In the Timekeeping Mode, hold down A for about two
seconds until the watch beeps.
3. The stopwatch second hand will move to R READY( ) to
indicate that the watch is setting up for time calibration
reception.
• The stopwatch second hand will move to W (WORK)
and stay there while actual reception is in progress.
• If signal reception is unstable during reception, the
stopwatch second hand may move between W (WORK)
and R (READY).
• The hour, minute, and 24-hour hands all continue to
keep time normally.
• The second hand will stop at “0”.*
* Some models show “60” instead of “0”.
30
30
W (WORK) R (READY)
Y (YES)
N (NO)
• Time calibration signal reception takes from two to seven minutes, but in some
cases it can take up to 14 minutes. Take care that you do not perform any button
operations or move the watch during this time.
• After signal reception is successful, the watch adjusts its hour, minute, 24-hour
hand, and second hand settings, and then returns to the Timekeeping Mode. Next,
the stopwatch second hand moves to ) momentarily to indicate that signalY (YES
reception was successful. After about five seconds, the stopwatch second hand
moves to 12 o’clock.
Note
• To interrupt a receive operation and return to the Timekeeping Mode, press any
button.
• If signal reception fails for some reason, the watch returns to normal timekeeping
without making any adjustments. Next, the stopwatch second hand moves to N (NO)
momentarily to indicate that signal reception failed. After about five seconds, the
stopwatch second hand moves to 12 o’clock.
• If the stopwatch second hand is pointing to Y ( (YES) or N NO), you can return to the
Timekeeping Mode by pressing any button.
Viewing the Latest Signal Reception Results
You can use the procedure below to check whether or not the last signal receive
operation was successful.
To check the latest signal reception results
In the Timekeeping Mode, press A.
• If the watch was able to perform a successful signal
receive operation during the last receive period, the
stopwatch second hand will move to Y (YES).
If the watch has been unable to receive any signal
successfully, the stopwatch second hand will move to
N NO( ).
• The watch will return to the Timekeeping Mode after five
seconds or when you press A.
• The current receive result is cleared when the first auto receive operation is
performed on the following day. This means ) indicates successful signalY (YES
reception since the start of the current day.
• If you adjust the time or date setting manually, the stopwatch second hand will move
to N (NO).
30
Produkt Specifikationer
Mærke: | Casio |
Kategori: | Ur |
Model: | GS-1100-1AER |
Vægt: | 92 g |
Dimensioner (BxDxH): | 46.8 x 15.2 x 49.8 mm |
Armbånd, materiale: | Resin |
Urkassens materiale: | Rustfrit stål |
Kalender: | Ja |
Stopur: | Ja |
Batteritype: | CTL1025 |
Slagfast: | Ja |
Urets glastype: | Mineral |
Alarmfunktion: | Ja |
Vandbestandig dybde: | 200 m |
Verdenstid funktkon: | Ja |
Radiosignal modtager: | DCF/MSF/WWVB/JJY |
Solenergi: | Ja |
Har du brug for hjælp?
Hvis du har brug for hjælp til Casio GS-1100-1AER stil et spørgsmål nedenfor, og andre brugere vil svare dig
Ur Casio Manualer

7 April 2025

7 April 2025

30 Marts 2025

22 December 2024

22 December 2024

21 December 2024

21 December 2024

21 December 2024

21 December 2024

21 December 2024
Ur Manualer
- Ur Asics
- Ur Ice Watch
- Ur Emos
- Ur Certina
- Ur Philip Watch
- Ur Hama
- Ur Misfit
- Ur Zuiver
- Ur Antelope Audio
- Ur Hermle
- Ur Spin Master
- Ur Speedo
- Ur Suunto
- Ur Clas Ohlson
- Ur Obaku
Nyeste Ur Manualer

9 Juni 2025

8 Juni 2025

8 Juni 2025

7 Juni 2025

7 Juni 2025

6 Juni 2025

6 Juni 2025

6 Juni 2025

6 Juni 2025

6 Juni 2025