English
GREAT BRITAIN • customer service
tel: 0845 300 9799 customerservice@clasohlson.co.uk www.clasohlson.com/uke-mail: internet:
1
2
3 4
Ver. 20140303
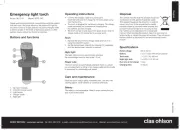
Earthed Plug-in Timer
Art.no 36-5573 Model 7GD/3A
Please read theentire instruction manual before using
theproduct and then save it for future reference.
We reserve theright for any errors in text or images and
any necessary changes made to technicaldata.
In theevent of technical problems or other queries,
please contact our customer services.
Safety
• Make sure that thelight or other load device
connected to thetimer is designed for use with
a230V AC, 50Hz power supply.
• Thetimer is only intended for indooruse.
• Make sure that theplug of theconnected load device
is pressed all theway into thesocket of thetimer.
• Never expose thetimer to impacts, shocks, rain or
moisture.
Disposal
This product should be disposed of in accordance with
local regulations. Ifyou are unsure how to proceed,
contact your local council.
Specifications
Rated voltage 230V, 50 Hz
Maxload 16Aresistive, 2Ainductive
Operating temperature 0–55ºC
Accuracy ±10 min/day
Setting Example: to switch alight on at 22:00 (10 pm) and off at
23:00 (11 pm):
1. Press in thefour segments from “22” to “23” on
thesettingdial.
2. Set thecurrent time by turning thesetting dial
clockwise until thecurrent time is indicated by
theblack arrow (2).
3. Set theselector switch (3) to to control TIMER
theon/off operations via thetimer.
4. Thelight will now come on at 22:00 and go off at
23:00 every day and will be off therest of thetime.
Connection
1. Set thedesired operating time on thetimer.
2. Make sure that thelight (or other load device) which
is plugged into thetimer is switched off before it is
plugged into thesocket of thetimer.
3. Plug thetimer into awall socket.
4. Set theselector switch (1) to desired position. The ON
position will bypass any settings on thedial and
thetimer socket will be on all thetime. Inthe TIMER
position thetimer socket will be controlled by
thesettingdial.
Care and maintenance
• Unplug thetimer from thewall socket before wiping it
clean with adrytowel.
• Thetimer should be unplugged from thewall socket if
it is not to be used for alongtime.
• Thetimer should be stored in adry, dust-freeplace.
1. Time segment
2. Current time indicator
3. Selector switch
4. Settingdial
• Themechanical timer can be set for up to 48 on/off
operations perday. Theminimum length of operation
(1 segment) is 15 minutes.
• Set theon/off operations by pressing in thesegments
(1) on thesetting dial (4).