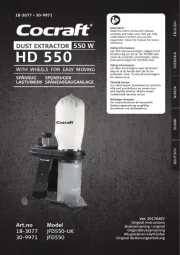
Cocraft DV2011B Manual


Læs gratis den danske manual til Cocraft DV2011B (4 sider) i kategorien Ikke kategoriseret. Denne vejledning er vurderet som hjælpsom af 18 personer og har en gennemsnitlig bedømmelse på 4.4 stjerner ud af 9.5 anmeldelser. Har du et spørgsmål om Cocraft DV2011B, eller vil du spørge andre brugere om produktet?

Side 1/4
GREAT BRITAIN
For consumer contact, please visit www.clasohlson.co.uk
and click on customer service.
Stud Detector
Art.no 40-8158 Model DV2011B
Please read the entire instruction manual before using the product and save it
for future reference. We reserve the right for any errors in text or images and
any necessary changes made to technical data. If you have any questions
regarding technical problems please contact our customer services.
Safety
Be when hammering in nails, or when sawing or drilling into a wall, CAREFUL
oor or ceiling where there is a possibility of striking live wires, pipes, etc.
The normal distance between centres of studs is 16 or 24 (40 or 60 cm)
and they are normally 1 2 (25–50 mm) in width. If you receive readings that
deviate from this standard, you should investigate before proceeding. Always
turn off the mains electricity before beginning to drill, saw or nail near cables.
Product description
Multi-detector used for nding metal pipes, live electrical wires and joists/
battens. LCD display with indication segments and an audible signal which
assist in object detection. The user can choose one of four manual operation
modes, each with an audible detection signal.
Getting started
Inserting the battery
1. Remove the battery cover.
2. Connect a 9 V battery to the battery wires.
3. Make sure that the battery wires are not crushed when inserting the battery.
4. Ret the battery cover.
Buttons and functions
Display
3. Mark where the edge is and then continue scanning the stud. past
Work your way back towards the stud from the other side and locate and
mark the other edge of the stud. The centre of the stud is halfway between
the two marks.
1. Live wire symbol.
2. STUD: Scan for wooden battens.
3. METAL: Scan for metal.
4. DEEP: Scan for wooden battens
hidden deeper.
5. AC: Scan for live electrical wiring.
6. Location indicator with several segments.
Operation
Calibration
Note: The stud detector automatically recalibrates every time the button on
the side is pressed.
1. Hold the detector steady against the surface to be scanned.
2. Press [ ] to turn on the stud detector.
3. Press [ ] to set the desired mode: STUD – METAL – DEEP – AC.
4. Depress the button on the side of the stud detector. When the detector
has been calibrated, three short audible signals will be emitted.
Note: The stud detector must be kept still during calibration.
Note: Depress the button on the side the entire time during calibration and scanning.
Scanning for metal
1. Calibrate the detector as described above.
2. Move the detector both horizontally and vertically over the surface
being scanned.
3. When a metal object is detected, an audible signal will be emitted and
the location indicator will be shown on the display. When all segments
show on the display, a metal object has been found.
4. Turn off the alarm by pressing [ ]. If the stud detector is not turned off
manually it turns off automatically after one minute to save power.
Scanning for studs
1. Calibrate the detector as described above.
2. Move the stud detector in one direction over the surface being scanned.
When the detector gets close to a stud an audible signal will be emitted
4. Turn off the alarm by
pressing [ ]. If the stud
detector is not turned off
manually it turns of
automatically after one
minute to save power.
Deep stud scan (up to 38 mm)
1. Calibrate the detector as described above.
2. Move the stud detector in one direction over the surface being scanned.
When the detector gets close to a stud an audible signal will be emitted
and the side segments of the location indicator will appear on the display.
When all of the segments have appeared the arrow on the display will
point at the edge of the stud.
3. Mark where the edge is and then continue scanning past the stud. Scan
back towards your mark to locate the other edge of the stud and then make
another mark. The centre of the stud is halfway between these two marks.
4. Turn off the alarm by pressing [ ]. If the stud detector is not turned off
manually it turns off automatically after one minute to save power.
Scanning for electrical wiring (AC)
1. Calibrate the detector as described above.
2. Move the detector over the area to be scanned.
3. When the detector gets close to a live electrical wire, an audible signal will
be heard and the side segments of the location indicator will appear on
the display. The live wire symbol will also appear. When all segments are
shown on the display, the arrow in the middle will point to the live wire.
4. Turn off the alarm by pressing
[ ]. If the stud detector is not
turned off manually it turns off
automatically after one minute
to save power.
Troubleshooting guide
Problem: The detector beeps as soon as it is placed against the wall (surface).
1. Place the detector against the wall (surface) while it is turned .  OFF
Press [ ] to turn on the stud detector.
2. Calibrate the detector as described above.
3. Once calibrated the detector can be moved sideways. The detector
beeps when it locates a stud which is thicker than the material in the wall
at the place of calibration.
4. If no studs are found, it might be because the detector was calibrated
directly over a stud, in that case repeat the calibration procedure at
another location.
5. Always check before scanning that the felt pads are pressed against
the surface to be scanned.
Disposal
When it is time to dispose of this product, do so in accordance with local
regulations. If you are unsure how to proceed, contact your local authority.
Specifications
Operating temperature -2 ºC to + 45 ºC
Max. air humidity 80 % RH
Max time for calibration 5 seconds
Battery 1 x 9 V (6F22)
If the battery power is low the detector automatically shuts off.
If the stud detector is left on for more than one minute it shuts off automatically.
Mode Max scan depth Accuracy
STUD 19 mm 3 mm
DEEP 38 mm 5 mm
METAL 50 mm 6 mm
AC 50 mm -
and the side segments of
location indicator will appear
on the display. When all of
the segments have appeared
the arrow on the display will
point at the edge of the stud.
6
1
2 3 4 5
SVERIGE KUNDTJÄNST Tel: 0247/445 00, Fax: 0247/445 09
E-post: kundtjanst@clasohlson.se, internet: www.clasohlson.se
Regeldetektor
Art.nr 40-8158 Modell DV2011B
Läs igenom hela bruksanvisningen före användning och spara den sedan för
framtida bruk. Vi reserverar oss för ev. text- och bildfel samt ändringar av
tekniska data. Vid tekniska problem eller andra frågor, kontakta vår kundtjänst.
Säkerhet
Var när du spikar, sågar och borrar i väggar, golv och tak där det FÖRSIKTIG
kan nnas kablar, rör etc. Normalt centrumavstånd mellan reglar (i Sverige)
är 60 eller 40 cm, och de har en bredd av 25-50 mm, var misstänksam mot
indikeringar med annat avstånd eller bredd. Stäng alltid av strömmen innan
du borrar, sågar eller spikar nära en kabel.
Produktbeskrivning
Multidetektor för metall, strömförande elledningar och träreglar, utrustad med
LCD-display. En summer hjälper dig att hitta objekt. Välj mellan 4 manuella
lägen för att hitta bestämda objekt med summerljud.
Att komma igång
Sätt i batteriet
1. Öppna batteriluckan.
2. Anslut ett 9 V-batteri till batterikabelns kontakt.
3. Placera batteriet på sin plats utan att kabeln kommer i kläm eller skadas.
4. Stäng batteriluckan.
Knappar och funktioner
Display
3. Markera kanten och fortsätt sökningen regeln. Sök sedan tillbaka förbi
mot föregående markering igen för att hitta den andra kanten och
markera den. Regelns centrum är mitt mellan dessa markeringar.
1. Symbol för strömförande elledning.
2. STUD: Sök efter träregel.
3. METAL: Sök efter metall.
4. DEEP: Sök efter träreglar på större djup.
5. AC: Sök efter strömförande elledningar.
6. Nivåindikator med era steg.
Användning
Kalibrering
Obs! Regeldetektorn kalibreras automatiskt varje gång knappen på sidan
trycks in.
1. Håll detektorn stilla mot den yta som ska avsökas.
2. Tryck [ ] för att slå på detektorn.
3. Tryck [ ] för att ställa in önskad mätmetod: STUD – METAL – DEEP – AC.
4. ll in knappen sidan. När kalibreringen är klar piper summern tre gånger.
Obs! Regeldetektorn måste hållas stilla under kalibreringen.
Obs! ll in knappen på sidan hela tiden under kalibreringen och hela mätningen.
Sök efter metall
1. Kalibrera regeldetektorn enligt ovan.
2. För detektorn både horisontellt och vertikalt över ytan som ska avsökas.
3. När detektorn närmar sig ett metallobjekt piper summern och nivåin-
dikatorn visas på displayen. När alla segment visas på displayen är ett
föremål av metall funnet.
4. För att stänga av, tryck [ ]. Om inte regeldetektorn stängs av manuellt
stängs den av automatiskt efter en minut för att spara ström.
Sök efter reglar
1. Kalibrera regeldetektorn på det sätt som beskrivs ovan.
2. För regeldetektorn åt ett håll över ytan som ska avsökas.
När detektorn närmar sig en regel piper summern och nivåindikatorn börjar
visas displayen. När alla segment nivåindikatorn visas är kanten
regeln funnen.
4. För att stänga av, tryck [ ].
Om inte regeldetektorn
stängs av manuellt stängs
den av automatiskt efter en
minut för att spara ström.
Sök efter träreglar på djupet (upp till 38 mm)
1. Kalibrera regeldetektorn på det sätt som beskrivs ovan.
2. För detektorn åt ett håll över ytan som ska avsökas.
När detektorn närmar sig en regel piper summern och nivåindikatorn
börjar visas på displayen. När alla segment på nivåindikatorn visas är
kanten på regeln funnen.
3. Markera kanten och fortsätt sökningen regeln. Sök sedan tillbaka förbi
mot föregående markering igen för att hitta den andra kanten och mar-
kera den. Regelns centrum är mitt mellan dessa markeringar.
4. För att stänga av, tryck [ ]. Om inte regeldetektorn stängs av manuellt
stängs den av automatiskt efter en minut för att spara ström.
Sök efter elledningar
1. Kalibrera regeldetektorn på det sätt som beskrivs ovan.
2. För detektorn över ytan som ska avsökas.
3. När detektorn närmar sig en strömförande elledning piper summern och
nivåindikatorn börjar visas på displayen. En symbol för spänningsförande
elledning visas också. När alla segment visas på displayen är en ström-
förande elledning funnen.
4. För att stänga av, tryck [ ].
Om inte regeldetektorn
stängs av manuellt stängs
den av automatiskt efter en
minut för att spara ström.
Felsökningsschema
Fel: Detektorn piper direkt när den placeras mot väggen (ytan).
1. Placera detektorn AVSTÄNGD mot väggen (ytan). Tryck [ ] för att slå på
regeldetektorn.
2. Kalibrera detektorn, se avsnitt ovan.Kalibrering
3. När kalibreringen är klar kan detektorn föras i sidled. Detektorn piper när
en regel hittas som har större tjocklek än vad som fanns i väggen vid
kalibreringsplatsen.
4. Om ingen regel hittas kan det bero på att detektorn kalibrerades direkt
över en regel, gör då om kalibreringen på en annan plats.
5. Kontrollera alltid innan mätning att regeldetektorns ltkuddar ligger an
mot underlaget.
Avfallshantering
När du ska göra dig av med produkten ska detta ske enligt lokala föreskrifter.
Är du osäker på hur du ska gå tillväga, kontakta din kommun.
Specifikationer
Användningstemperatur -2 ºC till 45 ºC
Max luftfuktighet 80 % RH
Maximal tid för kalibrering 5 sekunder
Batteri 1 x 9 V (6F22)
Om batterispänningen är för låg stängs detektorn automatiskt av.
Om detektorn lämnas påslagen i mer än en minut stängs den automatiskt av.
Inställning Max sökdjup Noggrannhet
STUD 19 mm 3 mm
DEEP 38 mm 5 mm
METAL 50 mm 6 mm
AC 50 mm -
6
1
2 3 4 5


Produkt Specifikationer

Mærke: Cocraft
Kategori: Ikke kategoriseret
Model: DV2011B

Har du brug for hjælp?

Hvis du har brug for hjælp til Cocraft DV2011B stil et spørgsmål nedenfor, og andre brugere vil svare dig


Ikke kategoriseret Cocraft Manualer

Cocraft

Cocraft HS2800N Manual

8 September 2024
Cocraft

Cocraft HI 450 Manual

8 September 2024
Cocraft

Cocraft LS4T Manual

8 September 2024
Cocraft

Cocraft HD 550 Manual

19 August 2024
Cocraft

Cocraft HH 2000-E Manual

15 August 2024
Cocraft

Cocraft 40-7818 Manual

14 August 2024
Cocraft

Cocraft HS 50-L Manual

14 August 2024
Cocraft

Cocraft HI 2000 Manual

14 August 2024
Cocraft

Cocraft 40-6925 Manual

13 August 2024
Cocraft

Cocraft LXC MT18 Manual

13 August 2024

Ikke kategoriseret Manualer

Nyeste Ikke kategoriseret Manualer