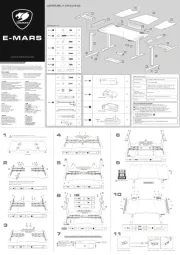
DISCLAIMERS
● COUGAR products should not be used as critical components in life support devices.
● COUGAR is not liable for any damage of life and limb or damage or loss of property caused by or during
COUGAR products’ use as or with medical equipment, military equipment, traffic equipment and disaster
prevention systems.
● COUGAR's warranty liability is limited to repair or replacement. The decision on whether to repair
or replace belongs exclusively to COUGAR.
● COUGAR is, to the extent not prohibited by law, not liable for any damages; expenses; lost data,
revenues, savings or profits; or any incidental or consequential damages happened while the use
of a defective product from COUGAR or due to its use.
WARRANTY AGREEMENT
● If the product has defects in material or manufacture, COUGAR will provide product repair and
replacement service within the warranty period.
● Our warranty service is based on the date of the invoice or warranty card.
WARRANTY PERIODS OF COUGAR GAMING DEVICES
Product : COUGAR E-MARS GAMING DESK
Warranty : 1 Year
This warranty gives you specific legal rights. You may also have other rights granted under local law.
These rights may vary.
CONDITIONS WHERE FREE MAINTENANCE IS NOT PROVIDED
● Any fault or damage caused by natural disasters (including storm, fire, flood, thunder, earthquake, etc).
● Any fault or damage caused by accidental factors and man-made reasons (including hit, scrape, crash,
moving, compression, stain, corrosion, riot, misuse, malicious damage, etc).
● Use in an improper operating environment (including high temperature, high humidity, water inflow, etc).
● Inability to provide the product warranty card, purchase receipt or invoice to prove the product is still
within the warranty period and the shipping date of the product is out of warranty.
● The warranty card has been altered or its number is hard to identify.
● The warranty period has expired.
● Any fault or damage caused by non-compliance with regulations stated on the user manual or improper,
rough and careless treatment.
● Any fault or damage caused by use of parts not certified by COUGAR original manufacturer.
● The problem is caused by improper repair or adjustment by the buyer or any manufacturer without
authorization from COUGAR.
● The product is not acquired from an authorized distributor of the company or is acquired from illicit sources.
● Paper carton, instruction and other accessories are not warranted.
This manual was created by Compucase Enterprise and may not be completely or partially
copied, passed on, distributed or stored without written consent by Compucase Enterprise.
COUGAR® is a registered brand of Compucase Enterprise Other product and company names
mentioned in this documentation may be brands or trademarks of their respective owners.
Compucase Enterprise reserves the right to make changes concerning the contents of the
manual and the technical data of the product without previous announcement.
Compucase Enterprise Co.,Ltd.
No. 225, Lane 54, An Ho Road Sec. 2 Tainan, Taiwan, R.O.C
Tel:+886-6-356-0606
Compucase Enterprise Co.,Ltd. All rights reserved. Made in China
COUGAR USA Technical Service
Tel: (833) 256-3778
Mail: rma@compucaseusa.com
Service email : https://cougargaming.com/support/contact/upload/
● Please wear protective gloves when assembling the Desk. It is your own responsibility to use
appropriate protection to prevent any physical damage.
● Do not use abrasive products or scrub energetically when cleaning. Please stick to gentle products
suitable for delicate materials.
● All parts should be checked monthly to confirm their integrity and to make sure that the screws
are not loose.
● If any part of the product is or appears to be damaged, missing or loose, please contact the local
distributor and do not use the product. WARNING facebook.com/cougargaming
youtube.com/user/COUGARGLOBAL
Connecting Monitor Extension Cable to Notebook
Inputs and Outputs of Desk Controller
HOW TO SYNCHRONIZE BETWEEN RGB CONTROL MODES
Connecting dual side wing to controller
Made in China
x4
TROUBLESHOOTING
I )ssues(s
Desk does not go up or down
Columns do not go up evenly.
Desk wobbles pretty excessively.
Desk is unusually noisy
S t nolu io
ERROR CODE FOR DESK WITH MEMORY CONTROLLER
T t s o he digi al display s thows he error code below t suggest the issues tha usert s
may encounter during he t operation.
No re s e o m pl e elt t c t y
S t nol u i o
Ov cter us e pr o te io n
Un ba l an c e pro io te c t n
A nt ni- coll is io
M1 M o or ov er- ur ren pro ec iot c t t t n
M2 M o or ov er- ur ren pro ec iot c t t t n
No s e ns or ro m H al l f M 1
No s e ns or ro m H al l f M 2
No urre n rom c t f M 1
E erro r C od
E00
E01
E02
E 30
T -t ch t t nE 4 o u P ro e c io0
E11
E12
E21
E22
E3 1
E3 M2No c u rre nt f ro m 2
LIFTING CONTROLS
3-digit display shows the height of the desk.
Memory functionality (4 settings)Lever switch for up and down
088
1 2 3 4
Right wing RGB connector
e
Mic connector
f
Speaker Connector
g
USB 3.0
h
Left wing RGB
connector
d
Controller connector
c
RGB switch button
i
Power for Left &
Right RGB Wings
b
USB 3.1
TYPE-C
a
Monitor extension
j
STEP .2
Monitor
HDMI
HDMI
STEP .1
Exclusive Monitor Extension Cable
Notebook
Monitor Extension
x1
Exclusive Monitor Extension Cable
Back of Desk
Front of Desk
USB 3.0 Extension to PC
f
g
h
Connect to Lifting Controller for RGB wing power
b
0P1
23 4
070
1 2
Simultaneously press the preferred memory buttons (1,2,3,4) with scrolling down or
up lever switch for 3 seconds, once the display shows P1 or P2 or P3 or P4, means
the position is memorized. Then, just press button 1,2,3, or 4 to move the desk to
memorized position.
For the first time, please conduct the combo buttons by pressing button 3 and 4
simultaneously for 8 seconds.
Continue pressing the buttons until both columns are in the lowest position.
When finished with the reset, the control box makes a beep sound and
the buttons can be released. Then, the display will show starting height.
Side wing connector
Male ConnectorFemale
RGB connector
Connecteur RGB
Left wing RGB connector Right wing RGB connector
Desk Controller
de
Screwed on the back panel of PC
Expand
other devices
5V Addressable RGB Header:
for Compatible ASUS, MSI ,
Gigabyte or ASRock Motherboards
x1
x1
x1
x1
Check all connections. Make sure the power cord is
plugged into the control box and a power outlet. Unplug
the power cord and reconnect after 10 seconds.
Reset the desk. If the problem persists, switch motor
cables from one port to another at the control box and
re-initialize one more time. If you have been using the
desk continuously for 2 minutes, non-movement might
be due to overheating. Stop using the desk for 10
minutes and let it cool down.
Unplug the power cord and re-plug after 10 seconds.
Reset the desk. If the problem persists, switch motor
cables from one port to another at the control box and
re-initialize one more time.
It is normal that the desk wobbles slightly at standing
height when in use. Make sure all the screws are
tightened and adjust leveling studs if the floor is
uneven.
It is normal that the desk is noisier when one stage
extends into the other. Apply silicone-based lubricant if
it is unusually noisy.
Reset may be needed from time to time in events like non-movement, uneven movement,
sudden power outage, over-load, overheat, etc. For most electronic devices, reset is simply a
power-off and a power-on. This desk has dual motors. The reset involves more than a
conventional power-off and power-on as both motors need to be synchronized. The reset
process is the same as initialization. If your desk has a memory controller, press, and hold both
UP and DOWN arrow buttons, and release both buttons when 000 appears. If your desk has a
basic 2-button controller, press, and hold the UP and DOWN arrow buttons for 3 seconds, and
then release both buttons. The desk will first go to the lowest position, then the highest position,
and finally stop in between.
c
Audio Extension to PC
E-MARS featured an automatic safety brake, which is for preventing the careless obstacle
in-between or severe shakes while adjusting the heights.
However, it is highly suggested to avoid the children underneath or clear the stuff under the
table as the height adjustment.
Make sure the type-C connector from the
notebook with projection feature.
Press and hold the RGB button for 3 seconds to Motherboard Driver RGB Control
mode, and the RGB button’s LED will be turned off. Adjust LED options from the
software of Motherboard and the synchronization will start.
If you need to return to default mode, just press the RGB button for 1 second.