Crestron CLX-2DIMFLV8 Manual


Læs gratis den danske manual til Crestron CLX-2DIMFLV8 (2 sider) i kategorien Ikke kategoriseret. Denne vejledning er vurderet som hjælpsom af 50 personer og har en gennemsnitlig bedømmelse på 4.3 stjerner ud af 25.5 anmeldelser. Har du et spørgsmål om Crestron CLX-2DIMFLV8, eller vil du spørge andre brugere om produktet?

Side 1/2
CLT-2DIMFLV8/CLX-2DIMFLV8
Terminal Block and Module
Installation Guide
Description
Control up to eight channels of dimmable lighting using the Crestron
®
CLX-2DIMFLV8
dimming module. The module controls 0-10 V dimmable uorescent ballasts and LED
drivers. Install the dimming module in a CAEN or CAEN-MLO enclosure (sold separately)
The dimming module is available in 120 VAC (CLX-2DIMFLV8) and 277 VAC
(CLX-2DIMFLV8-277) models that accept up to two single-phase 16 A power feeds. The
power feed phases can be the same or different (for example, A-A or A-B).
The color-coded CLT-2DIMFLV8 terminal block facilitates quick and simple wiring within the
enclosure. The terminal block is typically installed before the dimming module which allows
the eld wiring to be completed and tested for the installation and wiring of the module.
Important Safeguards
When using electrical equipment, basic safety precautions should always be followed,
including the following:
Read and follow all safety instructions.
Do not use outdoors.
Do not mount near gas or electric heaters.
Equipment should be mounted in locations and at heights where it will not be
subjected to tampering by unauthorized personnel.
The use of accessory equipment not recommended by the manufacturer may cause
an unsafe condition.
Do not use this equipment for other than its intended use.
All servicing should be performed by qualied service personnel.
If any Emergency Circuits are fed or controlled from this panel, it must be located
electrically where fed from a UPS, generator, or other guaranteed source of power
during emergency and power outage situations.
Save these instructions.
Installation Overview
The terminal black installs along the left side of a single-wide enclosure and along the
outside edges of double-wide enclosures. The dimming module installs along the right side
of a single-wide enclosure and side-by-side in the center of a double-wide enclosure. Refer
to the illustration below for the layouts.
CAUTION: This equipment is for indoor use only and needs to be air cooled. Mount in
a well-ventilated area. The ambient temperature must be 32° to 104 °F (0° to 40 °C). The
relative humidity must be 0% to 90% (noncondensing).
NOTE:
Rotate the terminal block and the dimming module 180-degrees when installing
them on the right side of a double-wide enclosure.
Both left-side and right-side adhesive wiring labels are provided. The left-side
labels are used in both single- and double-wide enclosures. The right-side labels
are used only in double-wide enclosures.
Modules and terminal blocks must be installed into the lowest available spaces
and continue toward the top of the enclosure.
Unless otherwise indicated, the lighting system specied in this guide is modular,
requiring assembly in the eld by a licensed electrician in accordance with all
national and local codes. If an assembled UL
®
Listed panel is required, Crestron
offers this service through its UL Listed panel shop. This includes complete in-
factory system conguration and assembly by Crestron for an additional fee.
A licensed electrician must mount the terminal block and module into an
enclosure in accordance with all national and local codes.
When connecting to an arc fault breaker, ensure the load does not exceed 1,000
watts total. Crestron certied breakers have a 2,000-watt limit.
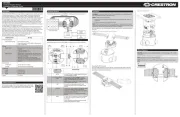
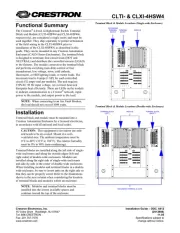
Terminal Block and Module Layout for a Single-Wide Enclosure
Ground bus CLT- terminal block CLX- module
Terminal Block and Module Layout for a Double-Wide Enclosure
Ground bus
CLT- terminal block CLT- terminal blockCLX- module
Install and Wire the Terminal Block
WARNING: The dimming module may be powered from multiple circuit breakers.
Install the Terminal Block
1. Turn the power OFF at the circuit breaker or fuse panel.
2. Remove the backing from the left- or right-side adhesive wiring label. Align the holes
on the label with the holes on the enclosure and attach the label to the enclosure.
3. Secure the terminal block to the enclosure using the two supplied self-tapping
Phillips pan head screws (8B x 1/4-inch L). The wiring label lies beneath the terminal
block.
CAUTION: Bypass jumpers are provided to test the circuits and to protect the
module during installation. When properly secured by ve screws, the jumpers on
the black and red sections of the terminal block shorts line in to dim out so that
the circuit is energized. Do not remove the bypass jumpers until all feed and load
wiring has been completed, the circuit has been tested for electrical faults, and the
module has been installed. Refer to Module Installation and Wiring for details.
Do not remove the two jumpers on the white sections of the terminal bock that tie
the neutral in and neutral out wires.
NOTE: Use copper conductors only, rated 75 °C or greater.
Wire the Terminal Block
1. Connect the feed (Line and Neutral) and the load (controlled circuit) wires to the
terminal block. For 2-feed systems, the two power feeds can be different phases.
Follow the labeling on the wiring label. When connecting wires:
Use 14-10 AWG wire.
Strip wire to 1/2 in (13 mm).
Tighten the terminal blocks to 9 in-lb.
2. Connect the Ground wires to the ground bus inside the enclosure:
Strip wire to 1/2 in (13 mm).
Tighten 14-10 AWG wire to 35 in-lb.
Tighten 8 AWG wire to 40 in-lb.
Tighten 6-4 AWG wire to 45 in-lb.
Wiring the Terminal Block to the Feed and Load(s)
(Single-Wide and Left-Side Double-Wide Enclosures)
LINE 1
Connection from a 15
or 20 A circuit
breaker
Bypass
jumpers
Terminal
block
To loads
Left-side
wiring label
LINE 2
Connection from a 15
or 20 A circuit
breaker
Ground
bus
Module
location
label
NEUTRAL
NEUTRAL
GND
Wiring the Terminal Block to the Feed and Load(s) (Right-Side Double-Wide Enclosures)
LINE 1
Connection from a 15
or 20 A circuit
breaker
Bypass
jumpers
Terminal
block
To loads
Right-side
wiring label
LINE 2
Connection from a 15
or 20 A circuit
breaker
Ground
bus
Module
location
label
NEUTRAL
NEUTRAL
GND
Test the Terminal Block Wiring:
1. Turn the power ON at the circuit breaker or fuse panel.
2. Verify that the circuit breakers do not trip.
3. Verify that the power is delivered to the proper loads.
4. Repeat steps 1-3 for the other circuit breaker.


Produkt Specifikationer

Mærke: Crestron
Kategori: Ikke kategoriseret
Model: CLX-2DIMFLV8
Type: Lysdæmper
Vekselstrømsindgangsspænding: 120 V
Bredde: 176 mm
Dybde: 84 mm
Højde: 191 mm
Relativ luftfugtighed ved drift (H-H): 10 - 90 %
Driftstemperatur (T-T): 0 - 40 °C

Har du brug for hjælp?

Hvis du har brug for hjælp til Crestron CLX-2DIMFLV8 stil et spørgsmål nedenfor, og andre brugere vil svare dig


Ikke kategoriseret Crestron Manualer
Crestron

Crestron HZ2-AUX Manual

7 Oktober 2025
Crestron

Crestron PW-2407WUL Manual

29 September 2025
Crestron

Crestron C2N-UNI8IO Manual

28 September 2025
Crestron

Crestron CLXI-4HSW4 Manual

24 September 2025
Crestron

Crestron GLD-LED-50W Manual

24 September 2025
Crestron

Crestron TPS-4LW Manual

23 September 2025
Crestron

Crestron Zūm Manual

23 September 2025
Crestron

Crestron SIMPL Manual

23 September 2025
Crestron

Crestron UC-FCM-T Manual

23 September 2025

Ikke kategoriseret Manualer

Nyeste Ikke kategoriseret Manualer