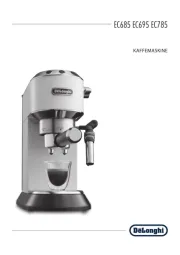
DeLonghi Bar M 39 Grande Manual

DeLonghi Kaffemaskine Bar M 39 Grande

Læs gratis den danske manual til DeLonghi Bar M 39 Grande (6 sider) i kategorien Kaffemaskine. Denne vejledning er vurderet som hjælpsom af 44 personer og har en gennemsnitlig bedømmelse på 4.5 stjerner ud af 22.5 anmeldelser. Har du et spørgsmål om DeLonghi Bar M 39 Grande, eller vil du spørge andre brugere om produktet?

Side 1/6
6
IMPORTANT SAFEGUARDS
When using electrical appliances, basic safety precautions should always be followed, including the following:
Read all instructions.
Do not touch hot surfaces. Use handles and knobs.
To protect against fire, electrical shock and personal injury, do not immerse cord, plug or appliance in
water or other liquid.
Close supervision is necessary when any appliance is used by or near children.
Unplug from the outlet when not in use and before cleaning. Allow to cool before fitting or taking off
parts, and before cleaning the appliance.
-Do not operate with a damaged cord or plug, or after the appliance malfunctions, or has been dama
ged in any manner. Return the appliance to the nearest authorized service facility for examination,
repair or adjustment.
The use of accessory attachments or spare parts not recommended by the appliance manufacturer may
result in fire, electrical shock or personal injury.
Do not use outdoors.
Do not let the cord hang over the edge of the table or counter, or touch hot surfaces.
Do not place on or near a hot gas or electrical burner, or in a heated oven.
Always attach plug to appliance first, then plug cord into the wall outlet. To disconnect, turn any control
to “off”, then remove plug from wall outlet.
Do not use the appliance for other than the intended use.
DO NOT unscrew or remove boiler cap while the machine is in operation. Wait until brewing cycle is
completed and all water and steam has been used up.
SAVE THESE INSTRUCTIONS
SHORT CORD INSTRUCTIONS
- A short power cord is provided to reduce risks resulting from becoming entangled in or tripping over a
longer cord.
- Longer, detachable power supply cords or extension cords are available and may be used if care is
exercised in their use.
- If an extension cord is used, the marked electrical rating should be at least as great as the electrical
rating of the appliance. If the appliance is provided with 3- wire, grounding type cord, the extension
should be a GROUNDING TYPE 3 - WIRE CORD. The longer cord should be arranged so that it will not
drape over the counter-top or table top where it can be pulled on by children or tripped over.
- Your product is equipped with a polarized alternating current line plug (a plug having one blade wider
than the other). This plug will fit into the power outlet only one way. This is a safety feature. If you are
unable to insert the plug fully into the outlet, try reversing the plug. If the plug should still fail to fit, contact
your electrician to replace your obsolete outlet. Do not defeat the safety purpose of the polarized plug.
CAUTION
This appliance is for household use only. Any servicing, other than cleaning and user maintenance, should
be performed by an authorized service representative.
Do not immerse base in water.
To reduce the risk of fire or electric shock, do not dis-assemble the base. No user serviceable parts inside.
Repair should be done by authorized service personnel only.
Check voltage to be sure that the voltage indicated on the name plate agrees with your voltage.
Never use warm or hot water to fill the water container! Use cold water only!
Keep your hands and the cord away from hot parts of the appliance during operation.
Never clean with scouring powders or hard implements.
39 USA/GB 9-06-2000 10:22 Pagina 6
7
DESCRIPTION OF THE APPLIANCE
1 Cup warmer
2 Compartment for accessories
3 Steam outlet lever
4 Level indicator
5 Power cord
6 Water tank
7 “Cappuccino” nozzle (if fitted)
8 Anti-scalding guard
9 Steam outlet tube
10 Pressure gauge (if fitted)
11 ON/OFF switch
12 Coffee dispenser switch
13 Steam switch
14 ON/OFF indicator light
15 Coffee-ready indicator light
16 Steam-ready indicator light
17 Automatic coffee press
18 Filter for “serving illycaffè”* or coffee pods
19 2-cup filter
20 1-cup filter
21 Boiler outlet
22 Filter lock
23 Filter holder
24 2-cup adaptor
25 Mesuring/pressing spoon
26 Drip tray
27 Grid for cups
* Serving Illycaf : a single serving (7 grams)
of 100 % “arabic” coffee, pressurized to pre-
serve the flavours. Specially ground, measu-
red out, tamped down and packed between
two layers of special filter paper.
USING THE COFFEE-MAKER FOR THE
FIRST TIME
Remove the packaging and take out the bag contai-
ning the accessories. When the appliance is new, the
following accessories must be washed with lukewarm
water and detergent then rinsed thoroughly: filter
holder, measuring,lters, water tank, 2 cup adaptor,
pressing spoon. The internal circuit of the coffee-
maker must then be pre-washed as fol lows:
Filling the tank
Remove the reservoir by pulling it sideways, at the
same time lifting the tubes (fig. 1).
Rinse the reservoir and fill with fresh water up to
the upper mark (fig. 2). Inspection of the water
level is facilitated by a ball-shaped float. Replace
the reservoir in its housing, ensuring that the tubes
are immersed in the water (fig. 3).
A simpler way of filling the reservoir is to pull it
out just enough to be able to pour in water direc-
tly from a jug.
Remember to clean the reservoir regularly.
Pre-washing
Plug in at the power socket, remembering the
safety instructions.
Press the ON/OFF switch (11). The ON/OFF
pilot lamp will switch on (14) (fig. 4).
Press the delivery switch (12). The pump will
switch on (fig. 5).
Wait until water begins to flow from the boiler
nozzle (fig. 6), then press the delivery switch
again.
After about 2 minutes, the “OK pilot lamp
will light (15) (fig. 7).
Press the delivery button again (12) allowing
water to flow from the boiler nozzle (fig. 6).
After 15/20 seconds, press the delivery button
again to interrupt the flow of water from the
nozzle (12).
Wait until the water in the boiler returns to the
correct temperature. When the OK pilot lamp
lights, repeat the previous operation.
To ensure perfect pre-washing, repeat the above
procedure at least five or six times.
The machine is now ready for use.
Features
To fit the filter-holder, place it under the boiler
nozzle (fig. 8). Then push the filter-holder
upwards and at the same time rotate it towards
the right .as far as it will go
A handy compartment in the lower section of the
casing can be used to store the measuring spoon
(fig. 9).
Cups can be placed on the shelf (fig. 10) for war-
ming and draining. If the machine is left switched
on for a while, the cups on the shelf will be war-
med.
‘serving illycaffè’ brand coffee pods may also
be used for easier and faster coee making.
These not only give the correct measure of
coffee, they also make cleaning easier. Other
types of pod may not give such good results.
39 USA/GB 9-06-2000 10:22 Pagina 7


Produkt Specifikationer

Mærke: DeLonghi
Kategori: Kaffemaskine
Model: Bar M 39 Grande

Har du brug for hjælp?

Hvis du har brug for hjælp til DeLonghi Bar M 39 Grande stil et spørgsmål nedenfor, og andre brugere vil svare dig