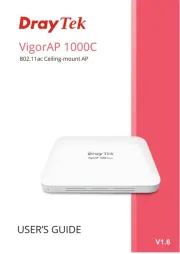
Draytek VigorAP 1060C Manual

Draytek Adgangspunkt VigorAP 1060C

Læs nedenfor 📖 manual på dansk for Draytek VigorAP 1060C (188 sider) i kategorien Adgangspunkt. Denne guide var nyttig for 25 personer og blev bedømt med 4.5 stjerner i gennemsnit af 2 brugere

Side 1/188
II
VigorAP 1060C
11ax Ceiling AP
User’s Guide
Version: 1.2
Firmware Version: V1.4.4
Date: December 6, 2021
III
Intellectual Property Rights (IPR) Information
Copyrights
© All rights reserved. This publication contains information that is protected by copyright. No part
may be reproduced, transmitted, transcribed, stored in a retrieval system, or translated into any
language without written permission from the copyright holders.
Trademarks
The following trademarks are used in this document:
Microsoft is a registered trademark of Microsoft Corp.
Windows, Windows 10 and Explorer are trademarks of Microsoft Corp.
Apple and Mac OS are registered trademarks of Apple Inc.
Other products may be trademarks or registered trademarks of their respective manufacturers.
Safety Instructions and Approval
Safety
Instructions
Read the installation guide thoroughly before you set up the modem.
The modem is a complicated electronic unit that may be repaired only be authorized and
qualified personnel. Do not try to open or repair the modem yourself.
Do not place the modem in a damp or humid place, e.g. a bathroom.
The modem should be used in a sheltered area, within a temperature range of +5 to +40 Celsius.
Do not expose the modem to direct sunlight or other heat sources. The housing and electronic
components may be damaged by direct sunlight or heat sources.
Do not deploy the cable for LAN connection outdoor to prevent electronic shock hazards.
Keep the package out of reach of children.
When you want to dispose of the modem, please follow local regulations on conservation of the
environment.
Warranty
We warrant to the original end user (purchaser) that the modem will be free from any defects in
workmanship or materials for a period of two (2) years from the date of purchase from the dealer.
Please keep your purchase receipt in a safe place as it serves as proof of date of purchase. During the
warranty period, and upon proof of purchase, should the product have indications of failure due to
faulty workmanship and/or materials, we will, at our discretion, repair or replace the defective
products or components, without charge for either parts or labor, to whatever extent we deem
necessary tore-store the product to proper operating condition. Any replacement will consist of a
new or re-manufactured functionally equivalent product of equal value, and will be offered solely at
our discretion. This warranty will not apply if the product is modified, misused, tampered with,
damaged by an act of God, or subjected to abnormal working conditions. The warranty does not
cover the bundled or licensed software of other vendors. Defects which do not significantly affect the
usability of the product will not be covered by the warranty. We reserve the right to revise the
manual and online documentation and to make changes from time to time in the contents hereof
without obligation to notify any person of such revision or changes.
Be a Registered
Owner
Web registration is preferred. You can register your Vigor router via https://myvigor.draytek.com.
Firmware & Tools
Updates
Due to the continuous evolution of DrayTek technology, all modems will be regularly upgraded.
Please consult the DrayTek web site for more information on newest firmware, tools and documents.
https://www.draytek.com
I
V
Table of Contents
Chapter I Installation ................................................................................................................................................VII
I-1 Introduction...................................................................................................................................................................................1
I-1-1 LED Indicators and Connectors.................................................................................................................................2
I-2 Hardware Installation...................................................................................................................................................................3
I-2-1 Ceiling-mount Installation (Wooden Ceiling)...........................................................................................................3
I-2-2 Ceiling-mount Installation (Plasterboard Ceiling)...................................................................................................4
I-2-3 Suspended Ceiling (Lightweight Steel Frame) Installation ....................................................................................5
I-2-4 Wall-Mounted Installation..........................................................................................................................................6
I-2-5 Connect to a Vigor Router using AP Management.................................................................................................7
I-3 Network IP Configuration............................................................................................................................................................8
I-3-1 Windows 10 IP Address Setup...................................................................................................................................8
I-4 Accessing to Web User Interface ............................................................................................................................................. 11
I-5 Changing Password................................................................................................................................................................... 14
I-6 Dashboard .................................................................................................................................................................................. 15
I-7 Quick Start Wizard ..................................................................................................................................................................... 16
I-7-1 Settings for Access Point ......................................................................................................................................... 17
I-7-2 Settings for Mesh Root ............................................................................................................................................ 20
I-7-3 Settings for Mesh Node........................................................................................................................................... 25
I-7-4 Settings for Range Extender ................................................................................................................................... 26
Chapter II Connectivity ............................................................................................................................................. 31
II-1 Operation Mode........................................................................................................................................................................ 32
II-2 General Concepts for Wireless LAN ....................................................................................................................................... 34
II-3 Wireless LAN (2.4GHz/5GHz) Settings for AP Mode............................................................................................................. 37
II-3-1 General Setup .......................................................................................................................................................... 38
II-3-2 Security ..................................................................................................................................................................... 41
II-3-3 Access Control ......................................................................................................................................................... 44
II-3-4 WPS ........................................................................................................................................................................... 46
II-3-5 Advanced Setting..................................................................................................................................................... 47
II-3-6 AP Discovery ............................................................................................................................................................ 49
II-3-7 WDS AP Status ......................................................................................................................................................... 50
II-3-8 Airtime Fairness....................................................................................................................................................... 50
II-3-9 Station Control......................................................................................................................................................... 52
II-3-10 Roaming ................................................................................................................................................................. 54
II-3-11 Band Steering (for Wireless LAN (2.4GHz))........................................................................................................ 56
II-3-12 Station List.............................................................................................................................................................. 61
II-4 Mesh Settings for Mesh Mode................................................................................................................................................ 67
II-4-1 Mesh Setup .............................................................................................................................................................. 69
II-4-2 Mesh Status.............................................................................................................................................................. 74
II-4-3 Mesh Discovery ....................................................................................................................................................... 76
II-4-4 Basic Configuration Sync........................................................................................................................................ 77
II-4-5 Advanced Config Sync ............................................................................................................................................ 80
II-4-6 Support List.............................................................................................................................................................. 80
II-4-7 Mesh Syslog ............................................................................................................................................................. 81
II-5 Universal Repeater Settings for Range Extender Mode...................................................................................................... 82
II-6 Monitor Radio ........................................................................................................................................................................... 86
II-6-1 Dashboard................................................................................................................................................................ 86
II-6-2 Monitor Setup.......................................................................................................................................................... 89
II-6-3 Rogue AP White List................................................................................................................................................ 91
V
II-6-4 Monitor Log.............................................................................................................................................................. 92
II-7 LAN ............................................................................................................................................................................................. 93
II-7-1 General Setup .......................................................................................................................................................... 93
II-7-2 Hotspot Web Portal................................................................................................................................................. 96
II-7-3 Port Control............................................................................................................................................................ 100
Chapter III Management ......................................................................................................................................... 101
III-1 System Maintenance............................................................................................................................................................. 102
III-1-1 System Status ....................................................................................................................................................... 103
III-1-2 TR-069 .................................................................................................................................................................... 104
III-1-3 Administrator Password ..................................................................................................................................... 106
III-1-4 User Password...................................................................................................................................................... 107
III-1-5 Configuration Backup.......................................................................................................................................... 108
III-1-6 Syslog/Mail Alert................................................................................................................................................... 110
III-1-7 Time and Date ...................................................................................................................................................... 111
III-1-8 SNMP...................................................................................................................................................................... 113
III-1-9 Management......................................................................................................................................................... 114
III-1-10 Reboot System ................................................................................................................................................... 116
III-1-11 Firmware Upgrade ............................................................................................................................................. 117
III-2 Central AP Management....................................................................................................................................................... 118
III-2-1 General Setup ....................................................................................................................................................... 118
III-2-2 APM Log................................................................................................................................................................. 119
III-2-3 Overload Management ....................................................................................................................................... 120
III-2-4 Status of Settings.................................................................................................................................................. 121
III-3 Mobile Device Management ................................................................................................................................................ 123
III-3-1 Station List............................................................................................................................................................. 123
III-3-2 Station Statistics ................................................................................................................................................... 129
III-3-3 Station Nearby...................................................................................................................................................... 130
III-3-4 Policies................................................................................................................................................................... 131
III-3-5 Station Control List .............................................................................................................................................. 132
Chapter IV Others .................................................................................................................................................... 133
IV-1 RADIUS Setting....................................................................................................................................................................... 134
IV-1-1 RADIUS Server ...................................................................................................................................................... 134
IV-1-2 Certificate Management ..................................................................................................................................... 135
IV-2 Applications............................................................................................................................................................................ 138
IV-2-1 Schedule................................................................................................................................................................ 138
IV-2-2 Wi-Fi Auto On/Off................................................................................................................................................. 141
IV-3 Objects Setting....................................................................................................................................................................... 142
IV-3-1 Device Object........................................................................................................................................................ 142
IV-3-2 Device Group ........................................................................................................................................................ 144
Chapter V Mobile APP, DrayTek Wireless............................................................................................................... 147
V-1 Introduction of DrayTek Wireless......................................................................................................................................... 148
V-2 Create a New Network........................................................................................................................................................... 149
V-3 Wizard - Mesh Root and Mesh Node ................................................................................................................................... 151
V-4 Login......................................................................................................................................................................................... 155
V-4-1 Network.................................................................................................................................................................. 156
V-4-2 Connect .................................................................................................................................................................. 157
V-4-2-1 Dashboard of the Device ......................................................................................................................... 158
V-4-2-2 Devices........................................................................................................................................................ 159
V-4-2-3 Clients / Groups......................................................................................................................................... 161
V-4-2-4 Setup........................................................................................................................................................... 162
V
I
Chapter VI Troubleshooting.................................................................................................................................... 163
VI-1 Diagnostics ............................................................................................................................................................................. 164
VI-1-1 System Log ............................................................................................................................................................ 165
VI-1-2 Speed Test............................................................................................................................................................. 165
VI-1-3 Traffic Graph ......................................................................................................................................................... 166
VI-1-4 WLAN (2.4GHz) Statistics..................................................................................................................................... 166
VI-1-6 WLAN (5GHz) Statistics........................................................................................................................................ 168
VI-1-7 Support Area......................................................................................................................................................... 169
VI-2 Checking the Hardware Status ............................................................................................................................................ 170
VI-3 Checking the Network Connection Settings ...................................................................................................................... 171
VI-3-1 For Windows ......................................................................................................................................................... 171
VI-3-2 For Mac Os ............................................................................................................................................................ 173
VI-4 Pinging the Device................................................................................................................................................................. 174
VI-4-1 For Windows ......................................................................................................................................................... 174
VI-4-2 For Mac Os (Terminal) ......................................................................................................................................... 174
VI-5 Backing to Factory Default Setting...................................................................................................................................... 176
VI-5-1 Software Reset...................................................................................................................................................... 176
VI-5-2 Hardware Reset.................................................................................................................................................... 176
VI-6 Contacting DrayTek ............................................................................................................................................................... 177
Index ............................................................................................................................................................................................... 178
V
II
Chapter I Installation
1
I-1 Introduction
This is a generic International version of the user guide. Specification, compatibility and features
vary by region. For specific user guides suitable for your region or product, please contact local
distributor.
Thank you for purchasing this VigorAP 1060C!
As a tri-band AP, it provides an extra 5GHz Wireless band which increases the supported number of
wireless devices. In Mesh mode or Range Extender mode, this extra band can also be dedicated as
the Uplink band to the Internet. VigorAP 1060C is suitable to construct a small Wireless network.
VigorAP 1060C can operate in standalone mode for your office network or a classroom; connected
to your LAN and offering you wireless access.
It makes high density with quality-performance be feasible for users as it is going to be
implemented with DrayTek VigorACS 2 supports configuration, firmware upgrade, status, and
monitoring.
The Power of Ethernet (PoE) on VigorAP 1060C relieves the installation of the power plug. The
massive deployment of VigorAP 1060CC for hospitalities and school environment will be much
easier.
With the optimized antennas built-in, DrayTek VigorAP 1060C ceiling-mount wireless access point is
ideal for hospitalities, small offices, and small campus.
Easy install procedures allows any computer users to setup a network environment in very
short
time - within minutes, even inexperienced users. Just follow the instructions given in
this user
manual, you can complete the setup procedure and release the power of this access
point all by
yourself!
2
I-1-1 LED Indicators and Connectors
Before you use the Vigor modem, please get acquainted with the LED indicators and connectors
first.
LED Status Explanation
On (Blue) The system is in boot-loader mode.
Off The system is not ready or fails.
1
Blinking(Blue) The system is in TFTP mode.
Off The system is not ready or fails. 2
Blinking(Blue) The system is ready and can work normally.
Interface Explanation
Ethernet Port Connects to LAN or router.
Supports PoE power & Gigabit (2.5Gpbs).
Power Jack (12V
2.5A)
Connecter for a power adapter.
Hole Explanation
Factory Reset Restores the unit back to factory default settings.
To use, insert a small item such as an unbent paperclip into the hole. You will
feel the button inside depress gently. Hold it for 5 seconds.
The VigorAP will restart with the factory default configuration and the LED
will blink blue.
Security Hole A security hole for installing the anti-theft lock.
Note:
For the sake of security, make the accessory kit away from children.
Factory
Reset
Ethernet Port Power Jack
(
DC IN
)
LED
Security
Hole
3
I-2 Hardware Installation
This section will guide you through installing the VigorAP.
VigorAP can be installed under certain locations: wooden ceiling, plasterboard ceilings,
light-weighted steel frame and wall.
Note:
For the sake of personal safety, only trained and qualified personnel should install this access
point.
I-2-1 Ceiling-mount Installation (Wooden Ceiling)
Determine where the Access Point to be placed and mark location on the surface for the two
mounting holes. Use the appropriate drill bit to drill two holes in the markings and hammer the
bolts into the openings.
1. Place the mount base under the wooden ceiling and fasten it on the ceiling with two screws
firmly.
2. Place the mount base under the wooden ceiling and fasten it on the ceiling with two screws
firmly.
5
I-2-3 Suspended Ceiling (Lightweight Steel Frame) Installation
You cannot screw into ceiling tiles as they are weak and not suitable for bearing loads. Your VigorAP
is supplied with mounts (Mount Base) which will be used to attach directly to the ceiling frame of
your suspended ceiling.
1. Slide the mount base into the slot of the AP.
2. Hold the Access Point with one hand to reach the other hand over the T-Rail sides of the
bracket.
3. Rotate and hook the stationary end of the ceiling mount base onto the T-Rail ceiling frame.
Note:
Warning: The screw set shown below is for wall mounting only. Do not use such set for ceiling
mounting due to the danger of falling.
6
I-2-4 Wall-Mounted Installation
For wall-mounting, the VigorAP has keyhole type mounting slots on the underside.
1. Use the appropriate drill bit to drill two 8.1mm diagram and 26mm depth holes in the
markings and hammer the bolts into the openings.
2. Screw the anchors unto the holes until they are flush with the wall; screw the included screws
into the anchors.
3. Place the Access Point against wall with the mounting screw heads.
7
I-2-5 Connect to a Vigor Router using AP Management
Your VigorAP can be used with Vigor routers which support AP management (such as the Vigor2865
or Vigor2927 series). AP Management enables you to monitor and manage multiple DrayTek APs
from a single interface.
1. Connect VigorAP to PoE switch (via LAN port) with Ethernet cable. VigorAP will get the power
from the switch directly. Then, connect the VigorSwitch to a Vigor router.
2. Access into the web user interface of Vigor router. Here we take Vigor2865 as an example.
Open Central Management>>AP>>Status.
3. Locate VigorAP 1060C. Click the IP address assigned by Vigor router to access into web user
interface of VigorAP 1060C.
4. After entering the username and password (admin/admin), the main screen will be displayed.
8
I-3 Network IP Configuration
After the network connection is built, the next step you should do is setup VigorAP 1060C with
proper network parameters, so it can work properly in your network environment.
Before you can connect to the access point and start configuration procedures, your computer must
be able to get an IP address in the same subnet as this AP. If it's not connected to the same DHCP
Server with the AP or you're unsure, please follow the following instructions to configure your
computer to use the static IP address in the same subnet as default IP address of this AP.
For the default IP address of this AP is set “192.168.1.2”, we recommend you to use “192.168.1.X
(except 2)” in the field of IP address on this section for your computer.
If the operating system of your computer is…
Windows 10 - please go to section I-3-1
I-3-1 Windows 10 IP Address Setup
Click the Start button (it should be located at lower-left corner of your computer), then click the
Settings icon.
Double-click Network & Internet.
9
Next, click Change adapter options.
Click the local area connection.
10
Then, select Internet Protocol Version 4 (TCP/IPv4) and click Properties.
Under the General tab, click Use the following IP address. Then input the following settings in
respective field and click OK when finish.
IP address: 192.168.1.9
Subnet Mask: 255.255.255.0
11
I-4 Accessing to Web User Interface
All functions and settings of this access point must be configured via web user interface. Please start
your web browser (e.g., Firefox).
1. Make sure your PC connects to the VigorAP 1060C correctly.
2. Open a web browser on your PC and type http://192.168.1.2. A pop-up window will open to
ask for username and password. Pease type “admin/admin” on Username/Password and click
OK.
Note:
You may either simply set up your computer to get IP dynamically from the router or set up the IP
address of the computer to be in the same subnet as the IP address of VigorAP 1060C.
If there is no DHCP server on the network, then VigorAP 1060C will have an IP address of
192.168.1.2.
If there is DHCP available on the network, then VigorAP 1060C will receive it’s IP address via the
DHCP server.
If you connect to VigorAP by wireless LAN, you could try to access the web user interface
through http://vigorap.com.
12
3. For the first time accessing VigorAP, the Quick Start Wizard for configuring wireless settings
will appear as follows. Refer to Section I-7 Quick Start Wizard for detailed information.
4. If VigorAP has been configured previously, th will appear as follows: e Dashboard of VigorAP
14
I-5 Changing Password
1. Please change the password for the original security of the modem.
2. Go to System Maintenance page and choose Administration Password.
3. Enter the new login password on the field of Password. Then click OK to continue.
4. Now, the password has been changed. Next time, use the new password to access the Web
User Interface for this modem.
15
I-6 Dashboard
Dashboard shows system status including the number of client connected, throughput, gateway,
physical connection status, radio (2.4GHz / 5GHz) status, backhaul network, recent activities,
wireless network usage, and so on.
Click Dashboard from the main menu on the left side of the main page.
16
I-7 Quick Start Wizard
Quick Start Wizard will guide you to configure 2.4G /5G wireless setting and other corresponding
settings for Vigor Access Point step by step.
Available operation mode includes:
Access Point
Mesh Root
Mesh Node
Range Extender
In this page, the advanced settings pages will vary according to the operation mode specified.
17
I-7-1 Settings for Access Point
1. Choose Access Point as the operation mode and click Next Step.
2. In the following page, configure the settings for wireless LAN (for 2.4GHz, and 5GHz) and click
Next Step.
Available settings are explained as follows:
Item Description
WiFi Name Set a name for VigorAP 1060C to be identified.
18
WiFi Password Type 8~63 ASCII characters, such as 012345678..(or 64 Hexadecimal
digits leading by 0x, such as "0x321253abcde...").
Enable 2nd WiFi Check the box to enable the guest wireless setting.
Such feature is especially useful for free Wi-Fi service. For example, a
coffee shop offers free Wi-Fi service for its guests for one hour every
day.
2nd WiFi Name - Set a name for VigorAP device which can be
identified and connected by wireless guest.
2nd WiFi Password - Set 8~63 ASCII characters or 64 Hexadecimal
digits leading by 0x which can be used for logging into VigorAP device
by wireless guest.
Enable Station
Control
Check the box to set the duration for the guest connecting
/reconnecting to Vigor device.
Connection Time –Scroll the radio button to choose the value you
want.
Reconnection Time –Scroll the radio button to choose the value you
want.
3. Change the default password for such device with new value. Then click Next Step.
Available settings are explained as follows:
Item Description
Admin Password Enter a new password.
Confirm
Password
Enter the new password again for confirmation.
19
4. A summary of settings configuration will be shown on screen. Click Finish.
20
I-7-2 Settings for Mesh Root
1. Choose Mesh Root as the operation mode and click Next Step.
2. Configure the settings for wireless LAN (for 2.4GHz and 5GHz) and click Next Step.
Available settings are explained as follows:
Item Description
WiFi Name Set a name for VigorAP 1060C to be identified.
21
WiFi Password Type 8~63 ASCII characters, such as 012345678..(or 64 Hexadecimal
digits leading by 0x, such as "0x321253abcde...").
Enable 2nd WiFi Check the box to enable the second wireless setting.
Such feature is especially useful for free Wi-Fi service. For example, a
coffee shop offers free Wi-Fi service for its guests for one hour every
day.
2nd WiFi Name - Set a name for VigorAP 1060C which can be
identified and connected by wireless guest.
2nd WiFi Password - Set 8~63 ASCII characters or 64 Hexadecimal
digits leading by 0x which can be used for logging into VigorAP 1060C
by wireless guest.
Enable Station
Control
Check the box to set the duration for the guest connecting
/reconnecting to Vigor device.
Connection Time –Scroll the radio button to choose the value you
want.
Reconnection Time –Scroll the radio button to choose the value you
want.
3. Change the default password for such device with new value. Then click Next Step.
Available settings are explained as follows:
Item Description
Admin Password Enter a new password.
Confirm
Password
Enter the new password again for confirmation.
22
4. A summary of settings configuration will be shown on screen. Click Finish.
5. After clicking Finish, the following web page appears. VigorAP will search for mesh node
around the network.
23
6. Available VigorAP devices will be shown on the screen. Select the device (as a mesh node) for
grouping under such mesh group and enter a device name for identification.
7. Click Apply and wait for a while.
24
8. Later, a summary page of mesh root with mesh node will be shown on the screen.
25
I-7-3 Settings for Mesh Node
1. Choose Mesh Node as the operation mode and click Next Step.
2. A summary of settings configuration will be shown on screen. Click Finish.
26
I-7-4 Settings for Range Extender
1. Choose Range Extender as the operation mode and click Next Step.
2. Configure the settings for wireless LAN (for 2.4GHz and 5GHz) and click Next Step.
Available settings are explained as follows:
Item Description
WiFi Name Set a name for VigorAP 1060C to be identified.
28
(e.g., SSID, Security Mode) of the selected device will be shown below. Enter the Security Key.
Then click Next Step.
Available settings are explained as follows:
Item Description
SSID Displays the SSID of the selected access point.
Channel Means the channel frequency of the wireless LAN. You may switch
channel if the selected channel is under serious interference.
Security Mode There are several modes provided for you to choose. Each mode will
bring up different parameters (e.g., WEP keys, Pass Phrase) for you to
configure.
Encryption Type Available options will vary according to the selected Security Mode.
When Open is selected:
Choose None to disable the WEP Encryption. Data sent to the AP
will not be encrypted.
WEP Keys –To enable WEP encryption for data transmission,
please choose WEP. Four keys can be entered here, but only one
key can be selected at a time. The format of WEP Key is restricted
to 5 ASCII characters or 10 hexadecimal values in 64-bit
encryption level, or restricted to 13 ASCII characters or 26
hexadecimal values in 128-bit encryption level. The allowed
content is the ASCII characters from 33(!) to 126(~) except '#' and
','.
When Shared is selected:
WEP Keys - To enable WEP encryption for data transmission,
please choose WEP. Four keys can be entered here, but only one
key can be selected at a time. The format of WEP Key is restricted
to 5 ASCII characters or 10 hexadecimal values in 64-bit
encryption level, or restricted to 13 ASCII characters or 26
hexadecimal values in 128-bit encryption level. The allowed
content is the ASCII characters from 33(!) to 126(~) except '#' and
29
','.
When WPA/PSK or WPA2/PSK is selected:
Select TKIP or AES as the algorithm for WPA.
Security Key - Enter 8~63 ASCII characters, such as
012345678..(or 64 Hexadecimal digits leading by 0x, such as
"0x321253abcde...").
5. A summary of settings configuration will be shown on screen. Click Finish.
30
This page is left blank.
32
II-1 Operation Mode
This page provides several available modes for you to choose for different conditions. Click any one
of them and click OK. The system will configure the required settings automatically.
Available settings are explained as follows:
Item Description
AP This mode allows wireless clients to connect to access point and
exchange data with the devices connected to the wired network.
Mesh Mesh Root – VigorAP must connect to a gateway with an Ethernet
cable.
Mesh Node – VigorAP can connect to other mesh root via wireless
connection. A mesh network creates one set of links automatically
and calculates the most optimal wireless path through the wireless
network back to a wired mesh root.
Range Extender VigorAP can act as a wireless repeater which will help you to extend
the networking wirelessly. The access point can act as Station and AP
at the same time. It can use Station function to connect to a Root AP
and use AP function to service all wireless clients within its coverage.
33
Note:
The Wireless LAN settings will be changed according to the Operation Mode selected here. For
the detailed information, please refer to the section of Wireless LAN.
35
It is the simplest way to build connection between wireless network clients and VigorAP 1060C.
Users do not need to select any encryption mode and type any long encryption passphrase to setup
a wireless client every time. He/she only needs to press a button on wireless client, and WPS will
connect for client and VigorAP 1060C automatically.
Note:
Such function is available for the wireless station with WPS supported.
There are two methods to do network connection through WPS between AP and Stations: pressing
the Start PBC button or using PIN Code.
On the side of VigorAP 1060C series which served as an AP, press WPS button once on the front
panel of VigorAP 1060C or click Start PBC on web configuration interface. On the side of a station
with network card installed, press Start PBC button of network card.
If you want to use PIN code, you have to know the PIN code specified in wireless client. Then provide
the PIN code of the wireless client you wish to connect to the VigorAP 1060C.
36
38
II-3-1 General Setup
By clicking the General Setup, a new web page will appear so that you could select mode, channel,
the SSID, the wireless channel, 2nd subnet and WDS. Please refer to the following figure for more
information.
Available settings are explained as follows:
Item Description
Enable Wireless LAN Check the box to enable wireless function.
Enable Client Limit Check the box to set the maximum number of wireless stations which
try to connect Internet through Vigor device. The number you can set
39
is from 3 to 128.
Enable Client Limit per
SSID
Define the maximum number of wireless stations per SSID which try
to connect to Internet through Vigor device. The number you can set
is from 3 to 128.
Mode At present, VigorAP 1060C can connect to 11n only, Mixed (11b+11g),
Mixed (11b+11g+11n), Mixed (11b+11g+11n+11ax), 11a Only, 11n
Only(5G), Mixed (11a+11n), Mixed (11a+11n+11ac) and Mixed
(11a+11n+11ac+11ax) stations simultaneously. Simply choose the
default mode.
(for 2.4GHz)
(for 5GHz )
Channel Means the channel of frequency of the wireless LAN.
VigorAP offers different channels for WLAN 2.4GHz and 5GHz
respectively.
You may switch channel if the selected channel is under serious
interference. If you have no idea of choosing the frequency, please
select AutoSelect to let system determine for you.
Filtered Out List - It will be shown if AutoSelect is selected as
Channel. Click such link to access into Wireless LAN >> Advanced
Settings page.
Extension Channel
(for 2.4GHz)
With 802.11n, there is one option to double the bandwidth per
channel. The available extension channel options will be varied
according to the Channel selected above. Configure the extension
channel you want.
Enable Bridge VLAN to Check it to support VLAN feature within the Mesh network.
40
Mesh
Enable Check it to enable the SSID setting.
Hide SSID Check it to prevent from wireless sniffing and make it harder for
unauthorized clients or STAs to join your wireless LAN. Depending on
the wireless utility, the user may only see the information except SSID
or just cannot see any thing about VigorAP 1060C while site surveying.
The system allows you to set four sets of SSID for different usage.
SSID Set a name for VigorAP 1060C to be identified. Default settings are
DrayTek-XXXXXX (the last six bytes of the MAC address).
Isolate LAN Check this box to isolate the wireless connection from LAN. It can
make the wireless clients (stations) with remote-dial and LAN to LAN
users not accessing for each other.
Isolate Member Check this box to make the wireless clients (stations) with the same
SSID not access for each other.
VLAN ID Type the value for such SSID. Packets transferred from such SSID to
LAN will be tagged with the number.
If your network uses VLANs, you can assign the SSID to a VLAN on
your network. Client devices that associate using the SSID are grouped
into this VLAN. The VLAN ID range is from 3 to 4095. The VLAN ID is 0
by default, it means disabling the VLAN function for the SSID.
+ Add SSID Click it to add a new SSID (up to 8 SSIDs).
Security Select WEP, TKIP or AES as the encryption algorithm.
Type 8~63 ASCII characters, such as 012345678..(or 64 Hexadecimal
digits leading by 0x, such as "0x321253abcde...").
Peer MAC Address Type the peer MAC address for the access point that VigorAP 1060C
connects to.
After finishing this web page configuration, please click OK to save the settings.
41
II-3-2 Security
This page allows you to set security with different modes for SSID 1 to 8 respectively. After
configuring the correct settings, please click OK to save and invoke it.
By clicking the Security Settings, a new web page will appear so that you could configure the
settings.
Available settings are explained as follows:
Item Description
Mode
There are several modes provided for you to choose.
Below shows the modes with higher security;
WPA3 Personal, WPA3/WPA2 Personal, WPA2 Personal,
WPA2/WPA Personal - Accepts only WPA clients and the
encryption key should be entered in PSK. The WPA encrypts
each frame transmitted from the radio using the key, which
either PSK (Pre-Shared Key) entered manually in this field below
or automatically negotiated via 802.1x authentication.
The WPA encrypts each frame transmitted from the radio using
the key, which either PSK (Pre-Shared Key) entered manually in
this field below or automatically negotiated via 802.1x
authentication. Select WPA, WPA2 or Auto as WPA mode.
42
WPA3 Enterprise, WPA3/WPA2 Enterprise, WPA2 Enterprise,
WPA2/WPA Enterprise - The WPA encrypts each frame
transmitted from the radio using the key, which either PSK
(Pre-Shared Key) entered manually in this field below or
automatically negotiated via 802.1x authentication.
OWE - WPA3 also introduces a new open and secure connection
mode; "Opportunistic Wireless Encryption" (OWE). It allows the
clients to connect without a password, ideal for hotspot
networks, but the connection between each individual client is
uniquely encrypted behind the scenes.
Below shows the modes with basic security;
WPA Personal - Accepts only WPA clients and the encryption
key should be entered in PSK. The WPA encrypts each frame
transmitted from the radio using the key, which either PSK
(Pre-Shared Key) entered manually in this field below or
automatically negotiated via 802.1x authentication.
WPA Enterprise - The WPA encrypts each frame transmitted
from the radio using the key, which either PSK (Pre-Shared Key)
entered manually in this field below or automatically negotiated
via 802.1x authentication.
WEP Personal - Accepts only WEP clients and the encryption key
should be entered in WEP Key.
WEP Enterprise - The built-in RADIUS client feature enables
VigorAP to assist the remote dial-in user or a wireless station
and the RADIUS server in performing mutual authentication. It
enables centralized remote access authentication for network
management.
None - The encryption mechanism is turned off.
WPA Algorithms Select TKIP, AES or TKIP/AES as the algorithm for WPA. Such feature is
available for WPA2/802.1x, WPA/802.1x, WPA/PSK or WPA2/PSK or
Mixed (WPA+WPA2)/PSK mode.
Pass Phrase Type 8~63 ASCII characters, such as 012345678..(or 64 Hexadecimal
digits leading by 0x, such as "0x321253abcde..."). Such feature is
available for WPA/PSK or WPA2/PSK or Mixed (WPA+WPA2)/PSK
mode.
Key Renewal Interval WPA uses shared key for authentication to the network. However,
normal network operations use a different encryption key that is
randomly generated. This randomly generated key that is periodically
replaced. Enter the renewal security time (seconds) in the column.
Smaller interval leads to greater security but lower performance.
Default is 3600 seconds. Set 0 to disable re-key. Such feature is
available for WPA2/802.1,WPA/802.1x, WPA/PSK or WPA2/PSK or
Mixed (WPA+WPA2)/PSK mode.
EAPOL Key Retry EAPOL means Extensible Authentication Protocol over LAN.
Click Enable to make sure that the key will be installed and used once
in order to prevent key reinstallation attack.
Key 1 – Key 4 Four keys can be entered here, but only one key can be selected at a
time. The format of WEP Key is restricted to 5 ASCII characters or 10
hexadecimal values in 64-bit encryption level, or restricted to 13 ASCII
characters or 26 hexadecimal values in 128-bit encryption level. The
allowed content is the ASCII characters from 33(!) to 126(~) except '#'
and ','. Such feature is available for WEP mode.
43
Click the link of to access into the followingRADIUS Server page for more settings.
Available settings are explained as follows:
Item Description
Use internal RADIUS
Server
There is a RADIUS server built in VigorAP 1060C which is used to
authenticate the wireless client connecting to the access point. Check
this box to use the internal RADIUS server for wireless security.
Besides, if you want to use the external RADIUS server for
authentication, do not check this box.
Please refer to the section, IV-1-1 RADIUS Server to configure settings
for internal server of VigorAP 1060C.
IP Address Enter the IP address of external RADIUS server.
Port The UDP port number that the external RADIUS server is using. The
default value is 1812, based on RFC 2138.
Shared Secret The external RADIUS server and client share a secret that is used to
authenticate the messages sent between them. Both sides must be
configured to use the same shared secret.
Session Timeout Set the maximum time of service provided before re-authentication.
Set to zero to perform another authentication immediately after the
first authentication has successfully completed. (The unit is second.)
After finishing this web page configuration, please click OK to save the settings.
44
II-3-3 Access Control
For additional security of wireless access, the Access Control facility allows you to restrict the
network access right by controlling the wireless LAN MAC address of client. Only the valid MAC
address that has been configured can access the wireless LAN interface. By clicking the Access
Control, a new web page will appear, as depicted below, so that you could edit the clients' MAC
addresses to control their access rights (deny or allow).
Available settings are explained as follows:
Item Description
Policy Select to enable any one of the following policy or disable the policy.
Choose Activate MAC address filter to type in the MAC addresses
for other clients in the network manually. Choose Blocked MAC
address filter, so that all of the devices with the MAC addresses listed
on the MAC Address Filter table will be blocked and cannot access into
VigorAP 1060C.
45
MAC Address Filter Display all MAC addresses that are edited before.
MAC Client’s MAC Address - Manually enter the MAC address of wireless
client.
Add - Add a new MAC address into the list.
Delete - Delete the selected MAC address in the list.
Edit - Edit the selected MAC address in the list.
Object In addition to enter the MAC address of the device manually, you can
Device Group - Select one of the existed device groups and click Add.
All the devices belonging to the selected group will be shown on the
MAC Address Filter table.
Device Object - Select one of the existed device object and click Add.
The MAC address of the device will be shown on the MAC Address
Filter table.
Cancel Give up the access control set up.
Backup Click it to store the settings (MAC addresses on MAC Address Filter
table) on this page as a file.
Restore Click it to restore the settings (MAC addresses on MAC Address Filter
table) from an existed file.
After finishing this web page configuration, please click OK to save the settings.
47
II-3-5 Advanced Setting
This page is to determine which algorithm will be selected for wireless transmission rate.
Available settings are explained as follows:
Item Description
Channel Bandwidth 20 MHz- The device will use 20MHz for data transmission and
receiving between the AP and the stations.
Auto 20/40 MHz–The AP will scan for nearby wireless AP, and then
use 20MHz if the number of AP is more than 10, or use 40MHz if it's
not.
40 MHz- The device will use 40MHz for data transmission and
receiving between the AP and the stations. It is for wireless LAN
2.4GHz only.
Auto 20/40 /80 MHz - The device will use 20/40/80 MHz channel
bandwidth for data transmission and receiving between the AP and
the stations.
Auto 20/40 /80/160 MHz - The device will use 20/40/80/160 MHz
channel bandwidth for data transmission and receiving between the
AP and the stations.
Tx Power The default setting is the maximum (100%). Lowering down the value
may degrade range and throughput of wireless.
48
Fragment Length Set the Fragment threshold of wireless radio. Do not modify
default
value if you don’t know what it is, default value is
2346.
RTS Threshold Minimize the collision (unit is bytes) between hidden stations to
improve wireless performance.
Set the RTS threshold of wireless radio. Do not modify default
value if
you don’t know what it is, default value is 2347.
Country Code VigorAP broadcasts country codes by following the 802.11d standard.
However, some wireless stations will detect / scan the country code to
prevent conflict occurred. If conflict is detected, wireless station will be
warned and is unable to make network connection. Therefore,
changing the country code to ensure successful network connection
will be necessary for some clients.
Auto Channel Filtered
Out List
The selected wireless channels will be discarded if AutoSelect is
selected as Channel selection mode in Wireless LAN>>General
Setup.
IGMP Snooping Click Enable to enable IGMP Snooping. Multicast traffic will be
forwarded to ports that have members of that group. Disabling IGMP
snooping will make multicast traffic treated in the same manner as
broadcast traffic.
Isolate 2.4GHz and
5GHz bands
The default setting is “Enable”. It means that the wireless client using
2.4GHz band is unable to connect to the wireless client with 5GHz
band, and vice versa.
For WLAN 2.4GHz and 5GHz set with the same SSID name:
No matter such function is enabled or disabled, clients using
WLAN 2.4GHz and 5GHz can communicate for each other if
Isolate Member (in Wireless LAN>>General Setup) is NOT
enabled for such SSID.
Yet, if the function of Isolate Member (in Wireless
LAN>>General Setup) is enabled for such SSID, clients using
WLAN 2.4GHz and 5GHz will be unable to communicate with each
other.
Isolate members with
IP
The default setting is “Disable”.
If it is enabled, VigorAP will isolate different wireless clients according
to their IP address(es).
WMM Capable To apply WMM parameters for wireless data transmission, please click
the Enable radio button.
APSD Capable APSD (automatic power-save delivery) is an enhancement over the
power-save mechanisms supported by Wi-Fi networks. It allows
devices to take more time in sleeping state and consume less power
to improve the performance by minimizing transmission latency.
The default setting is Disable.
MAC Clone
(for 2.4GHz only)
Click Enable and manually enter the MAC address of the device with
SSID 1. The MAC address of other SSIDs will change based on this
MAC address.
After finishing this web page configuration, please click OK to save the settings.
52
Item Description
ATF Mode Basic - Select to enable the basic airtime fairness settings.
Advanced - Select to enable the advanced airtime fairness settings.
Disable - Select to disable the ATF function.
Advanced ATF It is SSID-based airtime allocation.
The downstream or upstream from FTP, HTTP or some P2P
applications will occupy large of bandwidth and affect the applications
for other programs. Adjust the value (0 ~ 100) of airtime bandwidth
for each SSID.
Display Client Airtime
List
Click to get a table of current clients which share the bandwidth via
airtime fairness.
After finishing this web page configuration, please click OK to save the settings.
II-3-9 Station Control
Station Control is used to specify the duration for the wireless client to connect and reconnect
VigorAP. If such function is not enabled, the wireless client can connect VigorAP until it shuts down.
Such feature is especially useful for free Wi-Fi service. For example, a coffee shop offers free Wi-Fi
service for its guests for one hour every day. Then, the connection time can be set as “1 hour” and
reconnection time can be set as “1 day”. Thus, the guest can finish his job within one hour and will
not occupy the wireless network for a long time.
Note:
Up to 300 Wireless Station records are supported by VigorAP.
Available settings are explained as follows:
53
Item Description
SSID Display the SSID that the wireless station will use it to connect with
Vigor router.
Enable Check the box to enable the station control function.
Connection Time /
Reconnection Time
Use the drop down list to choose the duration for the wireless client
connecting /reconnecting to Vigor device. Or, type the duration
manually when you choose User defined.
Display All Station
Control List
All the wireless stations connecting to Vigor router by using such SSID
will be listed on Station Control List.
After finishing all the settings here, please click OK to save the configuration.
55
Disable RSSI Requirement - If it is selected, VigorAP will not
terminate the network connection based on RSSI.
Strictly Minimum RSSI - VigorAP uses RSSI (received signal strength
indicator) to decide to terminate the network connection of wireless
station. When the signal strength is below the value (dBm) set here,
VigorAP 1060C will terminate the network connection for that wireless
station.
Minimum RSSI - When the signal strength of the wireless station is
below the value (dBm) set here and adjacent AP (must be DrayTek AP
and support such feature too) with higher signal strength value
(defined in the field of With Adjacent AP RSSI over) is detected by
VigorAP 1060C, VigorAP 1060C will terminate the network connection
for that wireless station. Later, the wireless station can connect to the
adjacent AP (with better RSSI).
With Adjacent AP RSSI over – Specify a value as a threshold.
Fast Roaming (WPA2
Enterprise)
Enable – Check the box to enable fast roaming configuration.
PMK Caching - Set the expire time of WPA2 PMK (Pairwise master key)
cache. PMK Cache manages the list from the BSSIDs in the associated
SSID with which it has pre-authenticated. Such feature is available for
WPA2 Enterprise mode.
Pre-Authentication - Enables a station to authenticate to multiple
APs for roaming securer and faster. With the pre-authentication
procedure defined in IEEE 802.11i specification, the
pre-four-way-handshake can reduce handoff delay perceivable by a
mobile node. It makes roaming faster and more secure. (Only valid in
WPA2)
Enable - Enable IEEE 802.1X Pre-Authentication.
Disable - Disable IEEE 802.1X Pre-Authentication.
After finishing this web page configuration, please click OK to save the settings.
56
II-3-11 Band Steering (for Wireless LAN (2.4GHz))
Band Steering detects if the wireless clients are capable of 5GHz operation, and steers them to that
frequency. It helps to leave 2.4GHz band available for legacy clients, and improves users experience
by reducing channel utilization.
If dual-band is detected, the AP will let the wireless client connect to less congested wireless LAN, such
as 5GHz to prevent from network congestion.
58
according to the conditions set below.
2.4GHz Utilization Overload Threshold The default setting is
70%. It can define the network congestion for 2.4GHz.
5GHz Utilization Overload Threshold – The default setting is
70%. It can define the network congestion for 5GHz.
When the utilization of 2.4GHz is higher than the specified threshold
and the utilization of 5GHz is lower than the specified threshold,
VigorAP will steer the client to connect to 5GHz network.
After finishing this web page configuration, please click OK to save the settings.
Below shows how Band Steering works.
59
How to Use Band Steering?
1. Open Wireless LAN(2.4GHz)>>Band Steering.
2. Check the box of and use the default value (15) for check time setting. Enable Band Steering
3. Click OK to save the settings.
4. Open Wireless LAN (2.4GHz)>>General Setup Wireless LAN (5GHz)>>General Setup and .
Configure SSID as ap1060-BandSteering for these pages. Click OK to save the settings.
Same value
for 2.4GHz,
5GHz and
5GHz-2
60
5. Open Wireless LAN (2.4GHz)>>General Setup Wireless LAN (5GHz)>>General Setup and .
Configure Security as 12345678 for these pages. Click OK to save the settings.
6. Now, VigorAP 1060C will let the wireless clients connect to less congested wireless LAN, such as
5GHz to prevent from network congestion.
Same value
for 2.4GHz,
and 5GHz
61
II-3-12 Station List
Station List provides the information related to the number of clients connecting to VigorAP, used
bandwidth and the statistics of the AP device OS. Besides, users can create access control policies,
device objects and set black & white list for
II-3-12-1 Connected Number
This page lists the graph for the number of wireless stations connected to this Access Point with
different time phases.
62
II-3-12-2 Statistics
The number of detected devices and the number of device(s) passed/blocked according to the
policy specified in Mobile Device Management>>Policy can be illustrated as doughnut chart.
66
II-3-12-5 White List
This page displays general information of the stations under white list.
Available settings are explained as follows:
Item Description
Device Object list Click it to open the Device Object List dialog for reference.
Name / MAC Display the host name / MAC Address for the connecting client.
SSID Display the SSID that the wireless client connects to.
Action Display the action that you can execute for the station.
Block - Click to block the entry.
67
II-4 Mesh Settings for Mesh Mode
When you choose Mesh as the operation mode, the Mesh menu with the settings of Mesh Setup,
Mesh Status, Mesh Discovery and Configuration Sync will be shown on the screen.
Please note that, within VigorMesh network,
the total number allowed for mesh nodes is 8 (including the mesh root)
the maximum number of hop is 3
Refer to the following figure:
For the mesh group set within VigorMesh network,
It must be composed by “1” Mesh Root and “0~7” mesh nodes
(Roaming) Normally members in a mesh group use the same Wireless SSID/security
69
II-4-1 Mesh Setup
Such page can determine the role of the VigorAP connecting to the computer physically. For a mesh
root, you can search and specify mesh nodes as members under current mesh group.
Available settings are explained as follows:
Item Description
Role Mesh RootWhen VigorAP is connected to a Vigor router with a
physical Ethernet cable, it can be set as mesh root to deliver the
wireless signals to a mesh node AP.
Mesh Node – As a mesh node, such VigorAP can pass the wireless
connection signal to other mesh node or a remote device (PC, CPE,
mobile phone).
In addition, VigorAP can be searched by mesh root AP and join the
mesh group of the root AP. The configuration set for mesh root can be
applied to mesh node.
Log Level Choose Basic or Detailed. Related information will be
shown on the Diagnostics>>System Log.
70
When Mesh Root is
selected
Wireless Downlink Band – Choose a wireless band for connecting
with a downlink mesh root or a downlink mesh node.
Group Name - Display the name of the current mesh group.
Auto Reselect - It is selected in default. To perform the auto reselect,
make sure the process for CFG Sync and CFG Check for mesh nodes
are successful. If enabled, after changing the environment of mesh
network (e.g., offline, disconnection), the root device will perform auto
reselect to reconstruct the mesh network.
When Mesh Node is
selected
Wired Uplink – Check the box if such VigorAP connects to an uplinked
mesh root or an uplinked mesh node with an Ethernet cable.
Wireless Uplink Band – Choose a wireless band for connecting with
an uplinked mesh root or an uplinked mesh node.
Log Level Choose Basic or Detailed. Related information will be
shown on the Diagnostics>>System Log.
Mesh Group When the VigorAP is set as mesh root or is added to a mesh group,
the basic information including role, MAC address, and model name
of the AP will be shown in this area.
Up to 8 entries (one mesh root and seven mesh nodes) will be shown
on this field.
Reset - Click it to clear the Mesh Group information.
Delete - Click it to remove the selected entry.
Add Mesh Node Click Search to find out available mesh node on the network.
Check the one you want and click Apply. The selected AP will be
added onto current mesh root.
Backup Mesh Config Backup – Click the button to save the configuration as a file.
Upload/Restore – Click the Upload button to specify a configuration
file. Then click Restore to apply the configuration.
When the MAC address of such VigorAP does not appear under the
mesh group, the restore operation will not succeed and the error
message, ”Device MAC is not in mesh group list”, will be shown
instead.
72
3. Wait until the searching result appears.
4. Choose the device(s) you want to add to the Mesh Group as mesh node(s) and define the
Device Name for each node. In this example, five devices are specified as mesh nodes.
5. Click the Apply button and wait for it to finish the procedure.
75
77
II-4-4 Basic Configuration Sync
If you add one Mesh Node in a mesh group, the Mesh Root will send the basic configuration to the
device. This page could help you to change the Mesh Root settings and deliver the new
configuration of the Mesh Root to all "connected" Mesh Nodes.
Available settings are explained as follows:
Item Description
System Maintenance /
Wireless LAN (2.4Hz) /
Wireless LAN (5GHz)
Check the item(s) you want to make configuration sync.
ApplyClick it to apply the settings configured by such AP to all
connected mesh node. Note that this button is available only
when such AP is in mesh root mode.
Tips for Mesh Network Setup
Set up TWO mesh devices with uplink RSSI larger than -65dBm.
Upgrade the firmware version of Mesh devices through Mesh link, starting from the mesh
device with less hop number. For example, upgrade the firmware from the root, hop1 Mesh
Node then hop2 Mesh Node, and so on.
VigorMesh network supports up to 3 hops of mesh devices. However, it is suggested to connect
the mesh group with less than or equals to 2 hops.
For your reference, we make a real mesh environment test and get the following record. (Use
VigorAP APP to do internet speed test with different hops mesh node.)
Internet Download Speed (for root and hop1 ~ hop3):
iPad connects to Root : 80Mbps
iPad connects to hop1 Node : 49Mbps (Uplink RSSI : -55dBm)
iPad connects to hop2 Node : 41Mbps (Uplink RSSI : hop2 -64dBm / hop1 -55dBm)
93
II-7 LAN
Local Area Network (LAN) is a group of subnets regulated and ruled by modem.
II-7-1 General Setup
Click LAN to open the LAN settings page and choose General Setup.
Note:
This page will be changed according to the Operation Mode selected. The following screen is
obtained by choosing AP as the operation mode.
Available settings are explained as follows:
95
DNS Server IP Address Primary DNS Server - You must specify a DNS server IP address here
because your ISP should provide you with usually more than one DNS
Server. If your ISP does not provide it, the modem will automatically
apply default DNS Server IP address: 194.109.6.66 to this field.
Secondary DNS Server - You can specify secondary DNS server IP
address here because your ISP often provides you more than one DNS
Server. If your ISP does not provide it, the modem will automatically
apply default secondary DNS Server IP address: 194.98.0.1 to this
field.
After finishing this web page configuration, please click OK to save the settings.
99
Available settings are explained as follows:
Item Description
Destination Domain
Enable Check to enable the setting.
Domain Whitelist Enter a domain (URL) / an IP address.
Destination IP
Enable Check to enable the setting.
IP Whitelist LAN users with the IPs set in this page are able to access into Internet
without entering other portal.
Finish Click to save the settings.
After finishing this web page configuration, please click Finish to complete the configuration.
100
II-7-3 Port Control
To avoid wrong connection due to the insertion of unsuitable Ethernet cable, the function of
physical LAN ports can be disabled via web configuration.
Available settings are explained as follows:
Item Description
Port Control
Disable Port Check to disable the function of physical LAN port.
After finishing this web page configuration, please click OK to save the settings.
107
III-1-4 User Password
This page allows you to set new account and password for accessing the web pages under User
Mode.
Available settings are explained as follows:
Item Description
Enable User Mode After checking this box, you can access into the web user interface
with the password typed here for simple web configuration.
The settings on simple web user interface will be different with full
web user interface accessed by using the administrator password.
Account Enter a user name.
Password Enter in new password in this field. The length of the password is
limited to 31 characters.
Confirm Password Enter the new password again.
Click OK to save the settings.
Settings to be configured in User Mode will be less than settings in Admin Mode. Only basic
configuration settings will be available in User Mode.
112
the NTP server.
OK Save the settings.
Click OK to save these settings.
117
III-1-11 Firmware Upgrade
Before upgrading your modem firmware, you need to install the Modem Tools. The Firmware
Upgrade Utility is included in the tools. The following web page will guide you to upgrade firmware
by using an example. Note that this example is running over Windows OS (Operating System).
Download the newest firmware from DrayTek's web site or FTP site. The DrayTek web site is
www.draytek.com (or local DrayTek's web site) and FTP site is ftp.draytek.com.
Click System Maintenance>> Firmware Upgrade to launch the Firmware Upgrade Utility.
Click Download to locate the newest firmware from your hard disk and click Upgrade.
118
III-2 Central AP Management
Such menu allows you to configure VigorAP device to be managed by Vigor router.
III-2-1 General Setup
Available settings are explained as follows:
Item Description
Enable NodeAP Check the box to enable the function of AP Management (APM).
Enable Auto Provision VigorAP 1060C can be controlled under Central AP Management in
Vigor2862 series. When both Vigor2862 series and VigorAP 1060C
have such feature enabled, once VigorAP 1060C is registered to
Vigor2862 series, the WLAN profile pre-configured on Vigor2862
series will be applied to VigorAP 1060C immediately. Thus, it is not
necessary to configure VigorAP 1060C separately.
Enable RootAP Check this box to enable AP management. The role of this AP is
"Root".
Click OK to save these settings.
119
III-2-2 APM Log
This page will display log information related to wireless stations connected to VigorAP 1060C and
central AP management.
Such information also will be delivered to Vigor router (e.g., Vigor2862 or Vigor2926 series) and be
shown on Central AP Management>>Event Log of Vigor router.


Produkt Specifikationer

Mærke: Draytek
Kategori: Adgangspunkt
Model: VigorAP 1060C
Bredde: 205 mm
Dybde: 205 mm
Højde: 33.2 mm
Vægt: 809 g
Produktfarve: Hvid
Opbevaringstemperatur (T-T): -20 - 70 °C
Relativ luftfugtighed ved drift (H-H): 5 - 90 %
Ethernet LAN-porte (RJ-45): 1
Driftstemperatur (T-T): 0 - 40 °C
Ethernet LAN-datahastigheder: 10,100,1000,2500 Mbit/s
Sikkerhedsalgoritmer: HTTPS, WEP, WPA, WPA2, WPA3
Strømforbrug (maks.): 21 W
Placering: Ceiling, Wall
Netværksstandarder: IEEE 802.11a, IEEE 802.11ac, IEEE 802.11ax, IEEE 802.11b, IEEE 802.11g, IEEE 802.11n
DC-in-stik: Ja
DHCP-klient: Ja
DHCP-server: Ja
Antenner, antal: 4
Knap til nulstilling: Ja
LED-indikatorer: Ja
Udgangsspænding: 12 V
Udgangsstrøm: 2.5 A
Slot til kabellås: Ja
Maksimal dataoverførselshastighed: 3600 Mbit/s
Antenne type: Intern
Firmware kan opgraderes: Ja
Antal produkter inkluderet: 1 stk
MIMO: Ja
VLAN understøttelse: Ja
IGMP snooping: Ja
Filtrering af MAC-adresser: Ja
2.4 GHz: Ja
5 GHz: Ja
Antal SSID understøttet: 16
Maksimal dataoverførselshastighed (5 GHz): 2400 Mbit/s
Maksimal dataoverførselshastighed (2,4 GHz): 1200 Mbit/s
Syslog: Ja
MIMO type: Multi User MIMO

Har du brug for hjælp?

Hvis du har brug for hjælp til Draytek VigorAP 1060C stil et spørgsmål nedenfor, og andre brugere vil svare dig


Adgangspunkt Draytek Manualer
Adgangspunkt Manualer

Nyeste Adgangspunkt Manualer