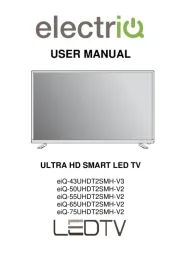
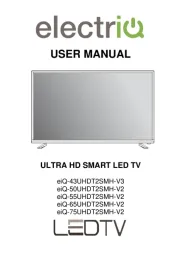
ElectriQ eiQ-M455DVA Manual

ElectriQ TV eiQ-M455DVA

Læs gratis den danske manual til ElectriQ eiQ-M455DVA (29 sider) i kategorien TV. Denne vejledning er vurderet som hjælpsom af 9 personer og har en gennemsnitlig bedømmelse på 4.9 stjerner ud af 5 anmeldelser. Har du et spørgsmål om ElectriQ eiQ-M455DVA, eller vil du spørge andre brugere om produktet?

Side 1/29
USER MANUAL
eiQ-M455DVA
2
3
CONTENTS
SAFETY INFORMATION
4
WHAT IS INCLUDED
7
INSTALLATION OF LEGS
7
INPUT / OUTPUT TERMINALS
8
CONNECTING TO EXTERNAL DEVICES
9
REMOTE CONTROL
10
INITIAL SETUP
11
NETWORK
17
ACCOUNT/SIGN IN
17
CHANNELS
17
DEVICE PREFERENCES
18
DATE AND TIME
18
TIMER
18
LANGUAGE
19
INPUTS
19
STORAGE
19
HOME SCREEN
20
RETAIL MODE
20
CHROMECAST
20
SCREEN SAVER
21
ENERGY SAVER
21
LOCATION
21
USER AND DIAGNOSTICS
22
ACCESSIBILITY
22
ABOUT
22
GOOGLE ASSISTANT
23
KEYBOARD
23
REMOTE AND ACSESSORIES
23
POWER
24
GOOGLE PLAY
24
PICTURE
25
SOUND
26
TECHNICAL SPECIFICATIONS
27
TROUBLESHOOTING
28
SUPPORT
29
4
SAFETY INFORMATION
Read these instructions – All the safety and operating instructions should be
read before this product is operated.
Keep these instructions – The safety and operating instructions should be
retained for future reference.
Heed all warnings – All warnings on the appliance and in the operating
instructions should be adhered to.
Follow all instructions – All operating and usage instructions should be
followed.
Do not use this equipment near water – The appliance should not be used
near water or moisture e.g. in a wet basement or near a swimming pool.
Clean only with a dry cloth. Do not use solvents or petroleum-based fluids.
Do not block any ventilation openings.
Do not install near any heat sources such as radiators, stoves or other
appliances (including amplifiers) that produce heat.
Do not tamper with the supplied plug. This plug is a BS1363 standard plug.
Protect the power cord from being walked on or pinched, particularly at the
plug and at the point where they exit from the appliance.
Only use attachments/accessories specified by the manufacturer.
Unplug the appliance during lightning storms or when unused for long periods
of time.
Refer all servicing to qualified personnel.
Please keep the unit in a well-ventilated environment.
The TV should only be connected to an earthed mains power supply with AC
100-240V~ 50/60Hz
To prevent overload, do not share the same power socket with too many
other electronic components.
Do not place any connecting wires where they may be stepped on or tripped
over.
Do not place heavy items on the cable as this may cause damage.
Hold the plug, not the wires, when removing the plug from a socket.
Unplug immediately and seek professional help if the plug or cable is
damaged, liquid has spilt onto the set, if accidentally exposed to water or
moisture, if anything accidentally penetrates the ventilation slots or if the set
does not work normally.
Do not remove the safety covers. There are no user serviceable parts inside.
To avoid battery leakage, remove exhausted batteries from the remote control
when not in use for a long period.
Do not block ventilation slots on the back cover. The TV can be placed in a
cabinet but ensure there is at least 10cm clearance around the TV and 30cm
above.
Do not tap or shake the TV screen, this may damage internal components.
At full volume, prolonged listening may damage the users hearing.
Diagrams within the manual are for illustrative purposes only, and as such
there may be differences to the actual product received.
5
WARNING
Never place a television set in an unstable location. A television set may
fall, causing serious personal injury or death. Many injuries, particularly to
children, can be avoided by taking simple precautions such as:
Use cabinets or stands recommended by the manufacturer of the
television.
Only use furniture that can safely support the television set.
Ensure the television is not overhanging the edge of the supporting
furniture.
Do not place the television on tall furniture (for example, cupboards or
bookcases) without anchoring both the furniture and the television to a
suitable support.
Do not place the television set on cloth or other materials that may be
located between the television set and the supporting furniture.
Educate children about the dangers of climbing on furniture to reach
the television or its controls.
If your existing television set is being retained and relocated, the same
considerations as above should be applied.
WARNING
To reduce the risk of fire or electric shock, do not expose this appliance
to rain or moisture. The appliance shall not be exposed to dripping or
splashing and objects filled with liquids, such as vases, shall not be
placed on or next to the appliance.
WARNING
The wall plug socket is used as a disconnection device and should
remain readily accessible.
CAUTION
Danger of explosion if the battery is incorrectly replaced.
Replace only with the same or equivalent type.
Batteries shall not be exposed to excessive heat such as direct sunlight,
fire or the like. Used batteries should be recycled appropriately.
CAUTION
To reduce the risk of electric shock, DO NOT remove the cover (or back).
No user serviceable parts inside. Refer servicing to qualified service
personnel.
6
ATTENTION
Place the TV on a firm and flat
surface, leaving a space of at
least 10cm around the set and
30cm from the top of the set to
the ceiling or cabinet. Ensure
the TV is positioned close to
the wall to avoid it falling if
pushed.
When twisting the TV,
do not hold the top of
the TV, you should
twist from the base.
When lifting the TV, do
not use one hand to
handle it, you should
lift the TV using two
hands, ensuring
pressure is not put on
the screen itself.
10
cm
30
cm
10
cm
cm
10
7
WHAT IS INCLUDED
TV Set Remote Control User Manual
(2 x AAA Batteries)
6 Screws 2 Legs
INSTALLATION OF LEGS
1 Place the TV with the front facing downwards on a soft towel or similar placed on a desk to
prevent scratching.
2 Insert the legs into the sockets on the base of the TV.
3 Insert the screws into the sockets and tighten them with a screwdriver. Do not use an
electric screwdriver, or similar.
FRONT PANEL
8
INPUT / OUTPUT TERMINALS
RJ45
Network connection.
VIDEO,
L and R
For connecting legacy DVD players, set top boxes, games consoles,
etc.
RF IN
Antenna connection.
OPTICAL
Digital audio output, for use with compatible sound bars / audio
equipment.
HDMI1-3
For connecting DVD players, set top boxes, games consoles, etc.
HDMI 2-3 Supports 4K HDR10 content.
USB p8-x2
Provides access to SMART TV. Connect smart remotes, keyboards,
gaming accessories or a USB flash drive for DTV recording, timeshift
or media playback. Only connect low power USB flash drives or
externally powered hard drives to the USB ports as they only provide
0.5 Amps power.
HDMI2
USBX2
HEADPHONE
9
CONNECTING TO EXTERNAL DEVICES
TV LABEL
IMAGE OF CABLE
EXTERNAL EQUIPMENT
RF
HDMI x4
AV IN
Video
L
R
USB
N/A
Optical
RJ45
The HDMI Logo are trademarks or registered trademarks of HDMI
The terms HDMI and HDMI High-Definition Multimedia Interface,
and Licensing Administrator, Inc. in the United States and other
countries.
Dolby, Dolby Vision, Dolby Atmos, Dolby Audio, and the double-D
symbol are trademarks of Dolby Laboratories Licensing
Corporation. Manufactured under license from Dolby
Laboratories. Confidential unpublished works. Copyright © 1992
2022 Dolby Laboratories. All rights reserved.
10
REMOTE CONTROL
1. STANDBY: Enter the TV into standby mode.
2. INDICATOR LIGHT: Illuminates when a button is pressed.
3. MUTE: Mute the sound.
4. PVR: Record live TV.
5. GUIDE: Displays the EPG (Electronic program guide).
6. INFO: Displays channel information and current time and
channel name.
7. HOME: Displays the home screen.
8. MENU: Displays the OSD.
9. INPUTS: Change the signal source input.
10. NAVIGATION BUTTONS: Move cursor up/down/left/right..
11. BACK: Press to move back through the menus.
12. EXIT: Exit current menu.
13. GOOGLE ASSISTANT: Press to use google voice control.
14. YOUTUBE: Open YOUTUBE*.
15. NETFLIX: Open Netflix.*
16. PRIME VIDEO: Open prime video.*
17. FREEVIEW PLAY: Open Freeview play.
18. MEDIA CONTROL: Fast forward/Play/Pause/Stop.
19. TEXT: Enter teletext.
20. AUIDIO: Displays audio settings.
21. SUBT: Enable/Disable subtitles.
22. VOL +: Increase the volume.
VOL -: Decrease the volume.
CH+: Next Channel.
CH-: Previous Channel.
23. RED: Access the red item or page.
GREEN: Access the green item or page.
YELLOW: Access the yellow item or page.
BLUE: Access the blue item or page.
*Availability of Nelix, YouTube and Prime features is
dependent on the TV model.
11
INSTALLATION OF BATTERIES
1. Remove the battery cover from the rear of the
remote control.
2. Install two AAA 1.5V batteries.
(Ensure the correct polarity of the batteries.)
3. Replace the battery cover.
Please take out of the batteries from the remote when it is not going to be used for a long
period of time to prevent leakage and damage to the remote.
If the remote control doesn't work properly, please carry out the following checks:
Check the TV is turned on.
Check the polarity of the batteries are correct.
Check the batteries and replace if necessary.
Check the plug is fully inserted and the socket is switched on.
Certain fluorescent or neon lights can interfere with remote signals.
INITIAL SETUP
1. Connect your TV to the power outlet.
2. Connect your aerial and/or set top box to the television.
3. Press the POWER button on the remote to turn on the TV.
CAUTION: Always disconnect the TV from the power outlet when the TV will not be used for
a long period of time. The POWER button on the television and remote is only used for
switching the TV into standby and does not disconnect the device from the mains voltage.
To completely disconnect the mains voltage, please remove the plug from the socket.
4. Use the // / buttons on the remote to follow the setup guide on screen.
12
INITIAL SET-UP
When first powering on your television, you will be asked to choose your preferred language.
Use the navigation buttons to select the language, then press OK to confirm.
For quick set up via the google app, follow
the below steps, if not setting up using the
google app, this step can be skipped by
selecting the “Skip” option.
On your android device, open the google
app.
Type or use the voice command on your
phone, “Ok google, set up my device.”
Tap the model name of the television on
the device.
NOTE: Press “back” to cancel.
CONFIGURING THE NETWORK
Use the navigation buttons to select which Wi-Fi network you wish to connect too. Then you
can enter your Wi-Fi password and connect to the internet. You can skip this step by pressing
“Skip” and it can be accessed later in the homepage or settings menu.
Google account sign in.
Sign into your google account to get new apps, recommendations, movies and more from
google. Use the remote to enter your google account email and password to sign into your
account.
Note: this is only applicable if the television is connected to a Wi-Fi network.
13
TERMS OF SERVICE
Please read the terms of service
carefully and press accept to improve
your experience with the product.
GOOGLE SERVICES
Press accept to confirm if you want your
location to be identified on your android
television and agree to send diagnostic
information to google to help improve
your user experience.
Play auto installs.
Select install or uninstall the
recommended apps that are suggested.
Press continue to move forward onto the
next page.
14
INFORMATION SCREENS
Information screens will now appear detailing necessary information to correctly use your
television. Use the right navigation button to cycle through these screens.
PAIRING BLUETOOTH REMOTE
Press the “Back” and “VOL - “buttons at
the same time for at least 3 seconds on
the remote control and the device will
enter Bluetooth pairing mode. The
indicator light on the remote will flash.
Press “Back” to skip this step.
15
SELECT THE MODE
If you are using this television for home use, please select the “Home” option. If this television
is being used for retail use, please select the “retail” option. Press confirm to go to the next
step.
Chromecast built-in
TM
Select ON or OFF to activate the built in Chromecast
feature.
Channel settings
Chose from antenna or cable to begin scanning channels on your television. This step can be
skipped by pressing skip. It can be found again in the televisions menus once set up is
complete.
SET UP COMPLETED
Your set up is now completed, please accept the disclaimer and you can begin to use your new
television.
16
HOME PAGE
Once set up is completed, you can press the “home” button and be taken to the television
homepage.
In the homepage you have the below options:
Google assistant
Use your voice to access shows, control devices and more, just ask Google.
Apps
Select apps to access all of your applications. Pre-installed applications are available
here. New apps can be downloaded from “Google Play”.
Notifications
All notifications relating to your televisions will be displayed here.
Inputs
Select inputs to change the input signal.
Network
Displays the current network connectivity status.
Settings
Manage your apps, televisions controls, change preferences, sounds and account.
17
SETTINGS
Press the home button to enter the home page, In the top right corner of the screen, find and
enter the settings menu. Use the navigation buttons to select the settings menu in the upper
right-hand corner of the screen. Use the navigation buttons to select the option you want to
adjust in the settings menu. Press “OK” on the remote to confirm the setting.
NETWORK
Use the navigation buttons to select
“network and internet” in the settings
menu. Use the navigation buttons to select
between: Wi-Fi/Add new
network/Scanning always available/Proxy
settings/IP settings.
ACCOUNT AND SIGN IN
Access your google account settings and
sign and out of your google accounts.
CHANNELS
Displays the scan sub-menu based on the
different installation modes.
Use the navigation buttons to select “channel
source” and channel installation mode and
parent control.
Press “OK” to enter parental controls and use
the navigation buttons or the numbers on the
remote to enter the default password “1234”
Use the navigation buttons to select which
channels blocked, program restrictions, inputs
blocked and change pin.
18
DEVICE PREFERENCES
Use the navigation buttons to
select from the options:
About - Use the navigation
buttons to check the additional
information of the television
including system update, device
name, restart, status and more.
Press the back button to return
to the previous menu, press the
exit button to exit the menu.
DATE AND TIME
Automatic date and time – set the
date and time to automatically sync
with your current region. If not using
this function, the date and time can
be set manually.
Set time zone – set your current
time zone.
Use 24-hour format – Change the
time between 12 and 24 hour.
TIMER
Power on time – Turn on the function that enables the television to turn on by itself when in
standby mode for a specific time.
Auto power on time – set the time for
television to turn on when using power
on time.
Power off time – Turn on the function
that enables the television to be turned
off into standby mode for specific time.
Auto power off time – Set the time for
television to turn off when using power
off time.
19
LANGUAGE
Choose your preferred language.
INPUTS
Chose the desire input for the video
input.
Please see page 8 for a full list of inputs
available.
STORAGE
Storage shows the internal storage
of the television, including apps
downloaded.
You can also access the device
storage for a removable storage
device in this menu.
20
HOME SCREEN
In the home screen section of the menu,
you can customize channels, app and
game ordering.
RETAIL MODE
Enter the television into the retail
mode.
CHROMECAST
Enter the Chromecast settings to allow
other users to cast to the television
using their own devices.
Please note that not all devices and
apps are compatible with Chromecast.
21
SCREEN SAVER
Enable a screensaver to start
after a desire period of
inactivity. The screensaver
can be changed using the
screensaver drop down menu.
ENERGY SAVER
Chose a time when you would like
the display to be turned off. Sound
will still play in this mode.
LOCATION
Set your current location to get
the best use out of the google
features.
22
USER AND DIAGNOSTICS
User and diagnostics allow your
diagnostic information to be sent to
google, such as crash reports and
usage data from devices and apps to
improve your experience.
ACCESSIBILITY
Audio type – change between
different audio types catering to
people of different hearing abilities.
Visually impaired – access settings
to improve the viewing experience
of people who are visually
impaired.
Captions – enable captions.
High contrast text – Enable high
contrast text on screen.
Text to speech – Enable all text on screen to be read aloud.
ABOUT
System update – update the system
as required for new features and
improvements.
Device name – change the name
that your television will display as
when other devices are connecting.
Factory reset – If factory reset is
selected, it will erase all data from
your devices internal storage,
including: your google account,
system and app data, settings and
downloaded apps.
Status – shows the current status of the network and other information.
Model – shows the television model number.
Android tv os version – shows the current version of android installed.
Software version – shows the current tv software.
23
GOOGLE ASSISTANT
Change the various settings for your
google assistant, including the
account used and apps available.
KEYBOARD
Change the settings of the on screen
keyboard used.
REMOTE AND ACCESSORIES
Add or remove Bluetooth
accessories, including the remote
control.
24
POWER
In the power menu, you have various
settings relating to the power functions of
the television.
Sleep timer – Set the sleep timer
function on or off.
Picture off – Turn off the screen, but still
keep the sound playing.
Switch off timer – set a timer for when
the television will turn off and go into
standby mode.
No signal auto power off – Set a timer for when the television will be turned off when no inputs
have been made by the user.
Auto sleep - Set a timer until the television screen goes into power saving mode.
GOOGLE PLAY
To have access and to download applications from the google play store, you must sign in with
a google account.
Once you open google play, you will be
prompted to sign in or create a new
account.
Once you have signed in, you will be brought to the
app page, scroll through the list of applications using
the navigation buttons to choose and app to
download, or press the google assistant button on
your remote to talk to google and search for an app
via voice control.
25
PICTURE
Can be changed between Standard, Dynamic, Vivid, Energy Saving,
User.
MORE SETTINGS
Back light - Used to adjust the level of lighting
provided by the LED backlight. Use the
navigation buttons to adjust.
Brightness - Used to adjust the current brightness
of the screen. Use the navigation buttons to
adjust.
Contract - Used to adjust the colour contrast of
the screen. Use the navigation buttons to adjust.
Saturation - Used to saturate the colours on the screen. Use the navigation buttons to adjust.
HUE - Used to adjust how vibrant reds and green appear on the screen. Use the navigation
buttons to adjust.
Sharpness - Used to adjust the sharpness of the image. Use the navigation buttons to adjust.
Gamma - Change between DARK, MIDDLE, LIGHT.
Colour temperature - Adjust the colour of the image from the below options:
Cool
Produces a gentle blue-hued image.
Normal
Produces a vivid image.
Warm
Produces a red-hued image.
User
Adjust choices individually
Advance video settings -
Colour tuner, tune the colour more precisely.
11-point white balance correction. Correct the colour of the whites on the television to your
specific requirements.
Reset to default, reset all picture settings to their default factory setting.
Standard
The default mode, to make users experience high-
quality images under normal light.
Dynamic
Enhances the contrast, colour and clarity of the
screen to balance the colour.
Vivid
Image colours more beautiful, more vivid picture.
Energy Saving
Reduce screen brightness, improved contrast for
energy saving.
User
User-defined picture settings.
Contrast
Adjust image contrast.
Brightness
Adjust image brightness.
Colour
Adjust image colour density.
Sharpness
Adjust the image edge sharpness.
26
SOUND
The Sound section provides you with the options to change the sound
settings, allowing you to modify the output based on your personal
preferences.
Can be changed between: Standard, Music, Theatre, News and User.
Standard
Produces a balanced sound in all environments.
Music
Preserves the original sound. Good for musical
programs.
Movie
Enhances treble and bass for a rich sound experience.
News
Enhanced voice.
User
Select to customize picture settings.
Bass
Adjust the bass.
Treble
Adjust the treble.
Balance
Adjust the left and right channel output
balance.
MORE SETTINGS
System sounds Turn on or off the option of
having button clicks make a sound.
Balance - Adjust the left and right channel
output balance.
Bass Adjust the bass.
Treble Adjust the treble.
Sound surround Turn on or off the surround
sound function.
Speaker delay Set a delay for the speaker to
start working.
Digital output Choose between the options of Off, PCM and RAW.
Auto volume control Used to avoid volume fluctuations when changing channel or programs.
Downmix mode Chose between stereo and surround sound mixing.
27
TECHNICAL SPECIFICATION
NOTE: Due to continued product development the specification shown above may change
without notice.
*Please note the power consumption will vary depending on the settings such as screen brightness. The
value shown on the energy label is related to typical energy usage and so will be lower than the
maximum figure quoted.
Product Model
eiQ-M455DVA
Eprel Number
eiQ-M455DVA
Screen Size”
55 Diagonal
Aspect Ratio
16:9
Power Supply
AC 110-240V, 50/60Hz
Max Power Consumption*
150W
TV System
PAL DVB-T2/-T/-C
(There is no DVB-C signal in some
Countries or Areas.)
Audio Output Power (Internal)
12Wx2
Input Terminal
Antenna Input
x 1
USB Input
x 2
HDMI Input
x 4
VGA Input
NO
PC AUDIO Input
NO
Audio Input (L/R)
YES
Video Input
YES
YPbPr Input
NO
RJ45 Input
x 1
CI card In
NO
DC In (12V)
NO
Output Terminal
Earphone
NO
Audio Line Out(L/R)
NO
Video Output
NO
Optical
x 1
Coaxial out
NO
Working Temperature
0-40⁰C
Working Humidity
30%-70%
28
SIMPLE TROUBLESHOOTING
If the display fails or the performance changes dramatically, check the display in accordance
with the following instructions. Remember to check the peripherals to pinpoint the source of
the failure.
Symptom
Solution
Power cannot be turned
on. (Power indicator does
not illuminate.)
Check that both ends of the power cable are plugged into the
socket appropriately and the wall socket is operational
No Input Signal message
appears.
Check that the aerial cable is connected properly.
Check that the power of the relevant peripherals is turned on.
Check that the selected source matches the input.
The remote control does
not function properly.
Check the batteries are not drained. (Use new batteries.)
Check that the remote control is within the operating range.
Check that the remote control is pointed to the remote-control
window on the display.
Check that there are no obstacles between the remote
control and the remote-control window.
Flashing spots or stripes
appear on the screen.
Check that there is no emission (Car, HV cable or Neon lamp)
or other possible interference sources.
Image colour or quality
deteriorates.
Check that all the video settings are adjusted
appropriately, such as brightness, contrast, colour etc.
For more information about video settings, refer to OSD
Functions
Screen position and size
are incorrect.
Check that the screen position and size is adjusted
appropriately.
Image or colour is
incorrect.
Check that the signal line is connected properly. When
connecting to a PC, you can change the resolution of the PC
to acquire the correct image. The discrepancy of the PC
output signal may affect the display of the image.
Display warning
message.
Check that the input signal line is properly fixed.
Select the correct input signal.
ANDROID SYSTEM RECOVERY
Within the Main Menu, Choose the Advanced Menu. The factory reset can be found within the
Common Sub Menu. Once selected, it will request the password (Default:0000) before
resetting the android system to factory defaults.
29
EU DECLARATION OF CONFORMITY
Hereby, electriQ declares that this television is in compliance with Directive 2014/53/EU. The
full text of the EU declaration of conformity is available at the following internet address:
https://www.electriQ.co.uk/DOC/EU/eiQ-43UHDT2SMH-V3.PDF
https://www.electriQ.co.uk/DOC/EU/eiQ-65UHDT2SMH-V2.PDF
https://www.electriQ.co.uk/DOC/EU/eiQ-50UHDT2SMH-V2.PDF
https://www.electriQ.co.uk/DOC/EU/eiQ-55UHDT2SMH-V2.PDF
https://www.electriQ.co.uk/DOC/EU/eiQ-58UHDT2SMH,PDF
electriQ UK SUPPORT
www.electriQ.co.uk/support
Please, for your own convenience, check the troubleshooting guide before
calling the service line.
If the unit still fails to operate call: 0330 390 3061
Office hours: 9AM - 5PM Monday to Friday
Replacement Remote controls can be sourced from the supplier using the
above contact information. eiQ-SMTVREMOTE
www.electriQ.co.uk
Unit J6, Lowfields Business Park
Lowfields Way, Elland
West Yorkshire, HX5 9DA
DISPOSAL
Disposal: Do not dispose this product as unsorted waste. Collection of such waste must be
handled separately as special treatment is necessary.
Recycling facilities are now available for all customers at which you can
deposit your old electrical products. Customers will be able to take any old
electrical equipment to participating sites run by their local councils. Please
remember that this equipment will be further handled during the recycling
process, so please be considerate when depositing your equipment. Please
contact the local council for details of your local household waste recycling
centres.


Produkt Specifikationer

Mærke: ElectriQ
Kategori: TV
Model: eiQ-M455DVA

Har du brug for hjælp?

Hvis du har brug for hjælp til ElectriQ eiQ-M455DVA stil et spørgsmål nedenfor, og andre brugere vil svare dig