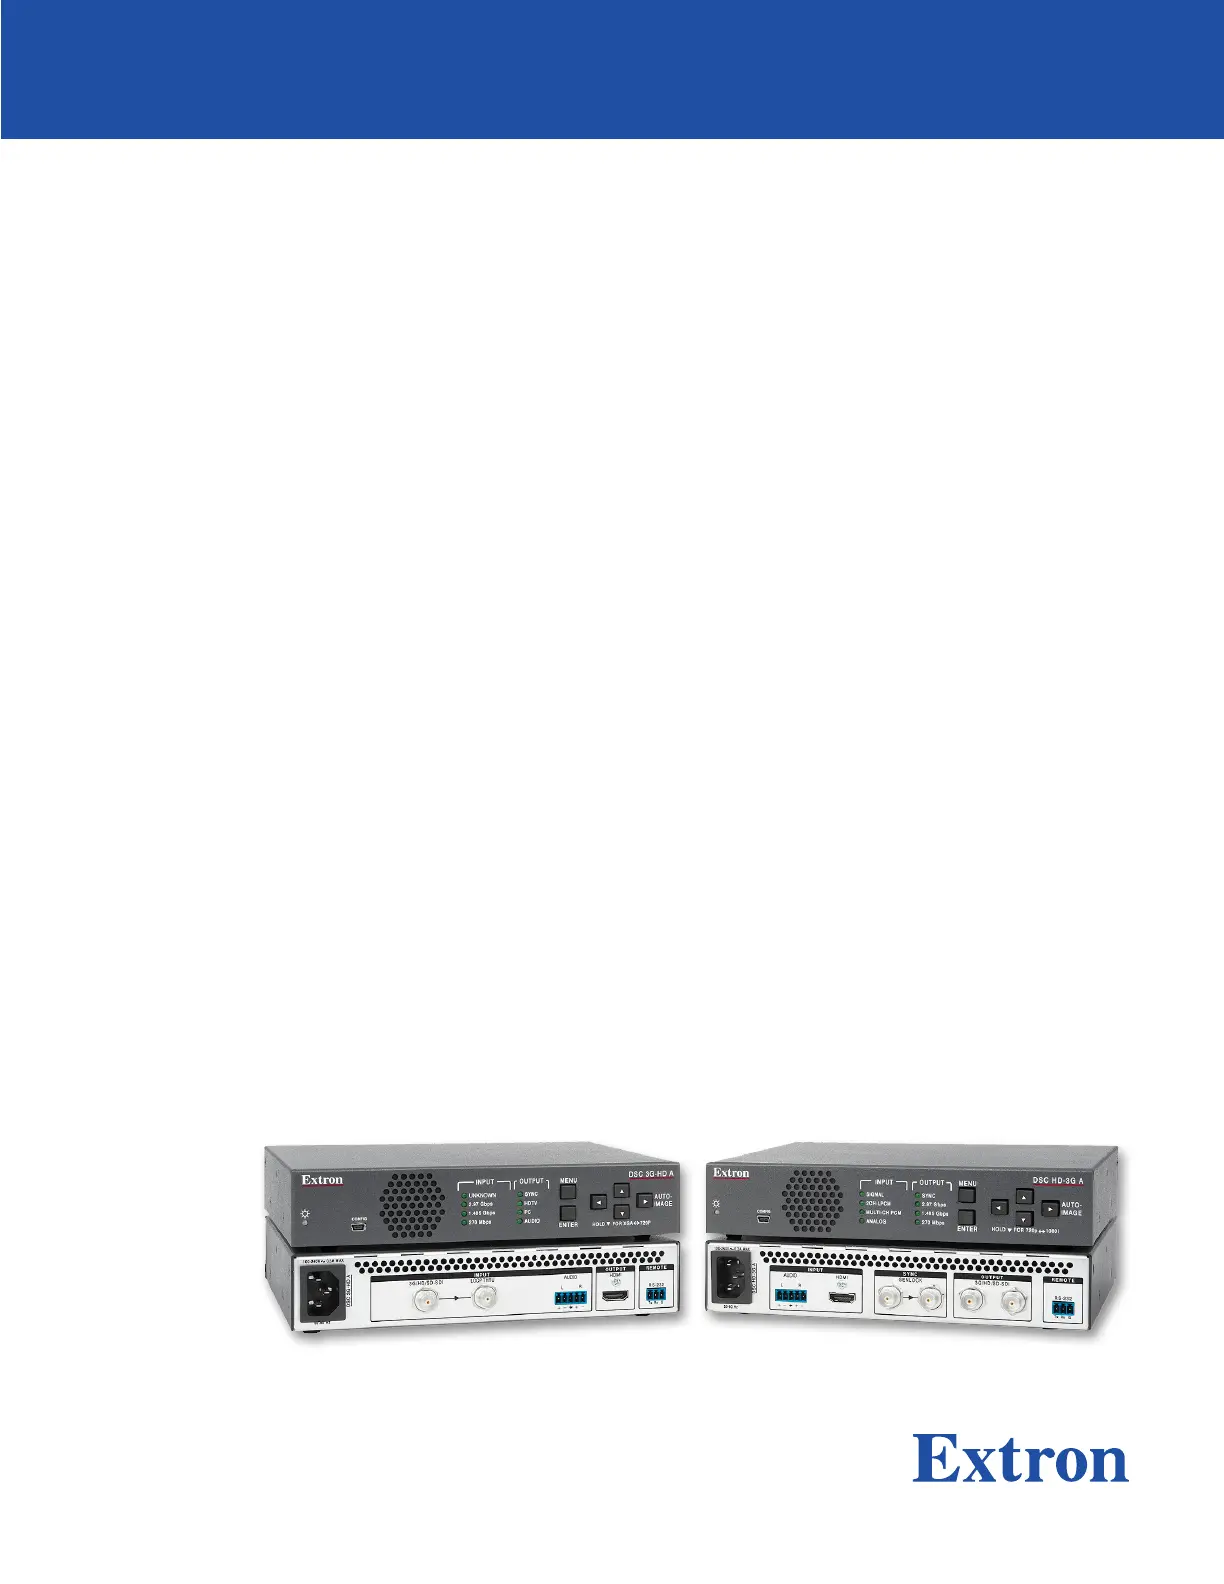
Extron DSC 3G-HD A Manual


Læs gratis den danske manual til Extron DSC 3G-HD A (4 sider) i kategorien Ikke kategoriseret. Denne vejledning er vurderet som hjælpsom af 11 personer og har en gennemsnitlig bedømmelse på 4.4 stjerner ud af 6 anmeldelser. Har du et spørgsmål om Extron DSC 3G-HD A, eller vil du spørge andre brugere om produktet?

Side 1/4
1
IMPORTANT:
Go to www.extron.com for the
complete user guide and installation
instructions befo
re connecting the
pr
oduct to the power sour
ce.
DSC 3G-HD A Scaler • Setup Guide
The Extron DSC 3G-HD A is a 3G-SDI to HDMI scaler that converts 3G-SDI, HD-SDI, and SD-SDI signals to HDMI. It accepts
and scales SMPTE video resolutions from 480i and 576i up to 1080p @ 60 Hz and 2K, and offers multiple output rates up to
1920x1200, including HDTV 1080p/60 and 2K. Stereo audio embedding and an SDI input loop-through are also provided.
This setup guide provides step-by-step instructions for an experienced user to set up and configure a DSC 3G-HD A. It covers
how to perform basic operations using the front panel controls and selected Simple Instruction Set (SIS) commands.
NOTE: For full installation, configuration, menus, connector wiring, and operation details, see the DSC 3G-HD A and
DSC HD-3G A User Guide, available at www.extron.com.
Installation
Rear Panel Features
FFEEDD
CCAA BB
HDMI
3G/HD/SD-SDI LOOP THRU
100-240V ~ 0.3A MAX
50-60 Hz
DSC 3G-HD A
REMOTEOUTPUT
AUDIO
INPUT
L R RS-232
Tx Rx G
Mounting and Cabling the DSC 3G-HD A
1. Disconnect power: Turn off or disconnect all equipment power sources.
2. Mount the unit: (Optional) Mount the DSC 3G-HD A either in a rack using
shelf mounting brackets (RSU 129 or RSB 129) or under furniture using
furniture mounting brackets (MBU 125) (see gures 1 and 2 at right). A false
face plate (RFF 052) can be tted on top of the low prole DSC if desired.
3. Connect the input: Connect an SDI video source to the 3G/HD/SD-SDI
BNC input connector B.
4. Connect a monitor: (Optional) Connect a local monitor to the buffered
Loop Thru SDI connector C.
5. Connect analog audio input: (Optional) Connect analog audio from the
source to the captive screw Audio input connector D.
NOTE: To embed analog audio from this input, you must first set
it up using the (OSD) (see page 2) or
on-screen display SIS
commands (see page 4).
6. Connect the output: Connect an HDMI display device to the HDMI
output connector E for HDMI output (with optional analog audio if
connected and embedded).
7. Connect a control device: For remote control via SIS commands or
the Extron PCS Windows
®-based control software:
zRS-232 For serial RS-232 control, connect a host computer to
the 3-pole captive screw RS-232 connector F.
RS-232 protocol (default values) are 9600 baud, 1 stop bit, no
parity, 8 data bits, no ow control.
zUSB — Connect a host computer to the front panel mini USB
port (B in the front panel illustration on page 2) for conguration
via Extron PCS software.
8. AC power connector — Connect the supplied US standard IEC
power cord between this connector A and a 110-220 V 50-60 Hz AC
power source. Figure 2. Under-furniture Mounting
DVC 50 1 SD
DIGI
TAL V
ID EO C ONVERTER
(2) 4-40 x 3/16" screws
Use 2 mounting holes on
opposite corners.
Half-rack
false front panel
uses 2 front holes.
A AC power connector
B 3G/HD/SD-SDI video connector
C Buffered loop-through connector
D 5-pole captive screw audio input
connector
E HDMI output connector
F 3-pole RS-232 captive screw
connector
Figure 1. Rack Mounting
MBU 125 Mounting Bracket
#8 Screw
(4) Places
Each Side
Mounting
Screws
(2) Places
Each Side
DSC 3G-HD A • Setup Guide (Continued)
2
Front Panel Overview
BBAA
DSC 3G-HD A
Ext nro
CONFIG
INPUT RATE MENU
AUTO-
IMAGE
ENTER
OUTPUT
UNKNOWN SYNC
HDTV
PC
AUDIO HOLD FOR XGA 720 P
2.97 Gbps
1.485 Gbps
270 Mbps
CC DD EE FF
A — Lights steadily amber when there is power but no signal, blinks amber every 3 seconds when the unit is in Status LED
standby mode, and lights steadily green when both power and an input signal are present.
B — Connect a computer to this USB mini-B port (cable not supplied) for device configuration and USB configuration port
firmware updating.
C — One signal LED (2.97 Gbps, 1.485 Gbps, or 270 Mbps) lights to indicate the type of signal that is Input Rate LEDs
present. The Unknown LED lights if the signal does not reference SMPTE 259M, 292M, or 424M.
D — Light to indicate the presence of sync and other output signal information:Output LEDs
zHDTV: Indicates 2K, 1080p, 1080i, 720p, 480p, 576p, or custom rates.
zPC: Indicates VESA standard or custom computer rates.
zAudio: Audio is embedded in the signal.
zSync: Sync is present (does not light if video sync is muted).
E — Let you access the OSD and select submenus and items from the menus.Menu and Enter buttons
F — Press these right , left , up Navigation buttons , and down arrow buttons to step through the OSD submenus,
to lock the front panel (see the next section), perform Auto-Image (press ), and reset the output rate (hold for 5
seconds).
Locking the Front Panel (Executive Mode)
To prevent unauthorized access or accidental changes to DSC settings, you can lock the front panel controls, making control
available only by SIS commands. (The default state is unlocked.) You can lock and unlock the front panel as follows:
zUsing the front panel buttons lock To , press the and buttons simultaneously and hold them until the OSD
displays (approximately 5 seconds). To , repeat this process. unlock
zSIS commands — To (enable executive mode), enter . To (disable executive mode), enter .lock unlock
Configuring the DSC 3G-HD A
The DSC 3G-HD A can be configured through a host connected
to the USB port, using Extron PCS Windows-based configuration
software (available at www.extron.com) or SIS commands
(see page 4 for a selection of ). You can also
basic commands
configure it using the OSD menu system, described below.
On-Screen Display (OSD) Menu System
The OSD menu system consists of seven submenus and two
information screens. To access the menus, press the front panel
button. With the main menu displayed, use the arrow
buttons to step through the submenus and submenu items.
Press the button to select items that you highlight. The
and screens are read-only and do
not provide selections.
• • Setup
• •
• •
NOTE: The OSD times out and closes after 1 minute if no
buttons are pressed.


Produkt Specifikationer

Mærke: Extron
Kategori: Ikke kategoriseret
Model: DSC 3G-HD A

Har du brug for hjælp?

Hvis du har brug for hjælp til Extron DSC 3G-HD A stil et spørgsmål nedenfor, og andre brugere vil svare dig