Festo EAHM-E10-TH Manual


Læs gratis den danske manual til Festo EAHM-E10-TH (2 sider) i kategorien Ikke kategoriseret. Denne vejledning er vurderet som hjælpsom af 51 personer og har en gennemsnitlig bedømmelse på 4.3 stjerner ud af 26 anmeldelser. Har du et spørgsmål om Festo EAHM-E10-TH, eller vil du spørge andre brugere om produktet?

Side 1/2
Montageanleitung (Original: de)
8003401
1205NH
†‡
Schlauchhalter
EAHM-E10-TH
Festo SE & Co. KG
Postfach
+49 (0)711 347 0
www.festo.com
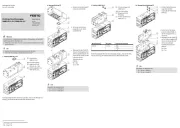
1. Te
ileliste
17430d_1
Schlauchhalter
1 Halteklemme
2 Mutter M5
3 Klebematte
4 Schraube M4x10
5 Schraube M5x20
6 Unterlegscheibe
7 Mutter M4
(1x)
(1x)
(1x)
(2x)
(1x)
(2x)
(2x)
Bestimmungsgemäß dient der Schlauchhalter EAHM-E10-TH dazu Schutz-
schläuche MKG-23-PG-29 an der Stabkinematik EXPT zu befestigen.
2. Montagebeispiel an der Stabkin
e
matik EXPT
17430d_2
Hinweis
Um die Bewegungsfreiheit der Stabkinematik nicht einzuschränken und den
Verschleiß der Versorgungsleitungen (Schläuche/elektrische Leitungen)
möglichst gering zu halten:
Wählen Sie die Position des Schlauchhalters und des Schutzschlauches
möglichst so, dass die Versorgungsleitungen die Bauteile der Stab-
kinematik während des Betriebs nicht berühren und die Bewegung nicht
behindern. Montieren Sie gegebenenfalls eine Zugentlastung wie folgt:
Die Bohrungen (A) dienen zur Befestigung von Kabelbindern (max. 3,5 mm
breit) zur Zugentlastung der Versorgungsleitungen.
Wählen Sie die Orientierung der Halteklemme 1 so, dass die
Bohrungen (A) auf der richtigen Seite sind, und nicht durch den
Schutzschlauch verdeckt werden ( Lupe 2. bis 4.).
3. Montage am Rahmen oder am Winkelbausatz EAHM-E10-AK...
17430d_3
17430d_4
17430d_7
Befestigen Sie die Halte-
klemme 1 mit den
Schrauben 4, z. B an den
dafür vorgesehene
Schnittstellen:
1. am Rahmen
am Gewinde (B).
2. am Winkelbausatz
an Durchgangsbohrung-
en (C) mit Unterlegschei-
ben 6 und den Muttern 7.
17430d_8
Klemmen Sie den Schutz-
schlauch mithilfe der
Schraube 5 und der
Mutter 2. Halten Sie das
zulässige Anziehdreh-
moment ein.
4. Montage an den Stabpaaren
17430d_5
17430d_6
Wählen Sie die Po
sition auf dem Stab ( Hinweis).
Beachten Sie, dass der Abstand zu den Stabenden mind. 100 mm beträgt.
Markieren Sie die Position auf dem Stab.
17430d_9
Entfernen Sie die Klebefolie
von der Klebematte 3.
Kleben Sie die Klebe-
matte 3 auf die ermittelte
Position.
17430d_10
Positionieren Sie die
Halteklemme 1 auf der
Klebematte 3.
17430d_11
Klemmen Sie den Stab und
den Schlauch mithilfe der
Schraube 5 und der
Mutter 2. Halten Sie das
zulässige Anziehdreh-
moment ein.
2
6
3
4
5
4
1,2 Nm
_ 20 %
1
1
2
1
5
1
1
0,25 Nm
_ 20 %
5
2
1
3
3
3
A
C
B
1
0,25 Nm
_ 20 %
1
7
7
6
Assembly instructions (Original: de)
8003401
1205NH
†‡
Tubing holder
EAHM-E10-TH
Festo SE & Co. KG
Postfach
+49 (0)711 347 0
www.festo.com
1. Parts list
17430d_1
Tubing holder
1 retaining clip
2 Nut M5
3 Adhesive ma
t
4 M4x10
screw
5 M5x20
screw
6 Washer
7 Nut M4
(1x)
(1x)
(1x)
(2x)
(1x)
(2x)
(2x)
The tubing holder EAHM-E10-TH is intended for mounting protective conduit
MKG-23-PG-29 to the parallel kinematic system EXPT.
2. Typical i
nstallation on the parallel kinematic system EXPT
17430d_2
Note
To avoid limiting the freedom of movement of the parallel kinematic system
and keep wear on the supply lines (tubing/electric cables) as low as
possible:
If possible, choose the position of the tubing holder and protective
conduit in such a way that the supply lines do not touch the components
of the parallel kinematic system during operation and do not hinder its
movement. If necessary, mount strain relief as follows:
The holes (A) are used to fasten cable binders (max. 3.5 mm wide) for strain
relief of the supply lines.
Select the orientation of the retaining clip 1 so that the holes (A)
are on the correct side and not concealed by the protective conduit
(Î magnifying glass 2 to 4).
3. Mounting to the frame or angle kit EAHM-E10-AK...
17430d_3
17430d_4
17430d_7
Fasten the retaining clip 1
with the screws 4, e.g. to
the intended interfaces:
1. to the frame
to the thread (B).
2. to the angle kit
to through-holes (C) with
washers 6 and nuts 7.
17430d_8
Clamp the protective
conduit using the screw 5
and nut 2. Comply with the
permissible tightening
torque.
4. Mounting to the rod pairs
17430d_5
17430d_6
Select t
he position on the rod (Î Note).
Observe that the distance to the rod ends is at least 100 mm.
Mark the position on the rod.
17430d_9
Remove the adhesive
transparency from the
adhesive mat 3.
Glue the adhesive mat 3 to
the determined position.
17430d_10
Position the retaining
clip 1 on the adhesive
mat 3.
17430d_11
Clamp the rod and tubing
using the screw 5 and
nut 2. Comply with the
permissible tightening
torque.
2
6
3
4
5
4
1.2 Nm
_ 20%
1
1
2
1
5
1
1
0.25 Nm
_ 20 %
5
2
1
3
3
3
A
C
B
1
0.25 Nm
_ 20%
1
7
7
6


Produkt Specifikationer

Mærke: Festo
Kategori: Ikke kategoriseret
Model: EAHM-E10-TH

Har du brug for hjælp?

Hvis du har brug for hjælp til Festo EAHM-E10-TH stil et spørgsmål nedenfor, og andre brugere vil svare dig


Ikke kategoriseret Festo Manualer

Ikke kategoriseret Manualer

Nyeste Ikke kategoriseret Manualer

Kimo

Kimo LR 110 Manual

2 September 2025
HMS Premium

HMS Premium LPD02 Manual

2 September 2025
AVer

AVer E1008 Manual

2 September 2025
Biltema

Biltema 17-547 Manual

2 September 2025
Groen

Groen AH/1E Manual

2 September 2025
ACOPower

ACOPower HY-P30 Manual

2 September 2025
Globe

Globe RG30 Manual

2 September 2025
Neutrik

Neutrik NLT4FXX Manual

2 September 2025