Festo VABF-S4-1-A2G2-N14 Manual
Festo
Ikke kategoriseret
VABF-S4-1-A2G2-N14
Læs gratis den danske manual til Festo VABF-S4-1-A2G2-N14 (2 sider) i kategorien Ikke kategoriseret. Denne vejledning er vurderet som hjælpsom af 18 personer og har en gennemsnitlig bedømmelse på 4.4 stjerner ud af 9.5 anmeldelser. Har du et spørgsmål om Festo VABF-S4-1-A2G2-N14, eller vil du spørge andre brugere om produktet?
Side 1/2

1. Teileliste
9329d_1
1 Winkelanschlussplatte
VABF-S4-..-A2G2-…
2 Selbstschneidende
Schraube (2x)
3 Dichtung
VABF-S4-..-A2G2
2. Montage
9329d_2
• Befestigen Sie die
Winkelanschlussplatte 1
an der Verkettungsplatte
VTSA mit den beiliegen-
den Schrauben 2. Achten
Sie darauf, dass die An-
schlüsse dabei nach unten
zeigen.
• Beachten Sie das zulässi-
ge Anzugsdrehmoment.
9329d_3
9329d_4
• Beachten Sie, dass eine
Befestigung mit den
Anschlüssen nach oben
nicht vorgesehen ist.
9329d_5
Die Anschlüsse und
Anschlussbezeichnungen
wären dann vertauscht.
0
2
46
8
10
9329d_6
• Drehen Sie die passenden
QS-Verschraubungen in
die Anschlussgewinde
(siehe Tabelle).
• Beachten Sie das
zulässige Anzugs-
drehmoment (siehe
Tabelle).
Typ Anschlussgewinde Max. Anzugsdrehmoment
VABF-…-G14 G ¼ 15 Nm
VABF-…-N14 ¼ NPT 14 Nm1)
VABF-…-G18 G x10 Nm
VABF-…-N18 x NPT 8 Nm1)
0
2
4
6 8
10
9329d_7
Zur Beschriftung:
• Drücken Sie einen
beschrifteten
Schilderträger ASCF-M-S6
in die Öffnung wie
abgebildet.
1) Drehen Sie die QS-Verschraubungen von Hand ein und drehen Sie die Verschraubungen
mit 1 bis 2 Umdrehungen fest.
Montageanleitung (de)
702 672 / 2006-06NH
†‡
Winkelanschlussplatte
VABF-S4-..-A2G2-...
Festo SE & G Co. K
Postfach
73726 Esslingen
++49/(0)711/347-0
www.festo.com
2
1
3
2
1
MA=6,1 Nm _ 15 %
1
1
3
3
2
1
1
1

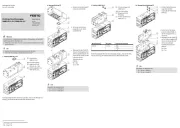
1. Parts list
9329d_1
1 90°-connection plate
VABF-S4-..-A2G2-…
2 Self-tapping screw (2x)
3 Seal
VABF-S4-..-A2G2
2. Fitting
9329d_2
• Fasten the 90° connection
plate 1 to the manifold
sub-base VTSA with the
screws supplied 2. Make
sure that the connections
face downwards.
• Note the permitted tight-
ening torque.
9329d_3
9329d_4
• Note that fastening with
the connections facing
upwards is not intended.
9329d_5
The connections and connec-
tion designations would then
be swapped.
0
2
46
8
10
9329d_6
• Screw the matching QS
connectors into the con-
nector thread.
• Note the permitted tight-
ening torque (see table).
Type Connector thread Max. tightening torque
VABF-…-G14 G ¼ 15 Nm
VABF-…-N14 ¼ NPT 14 Nm1)
VABF-…-G18 G x10 Nm
VABF-…-N18 x NPT 8 Nm1)
0
2
4
6 8
10
9329d_7
For identification:
• Press a written identifica-
tion holder type ACF-M-S6
into the opening as
shown.
1) Screw in the QS connectors by hand and tighten the connectors with 1 to 2 turns.
Assembly instructions (en)
702 672 / 2006-06NH
†‡
90°-connection plate
VABF-S4-..-A2G2-...
Festo SE & G Co. K
Postfach
73726 Esslingen
++49/(0)711/347-0
www.festo.com
2
1
3
2
1
1
1
3
3
2
1
1
1
MA=6.1 Nm _ 15 %
Produkt Specifikationer
Mærke: | Festo |
Kategori: | Ikke kategoriseret |
Model: | VABF-S4-1-A2G2-N14 |
Har du brug for hjælp?
Hvis du har brug for hjælp til Festo VABF-S4-1-A2G2-N14 stil et spørgsmål nedenfor, og andre brugere vil svare dig
Ikke kategoriseret Festo Manualer
31 Juli 2025
30 Juli 2025
30 Juli 2025
30 Juli 2025
30 Juli 2025
30 Juli 2025
30 Juli 2025
30 Juli 2025
30 Juli 2025
30 Juli 2025
Ikke kategoriseret Manualer
- Naim
- Mivar
- BlueWalker
- ViewZ
- Perfecta
- APsystems
- Güde
- Trident
- Hoover
- Progress Lighting
- Patriot
- BioChef
- Singular Sound
- TrekStor
- Xigmatek
Nyeste Ikke kategoriseret Manualer
9 August 2025
9 August 2025
9 August 2025
9 August 2025
9 August 2025
8 August 2025
8 August 2025
8 August 2025
8 August 2025
8 August 2025