Festo VACC-S13-11-K4-1-NE4A Manual

Festo Ikke kategoriseret VACC-S13-11-K4-1-NE4A

Læs gratis den danske manual til Festo VACC-S13-11-K4-1-NE4A (2 sider) i kategorien Ikke kategoriseret. Denne vejledning er vurderet som hjælpsom af 14 personer og har en gennemsnitlig bedømmelse på 4.3 stjerner ud af 7.5 anmeldelser. Har du et spørgsmål om Festo VACC-S13-11-K4-1-NE4A, eller vil du spørge andre brugere om produktet?

Side 1/2
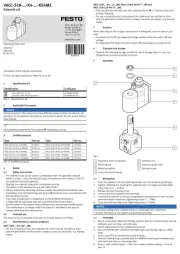
VACC-S13-11-K4-1-NE4A
Solenoid coil
Festo SE & Co. KG
Ruiter Straße 82
73734 Esslingen
Germany
+49 711 347-0
www.festo.com
8187892
2022-12a
[8187894]
8187892
Translation of the original instructions
© 2023 all rights reserved to Festo SE & Co. KG
1
Identification EX
Marking
Ex ia IIC T5/T6 Gb
Ex ia IIIC T95°C/T80°C Db
GYJ20.1094X
Tab. 1:
Identification EX
2
Applicable documents
NOTICE
Technical data for the product can have different values in other documents. For
operation in an explosive atmosphere, the technical data in this document always
have priority.
All available documents for the product
è
www.festo.com/sp.
3 Certified products
Voltage Type
14…32VDC VACC-S13-11-K4-1-…A
Tab. 2:
Certified solenoid coils
4 Safety
4.1
General safety instructions
The solenoid coils can be used in combination with the specified solenoid
valves in zones 1 and 2 for explosive gas atmospheres and in zones 21 and 22
for explosive dust atmospheres.
Do not commission the solenoid coil until after mounting.
Fit a suitable valve with a suitable armature guide tube
è
www.festo.com/
catalogue.
Work on the product may only be carried out by qualified personnel who can
evaluate the work and detect dangers.
4.2 Intended use
The solenoid coil is intended to be used to actuate valves from Festo.
4.3
Identification X: special conditions
Protect the device from electrostatic discharge.
5 Function
When switching on the voltage, the solenoid is energised, and the valve is actu-
ated. A built-in current pulse generator permits operation on low-power electric
networks.
6 Assembly
1
2
3
4
5
6
7
8
Fig. 1: Product design
1
Port 12 (only with external pilot
air supply)
2
Spring washer
3
Vent screw/retaining nut
4
Cable fitting with cap nut and
reducer
5
Cover, terminal housing
6
Solenoid coil
7
Armature guide tube
8
Solenoid valve
6.1 Mechanical system
Prevent the cable fitting from unscrewing when loosening the cap nut. Note the
tightening torque: cable fitting 2.3 Nm; cap nut 1.5 Nm
1.
Push the solenoid coil and spring washer over the armature guide tube.
Sealing compound points to the solenoid valve.
2.
Tighten vent screw. Twisting the solenoid coil is no longer possible (tightening
torque 4…6Nm).
3.
Open the cover of the clamping housing.
4.
Connect electrical cables to the terminals. Note polarity (tightening torque
2…3Nm).
5.
Close the cover of the clamping housing (tightening torque 0.6…0.7Nm).
6.
With external pilot air supply use port12.
7.
Seal unused openings with blanking plugs or slot covers.
NOTICE
The surface coating of the solenoid valves is electrically non-conductive.
Include the device in the system equipotential bonding.
6.2 Electrical
1. Use only a cable with outside diameter 4…13mm for the installed M20 x 1.5
cable fitting.
2. Note polarity.
3.
To avoid ingress of water, tighten fitting and lock ring with an open-ended
spanner until the sealing force is sufficient.
4.
Use strain relief.
Electrical connection diagram
Fig.2
7
Commissioning
WARNING
Risk of injury from touching hot surfaces.
Contact with housing of the solenoid coil can cause burn injuries.
Do not touch the housing.


Produkt Specifikationer

Mærke: Festo
Kategori: Ikke kategoriseret
Model: VACC-S13-11-K4-1-NE4A

Har du brug for hjælp?

Hvis du har brug for hjælp til Festo VACC-S13-11-K4-1-NE4A stil et spørgsmål nedenfor, og andre brugere vil svare dig