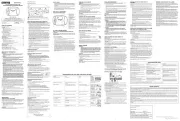
SMOKE & CARBON MONOXIDE ALARM
IMPORTANT! PLEASE READ CAREFULLY AND SAVE.
The warnings/limitations card and manual contains important information
about your Smoke Alarm’s operation. If you are installing this Alarm for use
by others, you must leave this manual—or a copy of it—with the end user.
Para el manual del usuario en español, por favor visite rstalert.com
Thank you for choosing First Alert
for your Smoke and Carbon Monoxide Alarm needs. You have purchased a state-of-the-art Smoke
& Carbon Monoxide Alarm designed to help provide you with early warning of a smoke and/or carbon monoxide danger. Please take
the time to read this manual and make the Smoke & Carbon Monoxide Alarm an integral part of your family’s safety plan.
• Dangers, Warnings, and Cautions alert you to important operating instructions or to potentially hazardous situations. Pay special
attention to these items.
• This Smoke/CO Alarm is approved for use in single-family residences. It is designed for marine or RV use.NOT
• This combination Smoke/Carbon Monoxide Alarm has two separate Alarms. The CO Alarm is not designed to detect re or any
other gas. It will only indicate the presence of carbon monoxide gas at the sensor. Carbon monoxide gas may be present in other
areas. The Smoke Alarm will only indicate the presence of smoke that reaches the sensor. The Smoke Alarm is not designed to
sense gas, heat or ames.
• This Smoke/CO Alarm cannot operate without working batteries. Removing the batteries for any reason, or failing to replace the
batteries at the end of their service life, removes your protection.
• ignore any Alarm. See “If Your Smoke/CO Alarm Sounds” for more information on how to respond to an Alarm. Failure to NEVER
respond can result in injury or death.
• The Silence Features are for your convenience only and will not correct a problem. See “Using the Silence Features” for details.
Always check your home for a potential problem after any Alarm. Failure to do so can result in injury or death.
• Test this Smoke/CO Alarm once a week. If the Alarm ever fails to test correctly, have it replaced immediately! If the Alarm is not
working properly, it cannot alert you to a problem.
• This product is intended for use in ordinary indoor locations of family living units. It is not designed to measure CO levels in
compliance with Occupational Safety and Health Administration (OSHA) commercial or industrial standards. Individuals with
medical conditions that may make them more sensitive to carbon monoxide may consider using warning devices which provide
audible and visual signals for carbon monoxide concentrations under 30 ppm. For additional information on carbon monoxide and
your medical condition contact your physician.
All these Smoke Alarms are designed to provide early warning of res if located, installed and cared for as described in the user’s
manual, and if smoke reaches the Alarm. If you are unsure which type of unit to install, refer to NFPA (National Fire Protection
Association) 72 (National Fire Alarm and Signaling Code) and NFPA 101 (Life Safety Code). National Fire Protection Association,
One Batterymarch Park, Quincy, MA 02269-9101. Local building codes may also require specic units in new construction or in
different areas of the home.
Battery (DC) operated Smoke Alarms: Provide protection even when electricity fails, provided the batteries are fresh
and correctly installed. Units are easy to install, and do not require professional installation. They do not, however, provide
interconnected functionality.
AC powered Smoke Alarms: Can be interconnected so if one unit senses smoke, all units Alarm. They do not operate
AC with battery (DC) back-up: will operate if electricity fails, provided the batteries are fresh and correctly installed. AC and AC/DC
units must be installed by a qualied electrician.
Smoke Alarms for Solar or wind energy users and battery backup power systems: AC powered Smoke Alarms should only be
operated with true or pure sine wave inverters. Operating this Smoke Alarm with most battery powered UPS (uninterruptible power
supply) products or square wave or “quasi sine wave” inverters . If you are not sure about your inverter or will damage the Alarm
UPS type, please consult with the manufacturer to verify.
Smoke Alarms for the hearing impaired: Special purpose Smoke Alarms should be installed for the hearing impaired. They include
a visual Alarm and an audible Alarm horn, and meet the requirements of the Americans with Disabilities Act. These units can be
interconnected so if one unit senses smoke, all units Alarm.
Smoke Alarms are not to be used with detector guards unless the combination has been evaluated and found
suitable for that purpose.
Smoke Alarms conform to regulatory requirements, including UL217 and are designed to detect particles of
combustion. Smoke particles of varying number and size are produced in all res.
Ionization technology is generally more sensitive than photoelectric technology at detecting small particles, which tend to be
produced in greater amounts by aming res, which consume combustible materials rapidly and spread quickly. Sources of
these res may include paper burning in a wastebasket, or a grease re in the kitchen.
Photoelectric technology is generally more sensitive than ionization technology at detecting large particles, which tend to
be produced in greater amounts by smoldering res, which may smolder for hours before bursting into ame. Sources of
these res may include cigarettes burning in couches or bedding.
For maximum protection, use both types of Smoke Alarms on each level and in every bedroom of your home.
WHERE TO INSTALL THIS ALARM
Minimum coverage for Smoke Alarms, as recommended by the National Fire Protection Association (NFPA), is one Smoke Alarm
on every level, in every sleeping area, and in every bedroom (See “Regulatory Information for Smoke Alarms” for details on the
For CO Alarms, the National Fire Protection Association (NFPA) recommends that a CO Alarm should be centrally located outside of
each separate sleeping area in the immediate vicinity of the bedrooms. For added protection, install additional CO Alarms in each
separate bedroom, and on every level of your home.
NOTE: For added protection, install an additional Smoke/CO Alarm at least 15 feet (4.6 meters) away from the furnace or fuel burning
heat source where possible. In smaller homes or in manufactured homes where this distance cannot be maintained, install the Alarm
as far away as possible from the furnace or other fuel burning source. Installing the Alarm closer than 15 feet (4.6 meters) will not
harm the Alarm, but may increase the frequency of unwanted Alarms.
IN GENERAL, INSTALL COMBINATION SMOKE AND CARBON MONOXIDE ALARMS:
• On every level of your home, including nished attics and basements.
• Inside every bedroom, especially if people sleep with the door partly or completely closed.
• In the hall near every sleeping area. If your home has multiple sleeping areas, install a unit in each. If a hall is more than 40 feet
(12 meters) long, install a unit at each end.
• At the top of rst-to-second level stairs, and at the bottom of the basement stairs.
• For additional coverage, install Alarms in all rooms, halls, and storage areas, where temperatures normally remain between 40˚ F
and 100˚ F (4.4˚ C and 37.8˚ C).
WHERE NOT TO INSTALL THIS ALARM
FOR BEST PERFORMANCE, IT IS RECOMMENDED YOU AVOID INSTALLING SMOKE/CO ALARMS IN THESE AREAS:
• Where combustion particles are produced. Combustion particles form when something burns. Areas to avoid include poorly
ventilated kitchens, garages, and furnace rooms. Keep units at least 20 feet (6 meters) from the sources of combustion particles
(stove, furnace, water heater, space heater) if possible. In areas where a 20-foot (6-meter) distance is not possible – in modular,
mobile, or smaller homes, for example – it is recommended the Smoke Alarm be placed as far from these fuel-burning sources
as possible. The placement recommendations are intended to keep these Alarms at a reasonable distance from a fuel-burning
source, and thus reduce “unwanted” Alarms. Unwanted Alarms can occur if a Smoke Alarm is placed directly next to a fuel-
burning source. Ventilate these areas as much as possible.
• In air streams near kitchens. Air currents can draw cooking smoke into the sensing chamber of a Smoke Alarm near the kitchen.
• In very damp, humid or steamy areas, or directly near bathrooms with showers. Keep units at least 10 feet (3 meters) away from
showers, saunas, dishwashers, etc.
• Where the temperatures are regularly below 40˚ F (4.4˚ C) or above 100˚ F (37.8˚ C), including unheated buildings, outdoor rooms,
porches, or unnished attics or basements.
• In very dusty, dirty, or greasy areas. Do not install a Smoke Alarm directly over the stove or range. Keep laundry room Smoke
Alarms free of dust or lint.
• Near fresh air vents, ceiling fans, or in very drafty areas. Drafts can blow smoke away from the unit, preventing it from reaching
• In insect infested areas. Insects can clog openings to the sensing chamber and cause unwanted Alarms.
• Less than 12 inches (305mm) away from uorescent lights. Electrical “noise” can interfere with the sensor.
• In “dead air” spaces. “Dead air” spaces may prevent smoke from reaching the Smoke Alarm.
“Dead air” spaces may prevent smoke from reaching the Smoke Alarm. To avoid dead air spaces, follow the installation
On ceilings, install Smoke Alarms as close to the center of the ceiling as possible. If this is not possible, install the Smoke Alarm at
least 4 inches (102 mm) from the wall or corner.
For wall mounting (if allowed by building codes), the top edge of Smoke Alarms should be placed between 4 inches (102 mm) and
12 inches (305 mm) from the wall/ceiling line, below typical “dead air” spaces.
On a peaked, gabled, or cathedral ceiling, install the rst Smoke Alarm within 3 feet (0.9 meters) of the peak of the ceiling,
measured horizontally. Additional Smoke Alarms may be required depending on the length, angle, etc. of the ceiling’s slope. Refer to
NFPA 72 for details on requirements for sloped or peaked ceilings.
HOW TO INSTALL THIS ALARM
• This combination Smoke/CO Alarm was designed to be mounted on the ceiling or wall. It is not a tabletop device. You
must install this device on the ceiling or wall as outlined below. Read “Where To Install This Alarm” before starting.
• Do not connect this unit to any other Alarm or auxiliary device. It is a single-station unit that cannot be linked to other
devices. Connecting anything else to this unit may prevent it from working properly.
• Do not install this unit over an electrical junction box. Air currents around junction boxes can prevent smoke from
reaching the sensing chamber and prevent the unit from Alarming. Only AC powered units are intended for installation
This unit is designed to be mounted on the ceiling, or on the wall if necessary.
Tools you will need: pencil, drill with 3/16" (5 mm) drill bit, standard athead screwdriver, hammer.
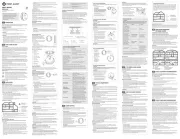
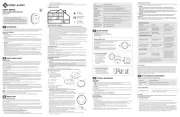
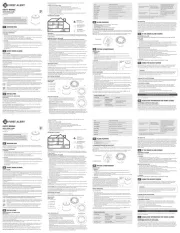
THE PARTS OF THIS SMOKE/CO ALARM
Dual power indicator light and Alarm
indicator: Green LED provides visual
indication of an Alarm memory condition;
Red LED provides visual indication of an
Battery compartment, install batteries here
FOLLOW THESE SIMPLE STEPS
1. Choose a location. See “Where to Install This Alarm” for reference.
WARNING! Do not install this Alarm over an existing electrical box. Only AC powered
units are intended for installation over electrical boxes.
2. Mark hole locations 4-1/4" apart. Use the mounting bracket to verify the hole mark
locations are accurately spaced. If mounting on the wall, holes must be aligned vertically to
ensure Alarm is mounted upright. Put the Alarm where it won’t get covered with dust while
3. Use a 3/16" (5mm) drill bit to drill through the marks you made for the mounting holes.
4. Insert the plastic screw anchors (in the plastic bag with the screws) into the holes. Tap
the screw anchors gently with a hammer, if necessary, until they are ush with the
5. Insert the screws but do not tighten completely. Leave them about 1/4” (6mm) away from
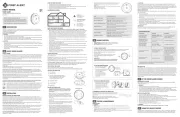
the wall. Attach the mounting bracket to the wall or ceiling by aligning the round part of
the slots with the screws. To mount on a wall, align the hole marked A with the top screw.
Rotate the bracket until the screws are completely inside the raised portion of the circular
recesses (see image). Once the screws are completely inside the raised portion of the
circular recesses, tighten the screws until they are snug to secure the bracket. Do not
6. Install the batteries. First install the battery closest to the outside of the Alarm and then
the battery which is closer to the inside of the Alarm. Match the + and – orientation to that
shown on the Alarm. Push the batteries in until they snap securely. If the batteries are not
snapped in completely, the unit cannot receive battery power.
NOTE: After you install the batteries, there will be LED and horn activation prompts.
7. Position the base of the Alarm over the mounting bracket and turn. Turn the Alarm clockwise until the unit is in place.
8. Test the Alarm. See “Weekly Testing.”
Action What You Will See & Hear
Under Normal Operations Horn: Power LED: Silent; Flashes Green once a minute
Horn: A “chirp” and then 3 beeps, pause, 3 beeps; Flashes Red Power LED:
followed by 4 beeps, pause, 4 beeps; Flashes RedHorn: POWER LED:
If Battery Becomes Low Horn: Power LED: chirps once a minute; Flashes Green approximately once a minute
Horn: Power LED: 3 chirps every minute; Three Green ashes approximately once a minute
Horn: Power LED: 5 chirps every minute; Five Green ashes approximately once a minute
Horn: 4 beeps, pause, 4 beeps*; Flashes RedPower LED:
NOTE: If unit goes into CO Alarm, the regular 4 beeps-brief pause cycle will repeat for four
minutes. After four minutes, the pause will increase to one minute.
Smoke is Detected Horn: 3 beeps, pause, 3 beeps; Flashes RedPower LED:
Smoke Alarm is Silenced Horn: Power LED: Off; Flashes Red
CO Alarm is Silenced Horn: Power LED: Off; Flashes Red
• Add protection in minutes.Easy Installation:
• Half the depth of a standard Alarm.Slim Prole Design:
• Lets you know when it’s time to replace.End of Life Warning:
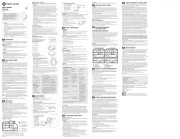
The optional locking feature is designed to prevent unauthorized removal of the Alarm. It is not necessary to activate the lock
in single-family households where unauthorized Alarm removal is not a concern.
Tools you will need: Needle-nose pliers or utility knife, standard
The feature uses a locking pin which is molded into the mounting bracket.
Remove locking pin by using needle-nose pliers or a utility knife.
To permanently remove the locking pin, insert a athead screwdriver
between the locking pin and the lock and pry the pin out of the lock.
TO LOCK THE MOUNTING BRACKET
1. Using needle-nose pliers, detach the
pin from the mounting bracket.
2. Insert the locking pin through the
hole on the back of the Smoke Alarm
3. When you attach the Alarm to
the mounting bracket the locking
pin’s head will t into a notch
TO UNLOCK THE MOUNTING BRACKET
1. Insert a athead screwdriver in between the
mounting bracket and the locking pin.
2. Pry the Alarm away from the bracket by
pushing up the screwdriver and turning the
Alarm counterclockwise (left) at the same time.
• use an open ame of any kind to test this unit. You might accidentally damage or set re to the unit or to your home. NEVER
NEVER use vehicle exhaust! Exhaust may cause permanent damage and voids your warranty.
• stand close to the Alarm when the horn is sounding. Exposure at close range may be harmful to your hearing. When DO NOT
testing, step away when horn starts sounding.
It is important to test this unit every week to make sure it is working properly. Using the test button is the recommended way to test
You can test this Smoke/CO Alarm: Press and hold the Test/Silence button 3-5 seconds until unit starts to Alarm. During testing, you
will see and hear the following sequence:
• The will sound 3 beeps, pause, 3 beeps. The ashes Red.Horn LED
• Next the will sound 4 beeps, pause, 4 beeps. The ashes Red.Horn LED
If the unit does not Alarm, make sure the batteries are correctly installed, and test again. If the unit still does not Alarm,
This unit has been designed to be as maintenance free as possible, but there are a few simple things you must do to keep
• Test it at least once a week.
• Clean the Smoke Alarm at least once a month; gently vacuum off any dust using your household vacuum’s soft brush attachment,
and test the Smoke Alarm after cleaning. Never use water, cleaners or solvents since they may damage the unit.
• If the Smoke Alarm becomes contaminated by excessive dirt, dust and/or grime, and cannot be cleaned to avoid unwanted
Alarms, replace the unit immediately.
• Relocate the unit if it sounds frequent unwanted Alarms. See “Locations to Avoid for Smoke Alarms” for details.
• Protect or cover the alarm when doing any maintenance to home i.e. sanding oors, painting, drywall patching, etc. to
Actual service life depends on the Smoke Alarm and the environment in which it is installed. You replace the Smoke/CO Alarm MUST
immediately once the unit starts “chirping” (the End of Life or Malfunction warning).
CHOOSING A REPLACEMENT BATTERY:
Your Smoke/CO Alarm requires two standard AA batteries. The following batteries are acceptable as replacements: Eveready Energizer
E91 or Duracell MN1500. These batteries are available at many local retail stores.
• Always use the exact batteries specied by this User’s Manual. DO NOT use rechargeable batteries. Clean the
battery contacts and also those of the device prior to battery installation. Install batteries correctly with regard to
• Please dispose of or recycle used batteries properly, following any local regulations. Consult your local waste
management authority or recycling organization to nd an electronics recycling facility in your area. DO NOT DISPOSE OF
BATTERIES IN FIRE. BATTERIES MAY EXPLODE OR LEAK.
• Keep battery out of reach of children. In the event a battery is swallowed, immediately contact your poison control
center, your physician, or the National Battery Ingestion hotline at 202-625-3333 as serious injury may occur.
Actual battery service life depends on the Smoke/CO Alarm and the environment in which it is installed. All the batteries specied
above are acceptable replacement batteries for this unit. Regardless of the manufacturer’s suggested battery life, you replace MUST
the battery immediately once the unit starts “chirping” (the “low battery warning”).
IF THE ALARM... PROBLEM... YOU SHOULD...
Horn “chirps” about once per minute. Low battery warning. Install two new AA batteries*.
Horn sounds 3 “chirps” every
minute; has 3 rapid Green LED
Device is not working properly, and
If unit is under warranty, contact
Consumer Support to process a
The ashes GREEN and the light horn
sounds 5 “chirps” every minute.
Alarm needs to be replaced.
Immediately replace the Alarm.
CARBON MONOXIDE ALARM ONLY
CO Alarm goes back into Alarm
4 minutes after you silence it.
CO levels indicate a potentially
IF YOU ARE FEELING SYMPTOMS
OF CO POISONING, EVACUATE
your home and call 911 or the Fire
Department. Refer to “If The CO
Alarm Sounds” for details.
CO Alarm sounds frequently even
though no high levels of CO are
revealed in an investigation.
The CO Alarm may be improperly
located. Refer to “Where to Install
Relocate your Alarm. If frequent
Alarms continue, have home
rechecked for potential CO problems.
You may be experiencing an
source like cooking smoke.
Silence Alarm using Test/Silence
button; clean the Alarm’s cover
with a soft, clean cloth. If frequent
unwanted Alarms continue,
relocate your Alarm. Alarm may
be too close to a kitchen, cooking
appliance, or steamy bathroom.
*For a list of acceptable replacement batteries, see “Regular Maintenance.”
If you have questions that cannot be answered by reading this manual, call the
Consumer Support Team at 1-800-323-9005
Follow safety rules and prevent hazardous situations: 1) Use smoking materials properly. Never smoke in bed. 2) Keep matches or
lighters away from children; 3) Store ammable materials in proper containers; 4) Keep electrical appliances in good condition and
don’t overload electrical circuits; 5) Keep stoves, barbecue grills, replaces and chimneys grease- and debris-free; 6) Never leave
anything cooking on the stove unattended; 7) Keep portable heaters and open ames, like candles, away from ammable materials;
8) Don’t let rubbish accumulate. Keep Alarms clean, and test them weekly. Replace Alarms immediately if they are not working
properly. Smoke Alarms that do not work cannot alert you to a re. Keep at least one working re extinguisher on every level, and
an additional one in the kitchen. Have re escape ladders or other reliable means of escape from an upper level in case stairs are
blocked; 9) Have an escape plan and practice it regularly.
IF YOUR SMOKE/CO ALARM SOUNDS
WHAT TO DO FIRST–IDENTIFY THE TYPE OF ALARM SIGNAL
Type of Alarm What You Will See & Hear
Carbon Monoxide (CO) CO LED: Horn:Flashes Red; 4 beeps, pause, 4 beeps, pause
Smoke Smoke LED: Horn:Flashes Red; 3 beeps, pause, 3 beeps, pause
“ALARM-MOVE TO FRESH AIR”
If you hear the CO Alarm horn and the CO red light is ashing, move everyone to a
source of fresh air. remove the batteries!DO NOT
Actuation of your CO Alarm indicates the presence of carbon monoxide (CO) which can kill you. In other words, when your
CO Alarm sounds, you must not ignore it!
IF THE CO ALARM SIGNAL SOUNDS:
1. Press the Test/Silence button.
2. Call your emergency services, re department or 911. Write down the number of your local emergency service here:
____________________________________________________________________
3. Immediately move to fresh air—outdoors or by an open door or window. Do a head count to check that all persons are accounted
for. Do not re-enter the premises, or move away from the open door or window until the emergency services responder has
arrived, the premises have been aired out, and your CO Alarm remains in its normal condition.
4. After following steps 1-3, if your CO Alarm reactivates within a 24-hour period, repeat steps 1-3 and call a qualied appliance
technician to investigate for sources of CO from fuel-burning equipment and appliances, and inspect for proper operation of this
equipment. If problems are identied during this inspection have the equipment serviced immediately. Note any combustion
equipment not inspected by the technician, and consult the manufacturers’ instructions, or contact the manufacturers directly, for
more information about CO safety and this equipment. Make sure that motor vehicles are not, and have not, been operating in an
attached garage or adjacent to the residence. Write down the number of a qualied appliance technician here:
____________________________________________________________________